• stem+node ceramics
  • HOME
  • Food Recipes
  • About
  • Contact
Menu

The Lovely Crazy

Street Address
City, State, Zip
Phone Number

Your Custom Text Here

The Lovely Crazy

  • stem+node ceramics
  • HOME
  • Food Recipes
  • About
  • Contact

Cauliflower, Kale, and Lentil Bowl with Peanut Sauce

June 20, 2020 Colleen Stem
IMG_8622.jpg
IMG_8615.jpg

I am freaking hot. We are currently in a heat wave right this very minute and I am not happy about it. This is my problem with summer, the heat. Or better yet, the heat with humidity. It turns me sour and I can’t deal with anything, including myself. It is not a good look on me.

But a redeeming quality summer does have is all the fresh produce. The farm share is really starting to pick up and we are getting a good amount of fresh goody goods and that is something I can’t not be happy about. But it is still to hot and when it’s to hot, no one (I think) wants to cook. So don’t cook, just compile. A big ass bowl of veggies, some lentil (or use beans if you want) , and creamy peanut sauce. Thrown together within minutes, hardy and satisfying without being heavy and hot, and tasted really freaking good. A meal on it’s own or a fantastic side dish or snack dish or you know, anytime eating time food dish.

It is just a good dish to make and even better to eat. Heatwave or not.

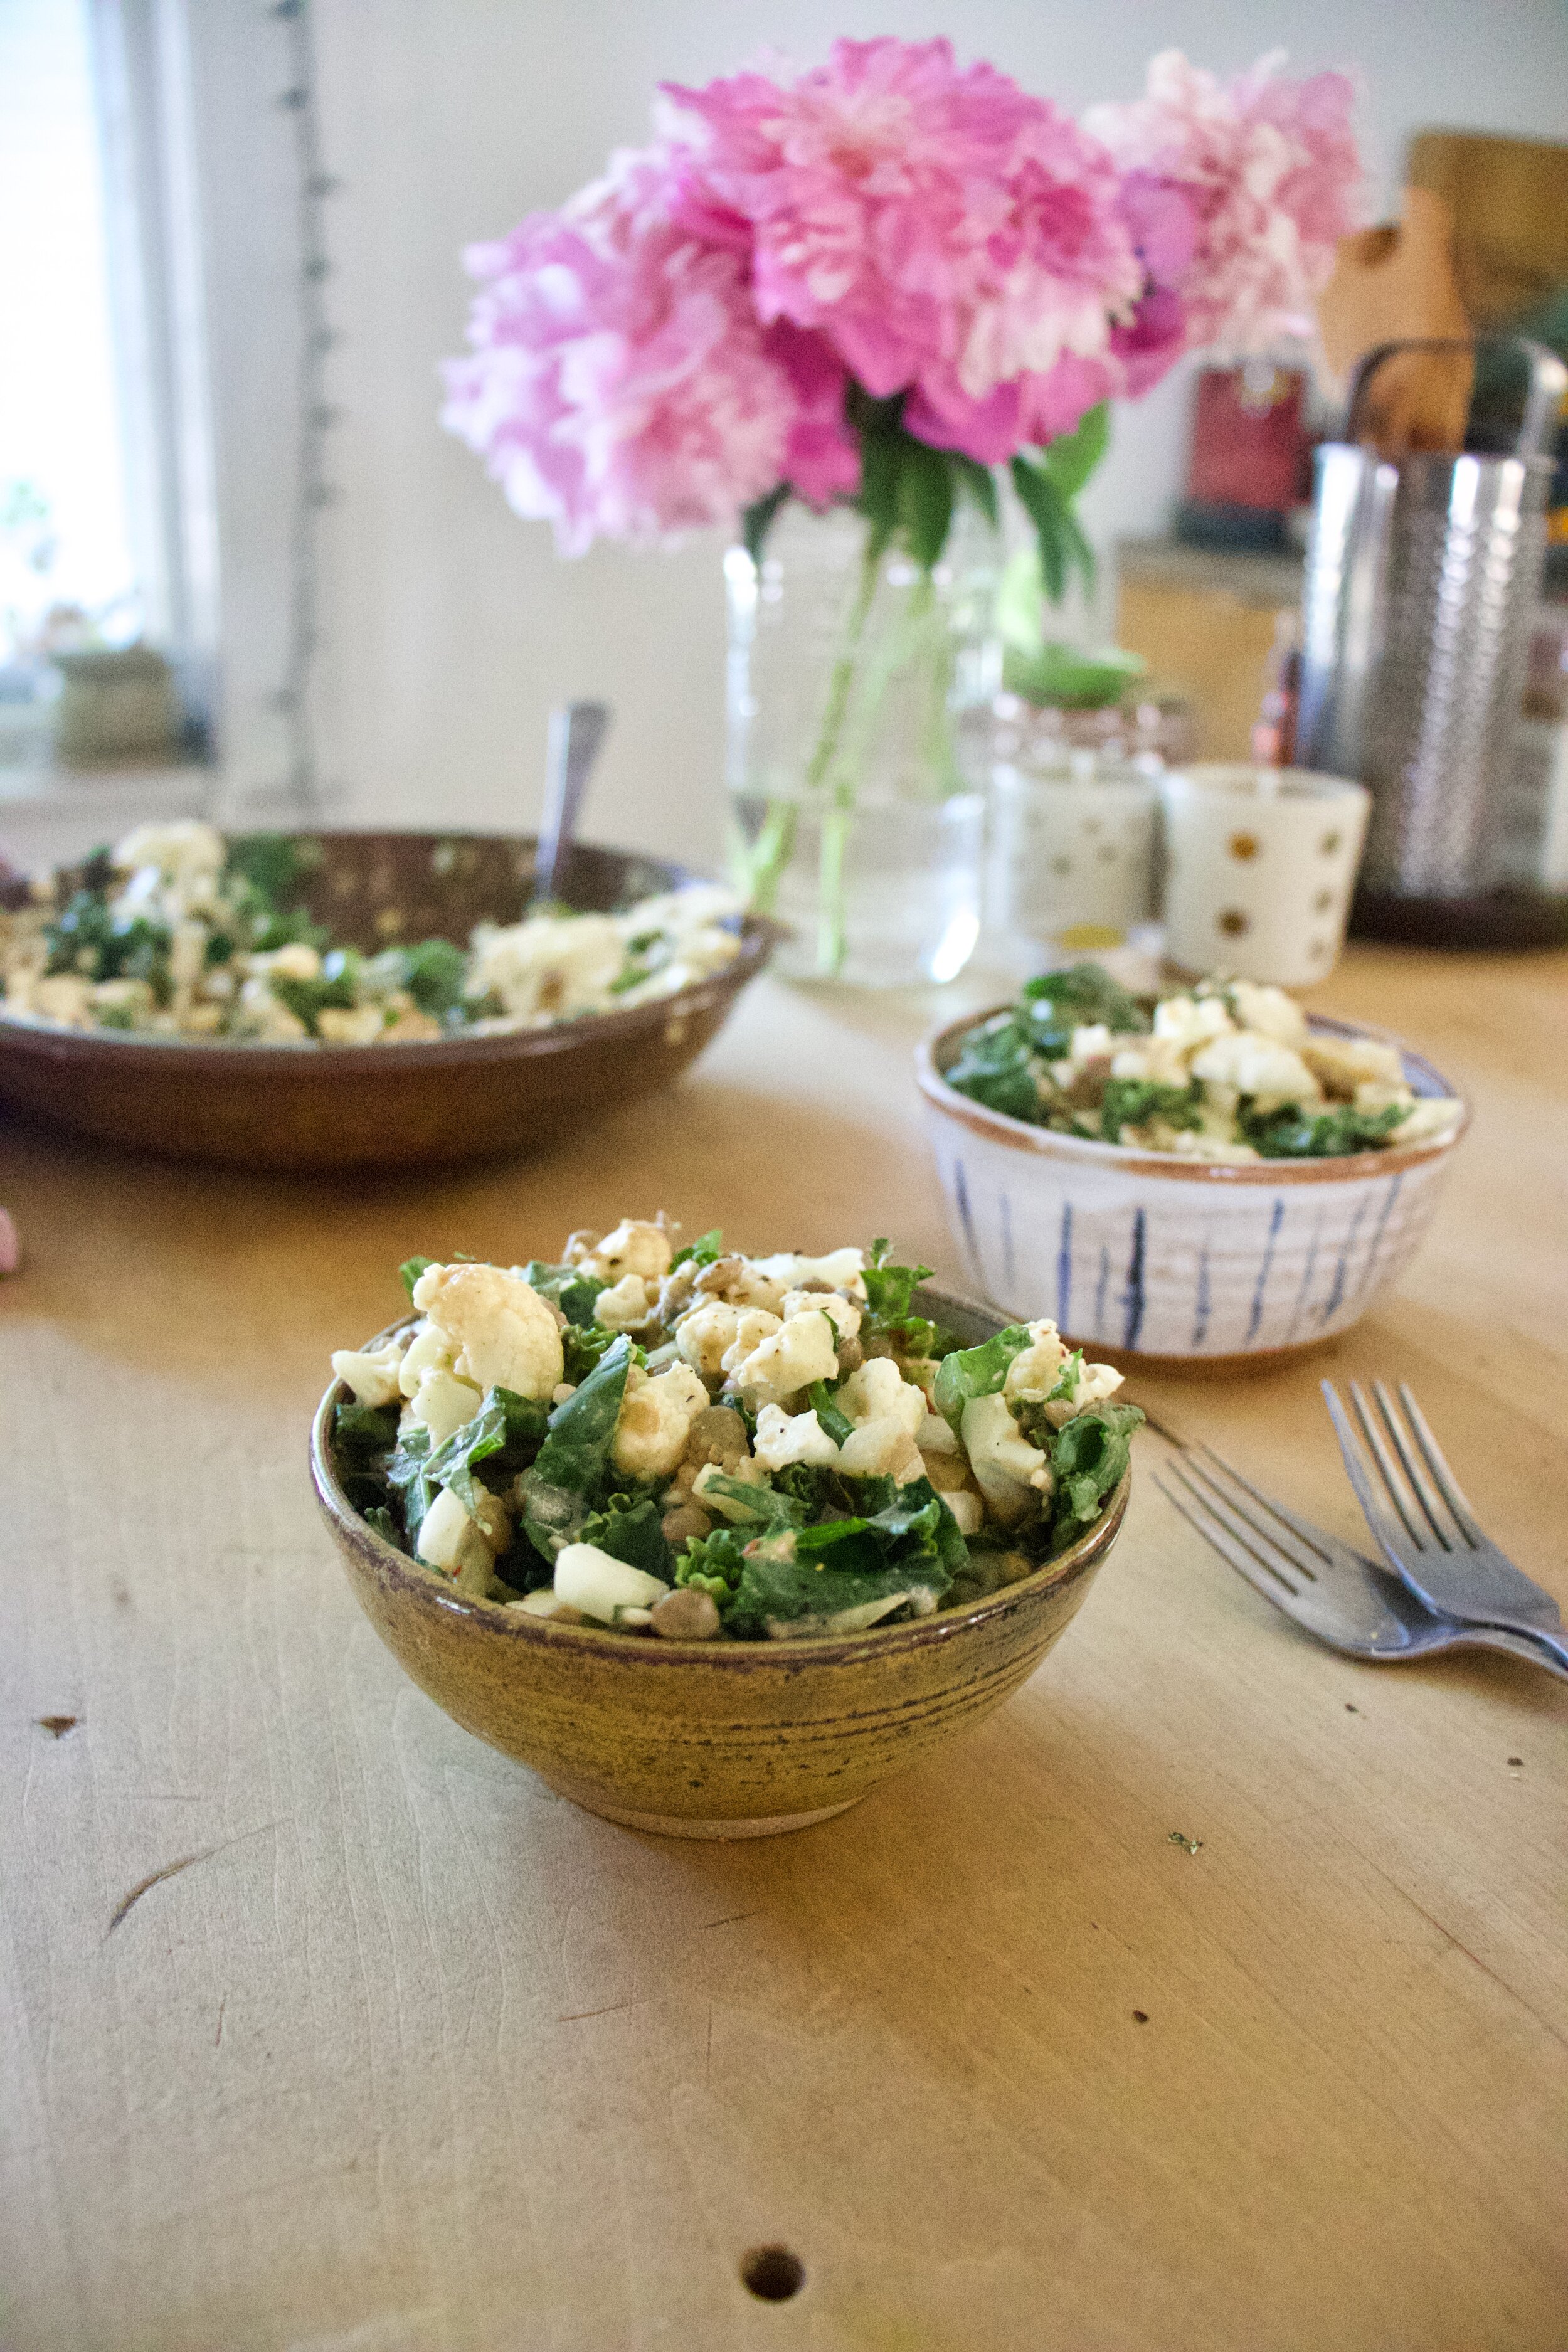
Now to the cauliflower, kale, and lentil bowl with all the peanut sauce!

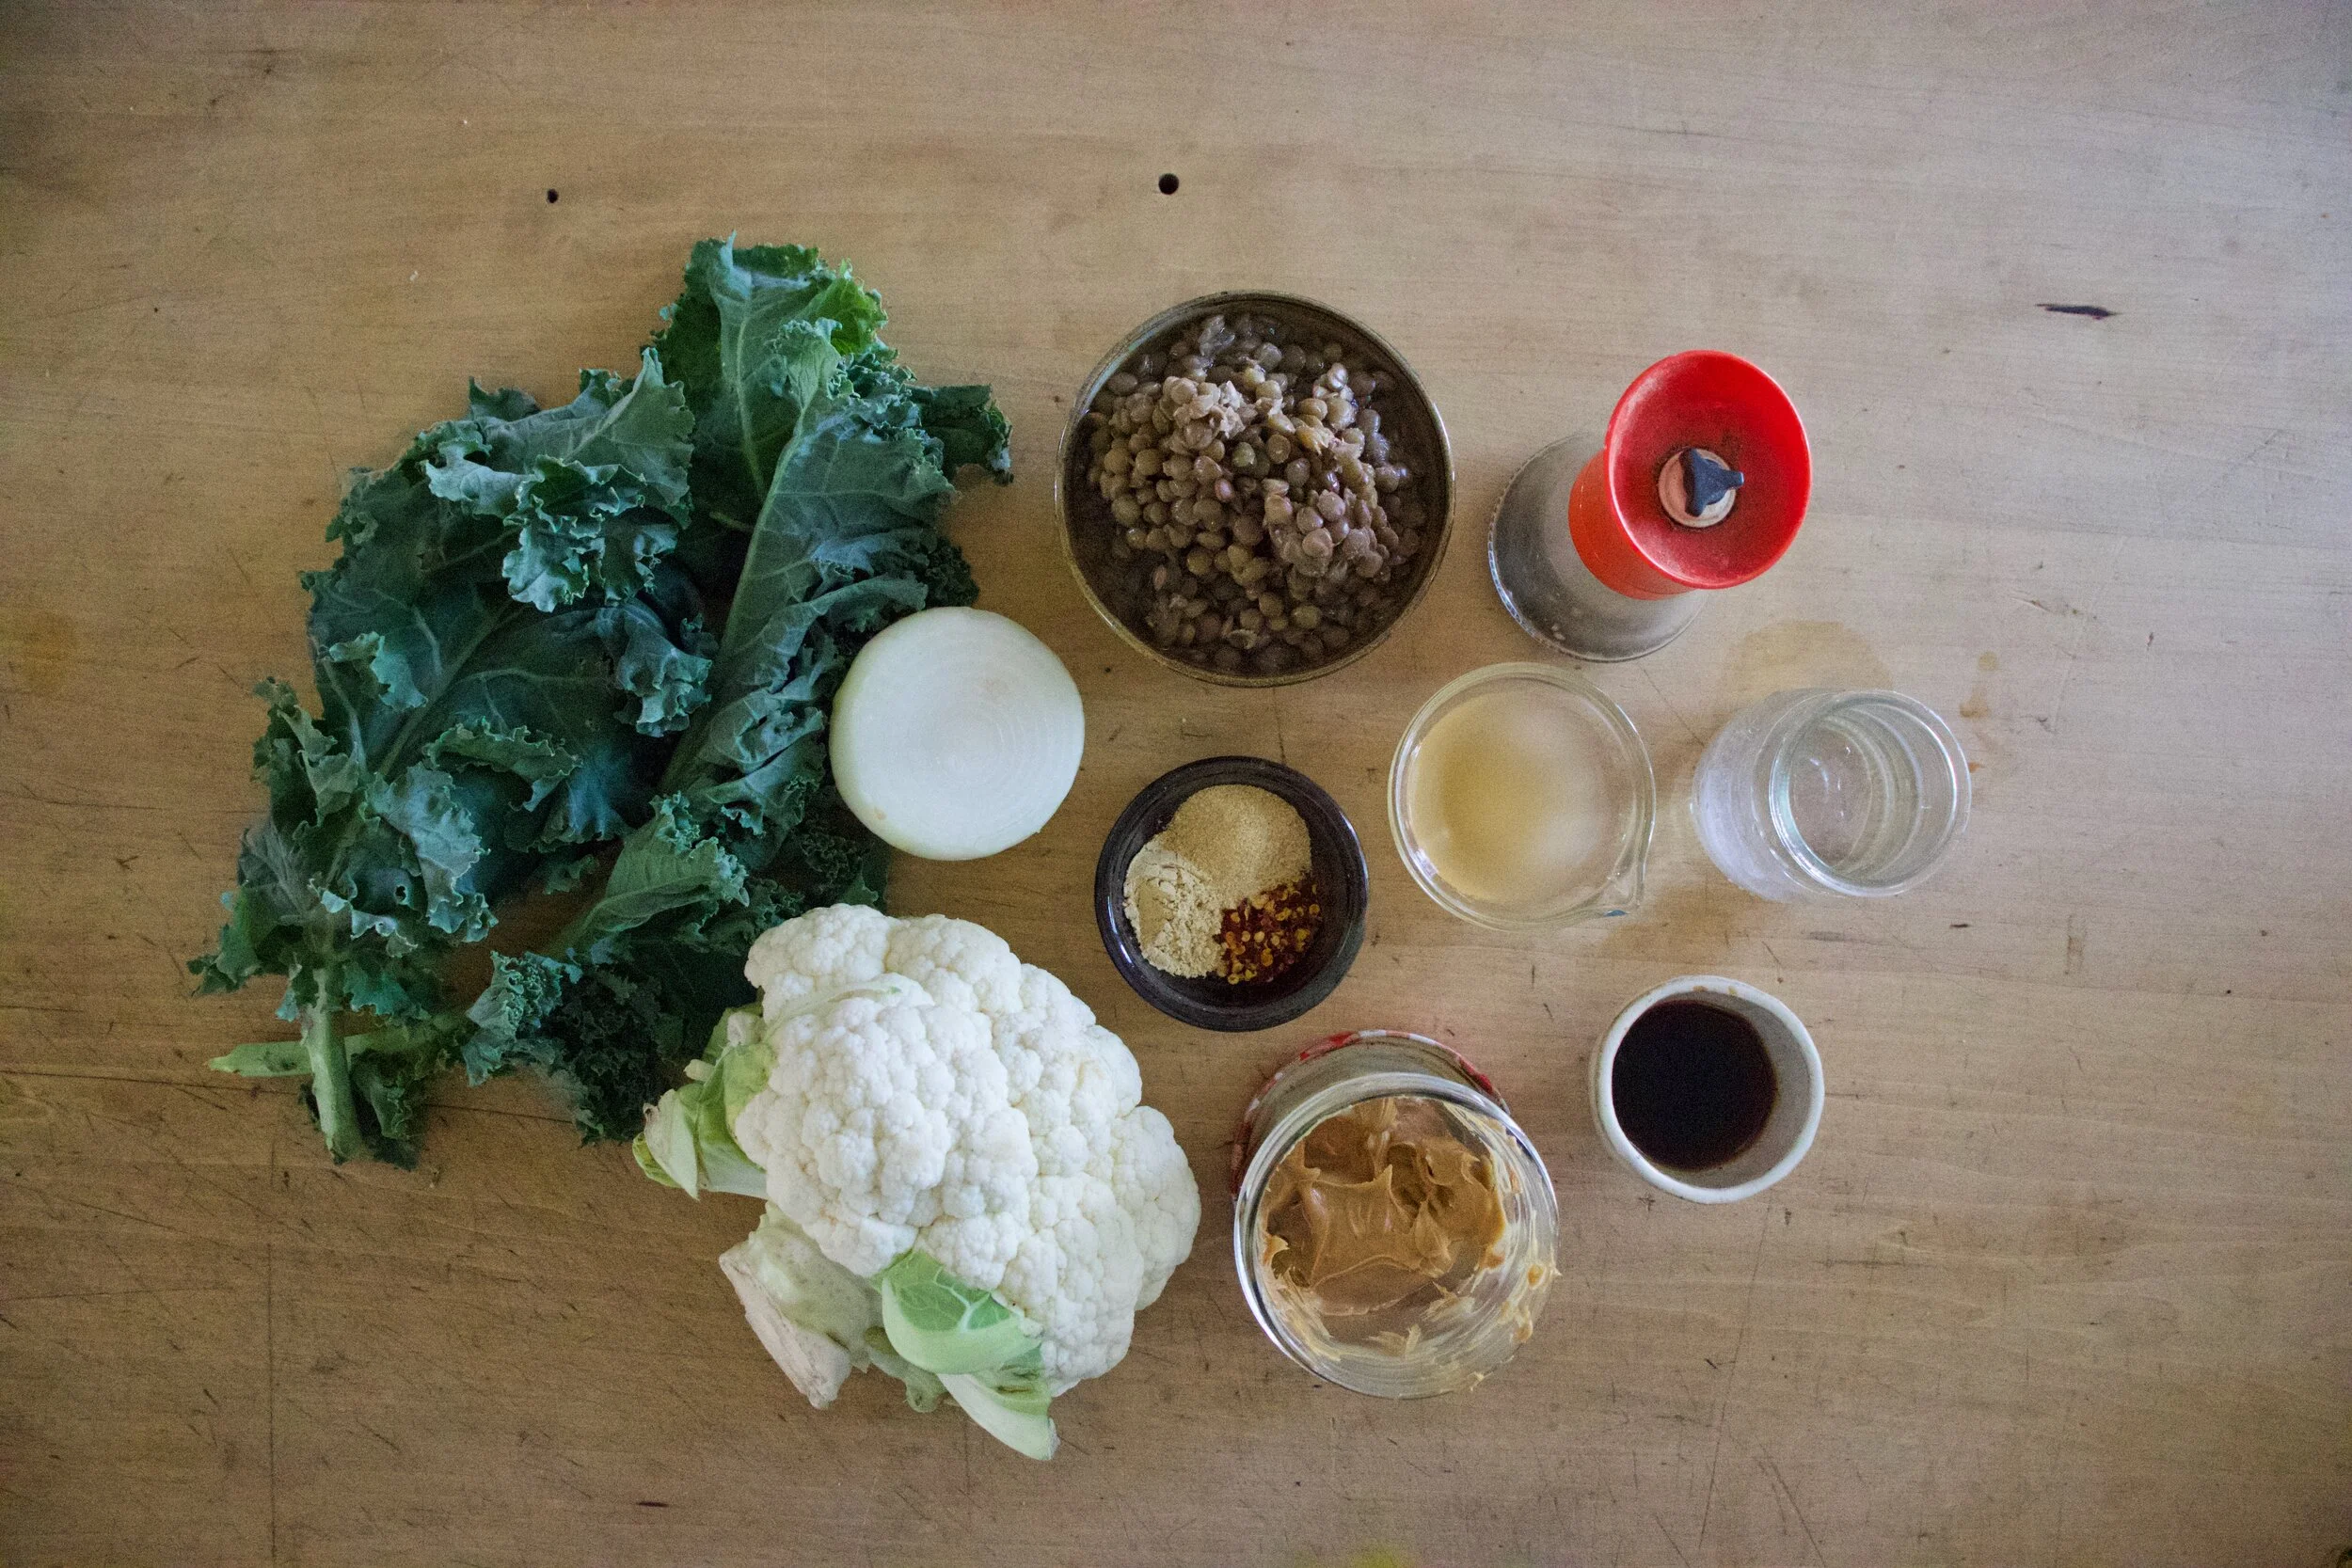
The stuff. Half a head of cauliflower, a few big kale leaves, half an onion, cooked lentils, peanut butter, apple cider vinegar, hot water, soy sauce, ginger, garlic powder, red pepper flakes, and black pepper.

IMG_8527.jpg
IMG_8536.jpg

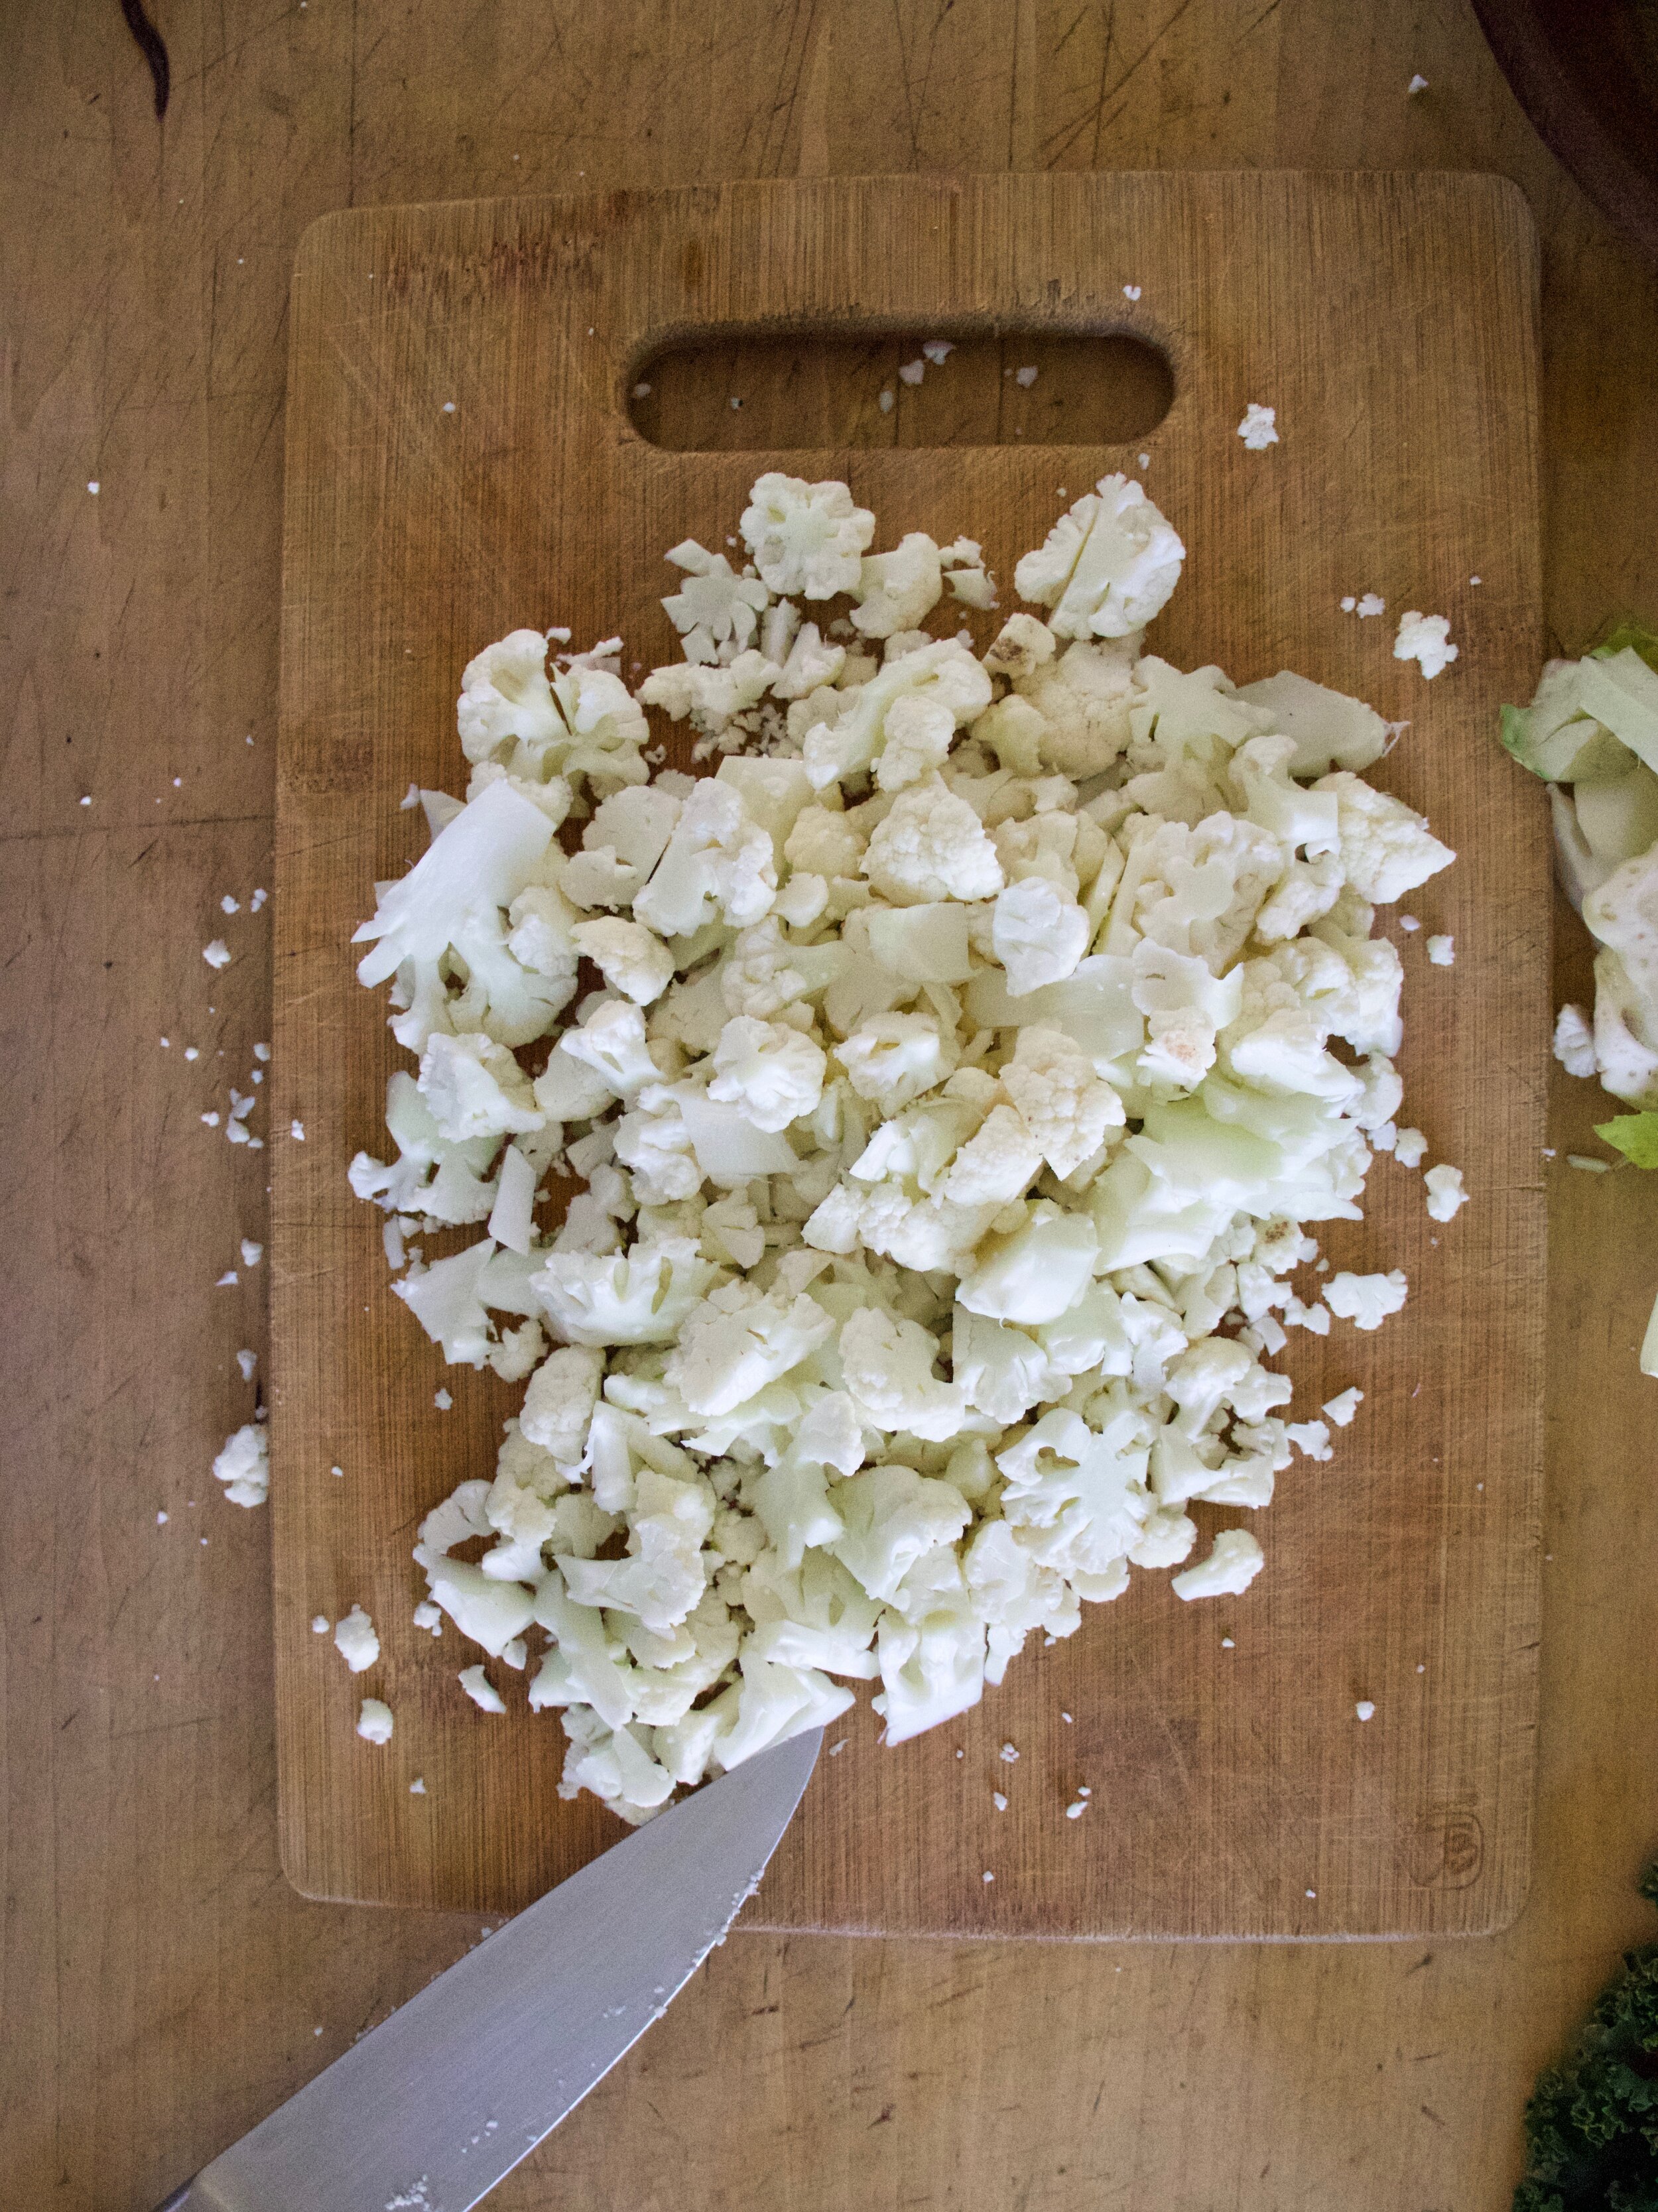
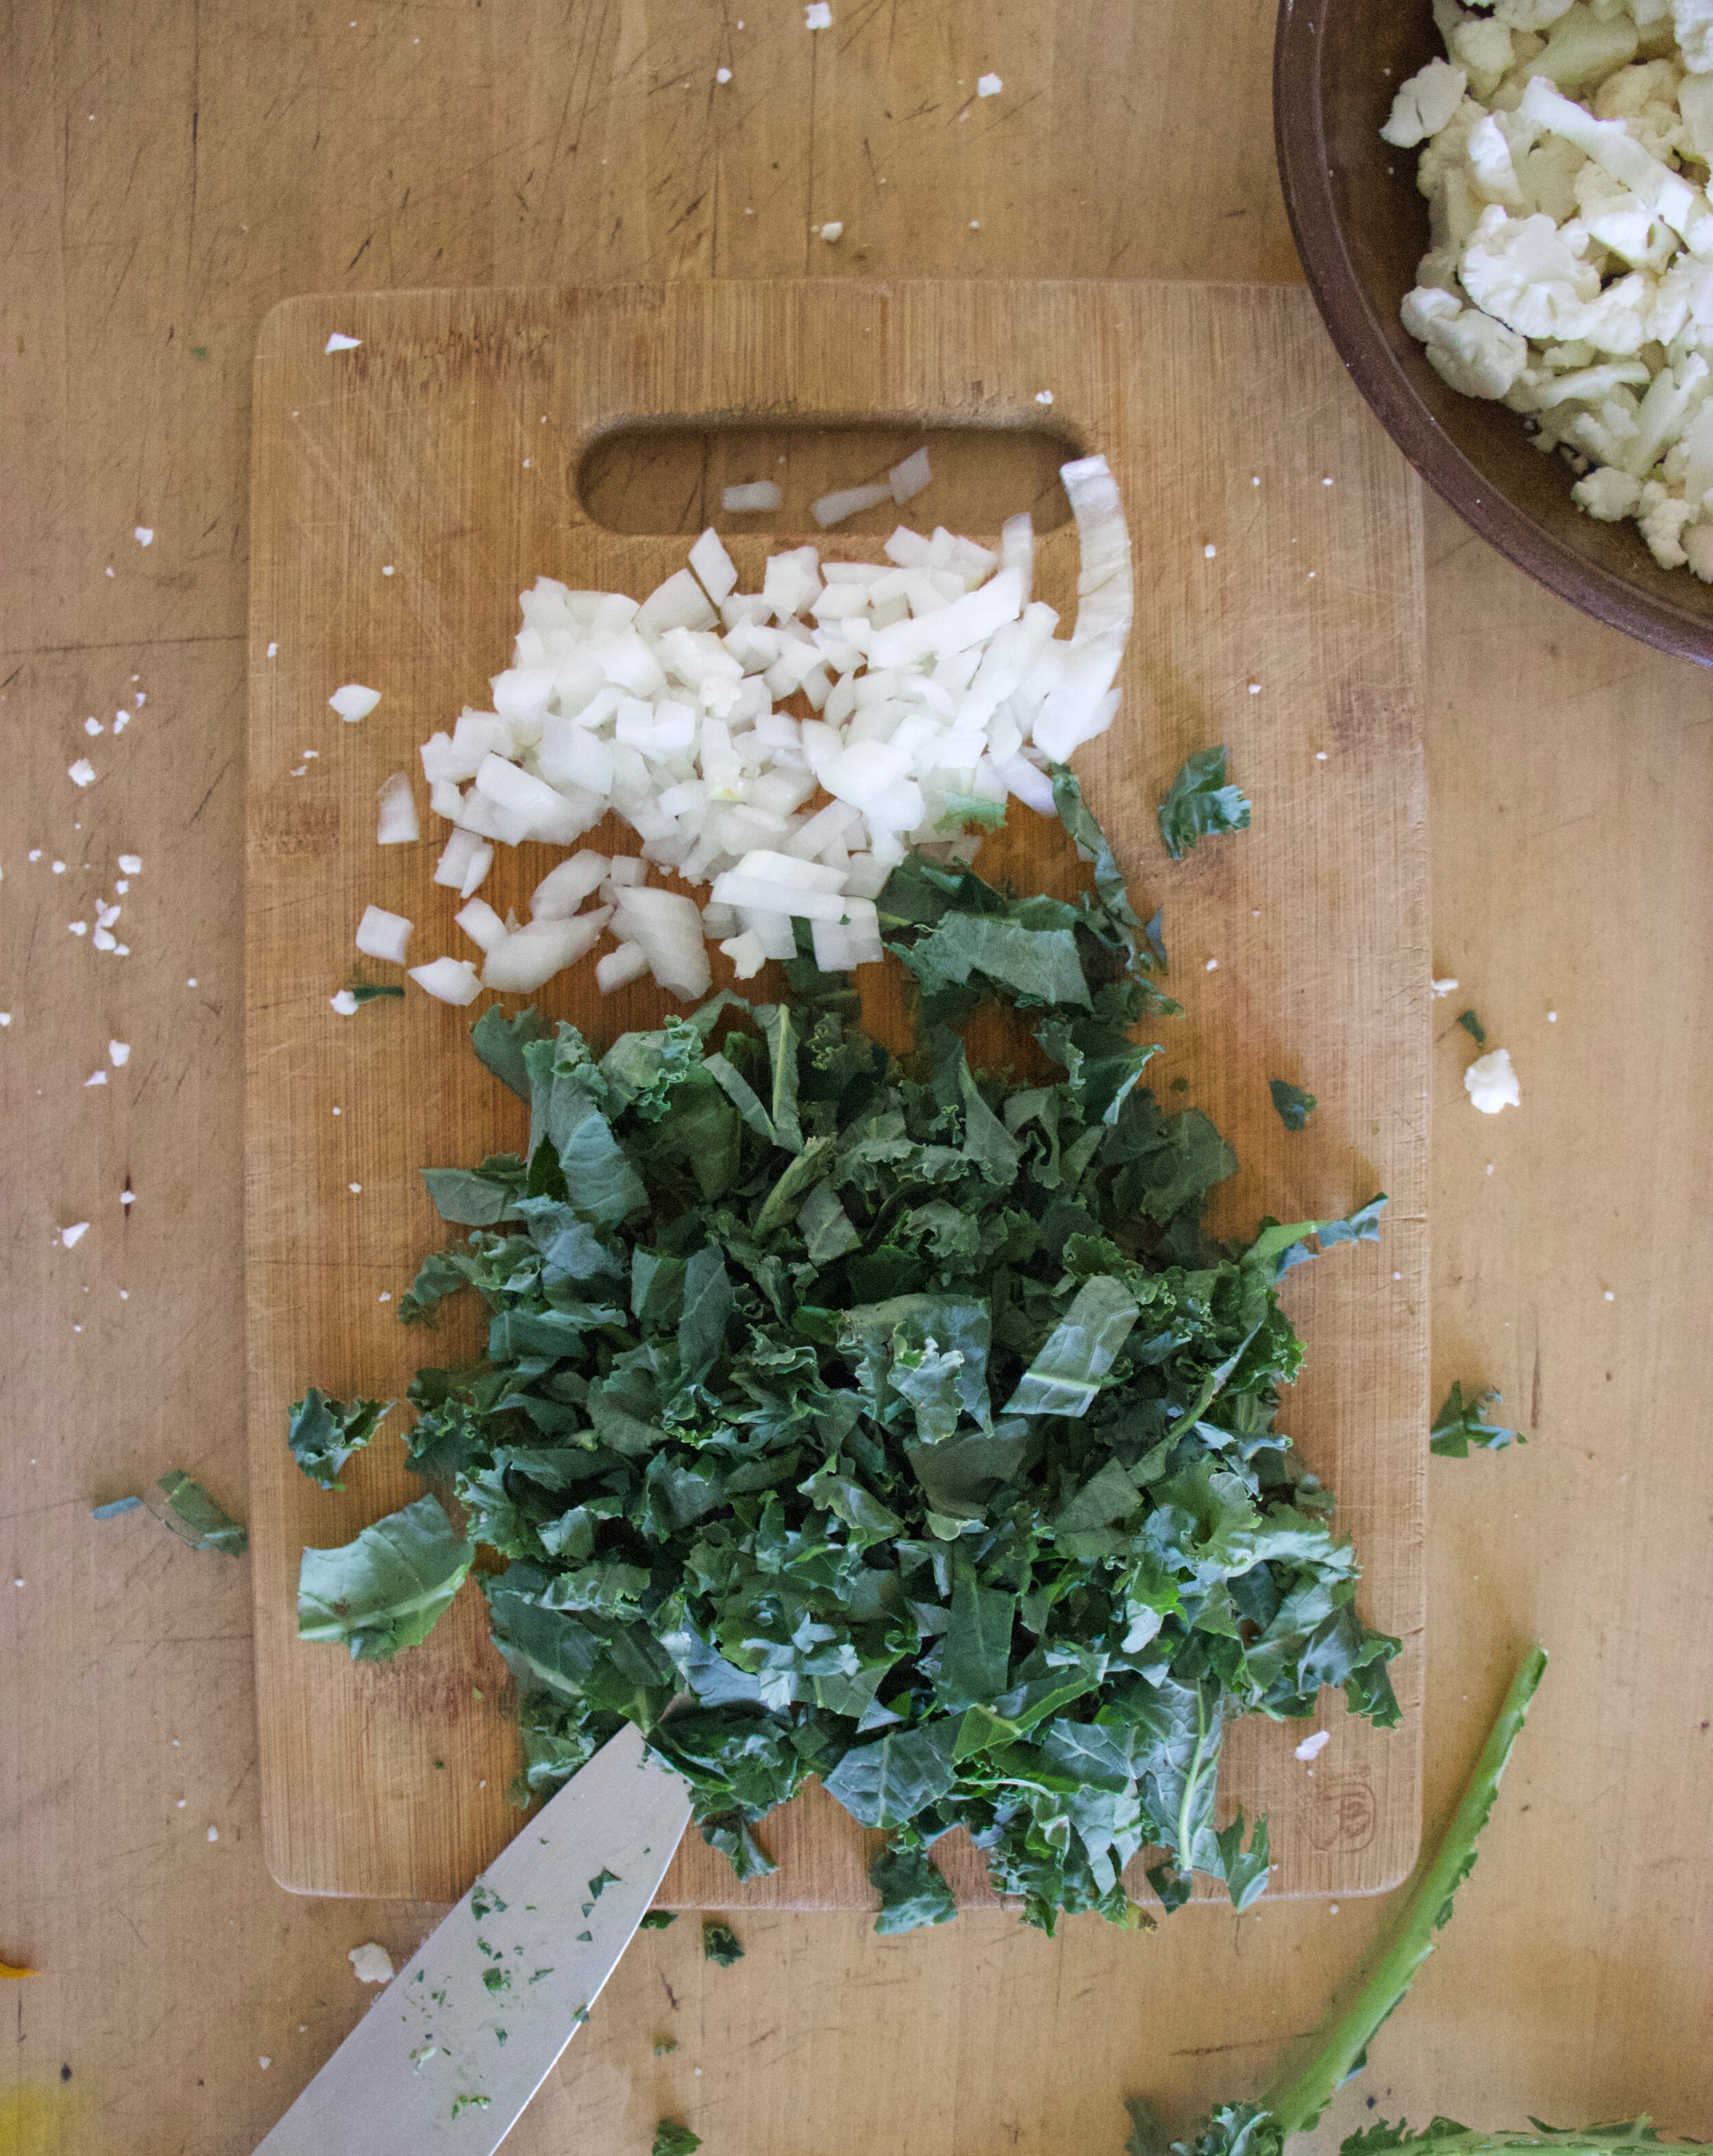
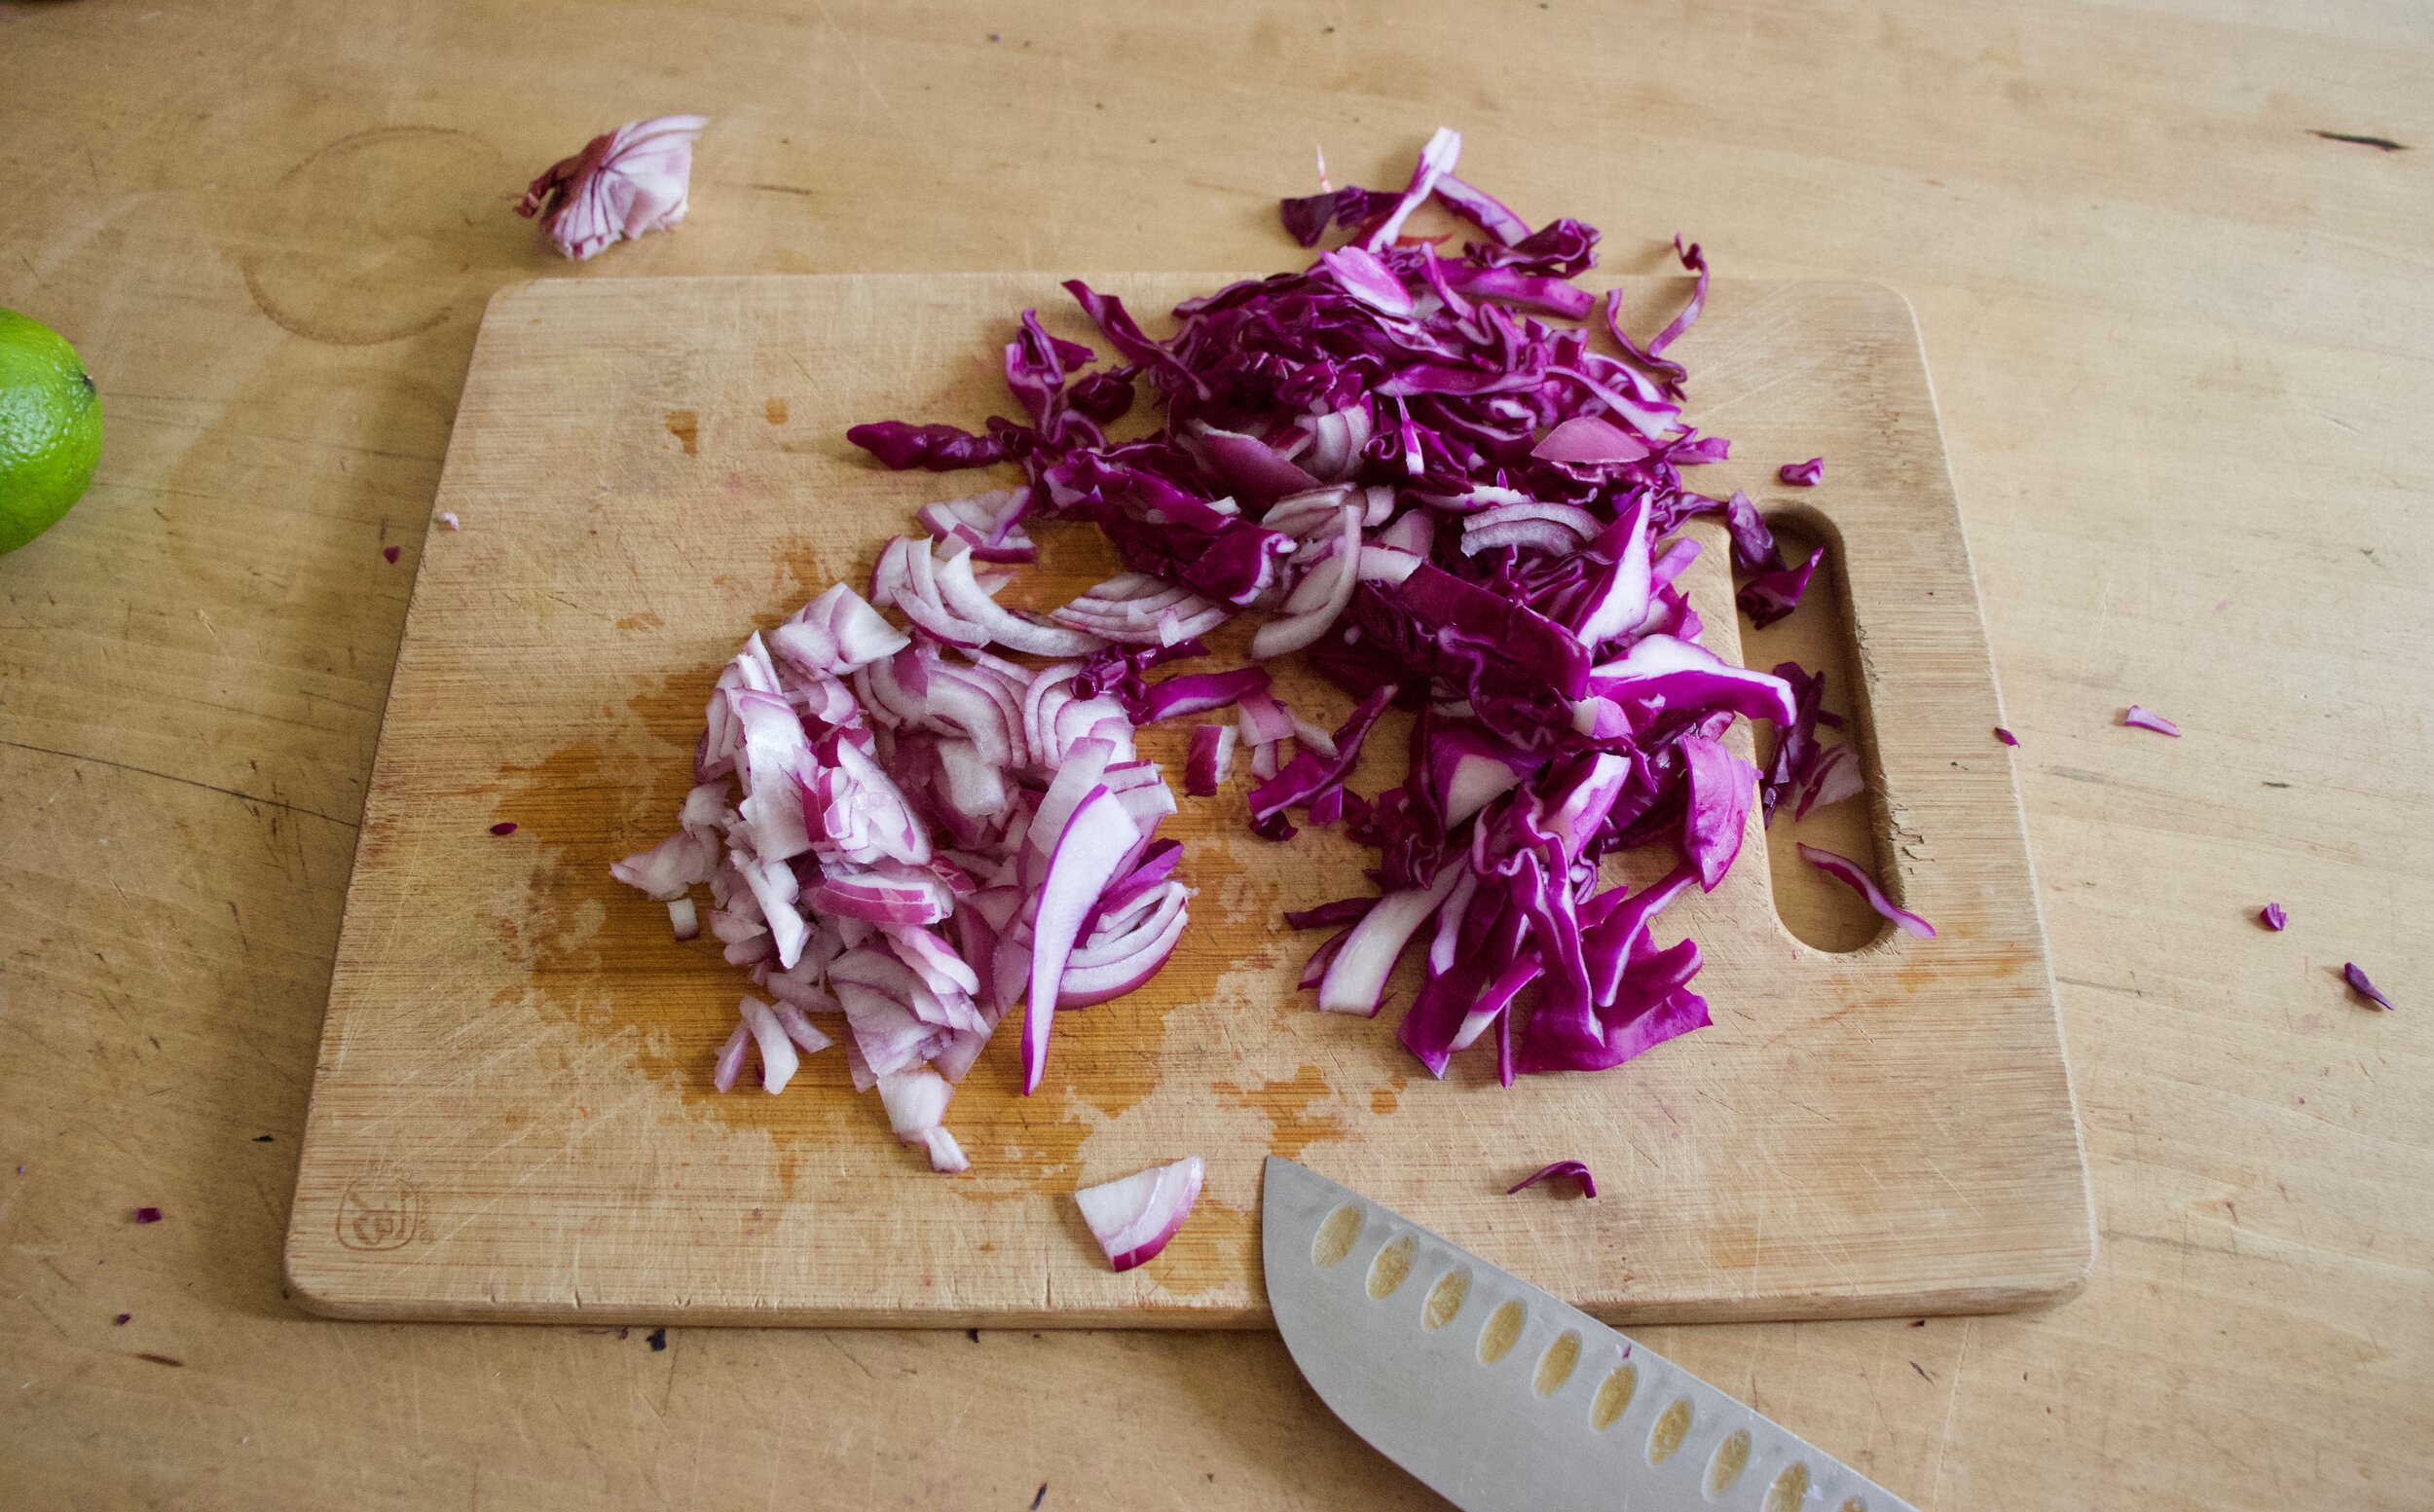
Cut up cauliflower. Just go at it with a knife until it is a pile of small little pieces. Then dice up the onion into small pieces and cut up kale into small pieces as well.

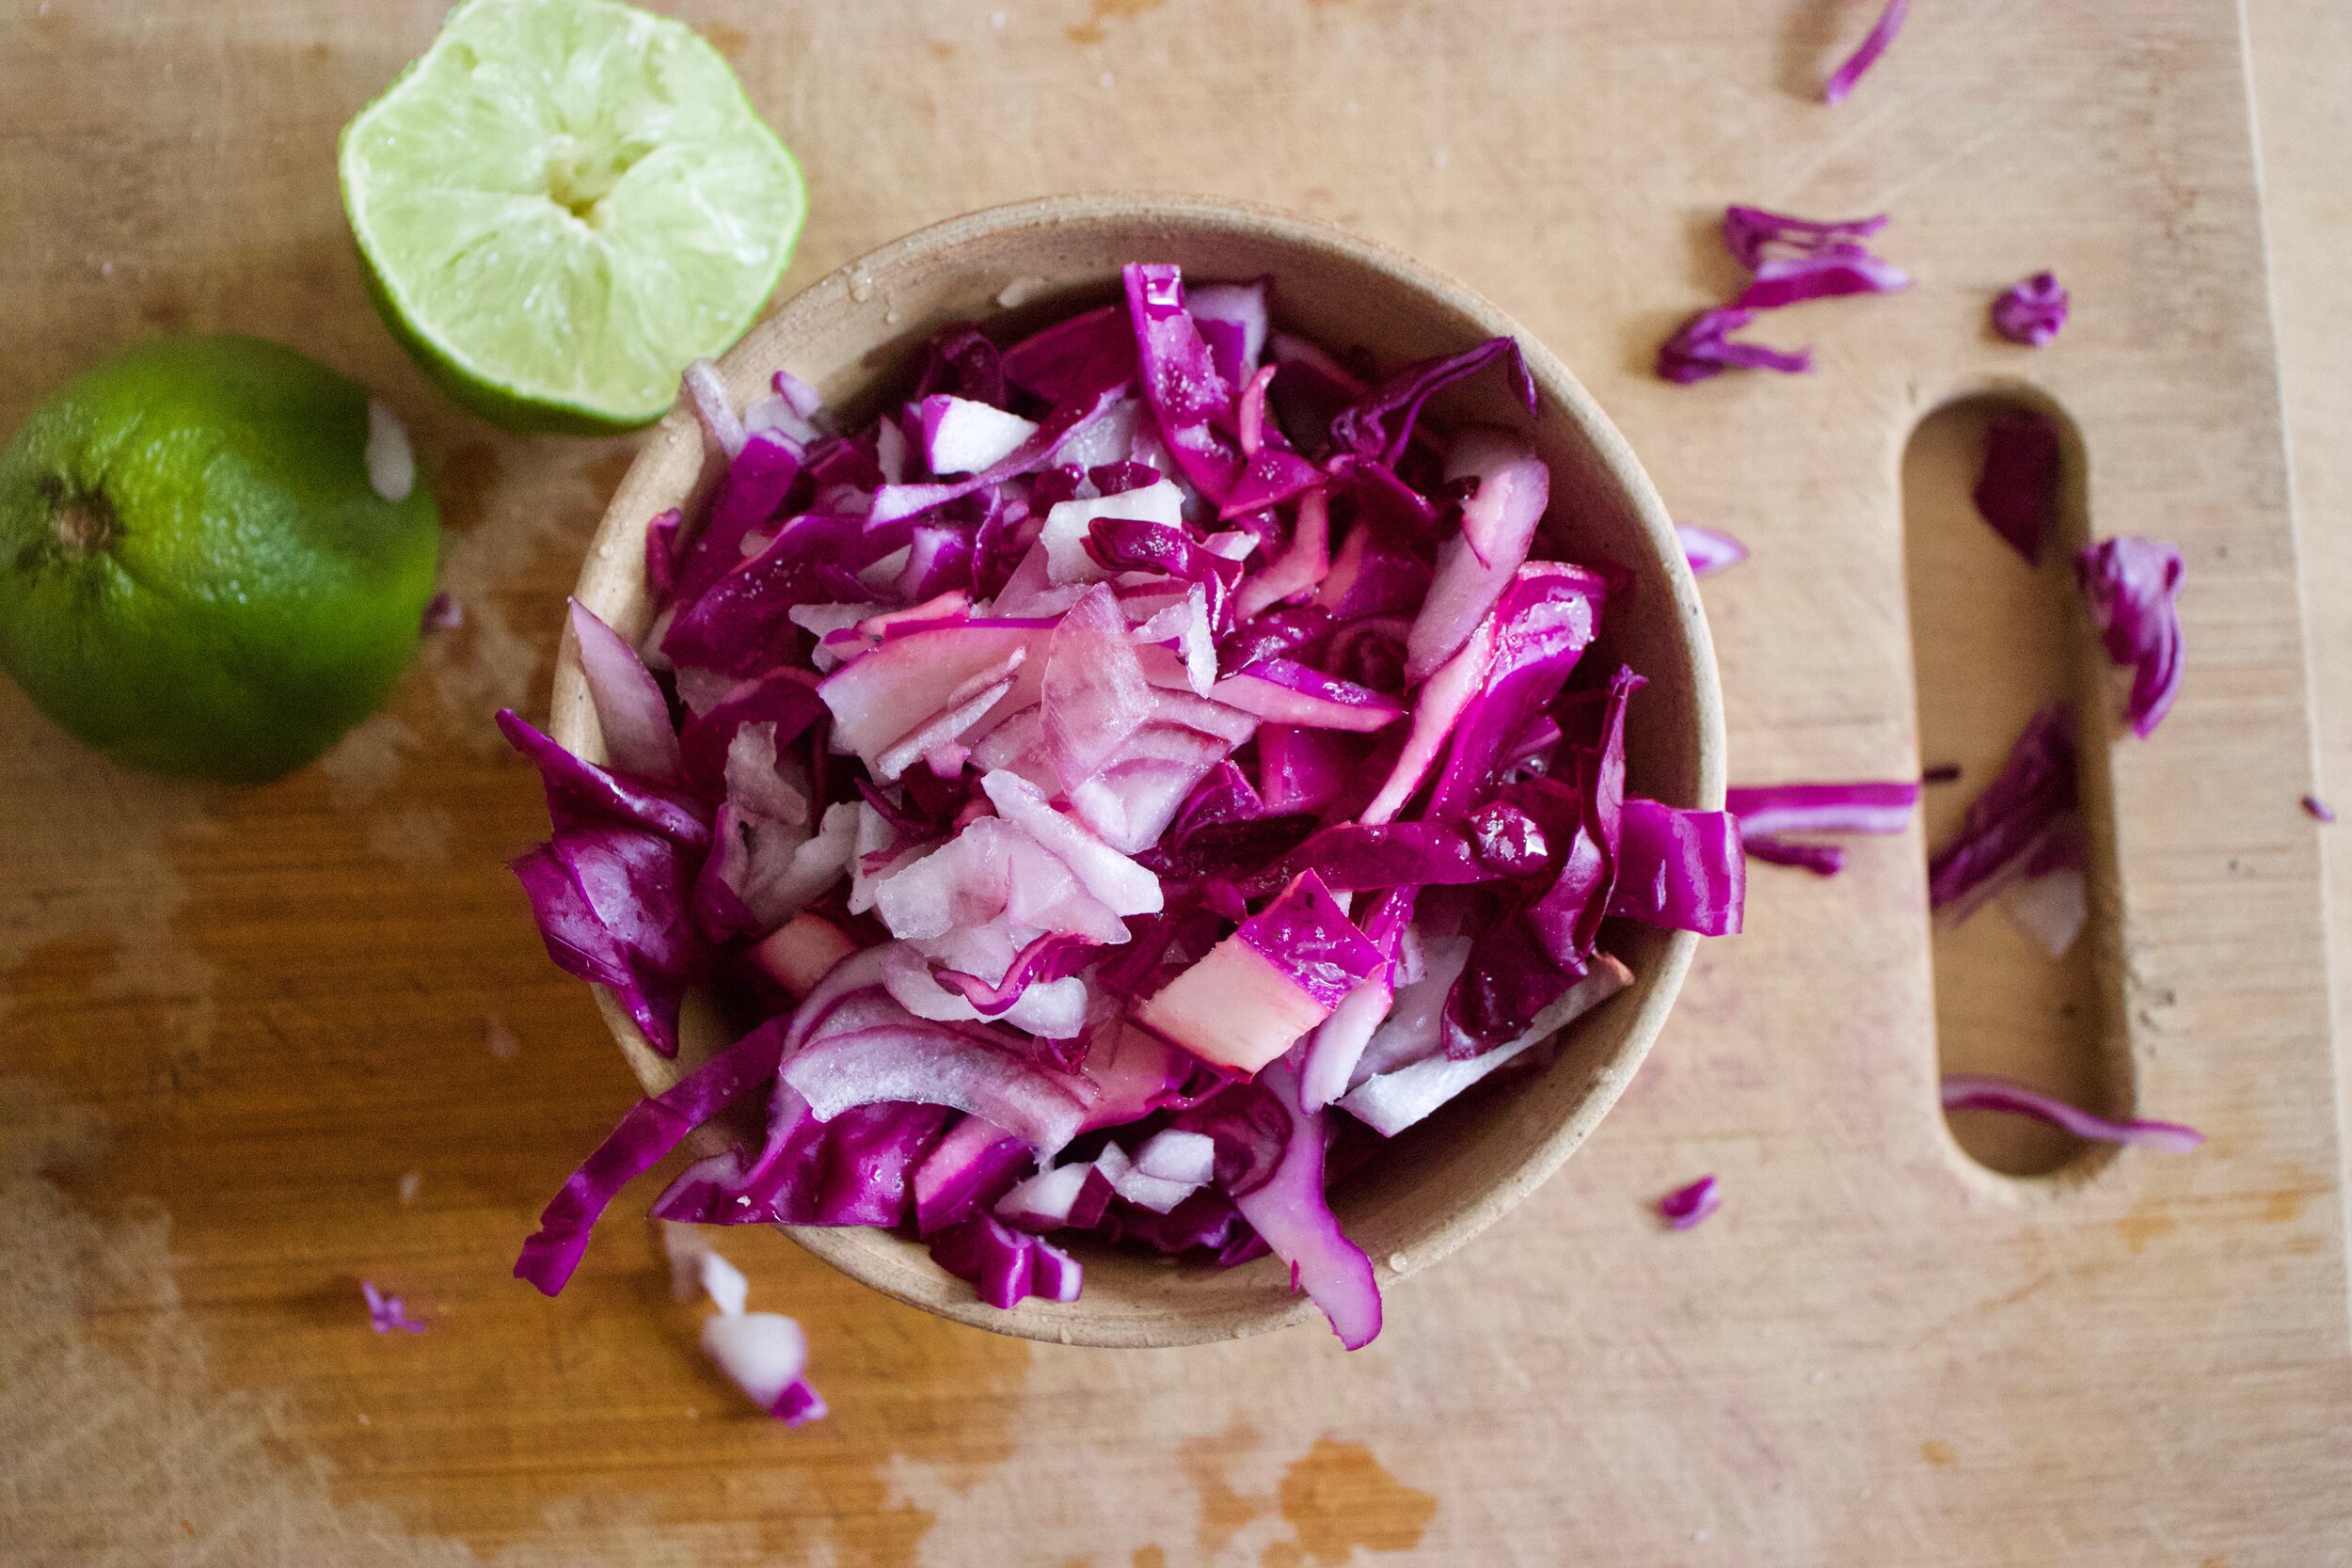
Toss all of that into a bowl and top with the lentils.

IMG_8552.jpg
IMG_8564.jpg

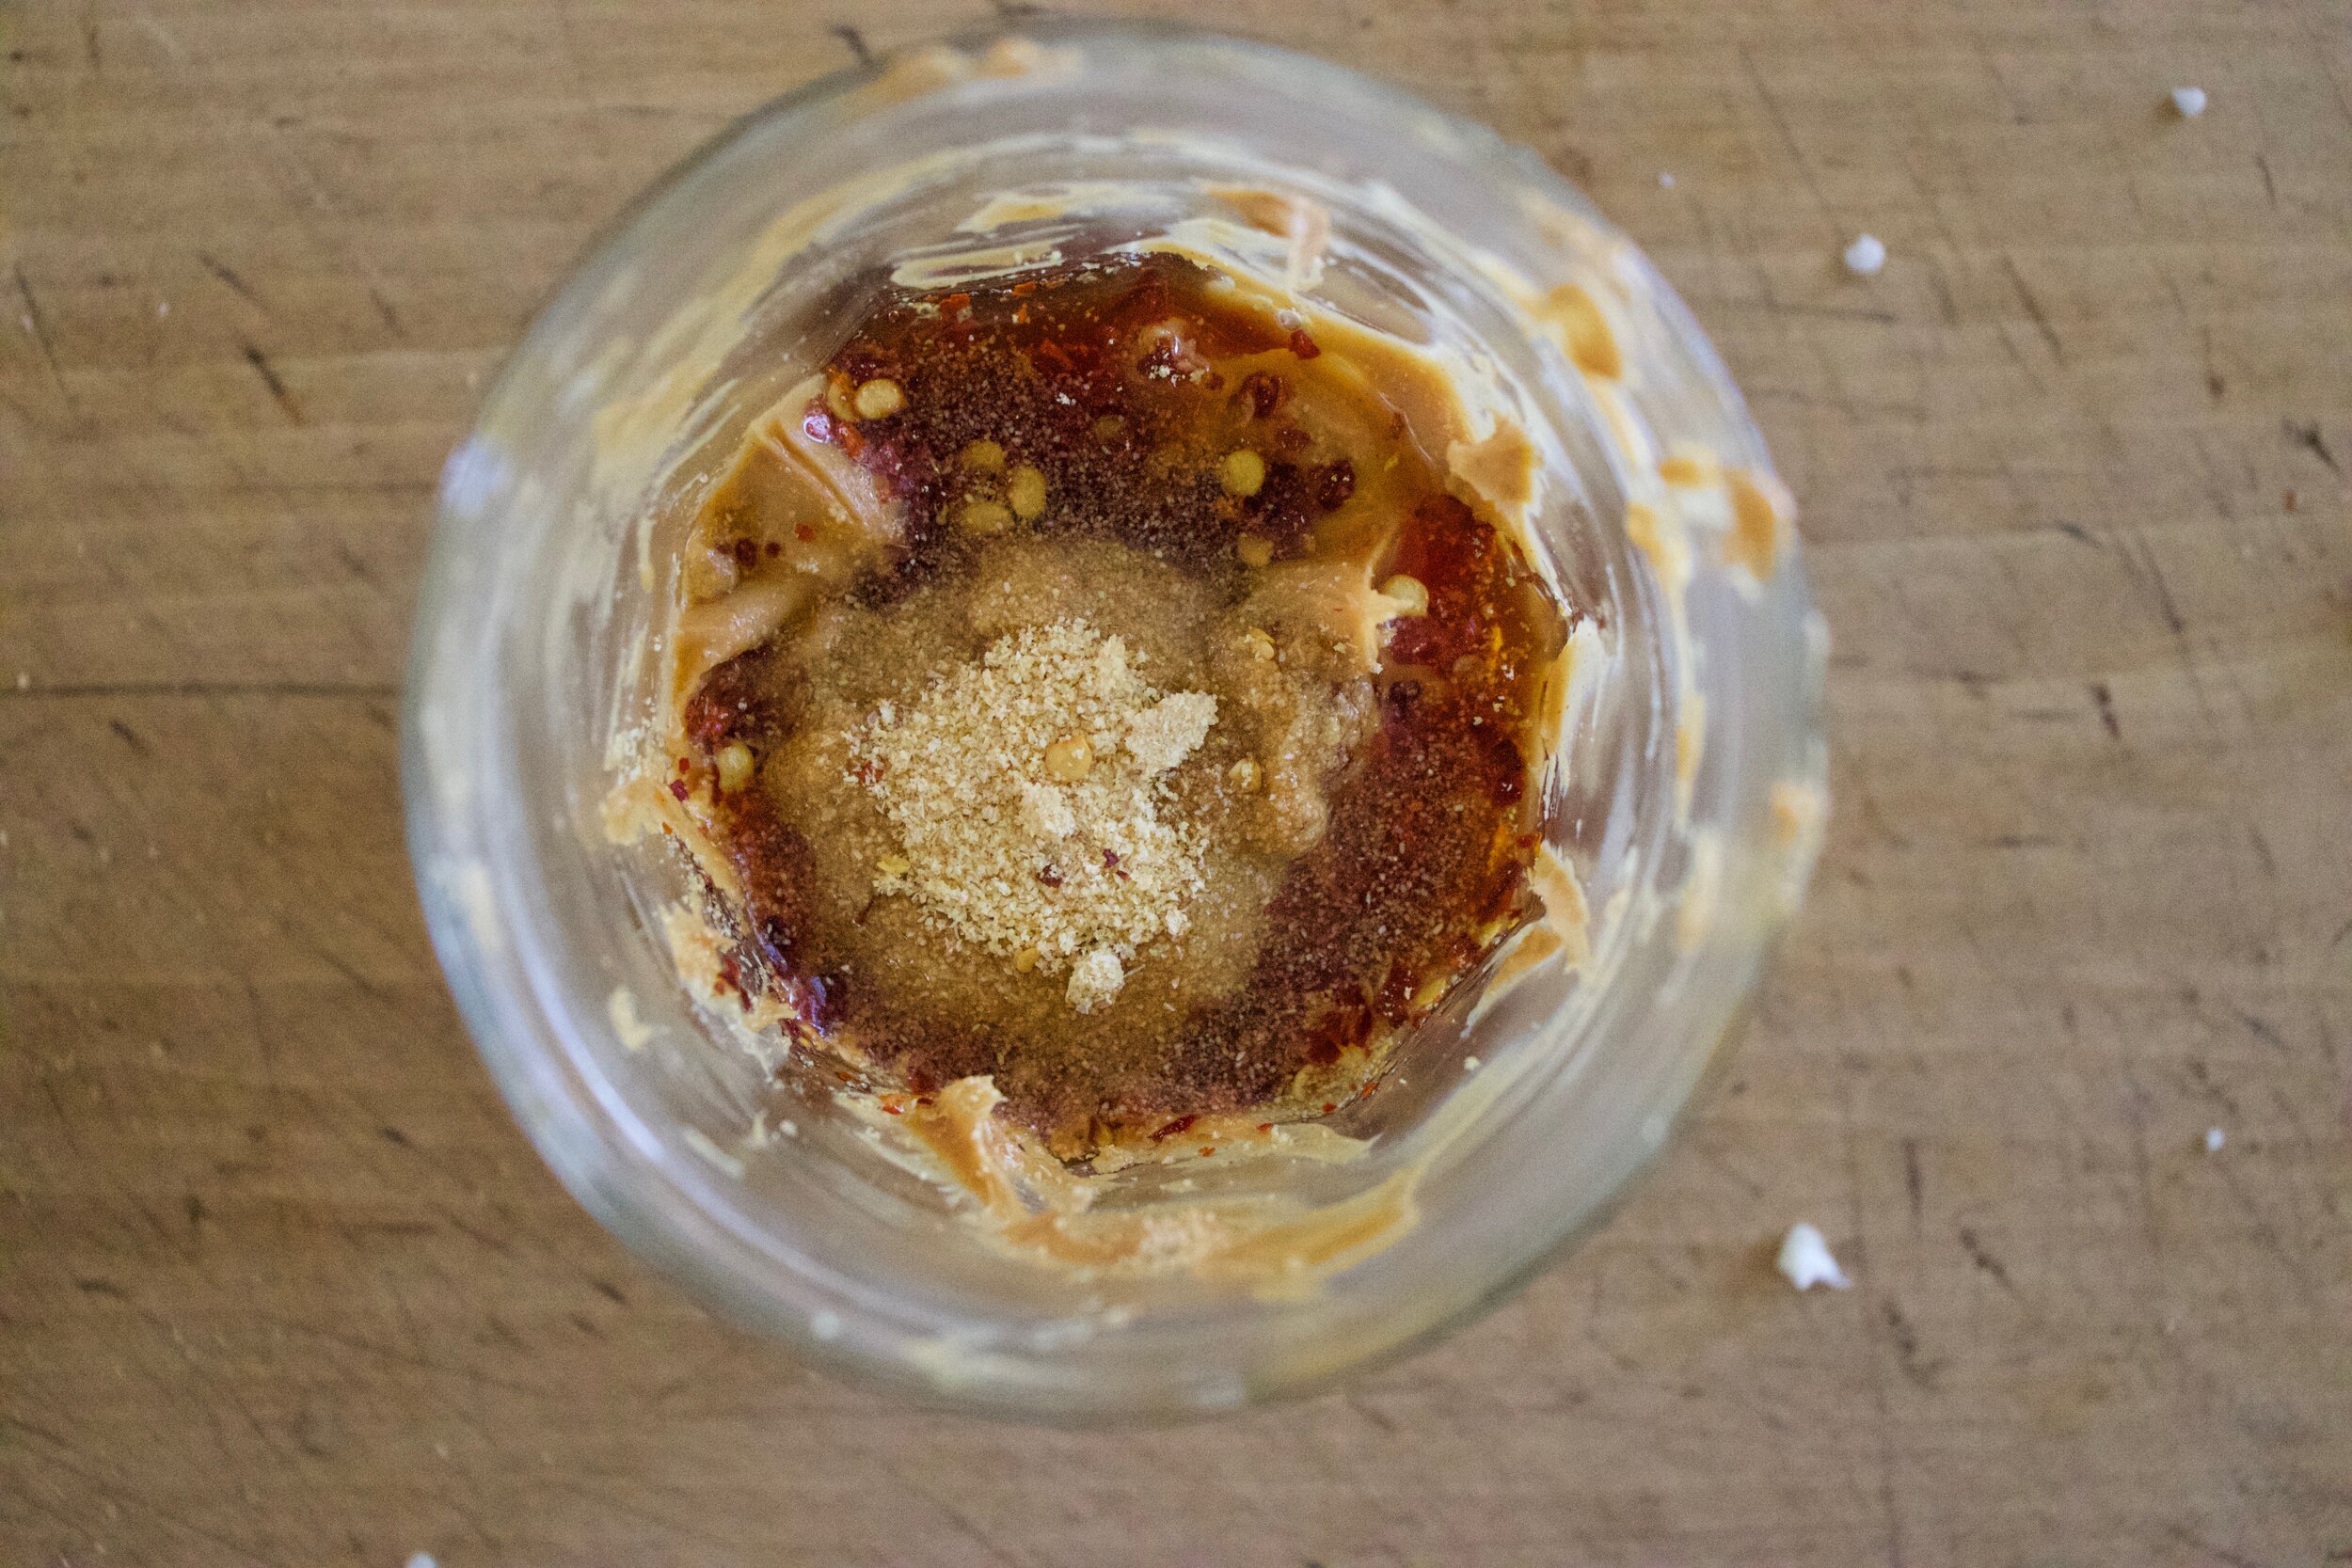
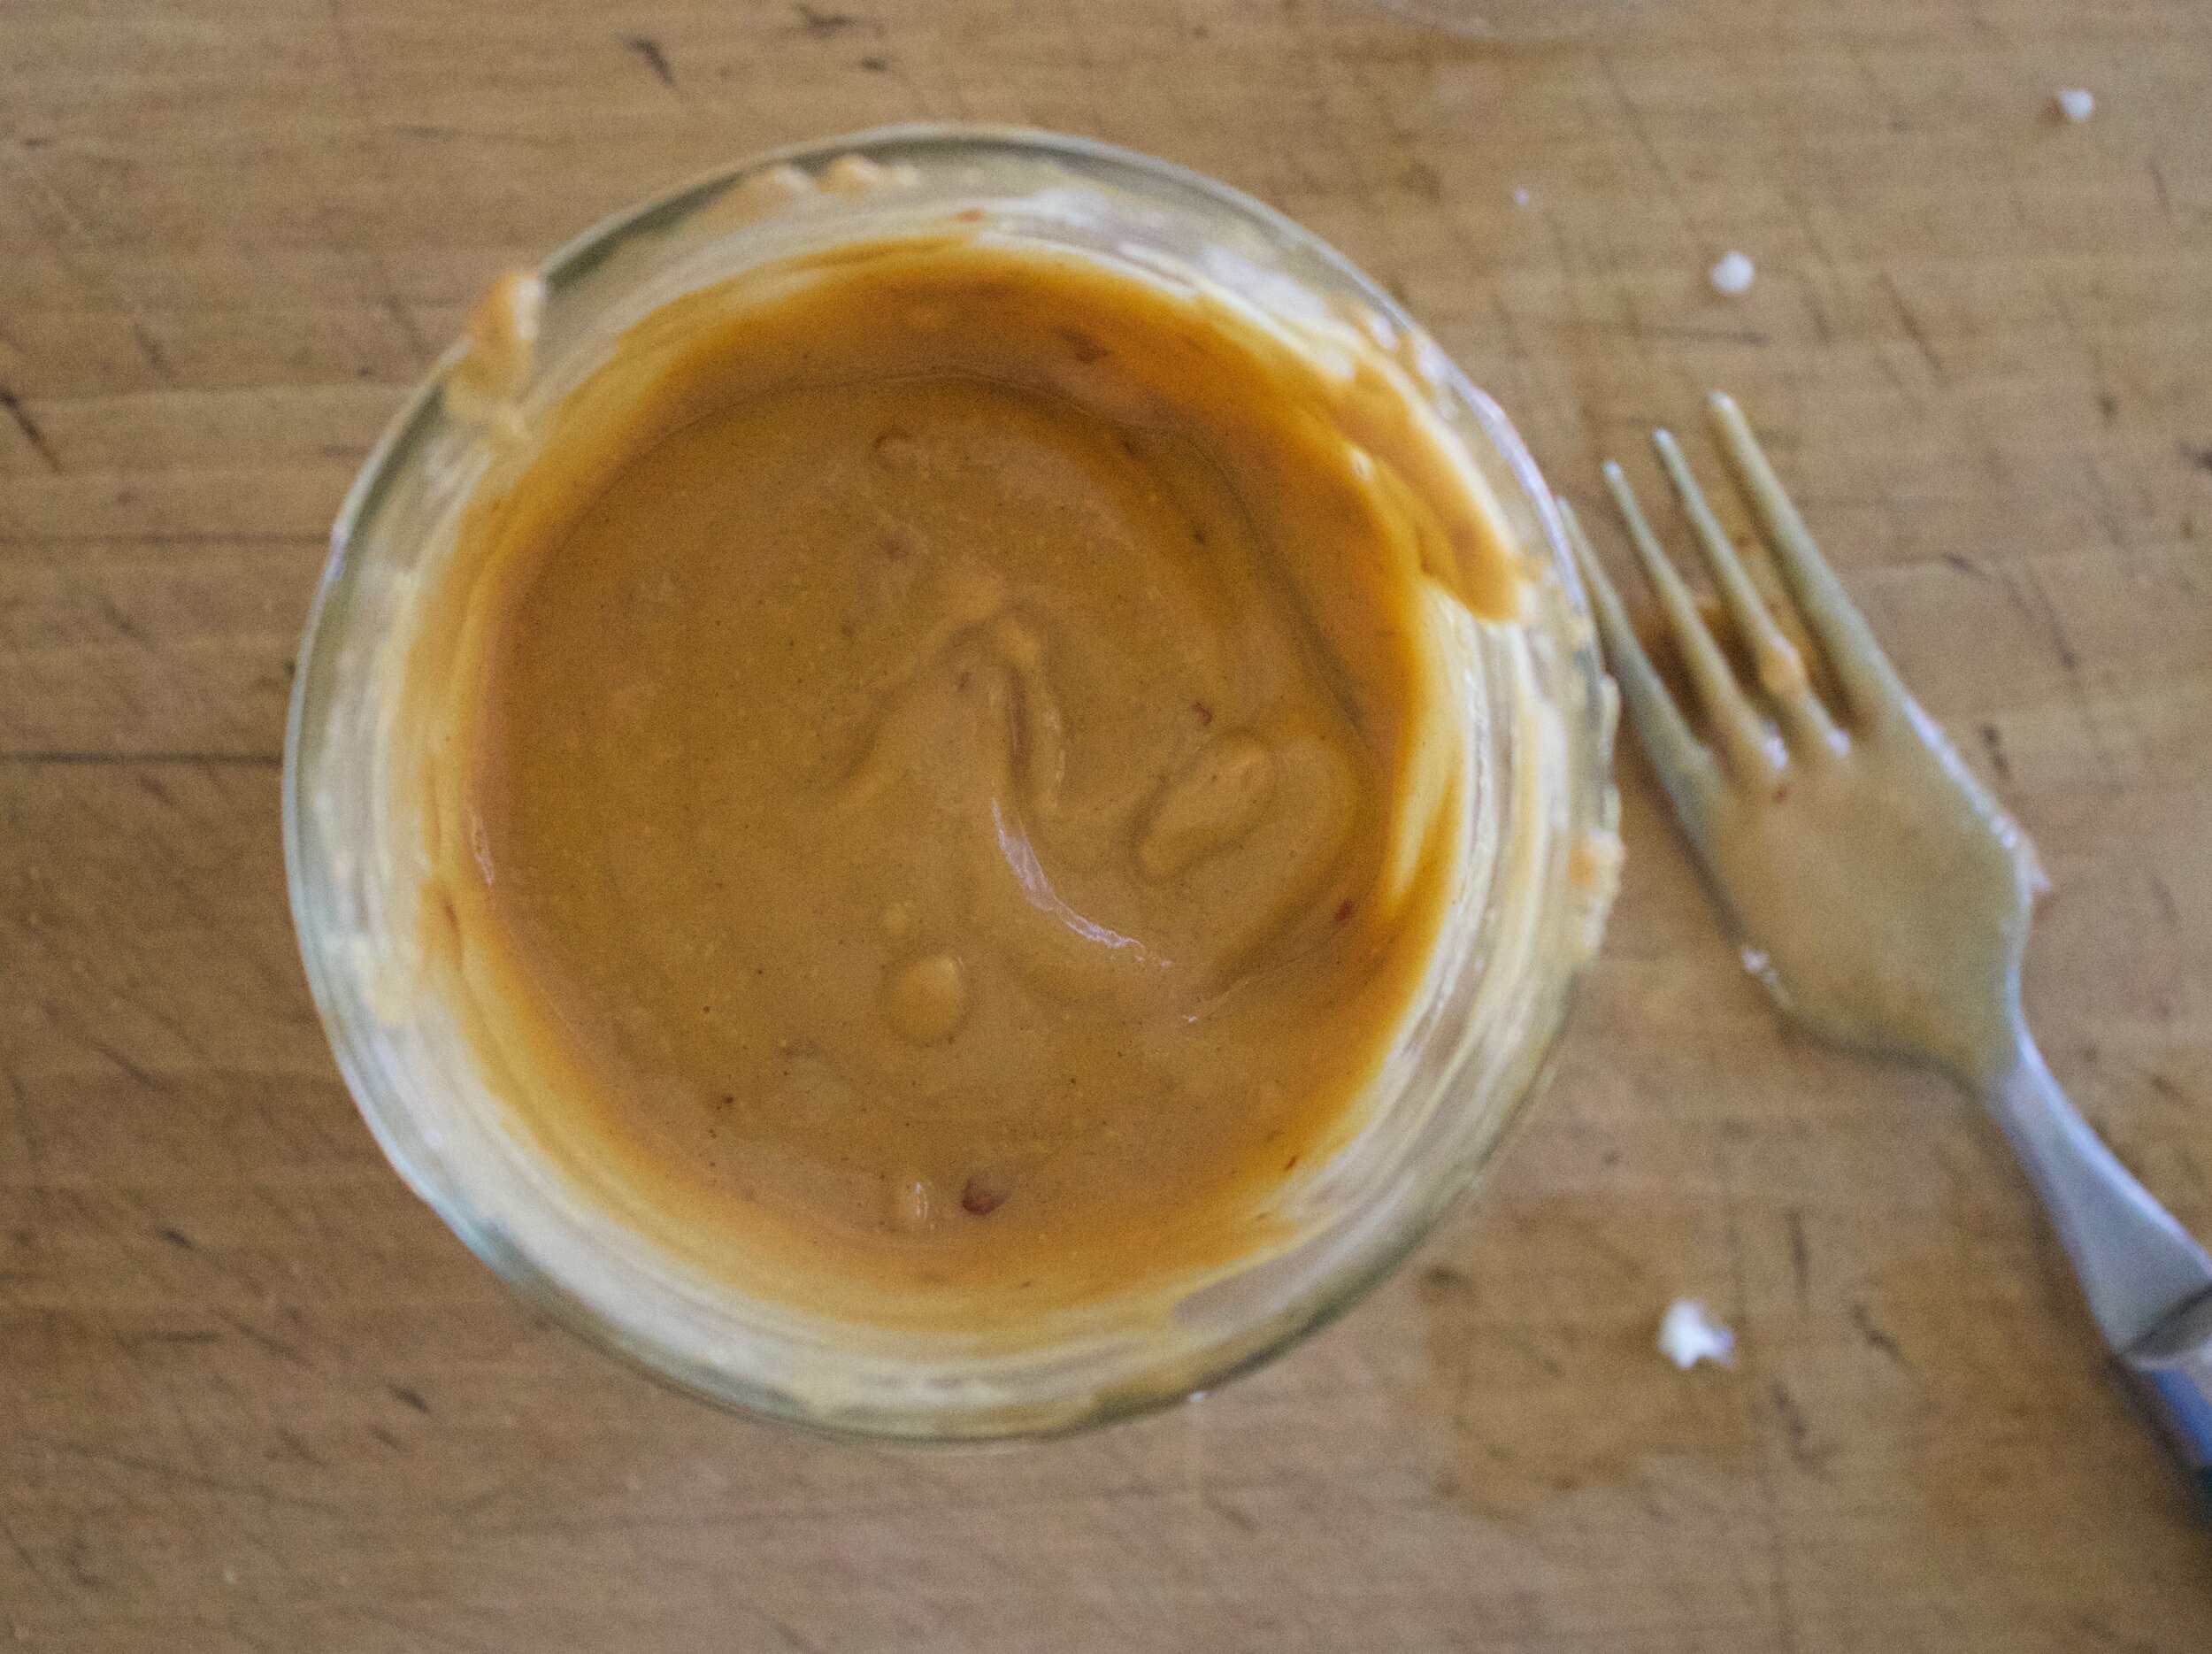
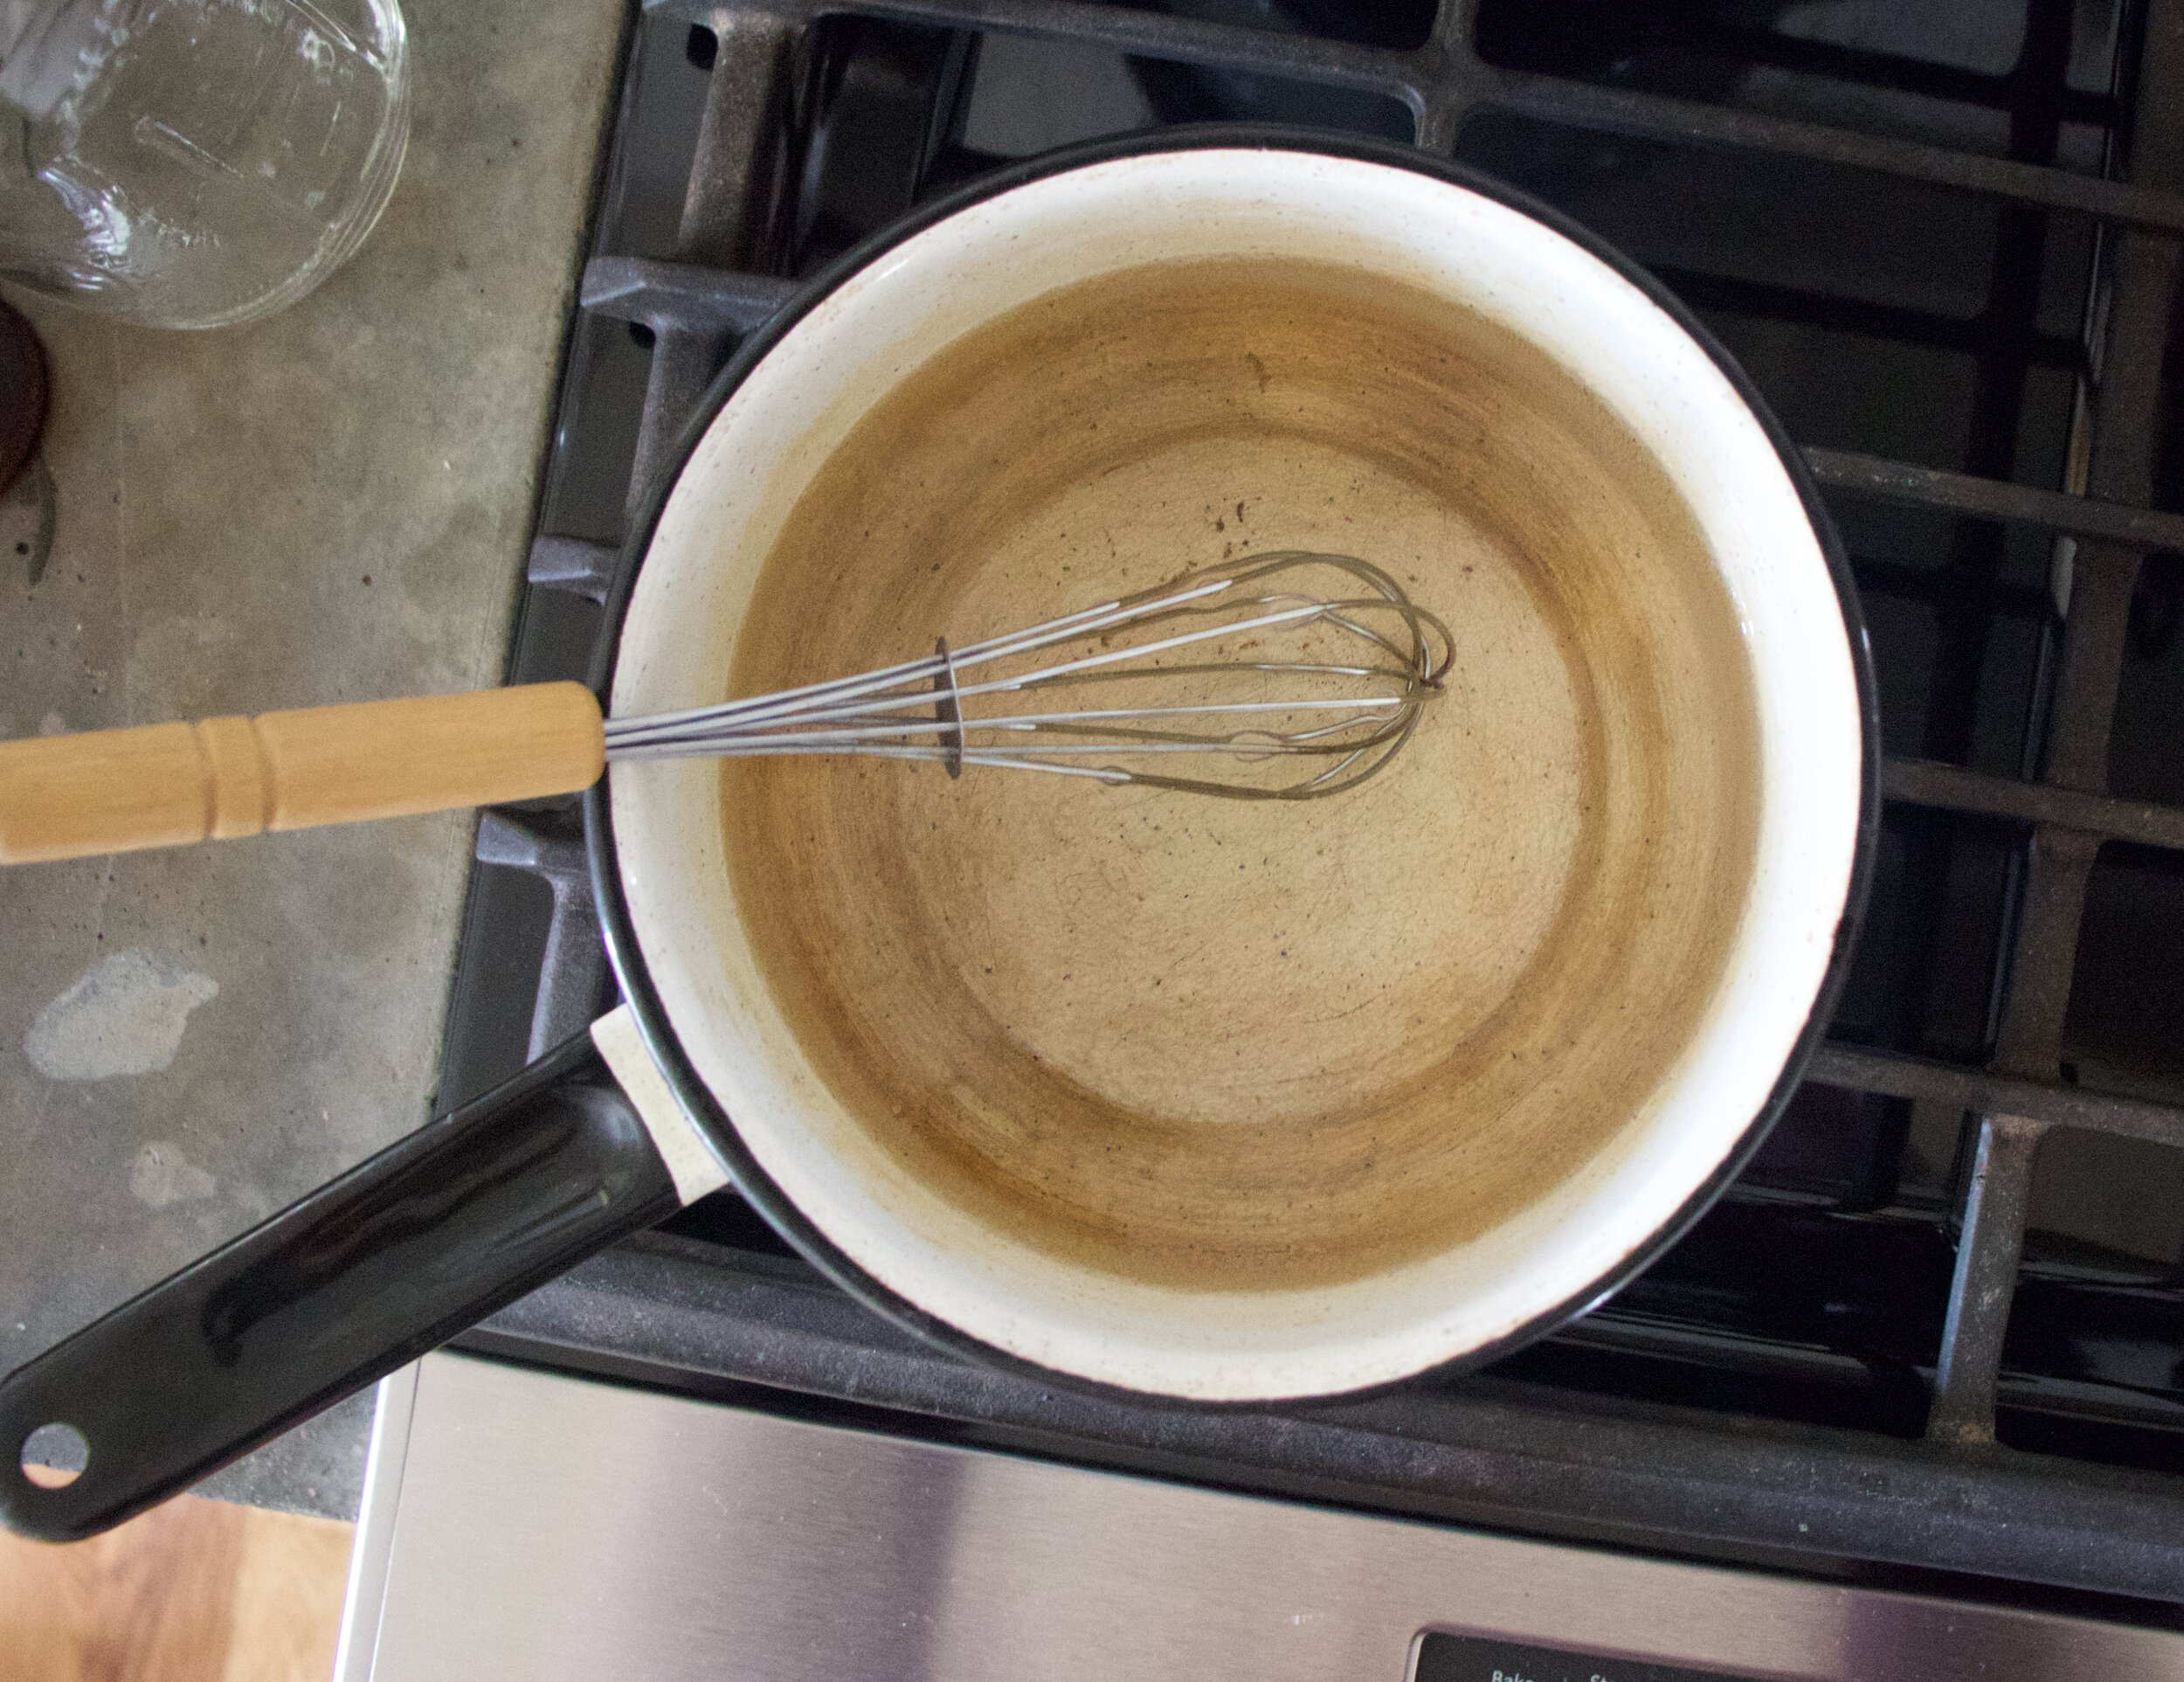
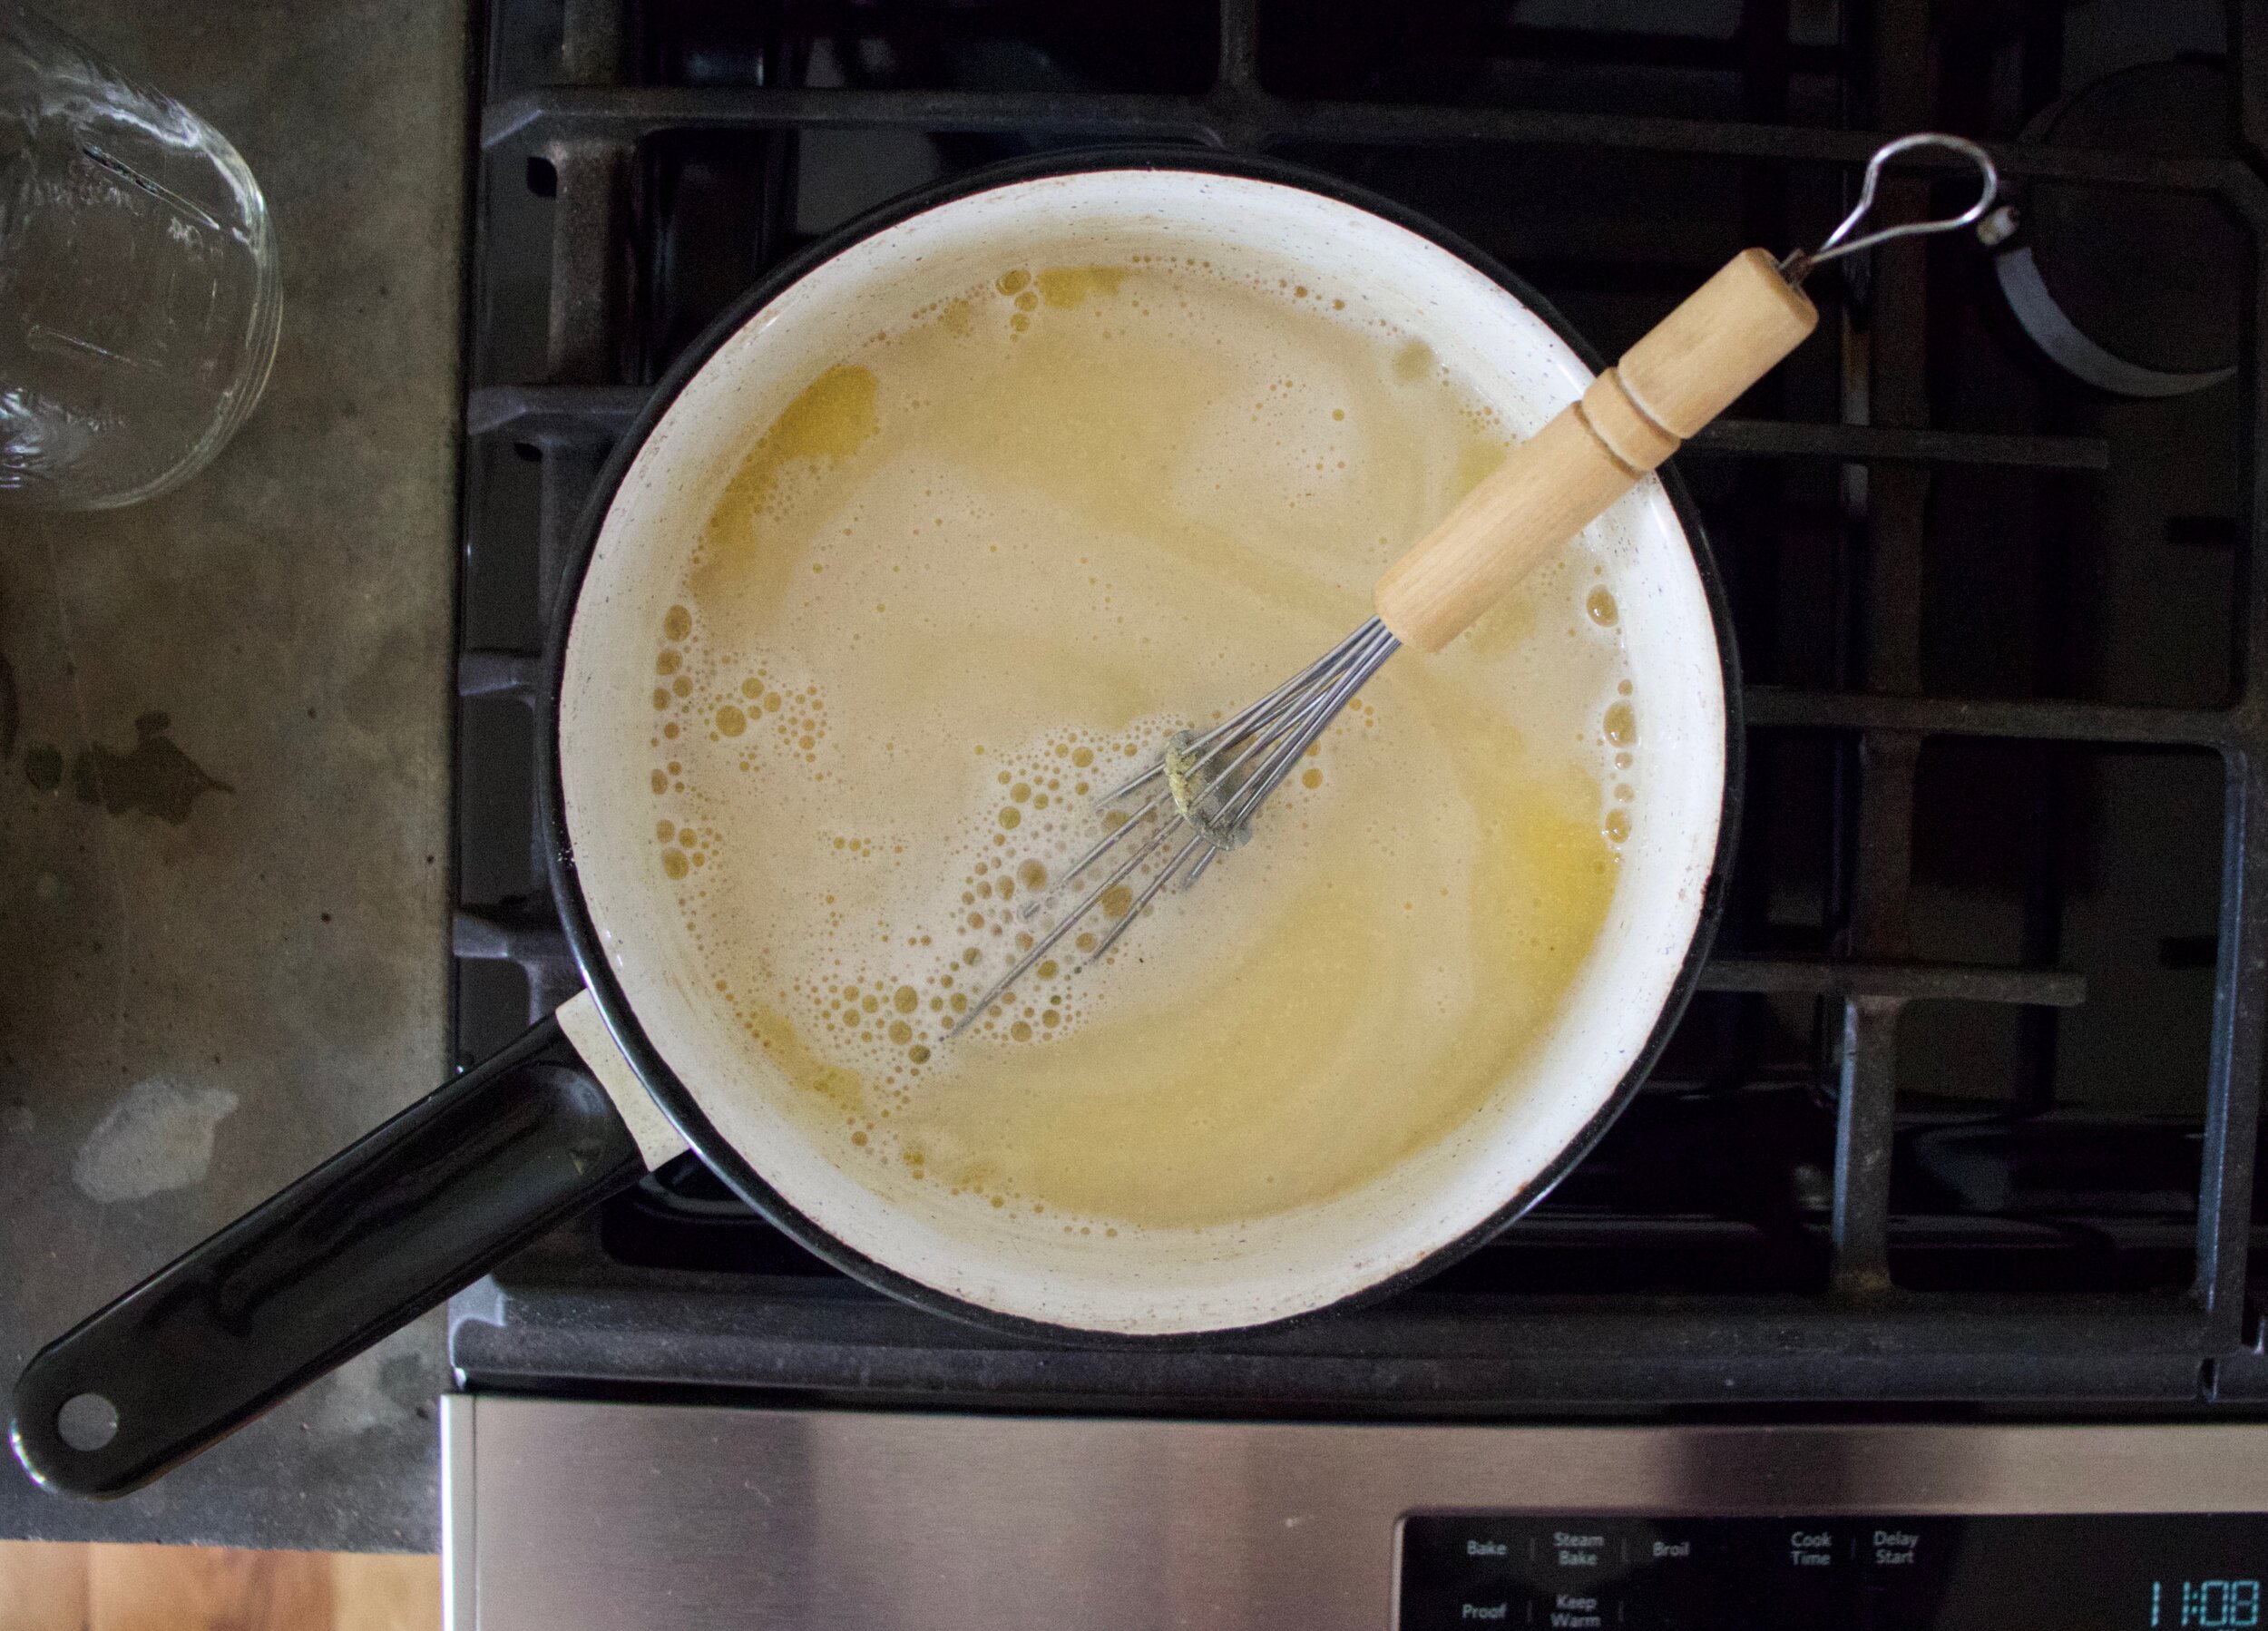
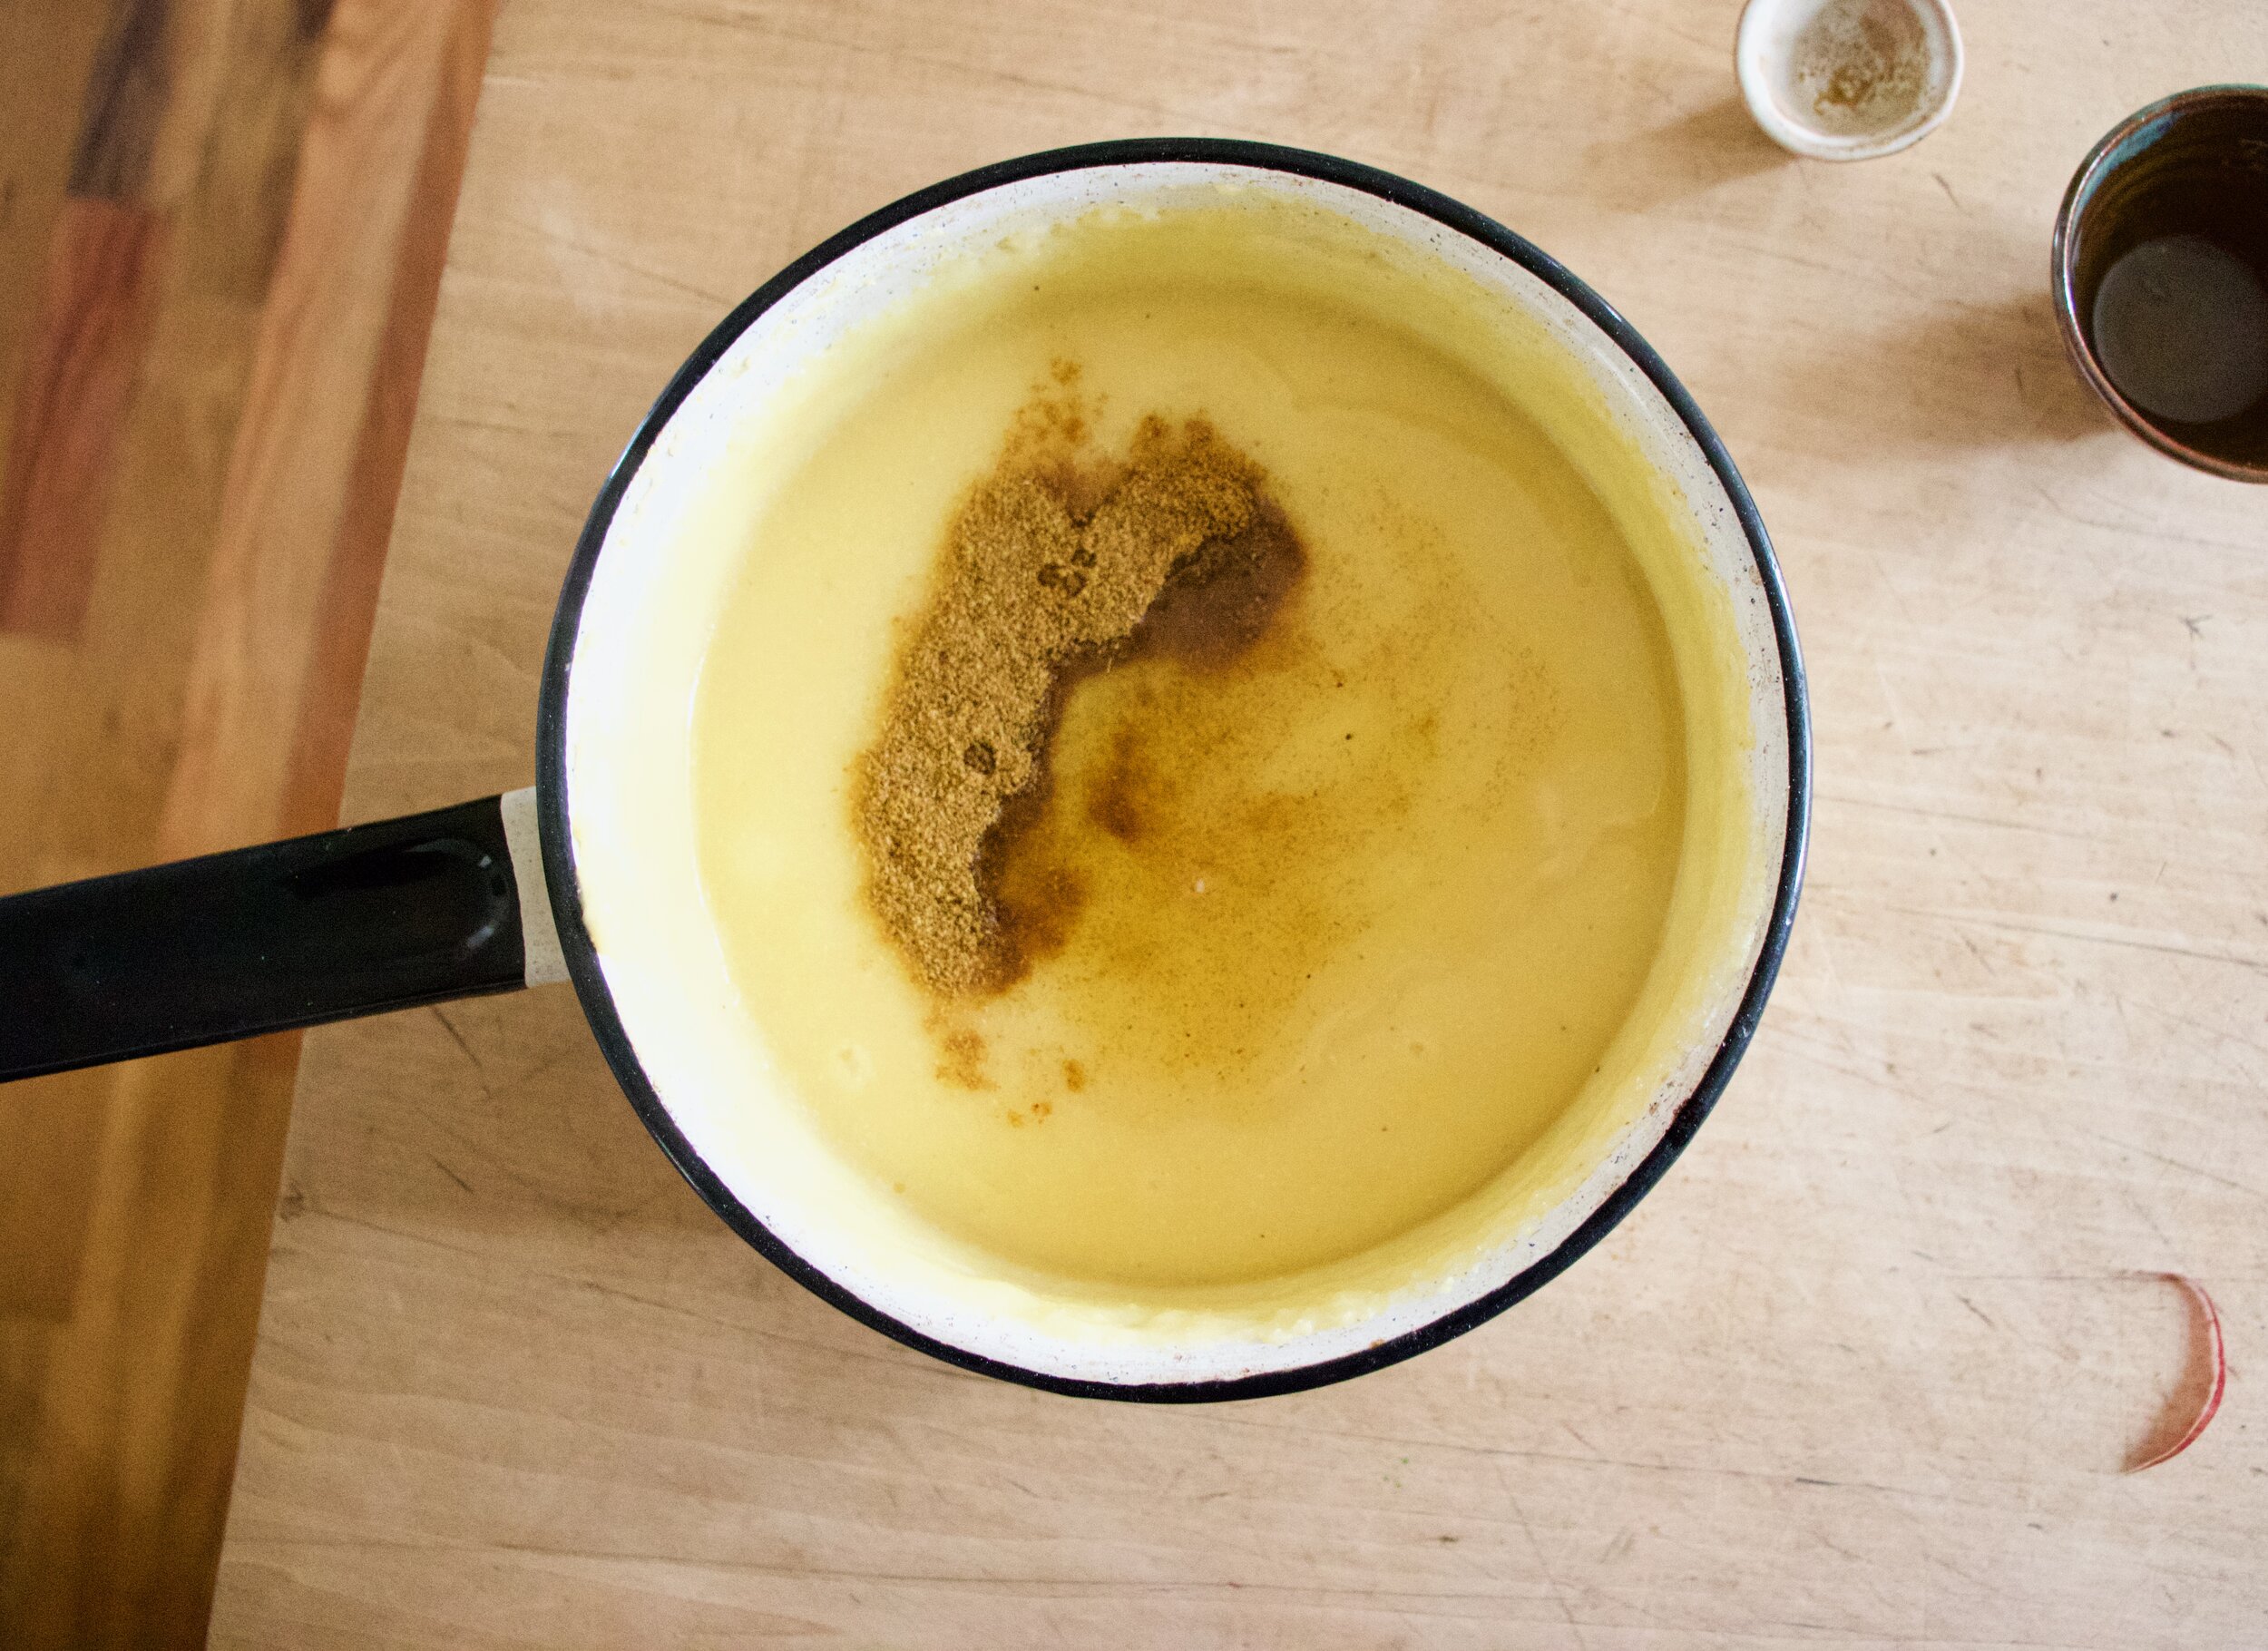
Peanut sauce. Mix together the peanut butter, vinegar, soy, ginger, garlic, and red pepper flakes. Stir and add in enough hot water to make it creamy, smooth, and pourable.

IMG_8568.jpg

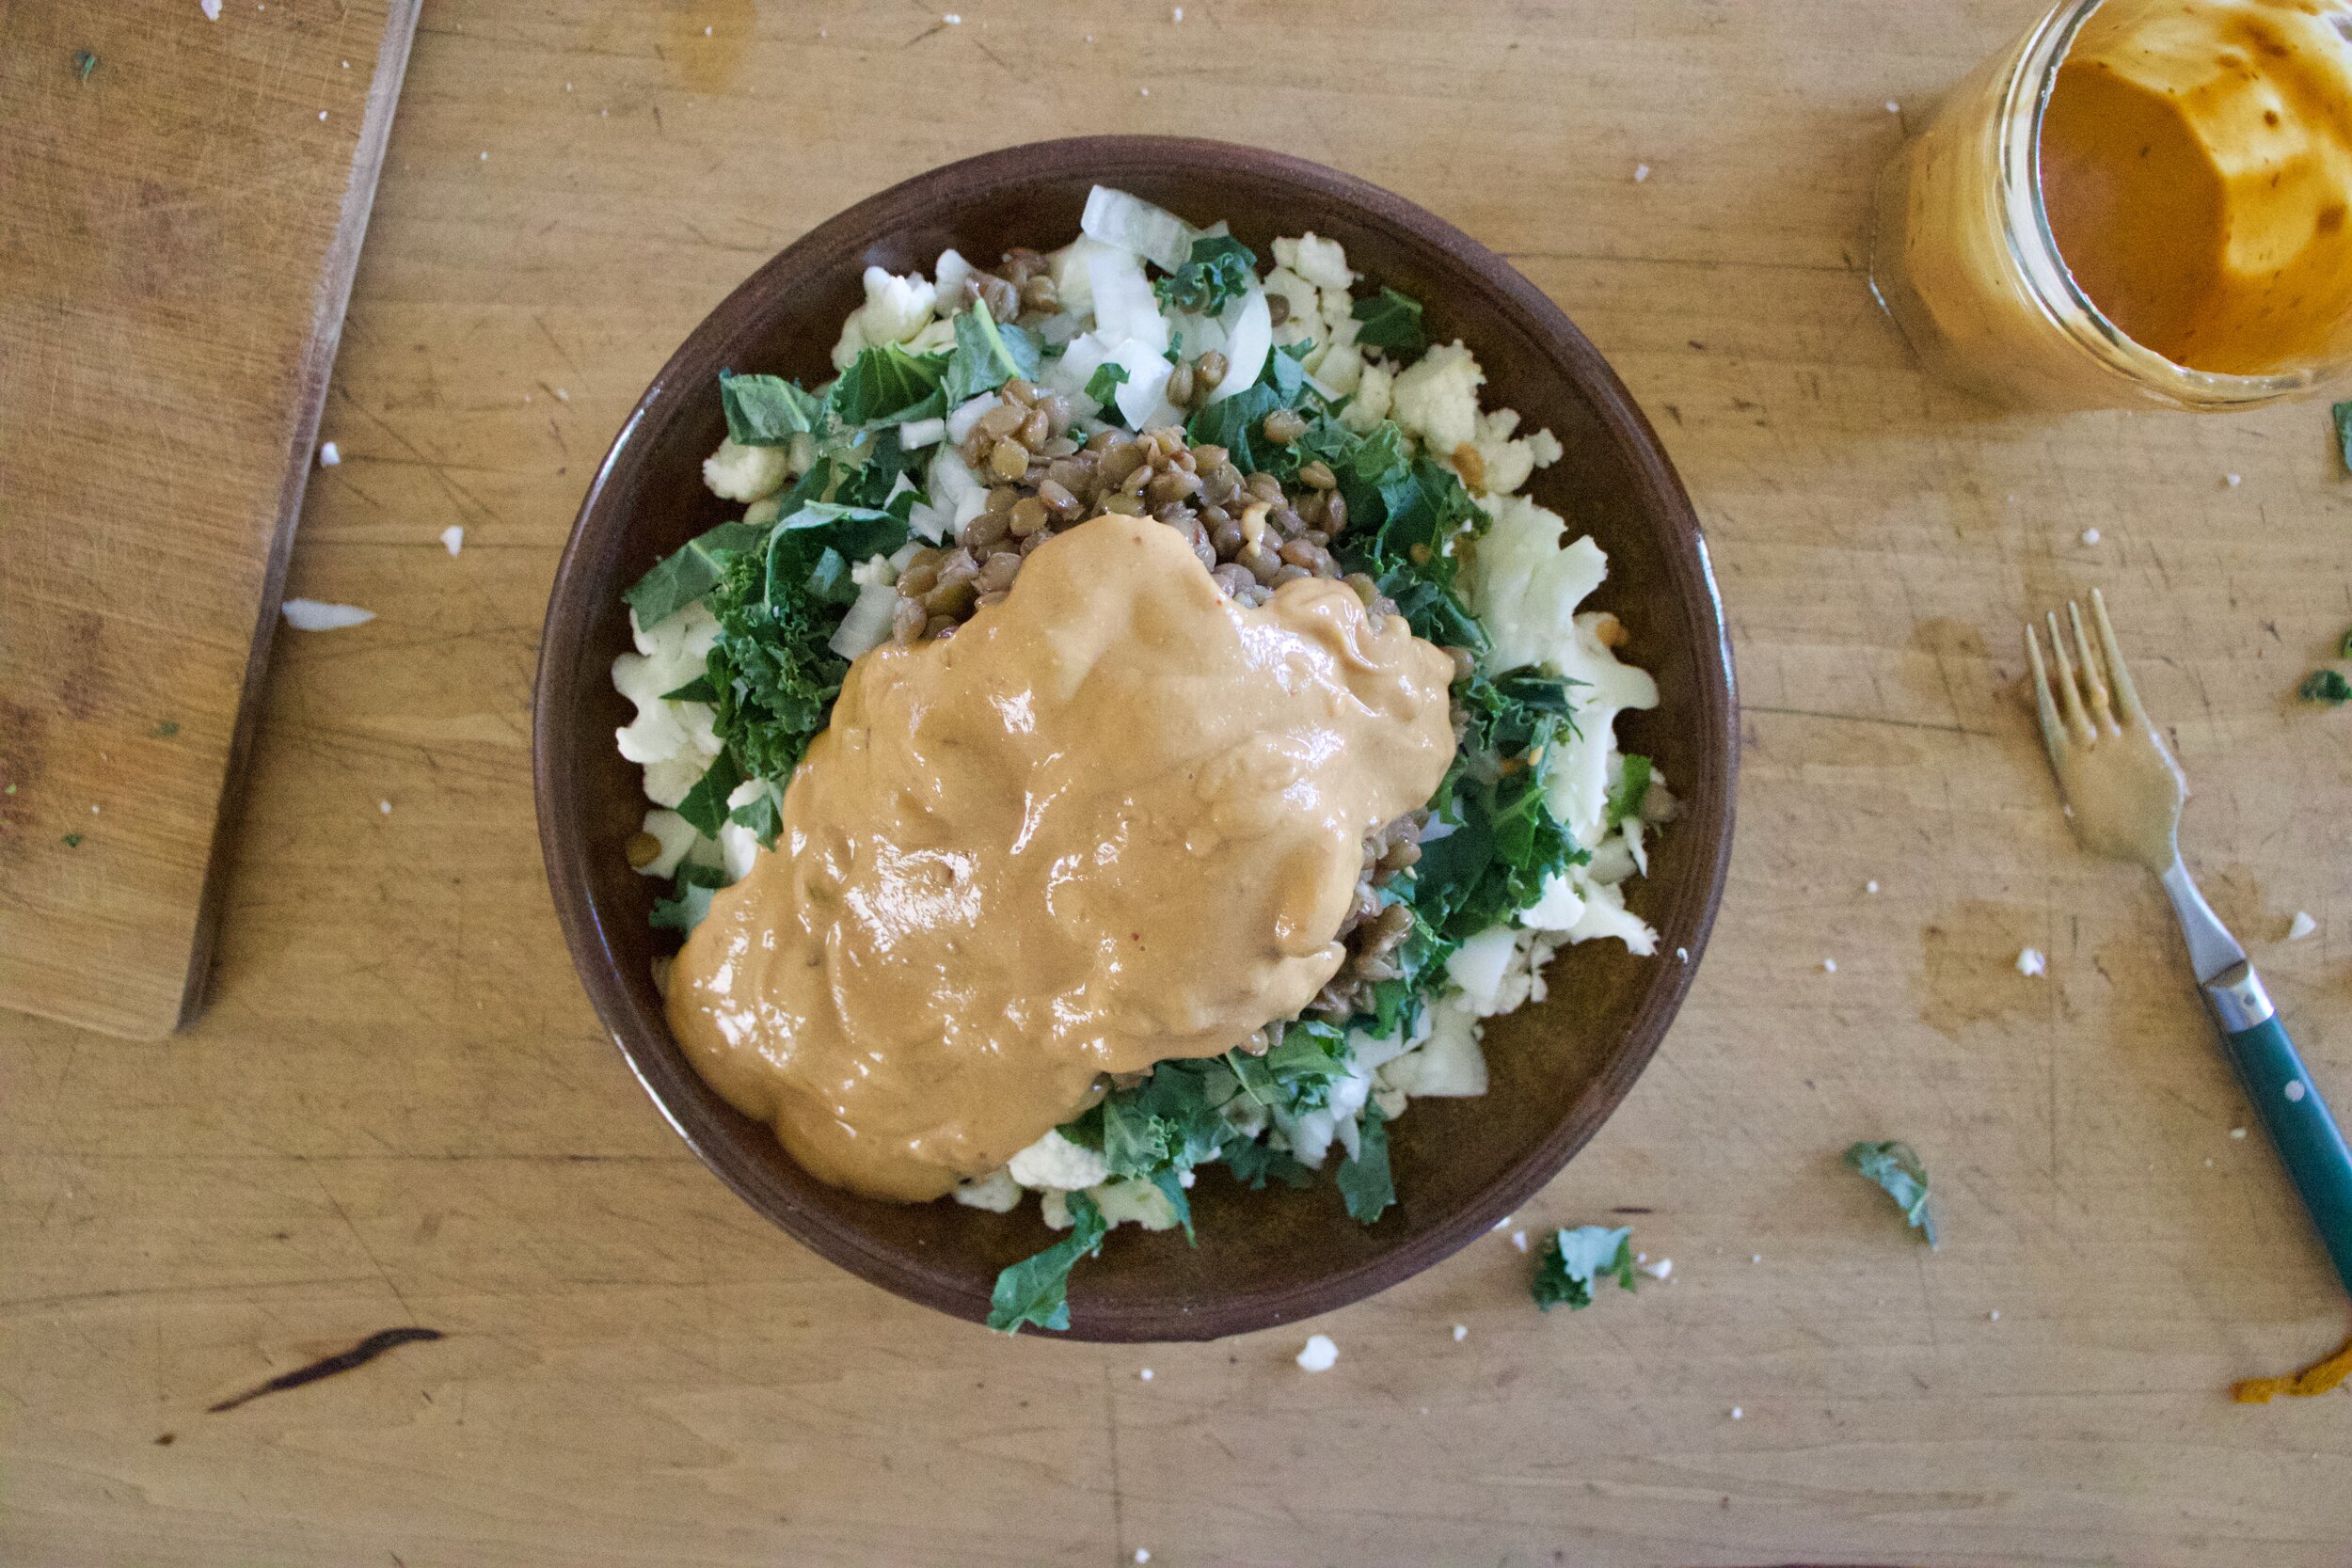
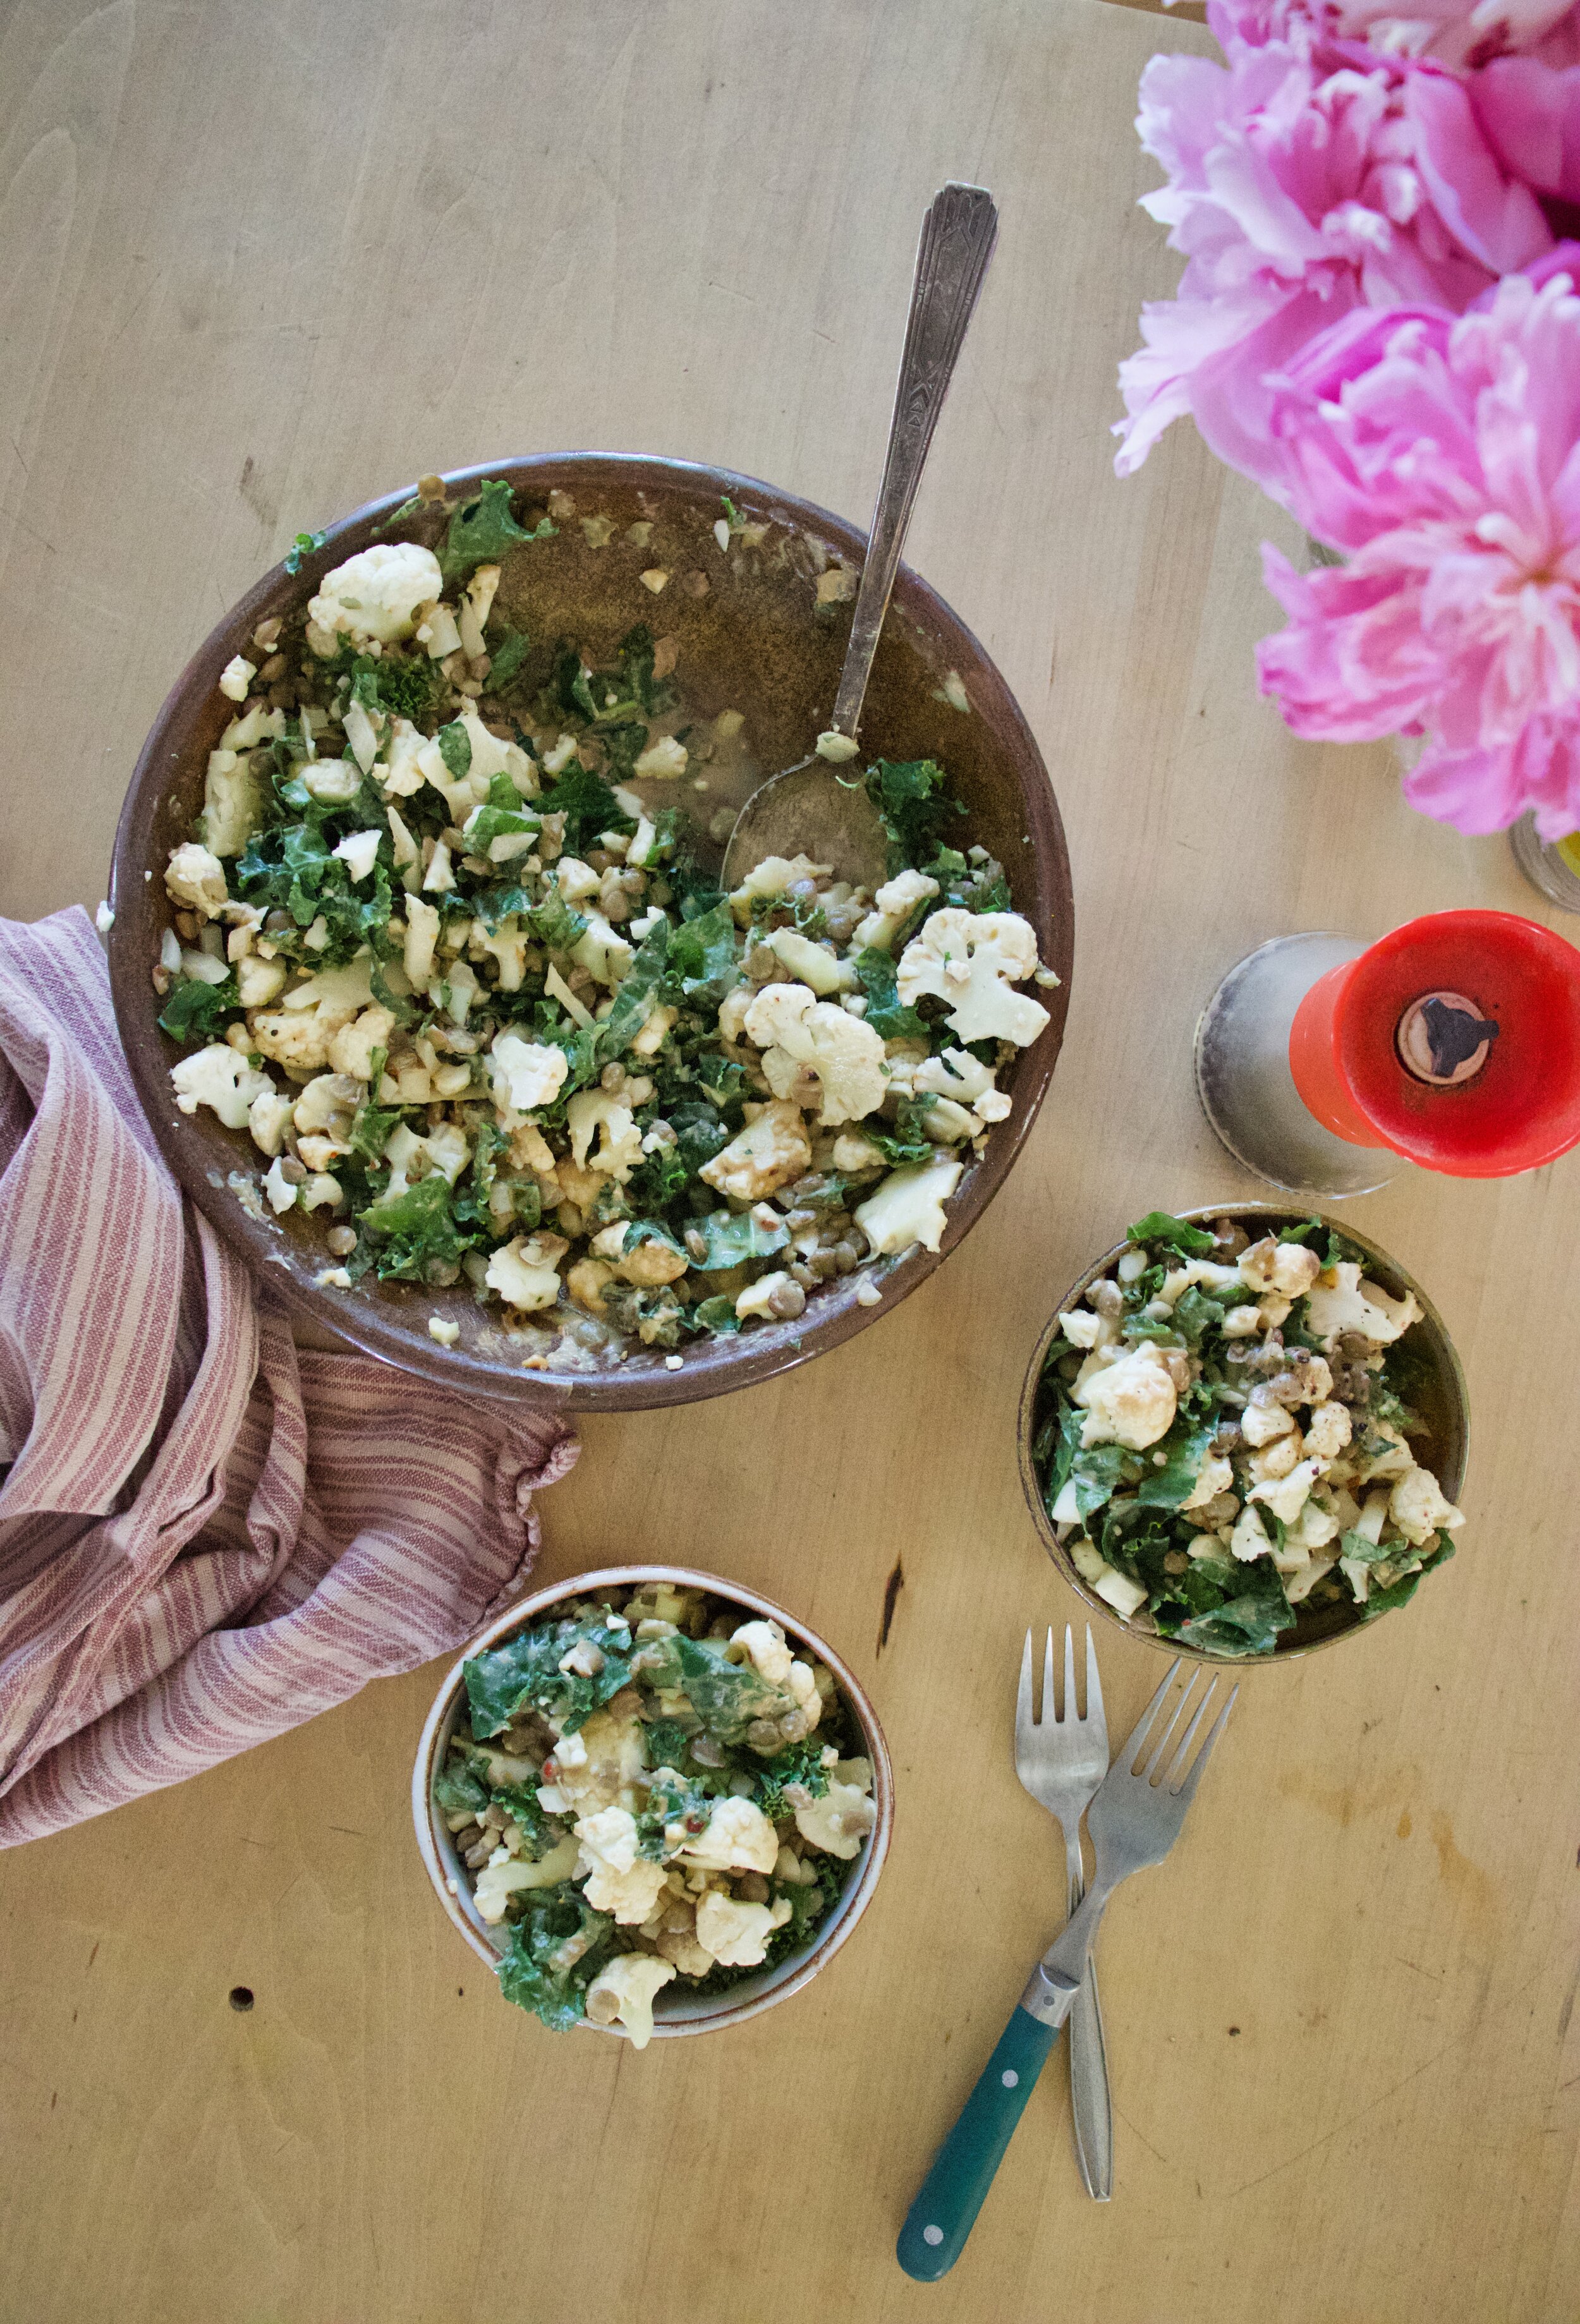
Dump the peanut sauce into the bowl with everything else.

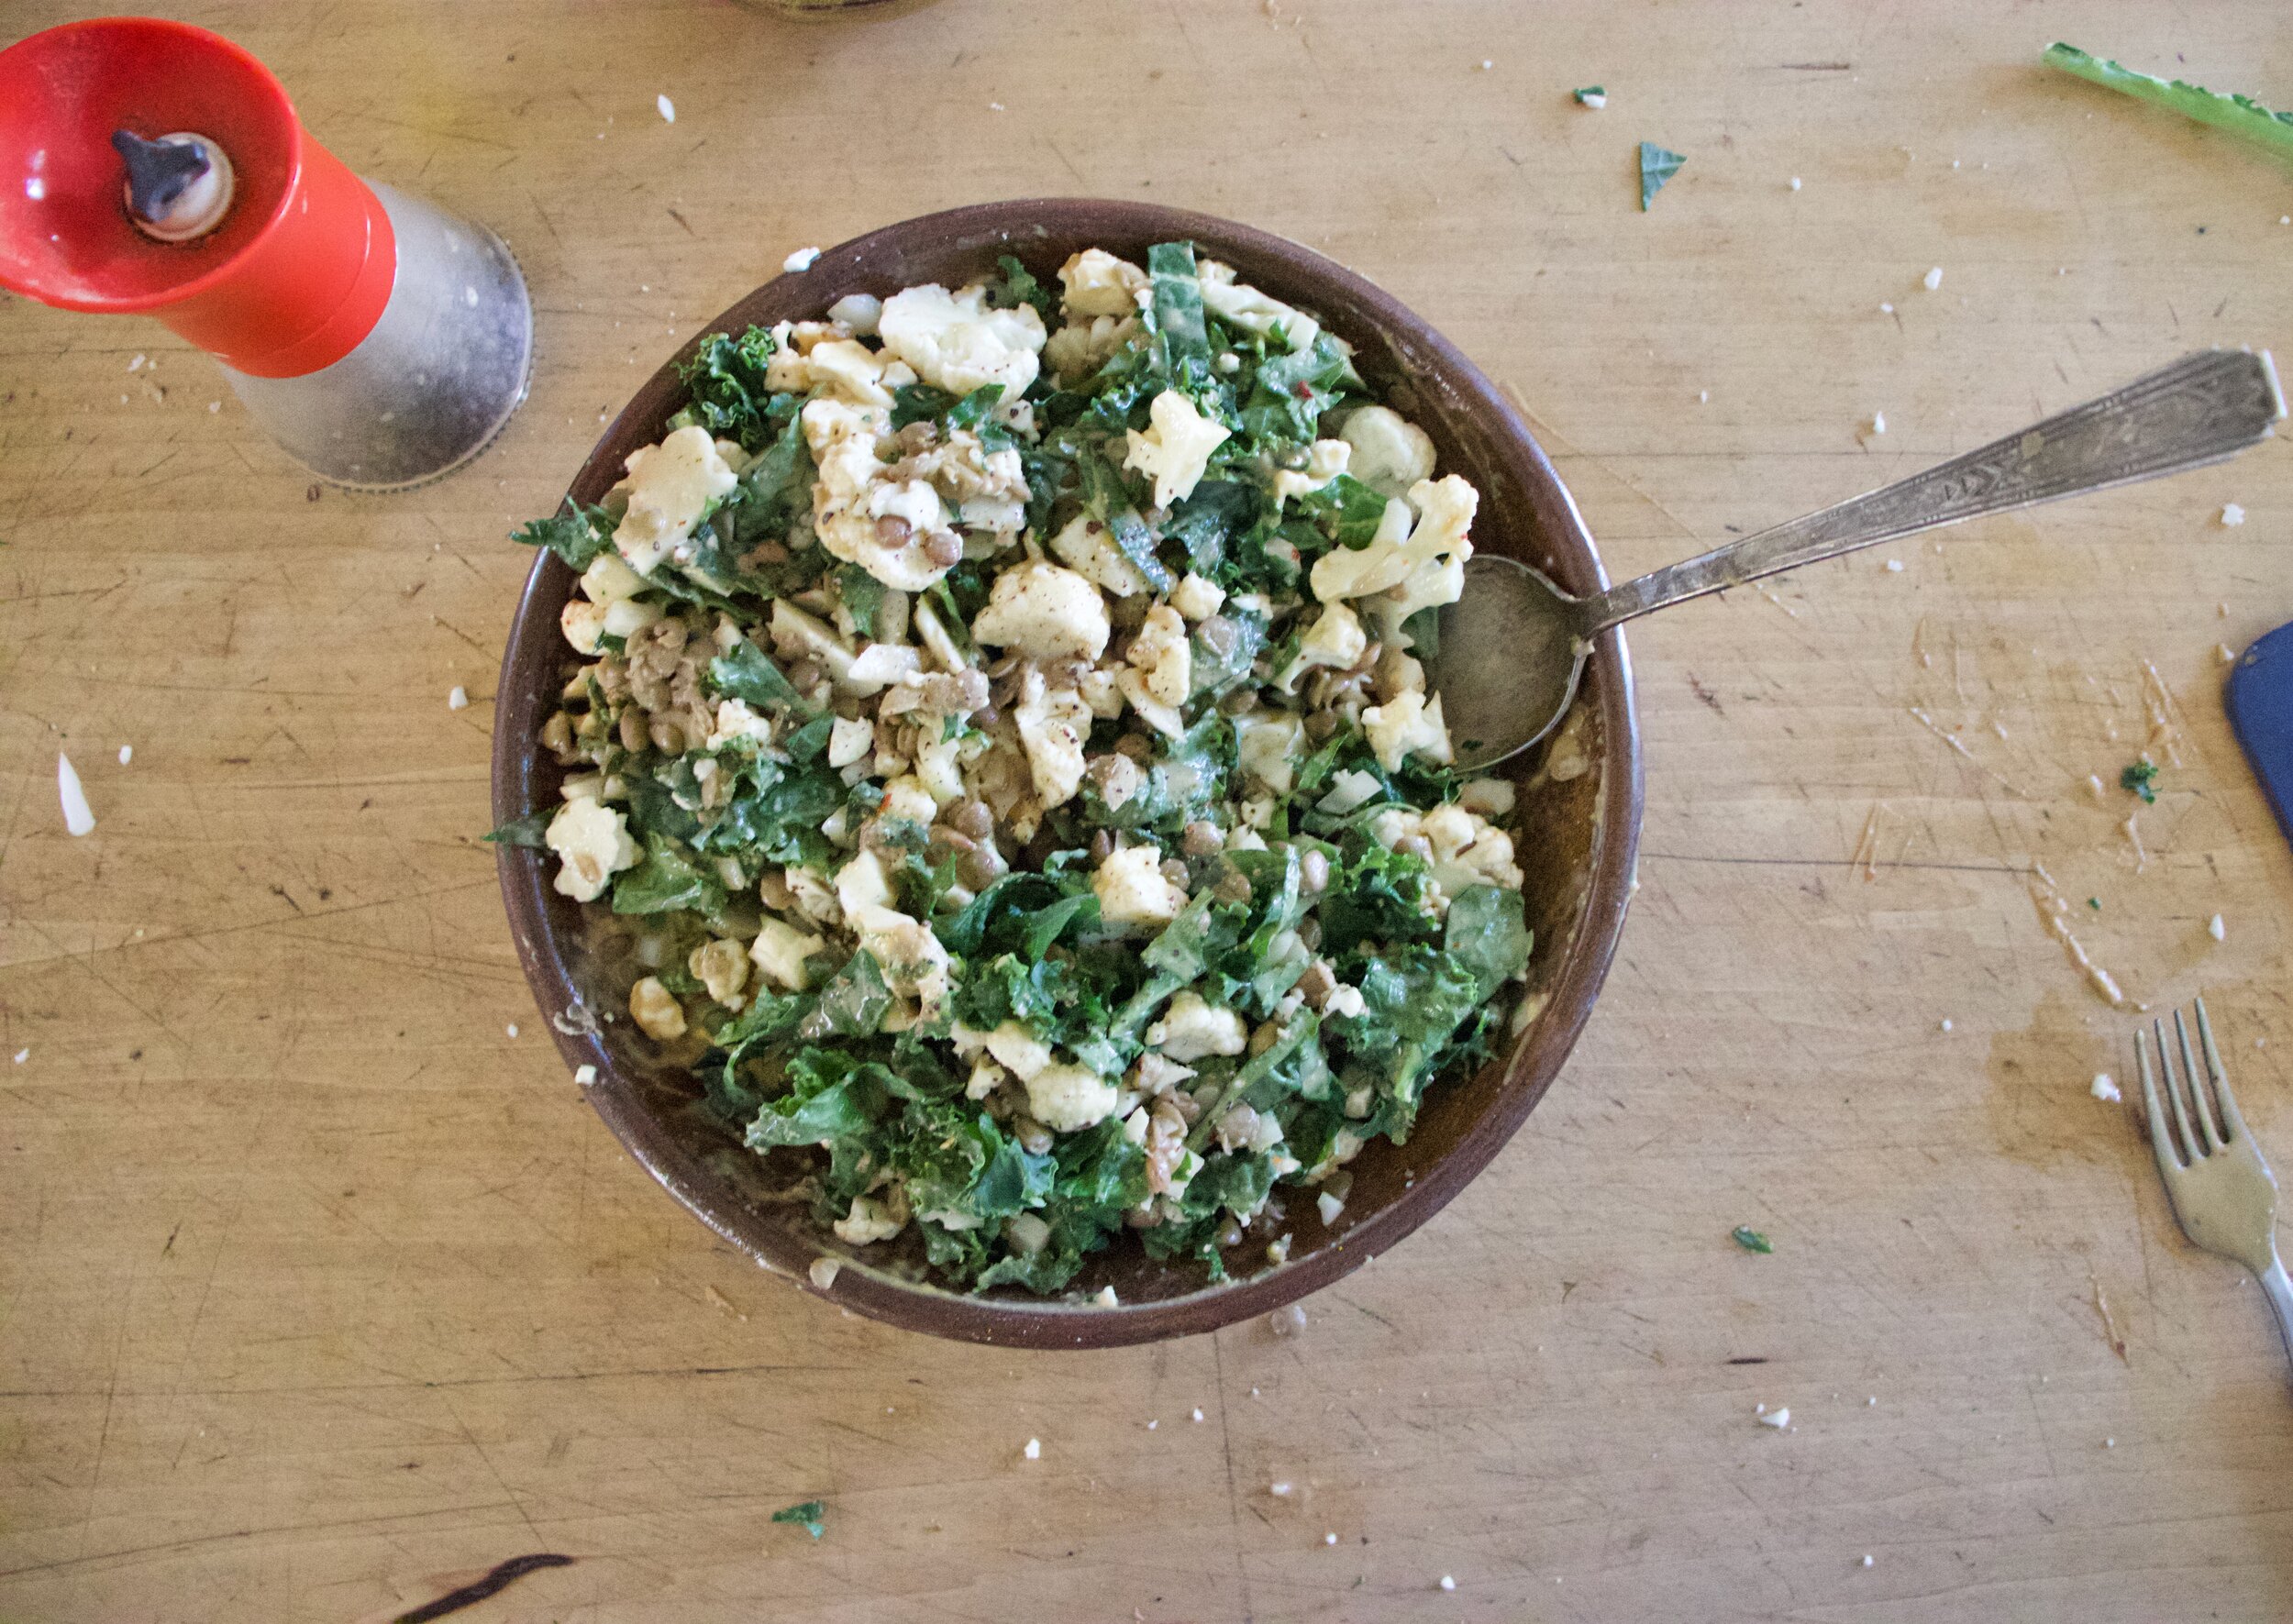
Toss until everything is evenly coated. And don’t forget to add a good amount of black pepper.

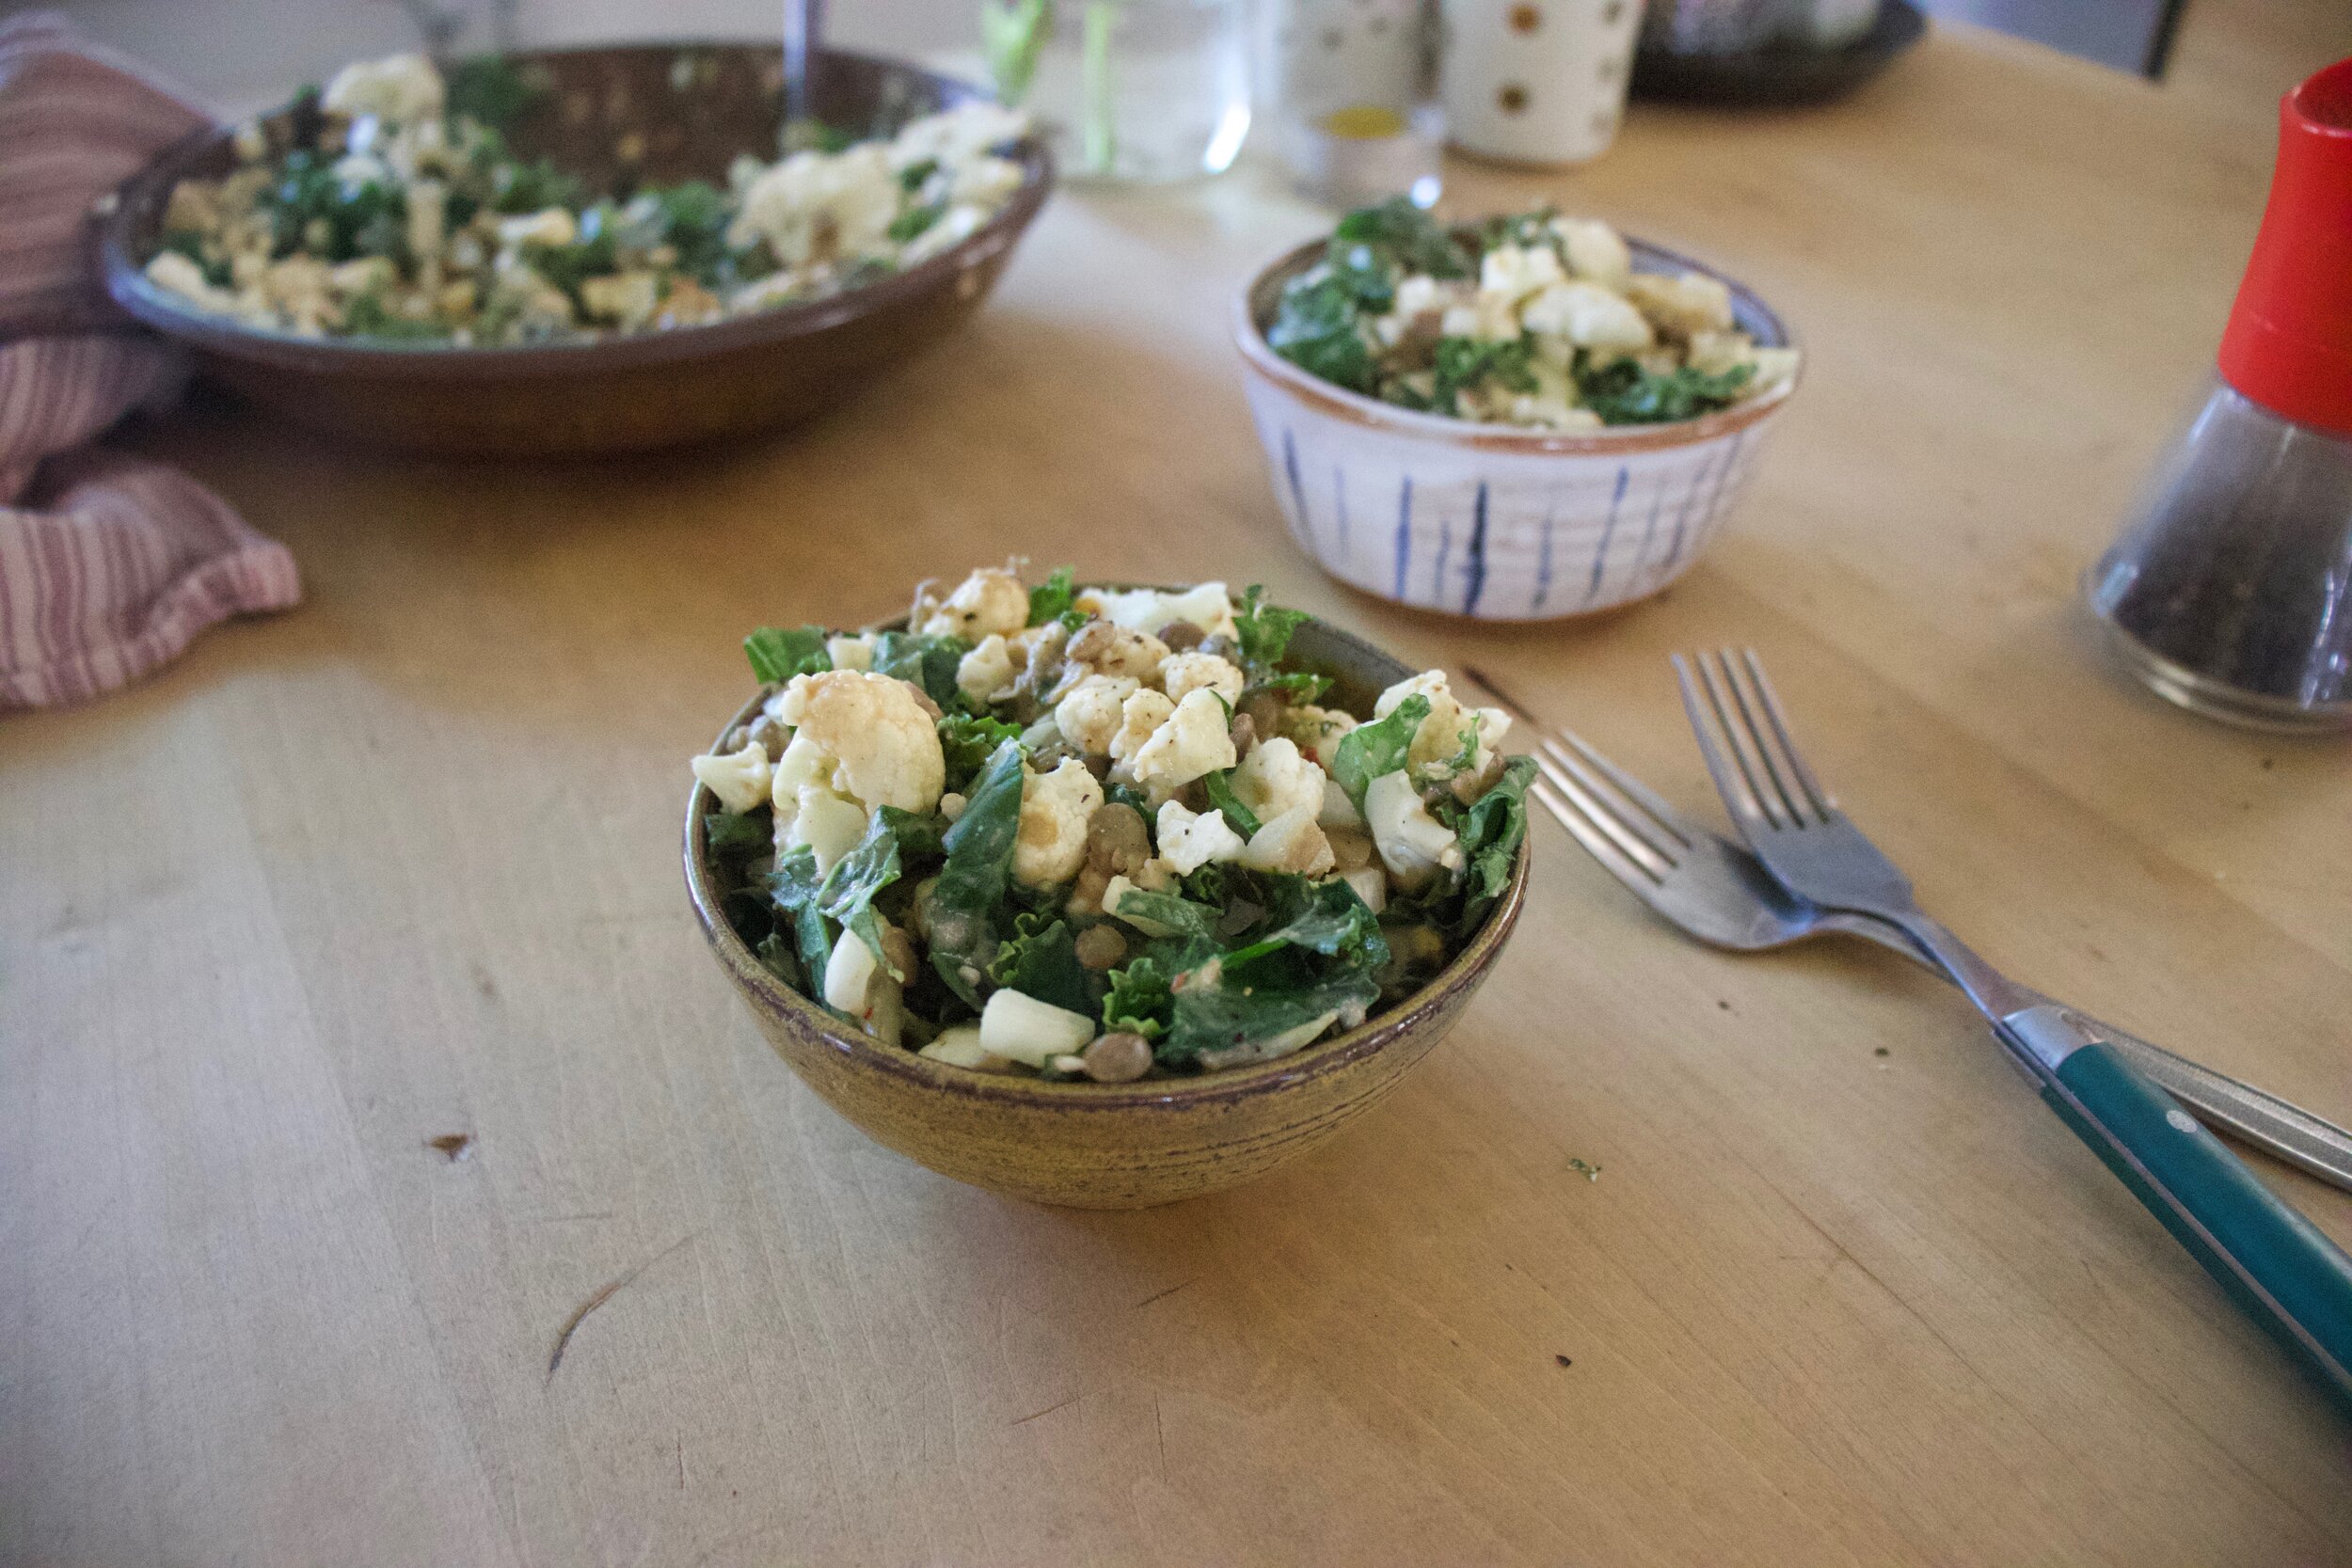
And that is it. Now grab a bowl and a fork and eat. It is really really good.

-C


Cauliflower, Kale, and Lentil Bowl with Peanut Sauce 

Serves 1-2 as a big salad or 3-4 as a side

  • 1/2 head of cauliflower

  • 1 1/2 cup cooked lentils

  • 2-3 large kale leaves

  • 1/2 a small onion

Peanut Sauce

  • 1/4 heaping cup of peanut butter

  • 2 tablespoons soy or liquid aminos

  • 2 tablespoons apple cider vinegar

  • 1 teaspoon garlic powder

  • 1/2 teaspoon ground ginger

  • 1/2 teaspoon chili flakes

  • 4-5 tablespoons hot water

  • black pepper

Start by chopping up cauliflower into little pieces. Some pieces will be like crumble and that is good. Also dice up onion into small pieces and chop kale into small pieces. Place it all into a bowl and top with the cooked lentils.

Make peanut sauce. Place peanut butter, soy ,vinegar, the ginger, garlic and red pepper flakes, and 4 tablespoons hot water into a jar or bowl and mix until incorporated. It should be smooth and thick, but pourable. If to thick, add in another tablespoon or two of hot water.

Once sauce is made, dump into bowl with the rest of the stuff and toss until everything is coated and combined. Top with lots of black pepper and then, well, eat. Or set aside until meal time. Then eat.

In Vegetables, Vegan, side dish, salad, Raw, pulses, quick and easy, grain free, Gluten Free, dinner, Dairy Free Tags Cauliflower, Kale, and Lentil Bowl with Peanut Sauce, cauliflower, lentils, pulses, vegan, grain free, gluten free, peanut sauce, healthy, plant based, dinner, quick and easy, summer, no cooking, saald, salad, BBQ, Summer, fresh, raw, dairy free
Comment

Sweet Pea Snack Cake with Strawberry Glaze

May 9, 2020 Colleen Stem
IMG_7904.jpg
IMG_7962.jpg

It started a few nights ago when I was eating my after dinner dessert snack. A big bowl of fresh strawberries. But there was something missing. I wanted a little something else to add to my dessert so I opened the freezer to see if there was any frozen bananas. What caught my eye was the bag of peas. And it just seemed right so I poured some into a bowl, dumped hot water on them to thaw, and mixed them into the bowl with the strawberries. Now I got to tell you, it was one of the most satisfying delicious desserts I have had in a long time. Think about it. Peas are sweet and creamy and strawberries are sweet and tart. The combination might seem a little strange but haven’t we learned by now that I am always right about flavors? HAHA. But really. It’s one of my new favorite snacks.

Now how to share my newfound love of peas and strawberries? Well cake of course. I figured people are less hesitant to try new flavor combinations when in cake form because everyone wants cake. And I was right. Plus it is a real looker if I do say so myself. Bright green cake with bright red strawberry glaze. A spring time snack with the spring time feels. Everything about this cake is right on point with all the things. And it is super fast and easy to make to boot because it’s all thrown together in a blender.

You really can’t go wrong here friends. And if you happened to be needing a little something something to snack on with your mama this weekend, well I think you just found the perfect snack.

Now to the cake!

The stuff. Peas,strawberrie jam of perceives (I had just made it so it is still warm) Flour, sugar and powdered sugar, baking soda and powder, salt, oil, and vinegar.

IMG_7720.jpg
IMG_7726.jpg
IMG_7734.jpg
IMG_7739 2.jpg
IMG_7756.jpg
IMG_7770.jpg

Super easy here. Place peas into blender and blend until smooth. Add oil and sugar and blend until incorporated. Then add in all the dry. Before you blend, take a spoon or spatula and hand mix it a little. Add in a cup of water and vinegar then pulse until incorporated. Don’t over blend it or else it will be tough.

Pour batter into a well greased pan and pop into a hot oven. Bake.

Afer about 25 minuts, check for doneness. When the fork or tester comes out clean, it is done!

Pop cake out and let cool on a wire rack.

IMG_7805.jpg
IMG_7813.jpg

And glaze. Warm up the jam in the microwave on on stove until loose then mix jam with powdered sugar.

When the cake has cooled, grab a fork and stab holes all over so when you pour glaze on it will kind of seep into said holes.

Pop cake back into pan (or don’t if you dont want too) and pour glaze all over top.

A dusting of powdered sugar for looks and done and done. Cut into squares, pop a piece on a plate, and snack away.

-C


Sweet Pea Snack Cake with Strawberry Glaze

makes a 9x9 cake

  • 2 cups all purpose flour

  • 3/4 cup white sugar

  • 1 1/3 cups sweet peas (fresh or frozen and thawed)

  • 1 cup water

  • 1/3 cup oil

  • 1/2 teaspoon salt

  • 1 teaspoon baking powder

  • 1 teaspoon baking soda

  • 1 tablespoon vinegar

  • 1 cup powdered sugar

  • 3 tablespoon strawberries jam or preserves

Preheat oven to 350

Place peas into blender ans blend until smooth. Add in oil and sugar and blend until incorporated. Next add in baking soda and powder and then flour on top. Grab a spoon or spatula and mix a little to give the batter a head start then add int he water and vinegar. Pulse in blender for a few seconds, scrap sides, then pulse again until it just become a cohesive batter. Don’t oven blend it or that cake will be tough.

Pour batter into a well greased 9x9 baking tin and place into hot oven. Bake for about 25 minutes or until golden brown and a tester comes out clean. When it is done, pop out of oven and pop cake out of tin to cool on a wire rack.

Once cake is cooled, place back into baking pan. Mix together the powdered sugar and jam then either microwave it or heat on stove for 30ish seconds until warmed and pourable. Grab a fork and stab holes all over top of cake then pour glaze all over.

Sprinkle some more powdered sugar on top for looks, but other then that, it’s now time to eat.

Cake that is not eaten is best keep at room temperature for 2-3 days. Can be frozen too.

In cake, Dairy Free, desserts, fruit, quick and easy, Sweets, Vegan, Vegetables Tags Sweet Pea Snack Cake With Strawberry Glaze, cake, vegan, dairy free, plant based, peas, dessert, snack cake, homemade, mothers day, spring, blender cake, easy, fast, green cake
Comment

Baked Polenta with Black Beans and Fixins

April 4, 2020 Colleen Stem
IMG_7087.jpg
IMG_7081 2.jpg

I know that everyone in the world right now is making bread. And that is great, that is awesome, and I am (although I always have been) one of those people making bread. But I was thinking about all those that are not bread eaters, or people that can’t find a freaking bag of flour because the world has gone crazy and all we do now is bake. Well I got you. Polenta friends. Basically all you need for polenta is cornmeal and water and you are good to go. No flour needed.

This polenta situation is a little more then just make polenta and eat. No, it has been cooled, seared, baked, then topped with basically anything you would throw into a burrito because why the heck not. And really, that is what you really should do with polenta because it is like a big crispy, yet soft and creamy corn tortilla (I know right.) Plus you can show pictures to all of your friends of this amazing meal you whipped up and made look all nicey nice and shit. You will say “What bread, no, you should see this polenta!” And then soon after the internet will be ablaze with polenta cakes with beans. Seriously. It’s gonna happen., and think, it could be you who makes it so. Haha!

To the polenta a fixins!

The stuff. Cornemal, water, salt and pepper, cumin, and olive oil. Then fixing of cooked black beans, salsa, some shredded cabbage, 1/2 a big onion, avocado, a lime, and some pickled jalapeño.

Note that you can use all these fixings or none of these. Use what you have!

IMG_6989 2.jpg
IMG_6998.jpg
IMG_7001.jpg
IMG_7006 2.jpg

The polenta. First off, you need to make this at least an hour before you start to bake it because it needs time to set so factor that into your time.

To make polenta, water goes into a big pot and placed on stove to boil. Once water is boiling, slowly pour cornmeal into water while continuously whisking. Once all in, turn heat to medium low and keep whisking, for about 15 minute, until polenta is nice and thick and creamy. Remove from heat, dump in cumin and olive oil, mix and mix until incorporated.

Quickly pour polenta into an oiled baking pan and pop that pan into the fridge for the polenta to set.

IMG_6984.jpg
IMG_6988.jpg

In the meantime, slice and dice up onion and toss it around with cabbage, a pinch of salt, and juice of lime.

Once polenta is set, turn it out of pan onto a cutting board. Cut into 4-6 equal sized pieces.

Another note. You can for sure only cook a serving or two and save some for a later time. Just place unbaked polenta in a airtight container and it should be good in fridge for up to a week.

Sear polena. Get a skillet oiled and nice and hot and cook each side for about 5 minutes or until golden crispy. Then either place on a baking sheet or keep in skillet if it’s oven safe and pop into oven to bake for about 1/2 and hour.

IMG_7065.jpg

Done polenta. DONE!

Now for the fixins. I won’t go to into details, I trust you know what to do.

IMG_7123.jpg

What are you waiting for? EAT!

-C


Baked Polenta with Black Beans and Fixins

serves 4-6

For the polenta

  • 1 cup cornmeal

  • 4 cups water

  • 2 tablespoons olive oil

  • salt and pepper

  • 1 tablespoon cumin

FIxins

  • 3 cups cooked black beans (about a 3/4 cup per serving )

  • 3 cups shredded cabbage

  • 1 small or 1/2 a large red onion

  • A lime

  • Salsa

  • An avocado

  • fresh or pickled jalapeño

  • And anything else you want (Greens, cheese, yogurt, sour cream…. )

Start off by making polenta. Add water ro a medium sized pot and bring to a boil. Once boiling, grab a whisk and the cornmeal and slowly add cornmeal into water while whisking. Once all cornmeal is in, turn heat to low and pretty much continuously whisk for about 15 minutes. Careful to really whisk all around the bottom of the pot so you don’t burn the bottom of pot. Once the polenta is nice and thick and creamy, remove from heat and dump in the cumin, a good pinch of salt and pepper, and oil olive. Mix until completely incorporated then pour mixture into a oiled 9x9 or 10x10 baking pan. Place pan in fridge to let the polenta to set, which should take about an hour but can stay all day if you want.

In the meantime, slice onion up and place into a bowl with shredded cabbage. Add juice of 1/2 the lime and a pinch of salt and toss. Set aside.

Once polenta has set, preheat oven to 400.

Take pan and invert it onto a cutting board then cut into 4-6 equal sized pieces (any size and or shape works). Grab a skillet and drizzle a in a little oil. Get it nice and hot on the stove then sear the polenta, both sides for about 5 minutes or until nice and crispy. Once the polenta is seared, place either on a baking sheet or keep in the skillet (if it is oven safe) and place in oven to bake for about 1/2 or until nice and firm and crispy. Warm up the black beans while you are waiting.

When the polenta is baked to your liking, remove from oven and place on plates. Scoop on black beans, grab a handful of cabbage onion slaw, top with salsa, jalapeños , avocado , and anything else you want.

Eat.

Left over polenta is great to have in the fridge. Just store in an airtight canters for up to a week. Sear it or bake it up whenever you are in the need.

In Vegan, pulses, Gluten Free, entree, Dairy Free, biscuits and such, beans Tags Baked Polenta With Black Beans And Fixins, vegan, gluten free, dairy free, quarantine food, dried beans, canned beans, pulses, healthy, plant based, mexican, polenta, baked polenta, dinner, cornmeal, no flour, substitutions
Comment

Poppy seed Crusted Apricot Jam Muffins

January 11, 2020 Colleen Stem
IMG_4908.jpg
IMG_4949.jpg
IMG_4917.jpg

Mid week, I was doing a little pantry cleaning/ inventorying of what I had and needed when I came upon not one, not two, or even three. No, six. SIX, jars of jam. And there are 2 that are already opened in the fridge. I don’t know why, but knowing that there was that much jam in the house made me a little uneasy. Six unopened jars is about 3 jars past my comfort zone. Sure there are so many things you can do with a jar of jam (jelly, preserves, and marmalade included) and now that I am thinking about it, is one of the reasons why I bought a few jars a while back. Then there was Christmas and I think we got at least two jars as gifts so it’s not all my fault, but still, that is just too many jars of jam. Right there I needed to get rid of at least one jar. So muffins. Jam muffins, with poppyseed crust because it’s pretty and nobody ever complains about poppy seeds, or at least they don’t until after they eat them and have poppy seeds stuck in their teeth all day. But that is just our mouths way of saving a little for later, am I right? HA

Anyway, a quick and simple muffin recipe for all of you people out there that might have a jar or two too many of jam in the fridge or pantry (I used apricot but any flavor(s) would work) and could use yourself a tasty little muffin situation. I mean who doesn’t want a tasty muffin?

To the muffins.

IMG_4798.jpg

The stuff. In the bowl is white and white whole wheat flour, baking powder and soda, and salt. Also have apricot jam, oil, almond milk, apple cider vinegar, and orange, and some poppy seeds.

Grab a zester and zest the orange into the bowl with all the dry stuff. Whisk to combine.

IMG_4805 2.jpg

Jam, oil, milk, and vinegar. All on top of dry. Whisk that up until just combined. No over mixing. You will get tough (not in a good way) muffins.

IMG_4812 2.jpg

Apricot muffin batter.

IMG_4816.jpg
IMG_4822.jpg

Scoop into well greased muffins tins then cover the tops with poppy seeds.

Ready for that hot oven.

IMG_4854.jpg

And out of the oven, looking all pretty like.

IMG_4894.jpg

Pop those muffins out of the tins and cool on a wire rack for a bit. And by all means, don’t wait until they are completely cool.

Now eat you a warm muffin and if they are mini, grab a few. You can’t just eat one mini muffin, that is just crazy.

-C


Poppy seed Crusted Apricot Jam Muffins

Make 12 normal size muffins or 24 mini muffins

  • 1 cup all purpose flour

  • 1 1/4 cups white whole wheat flour

  • 2 teaspoon baking powder

  • 1/2 teaspoon baking soda

  • 1/2 teaspoon salt

  • 1 cup plant milk

  • 1/3 cup neutral oil

  • 1 tablespoon apple cider vinegar

  • zest of an orange

  • 1 heaping cup apricot jam or preserves (can sub in any flavor you like)

  • 1/3 cup poppy seeds

Preheat oven to 350

In a large bowl whisk together the flours, salt, baking powder and soda, and the zest of the orange. Add in the oil, milk, jam, and vinegar and whisk until just incorporated. Scoop batter into well grease muffin pans (12 regular or 24 mini) then cover the tops with poppy seeds. Pop into hot oven and bake until risen and a tester comes out clean when one is poked. For mini muffins, check after 13 minutes, for normal muffins, after 16 minutes.

Once baked, remove from oven and pop out of pans when cool enough to handle. Place on a wire rack to cool completely or just start eating them warm.

Store left over muffins in an airtight container for 3-4 days at room temperature. They also freeze well.

In breakfast, Vegan, sweet breads and muffins, quick and easy, Dairy Free Tags Poppy seed Crusted Apricot Jam Muffins, Vegan, Vegan muffins, poppyseeds, jam, breakfast, fast, easy, no fuss, plant based, dairy free, home made, fresh, baker, recipe, delicious, king Arthur flour
2 Comments

Clementine Cake

December 28, 2019 Colleen Stem
IMG_4524.jpg
IMG_4602.jpg

It’s not too late to get in a little end of the year baking. It is actually the perfect time to bake. All the holiday hub bub is still going on so there is usually still people all around still willing and able to eat your offerings (if you were so inclined to share), the days just feel more slow and of need of warmth and lovely smells. Plus we need something to do while while waiting for New Years, because we are just all sitting around waiting for that ball to drop, right? HAHAHA. No.

Anyway, I have been wanting to make some version of a boiled clementine cake for a while now. I love that fact the the whole clementine goes into the cake, that there is no peeling or zesting or juicing. It is just boil the clems for a little while to get the bitterness out and you are good to go. And it doesn’t hurt that right now is citrus season so I have a humngo bowl of clementines, plus a shit load of other oranges and other citrus to go through so the thought of tossing a good few clementines into a cake, well it was just what needed to be done.

And the family is coming over to eat and trash my house so I needed another dessert besides the half eaten ice cream cake left in the freezer from Camereon’s birthday/Christmas. So I baked that they will eat. And there we go. Win win.

Now to the clementine cake.

The stuff. Flour, baking powder and soda, salt, sugar, oil, cinnamon, vinegar, clementines, and powdered sugar.

First you need to boil the clementines. Big pot, fill with water, place clems inside, bring to a boil, then simmer for 2 hours. Seems like a long time but just do it while you are making and drinking coffee or doing laundry or whatever. You don’t need to keep an eye on them, other then to check that the water hasn’t evaporated, and it smells so nice.

After the 2 hours are up, remove clementines from water and let cool enough to handle. Cut in half. If there are giant seeds, remove them.

IMG_4432.jpg
IMG_4446.jpg

Place the clementines into blender and blend until silky smooth.

Now the other stuff. Flour, sugar, salt, baking powder and soda, and cinnamon. All into big bowl.

IMG_4453.jpg
IMG_4455.jpg

Whisk together until incorporated then add in the clementine puree, the oil, and the vinegar. Whisk together until it becomes a uniform batter.

IMG_4466.jpg

Unbaked cake.

IMG_4472.jpg
IMG_4473.jpg

Scoop batter into a very well greased bundt cake pan and bake, 50-60 minutes, until tester comes out clean.

IMG_4479.jpg

The big revel…. And it went perfect! Now time to let this sucker cool a bit on a wire rack.

IMG_4496.jpg

While the cake is cooling, make a simple glaze. Just powdered sugar and fresh (not boiled) clementine juice. Mixed unit glaze consistency.

Once the cake is pretty much cooled, pour on the glaze.

IMG_4525.jpg

And now it is cake time.

-C


Clementine Cake

Makes one bundt cake

  • 2 1/4 cups all pupose flour

  • 1 cup white sugar

  • 1/2 teaspoon salt

  • 1 teaspoon baking powder

  • 1 teaspoon baking soda

  • 1 tablespoon vinegar

  • 1/2 cup any neutral oil

  • 1 teaspoon cinnamon

  • 6 clementines (you need 2 cups pureed)

    For the glaze

  • 1 cup powdered sugar

  • 1 clementine

To start, place 6 clementines into large pot and fill with water. Place on stove and bring water to a rapid boil then reduce heat and continue to simmer clementines for about 2 hours.

Once clementines are cooked, cut in half and check and discard any large seeds. Place the clementines into a blended and blend until smooth. Should have about 2 cups puree. If you are short on volume, add water to make up the difference.

Preheat oven to 350

Grab a large bowl. Dump the flour, baking powder and soda, salt, cinnamon, and sugar and whisk together until completely incorporated. Now add in the clementine puree along with the oil and the vinegar. Mix until completely incorporated. Scoop batter into a well greased burnt pan (at least 10 cup capacity) then place into oven on middle rack and bake for 50-60 minutes until a tester (or a fork) stuck in to the deepest part of the cake comes out clean.

Once baked, remove cake from oven and allow to cool for a few minutes in pan, then flip the cake out of pan, gently of course, and hope you greased it well enough for it to just pop out. Once removed from pan, allow to cool on a wire rack.

While cake is cooling, make the glaze. Powered sugar into a bowl along with the juice of a clementine. Mix together. If the glaze is to thick, add more juice (or water), to thin, a little more powdered sugar until you reach your desired consistency (pourable but not runny is good) and once cake is cooled, pour glaze all over.

And then eat cake.

In cake, Dairy Free, fruit, Vegan Tags Clementine Cake, bundt cake, vegan, no eggs, dairy free, King Arthur flour, food, food 52, citrus, dessert, Homemade, sweets, holiday, easy, boiled clementines
Comment
← Newer Posts Older Posts →
 

https://thelovelycrazy.squarespace.com/config#/|/about/

Me. Food Maker.Food eater. Woo HOO!

STEM+NODE  SMALL BATCH AND ONE OF A KIND POTTERY

stem+node ceramics


____________________

Subscribe

GET NEW POSTS IN YO EMAIL

You are AWESOME!!!


@thelovelycrazy 2014-2021