• stem+node ceramics
  • HOME
  • Food Recipes
  • About
  • Contact
Menu

The Lovely Crazy

Street Address
City, State, Zip
Phone Number

Your Custom Text Here

The Lovely Crazy

  • stem+node ceramics
  • HOME
  • Food Recipes
  • About
  • Contact

Sweet Potato Hand Pies

November 21, 2020 Colleen Stem
IMG_2132.jpg
IMG_2076.jpg

What, you did’t skip an afternoon of life to stay home avoiding all the things that need to be done to watch the snow gently fall with the twinkle lights on, Sufjan Stevens Christmas playing and make little hand pies? Well shit, maybe that is exactly what you should do because I got to tell you, it was probably one of the best afternoons I have had in a while.

And don’t get at me about the Christmas music. Sufjan Stevens Christmas is one of the things I look forward to the most about this time of year. If you know, you know. If you don’t know, then stop what you are doing and go listen to it. Trust.

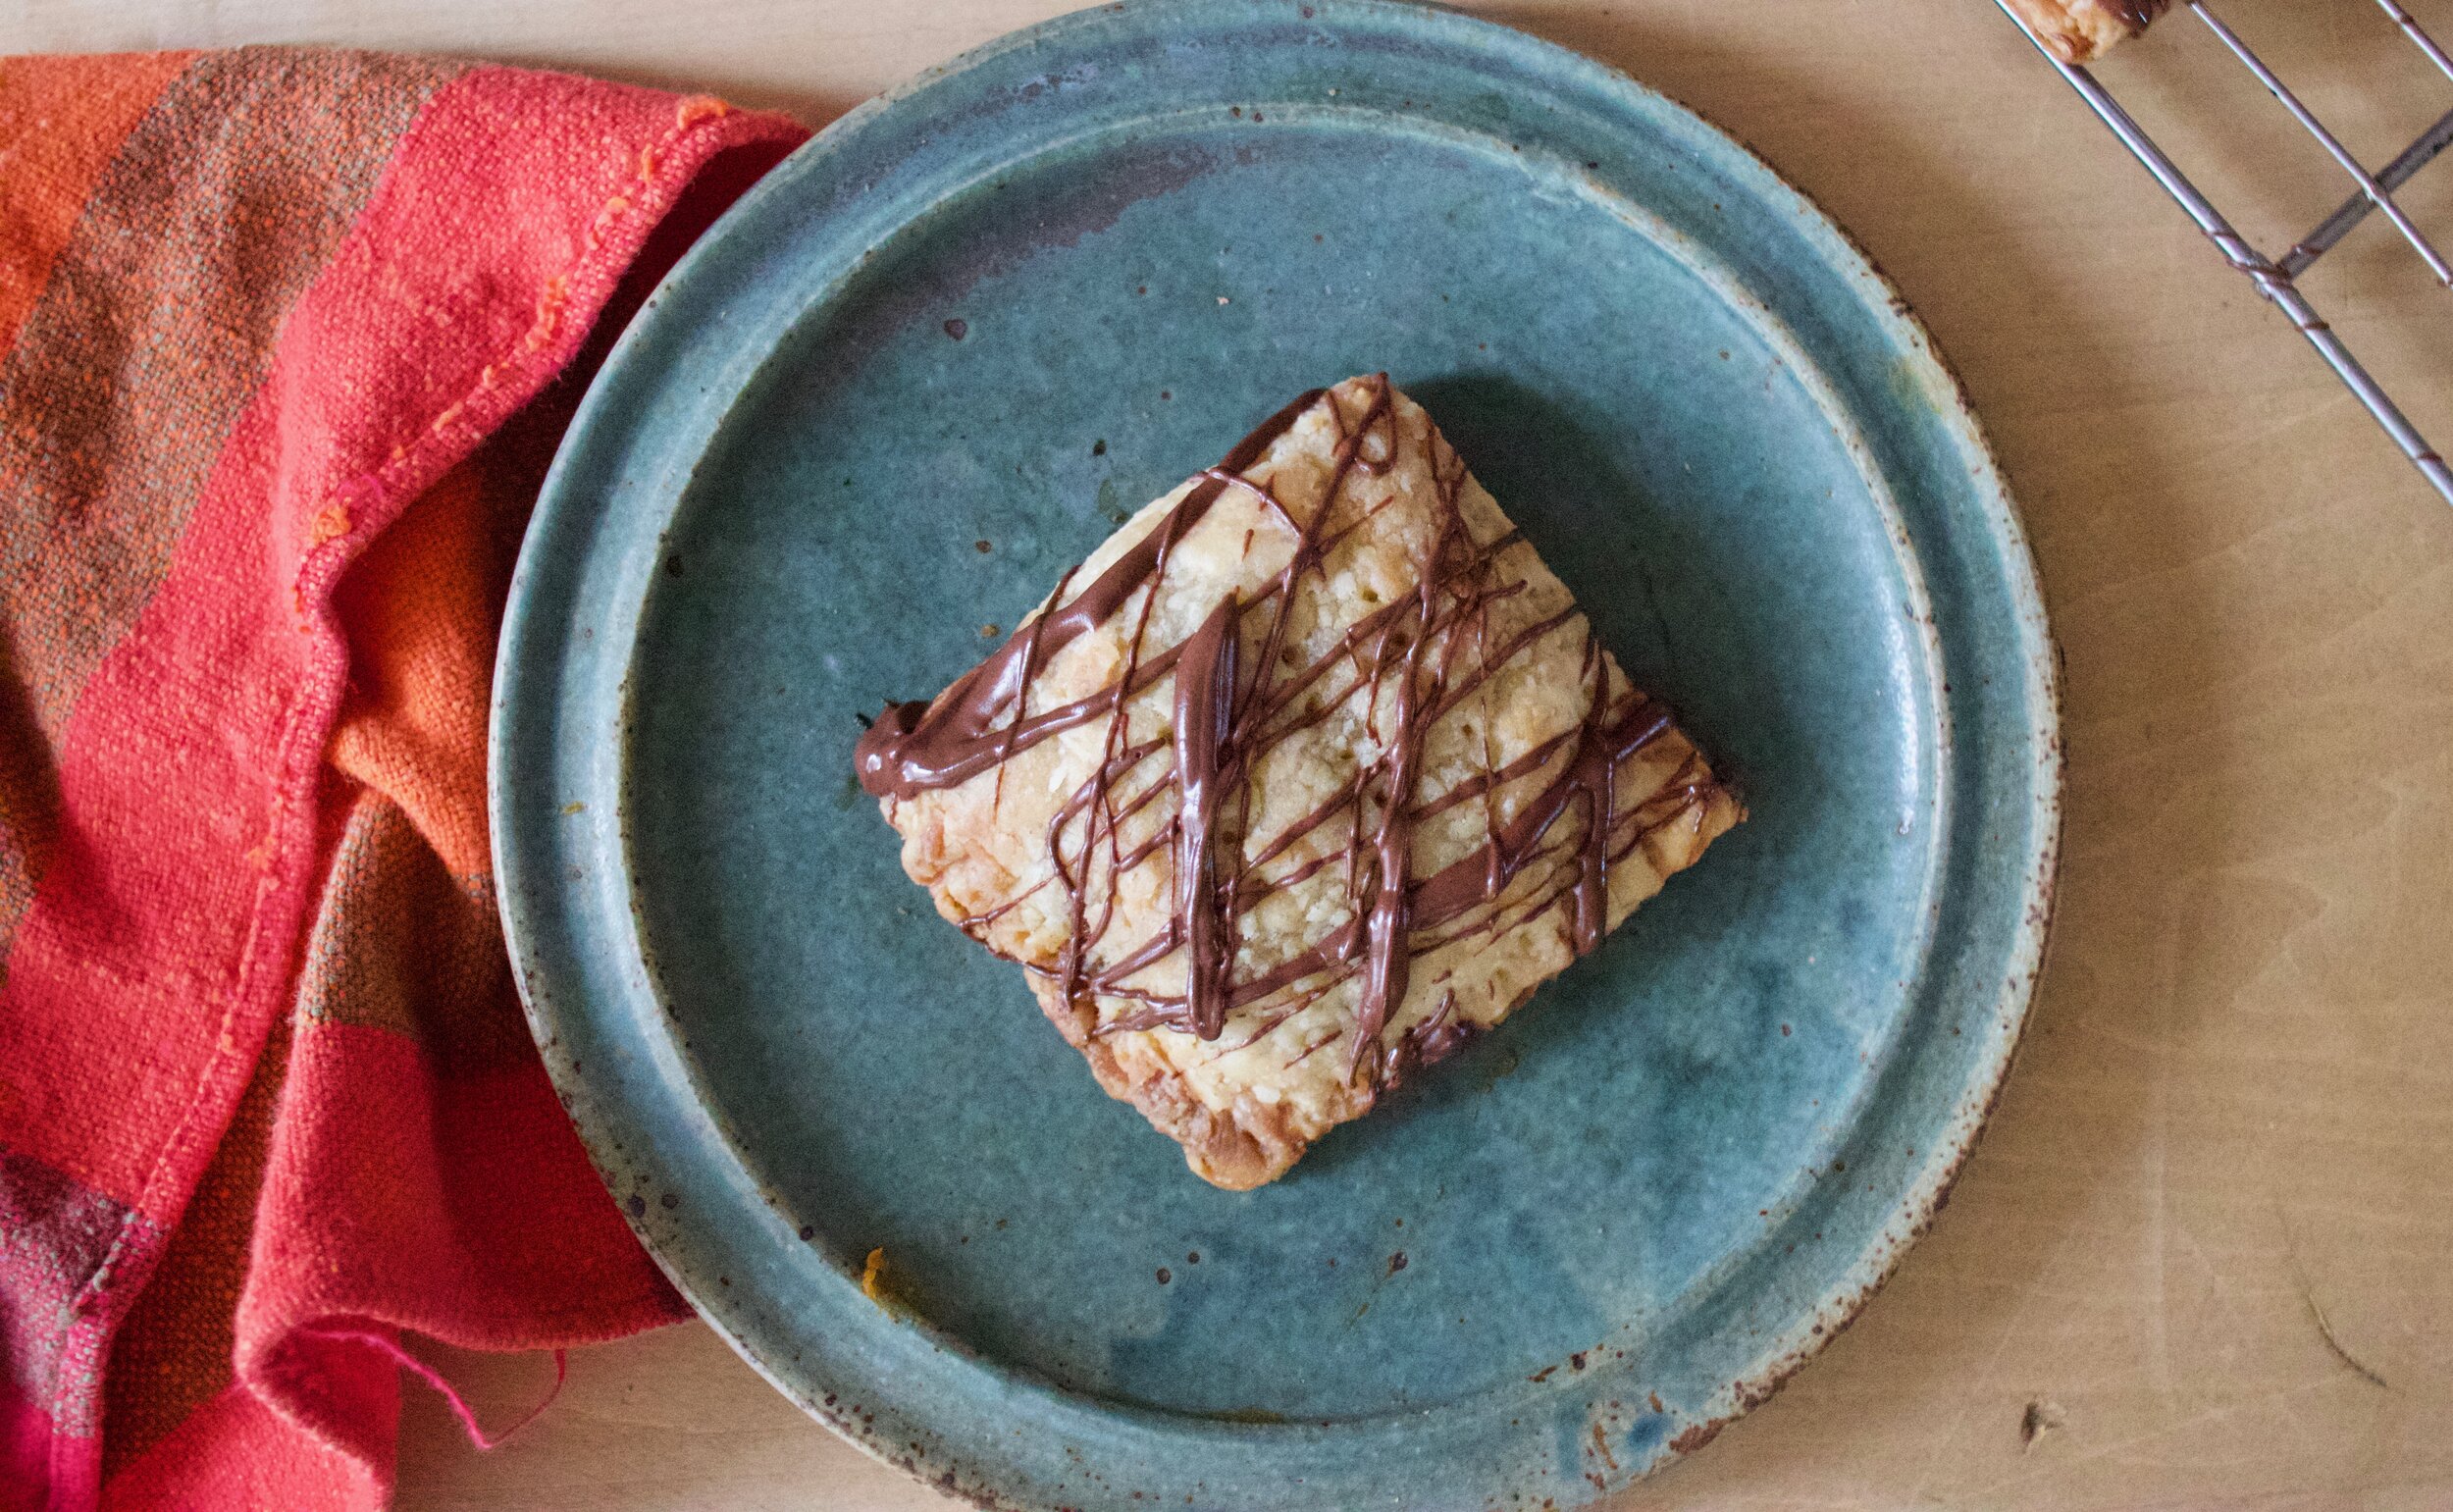
These little hand held pies are perfect for the upcoming holiday season, but anytime really. Crispy flaky pie crust filled with spiced sweet potato the is creamy and custard like then topped with a nice chocolate drizzle. All packed nicely into a square that you can eat without plate or fork plus they pack up so nicely (they make great gifts) and are just really freaking amazing. I made a batch and basically the mr and Barb fought over who was going to eat them all because they were just that good. And the mr isn’t even a sweet potato fan. (When will he realize he likes all food?)

Anyway, Take a couple hours and listen to Sufjan Stevens, watch it snow (if you can get it to do that), and make these hand pie, It will make you happy.

Now to the hand pies!

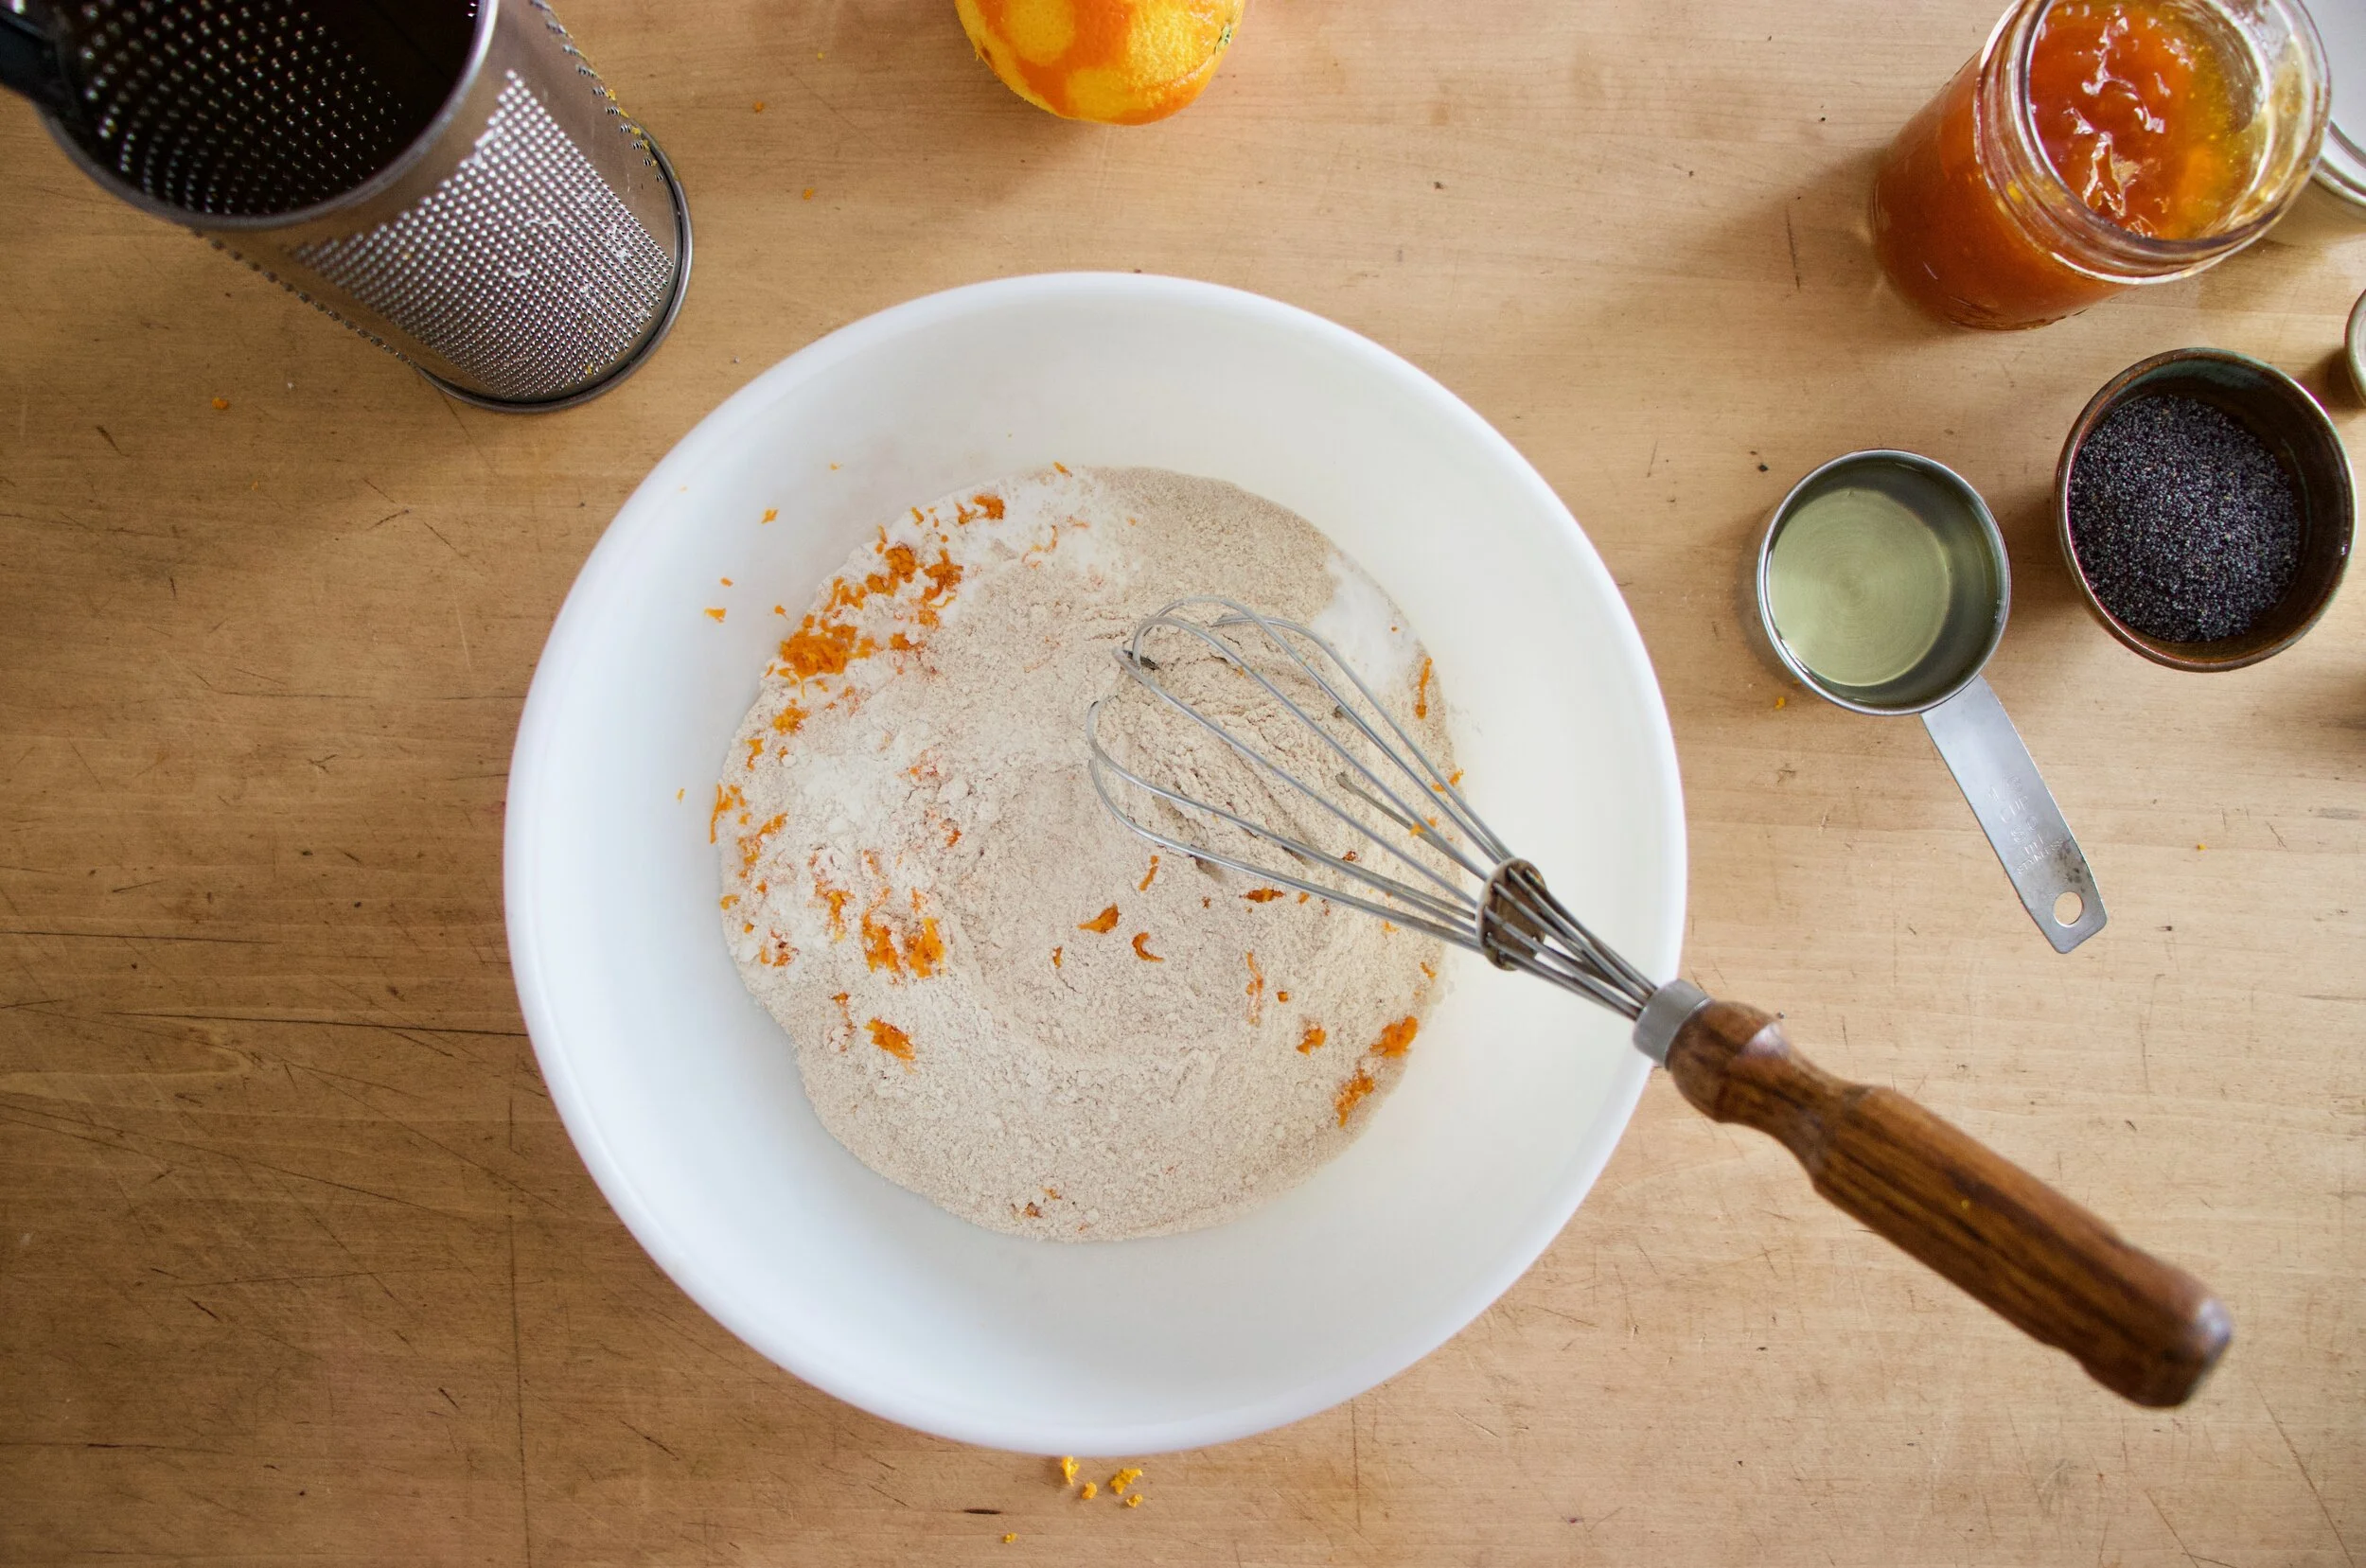
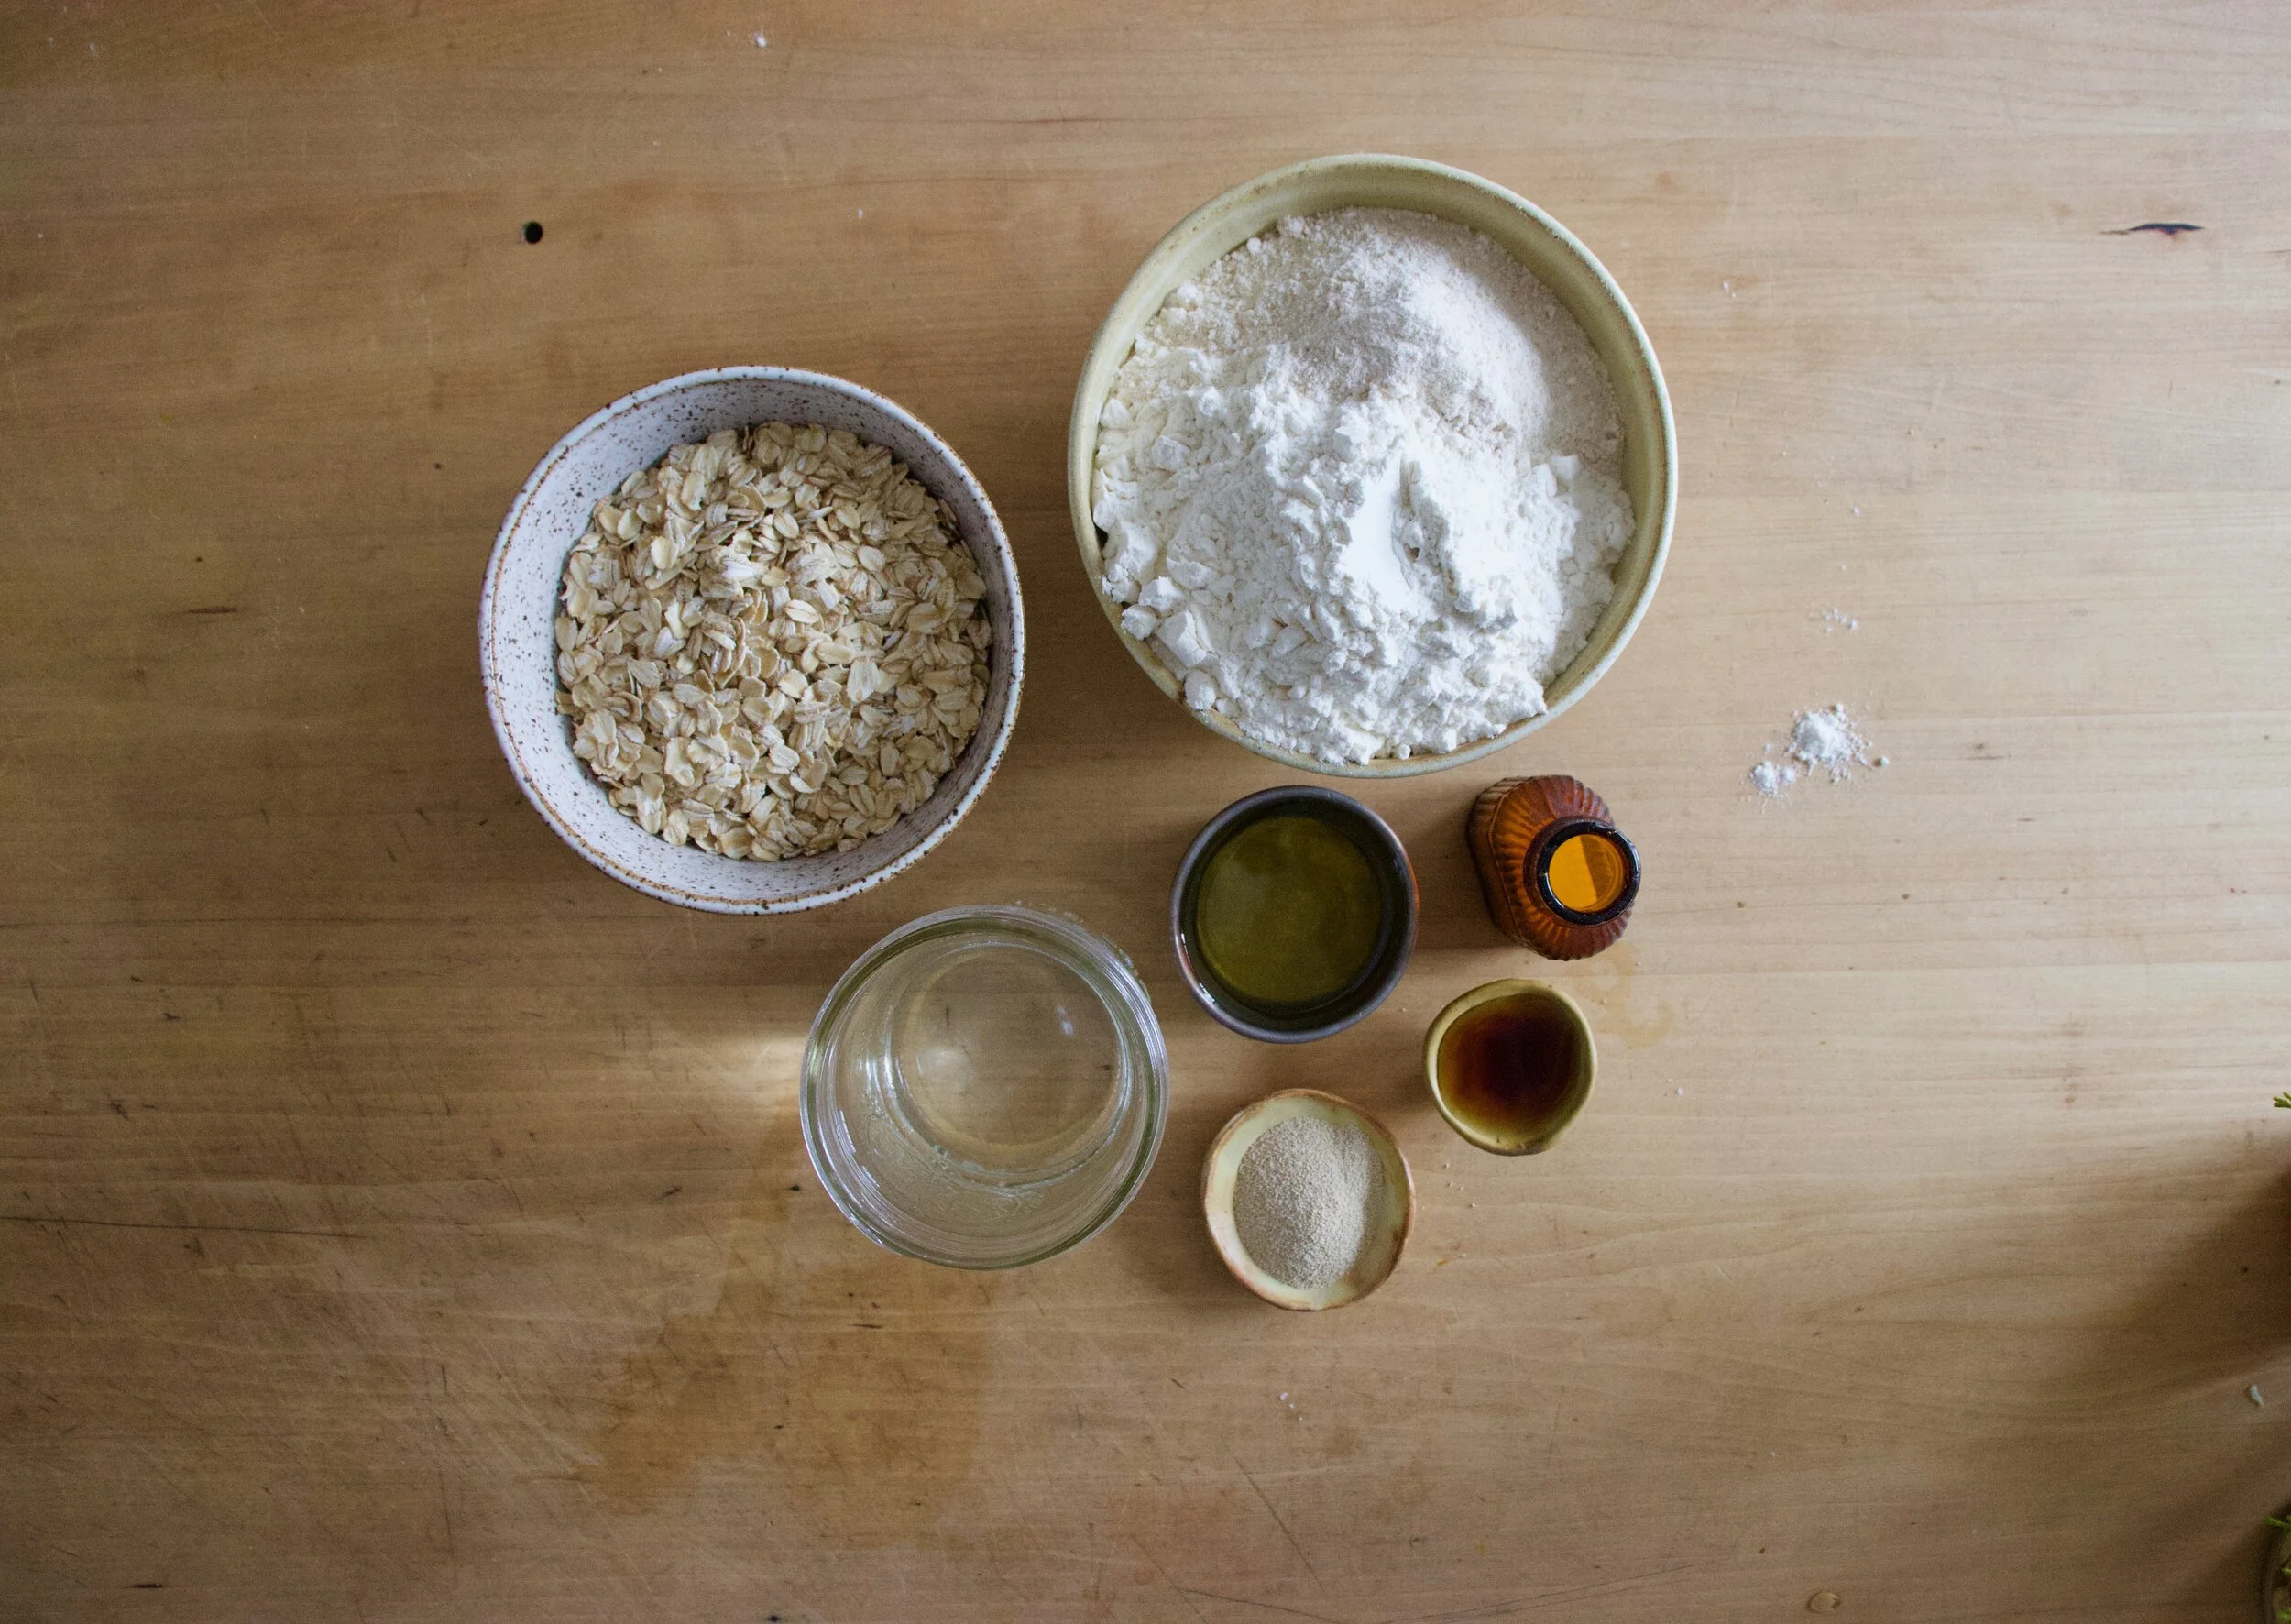
The stuff. For the dough you need flour, salt, brown sugar, ice water, and a stick of frozen vegan butter. (I use country crock vegan butter and it is AMAZING for pie crust). For filling it is baked sweet potatoes, cinnamon, ground ginger and nutmeg, and maple syrup. Also need chocolate chips and a little coconut oil for a nice chocolate drizzle.

IMG_1971.jpg
IMG_1981.jpg
IMG_1984.jpg
IMG_1985.jpg

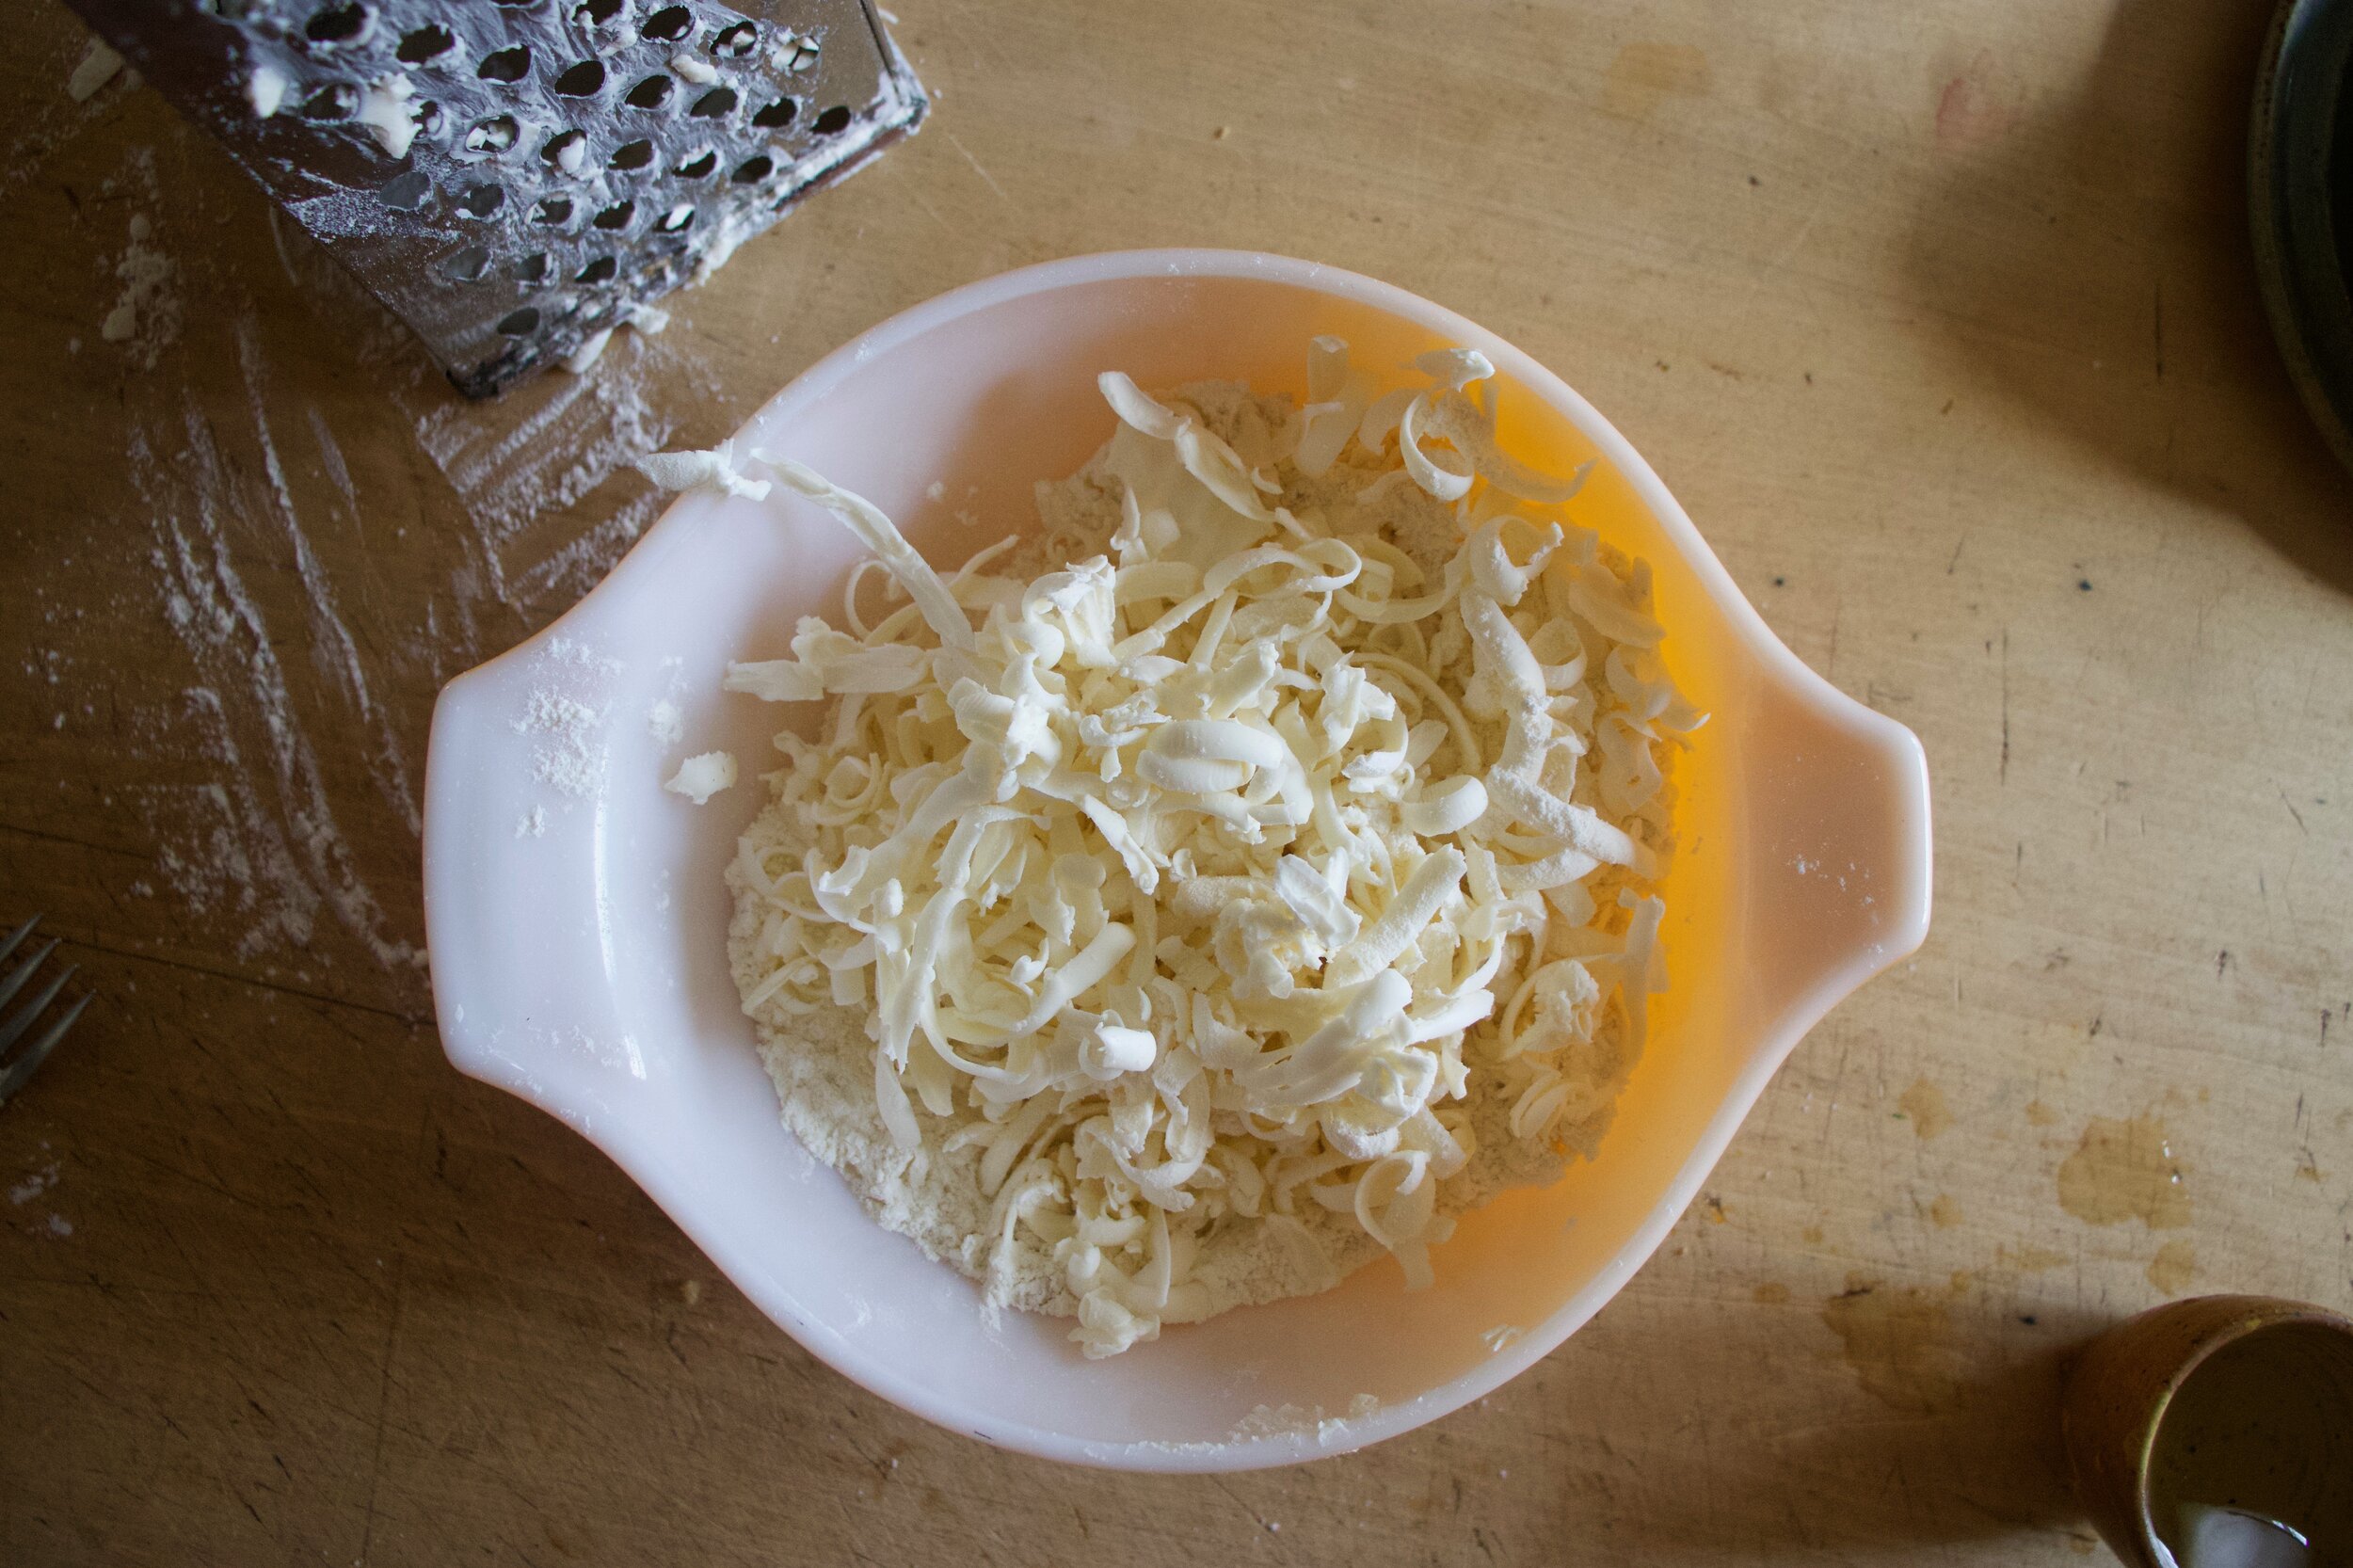
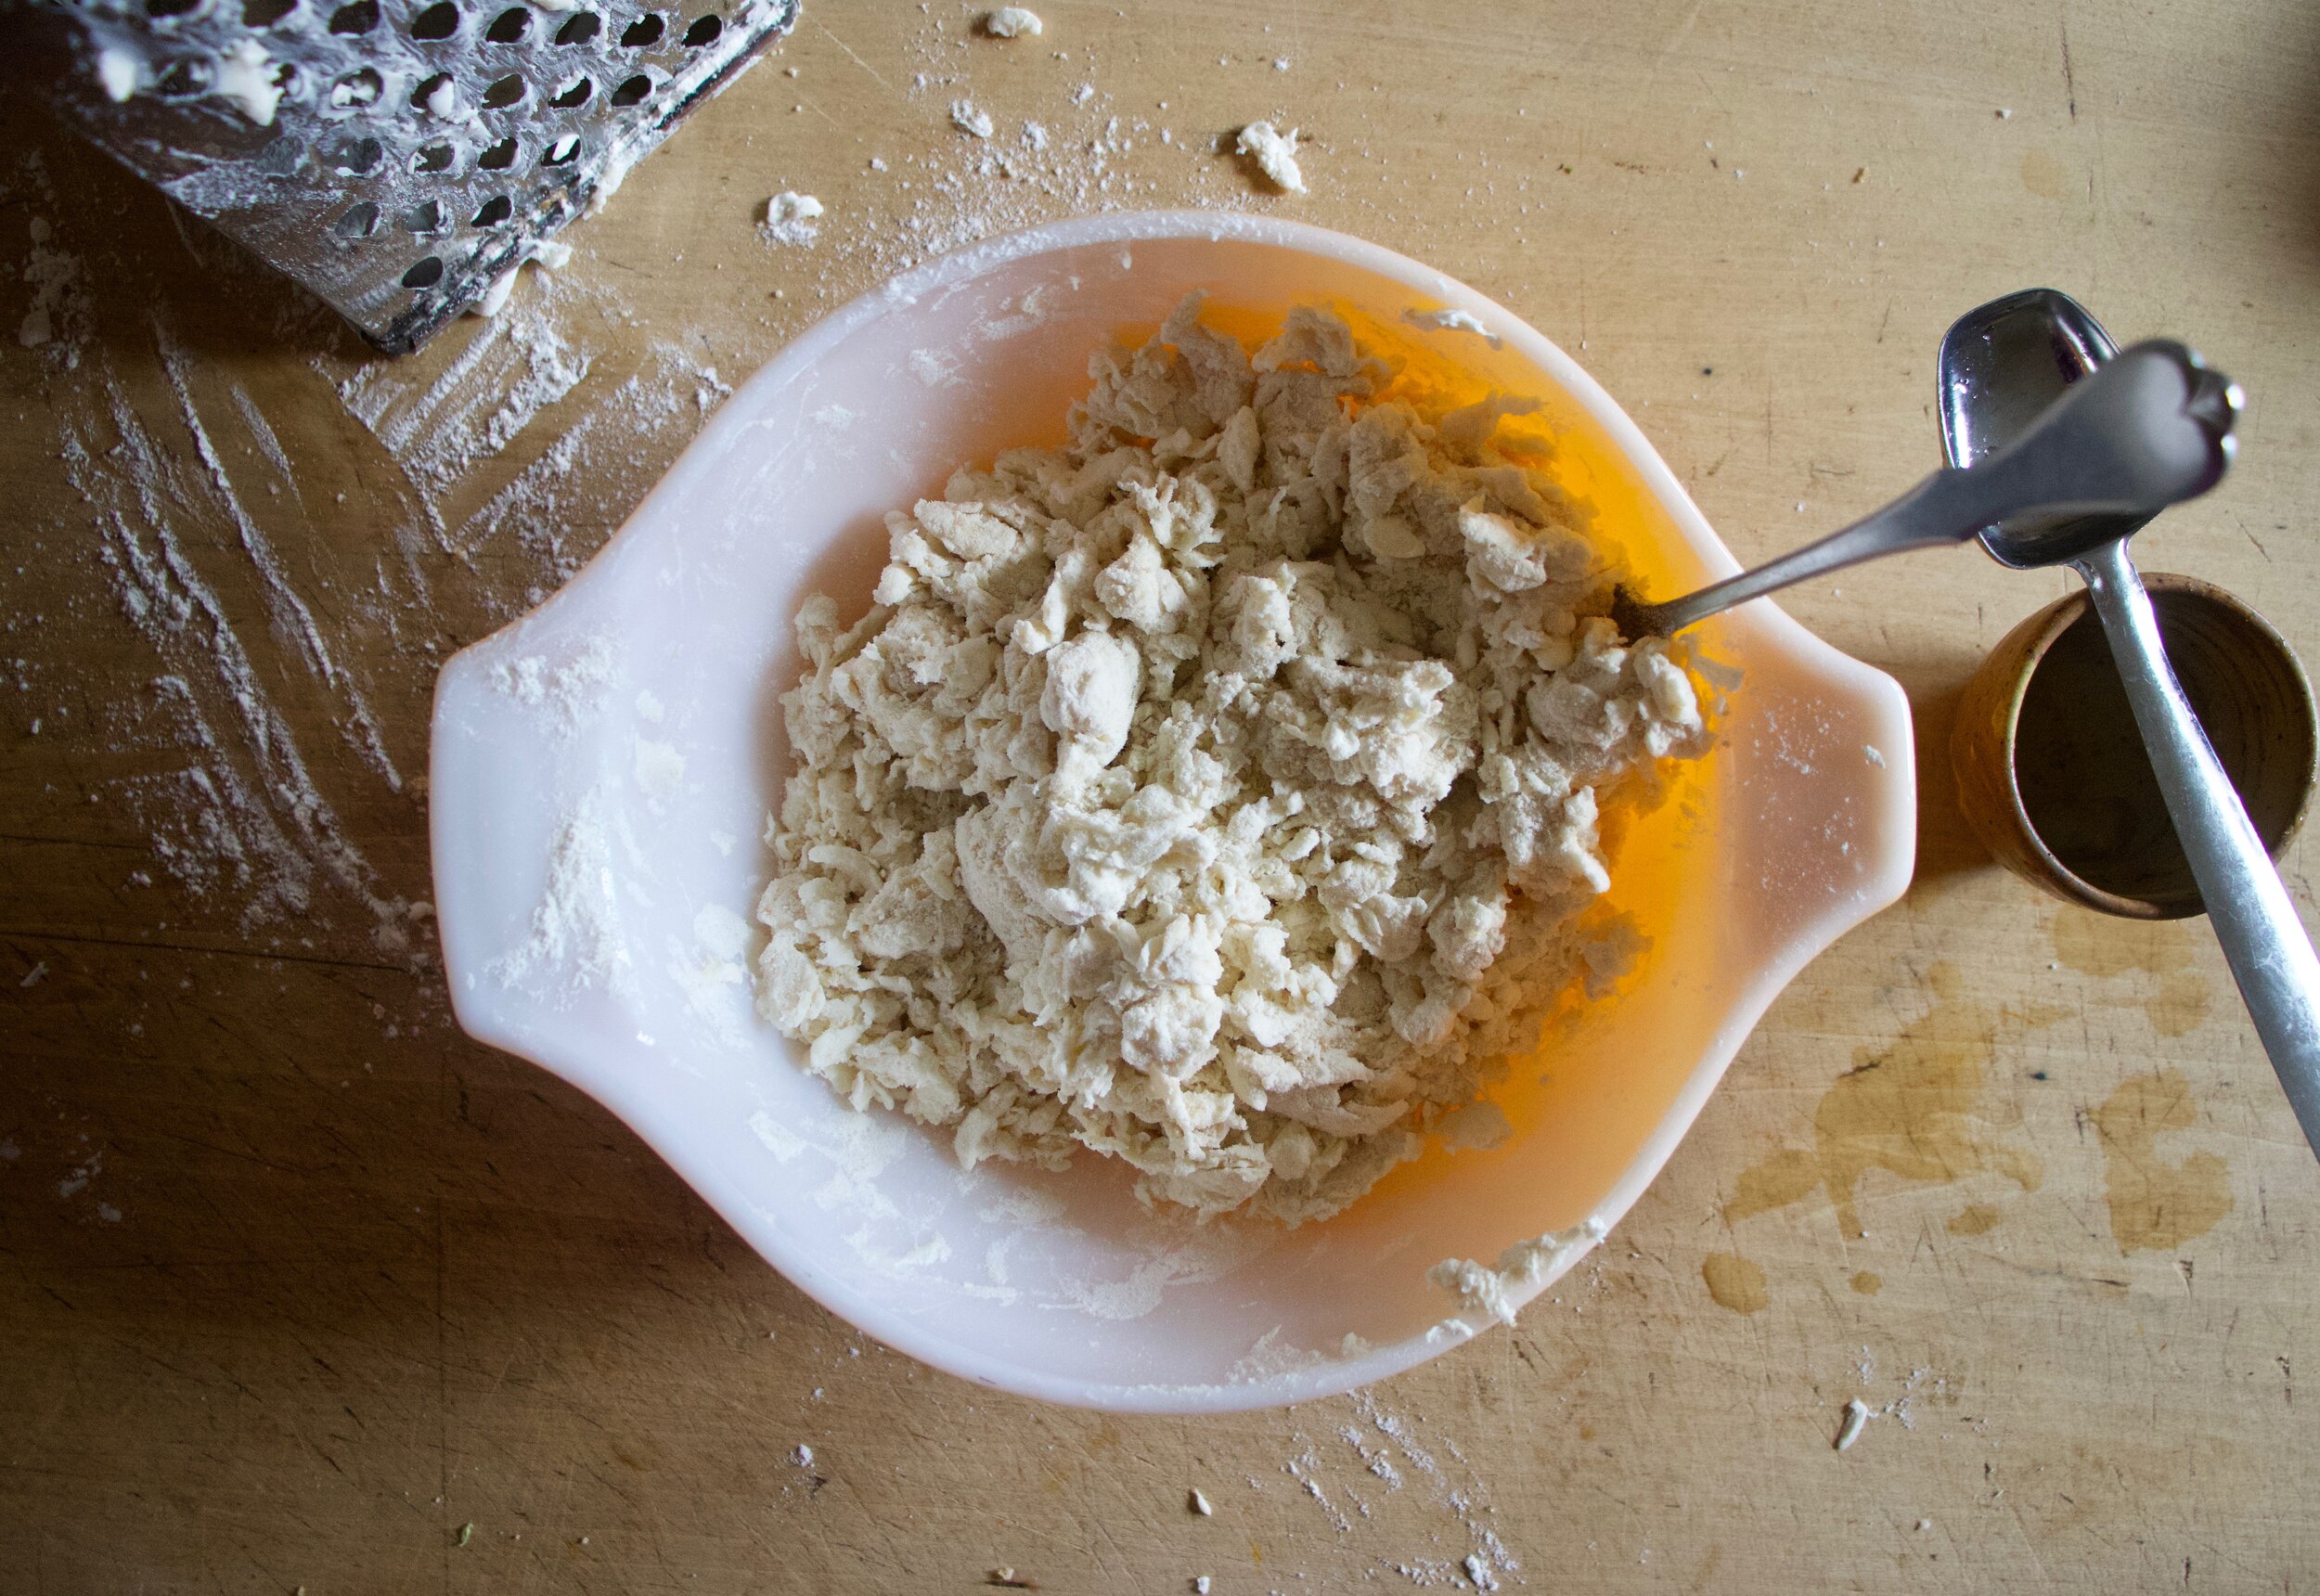
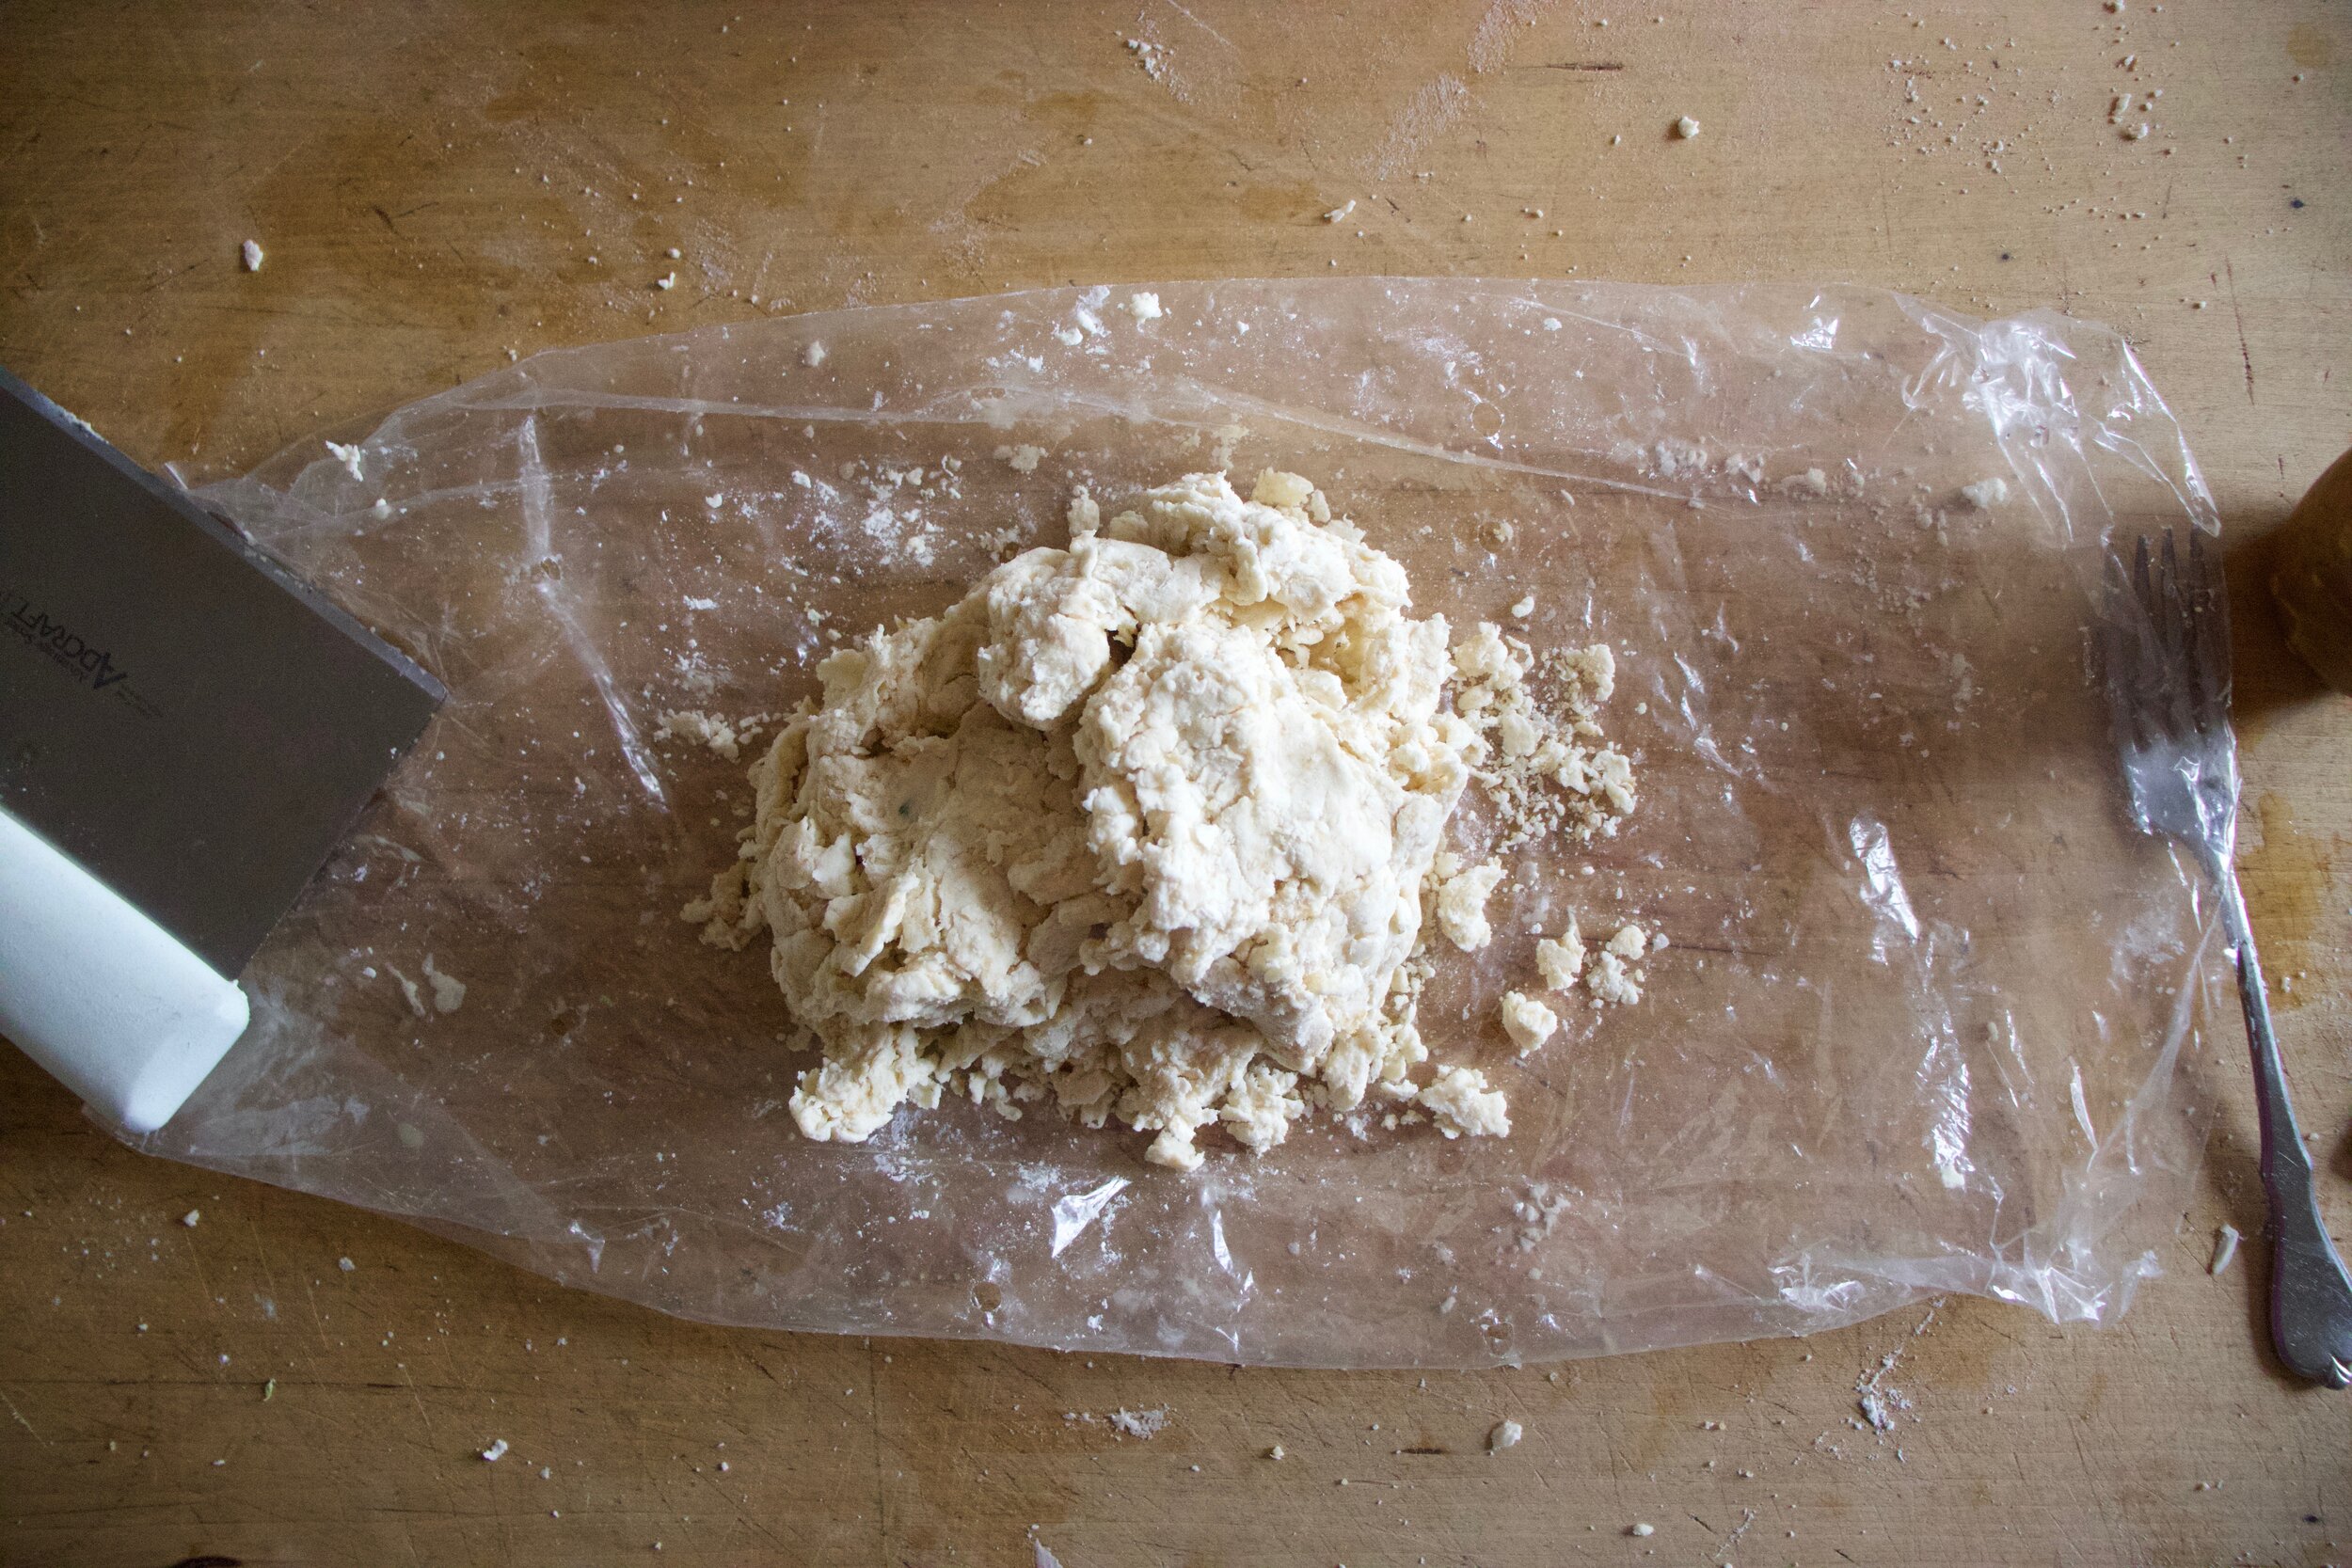
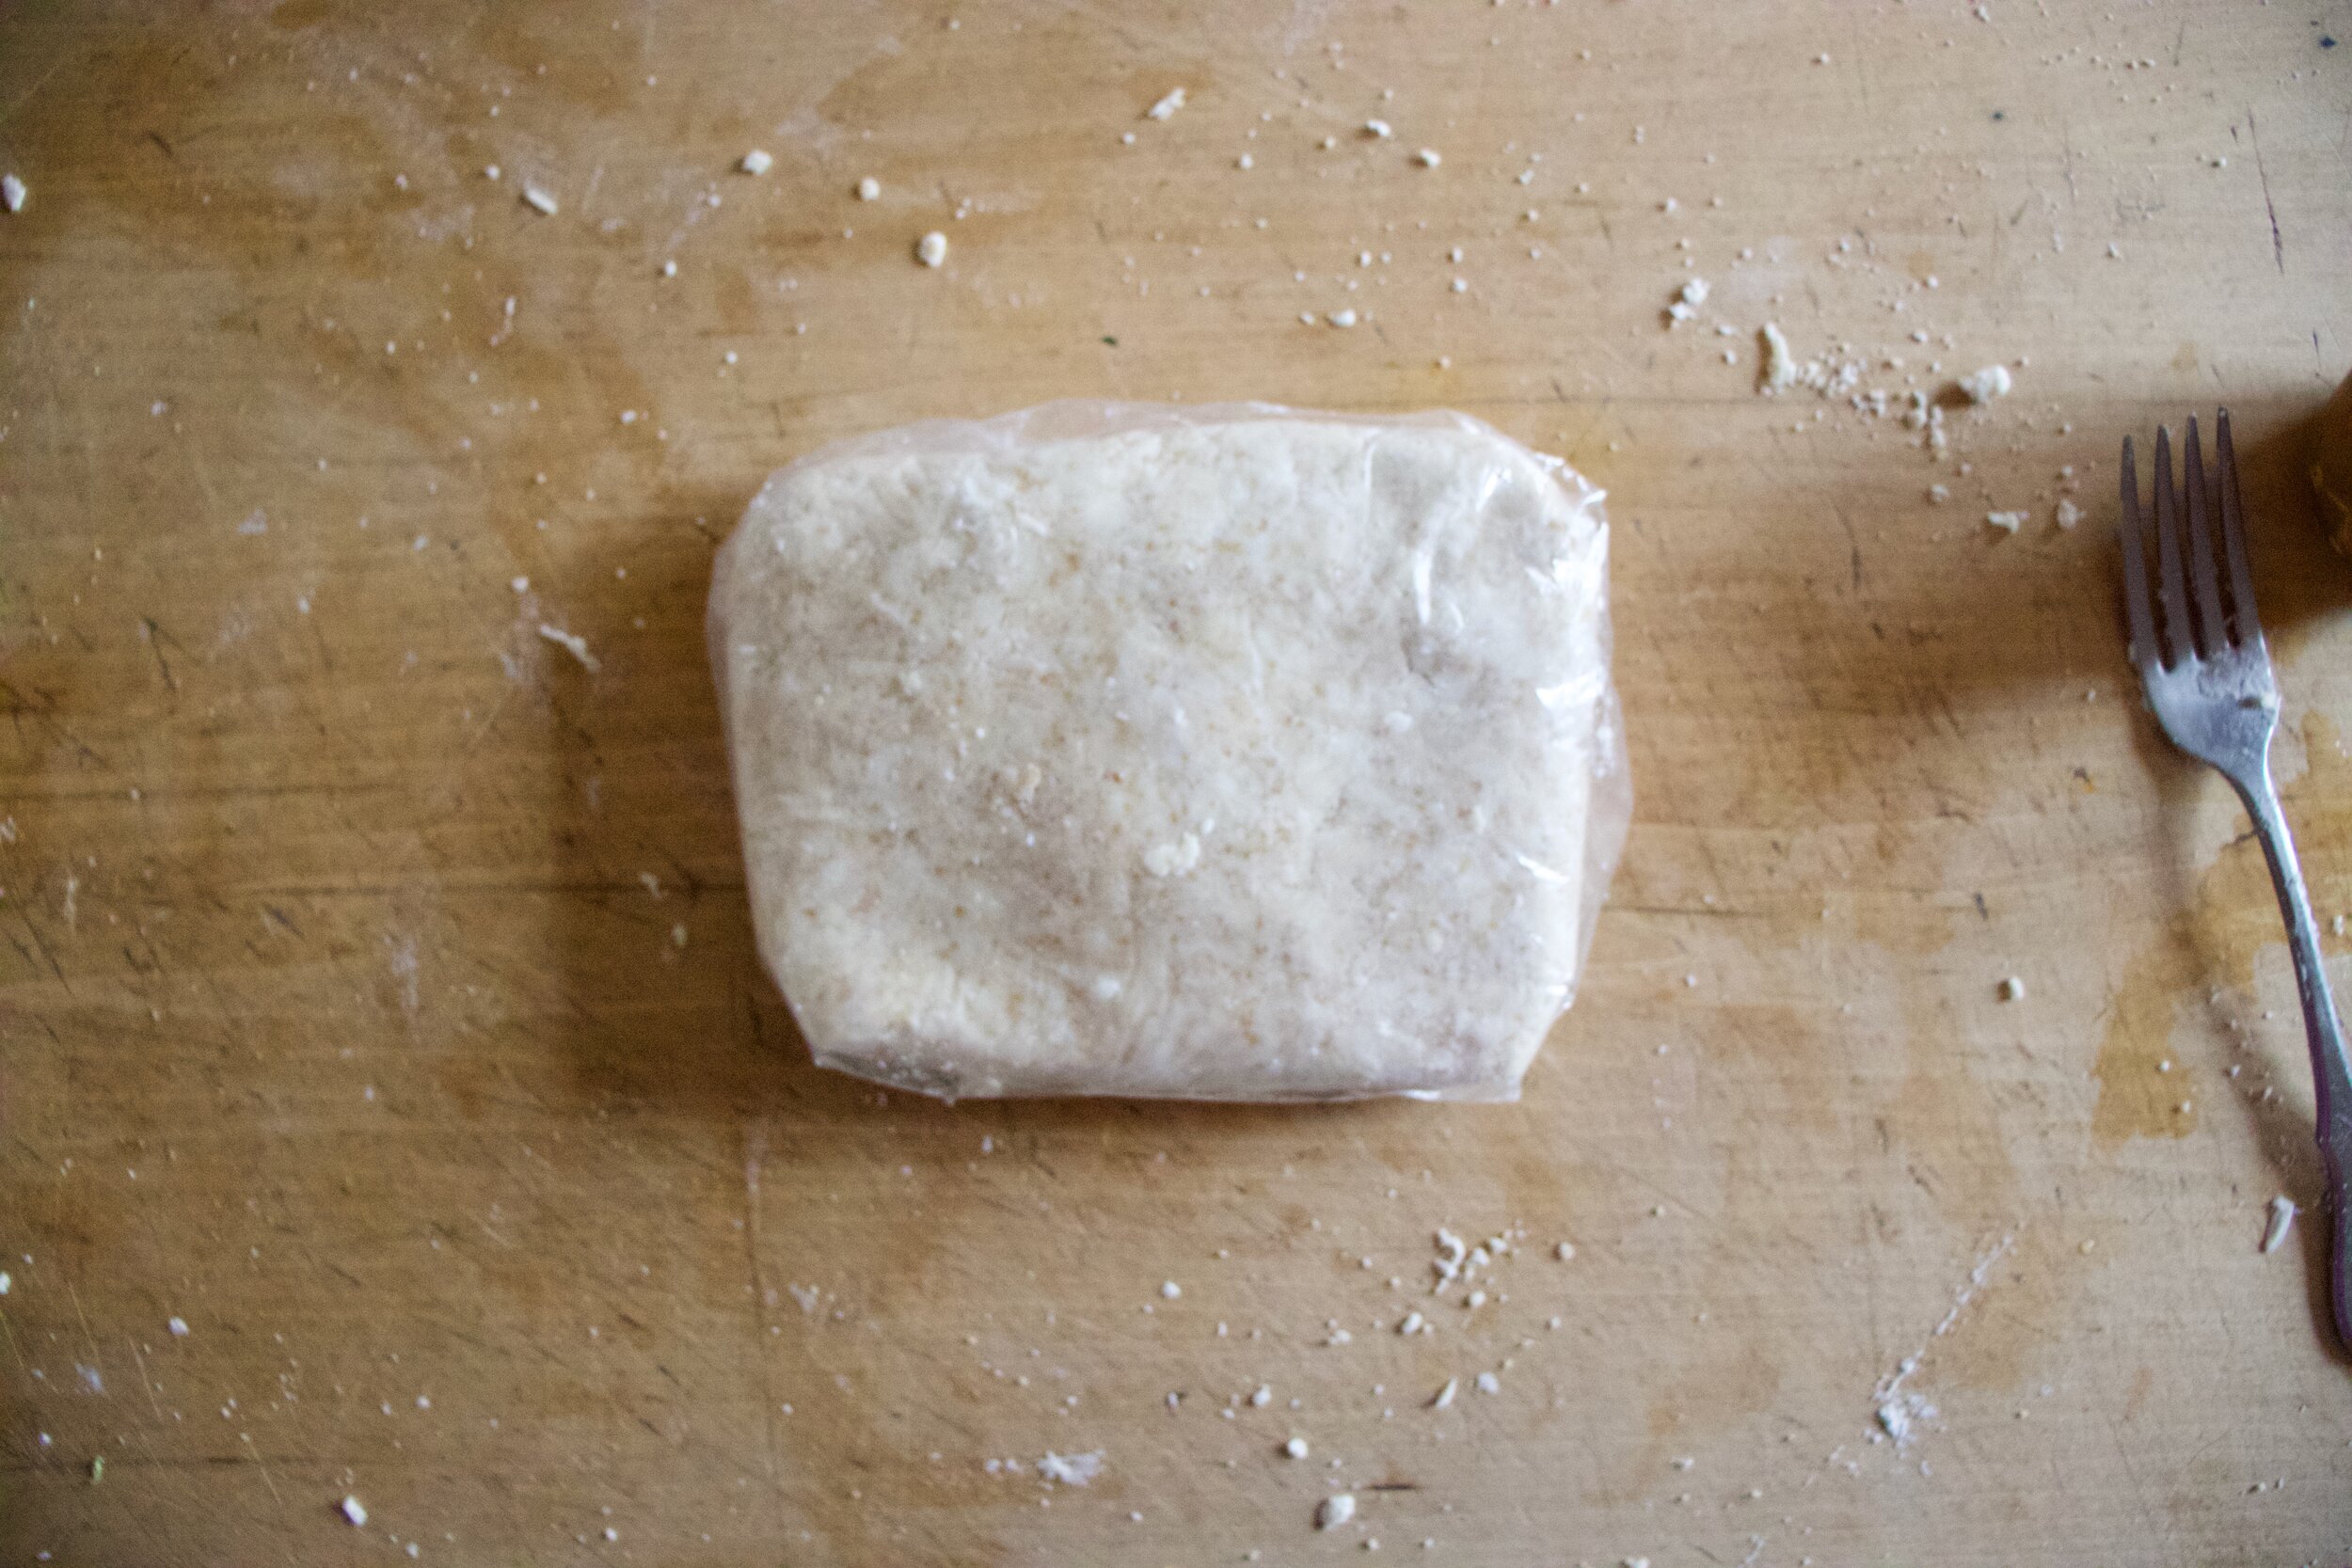
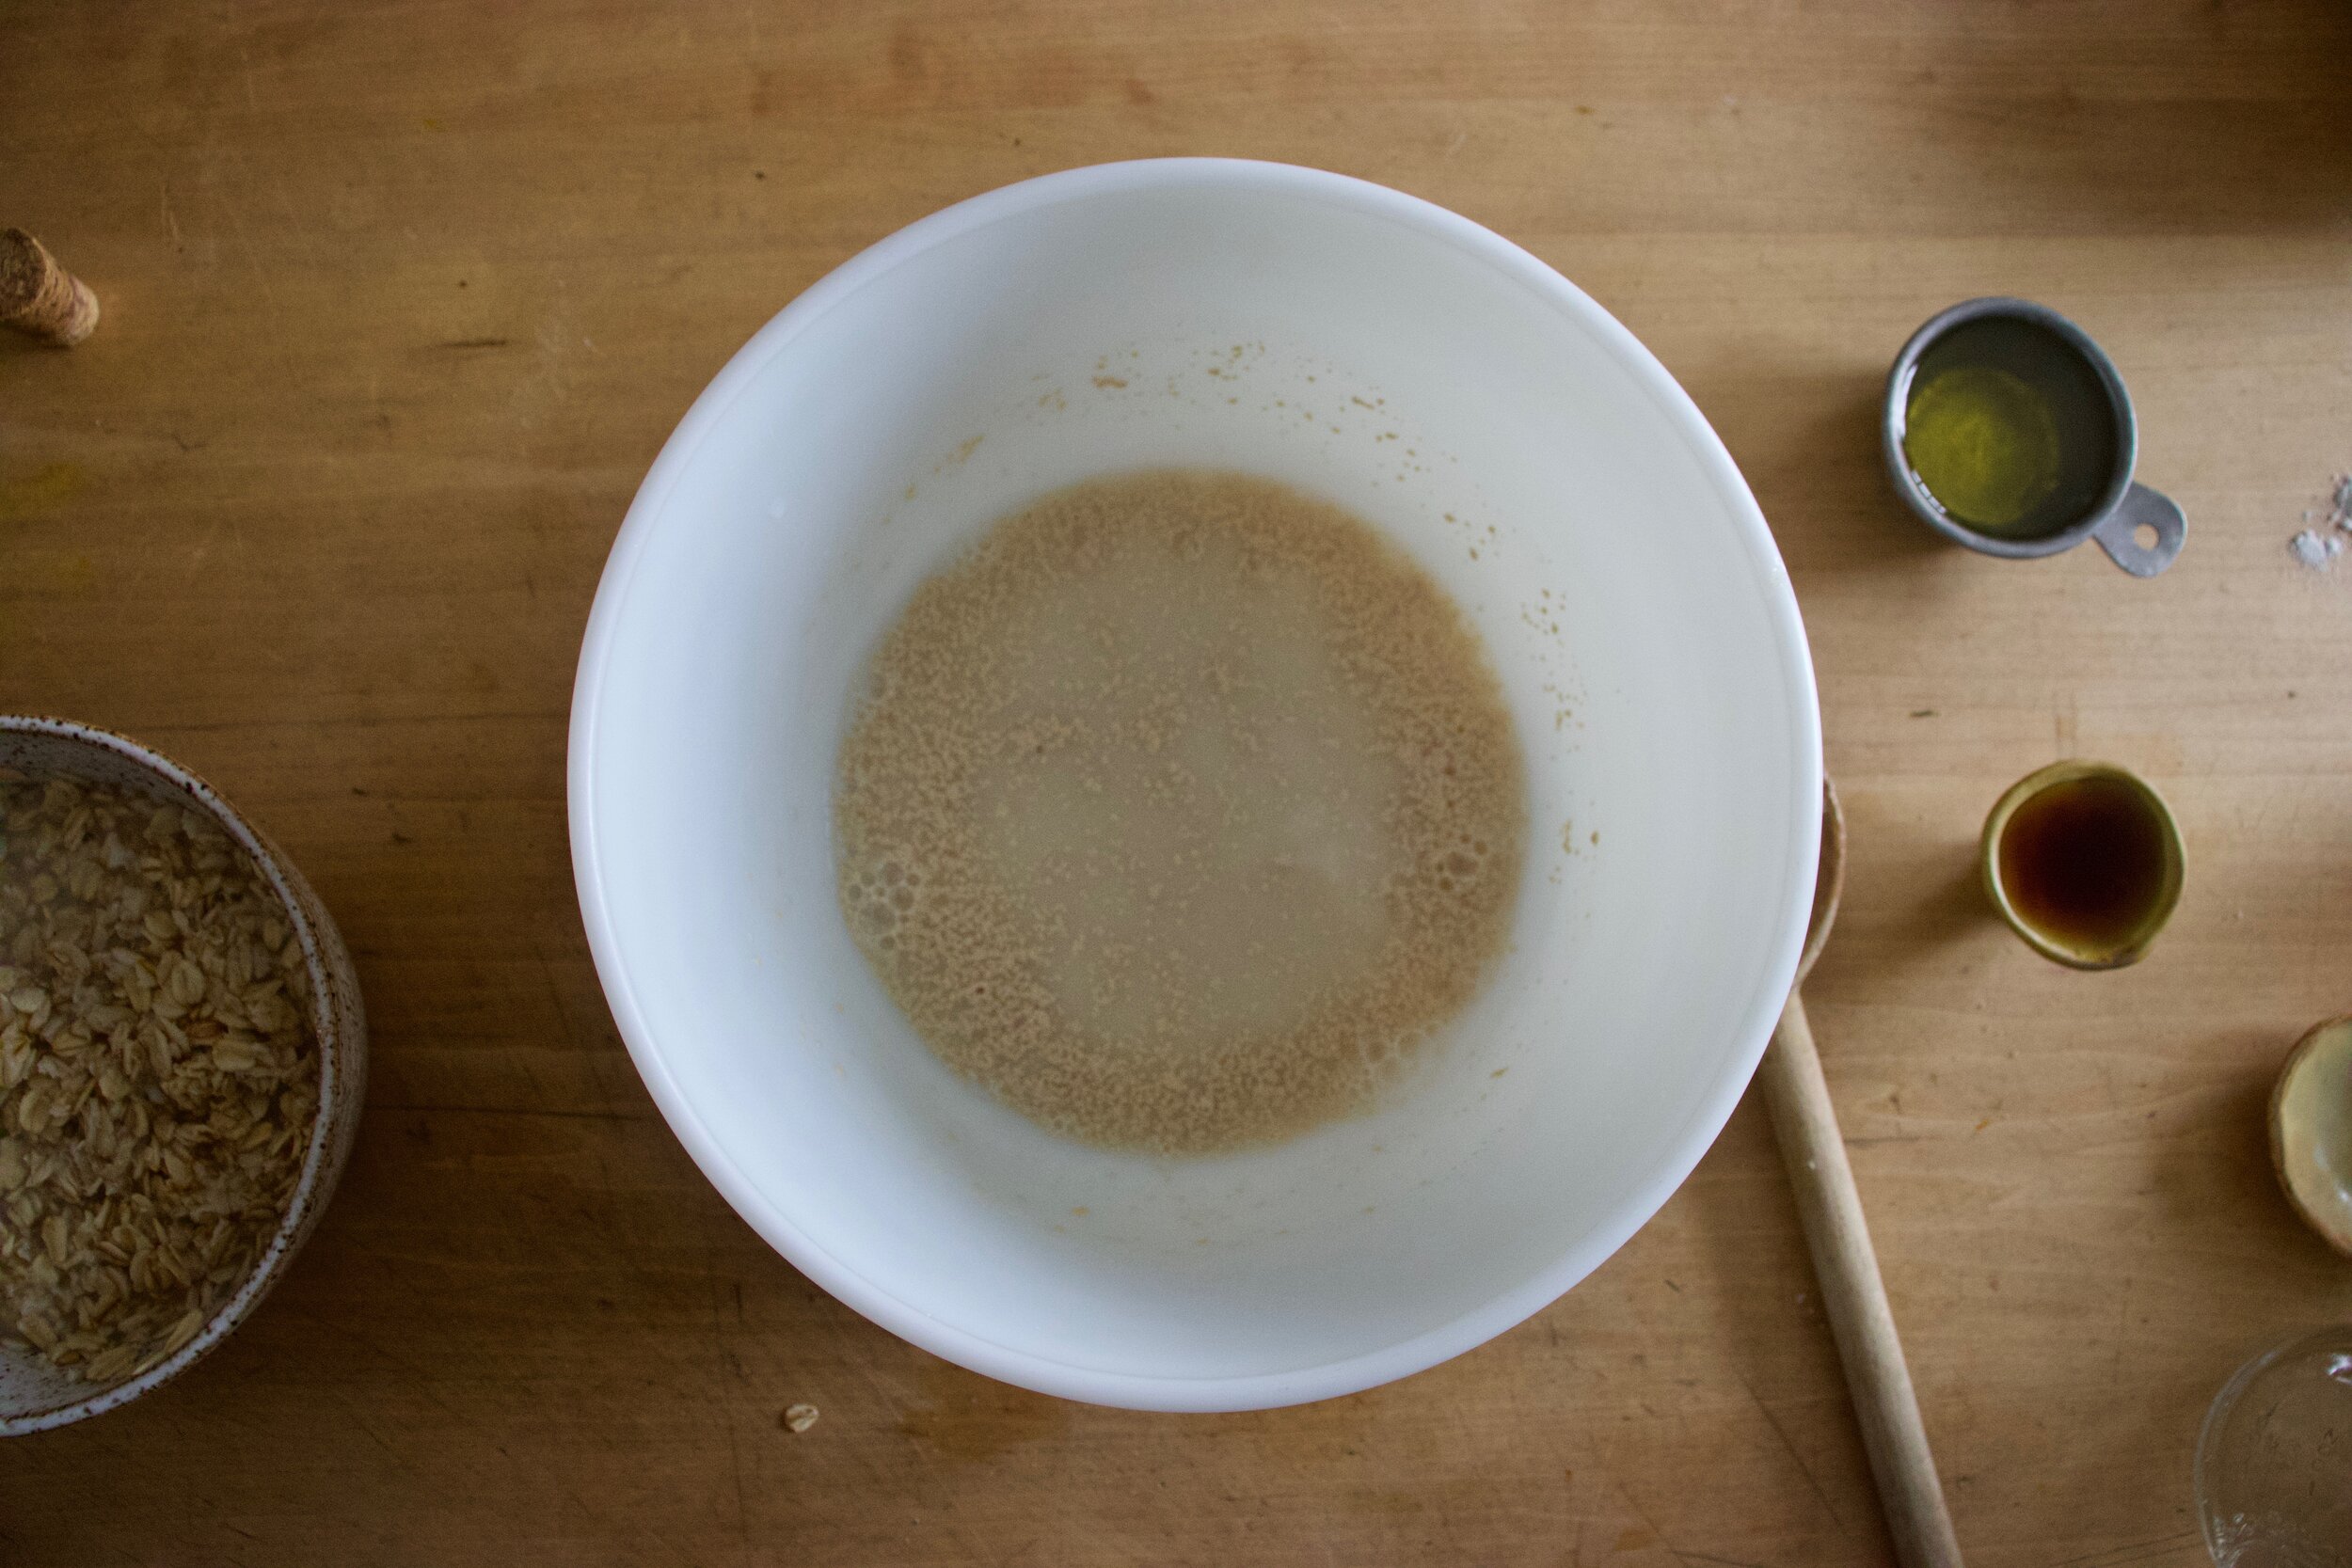
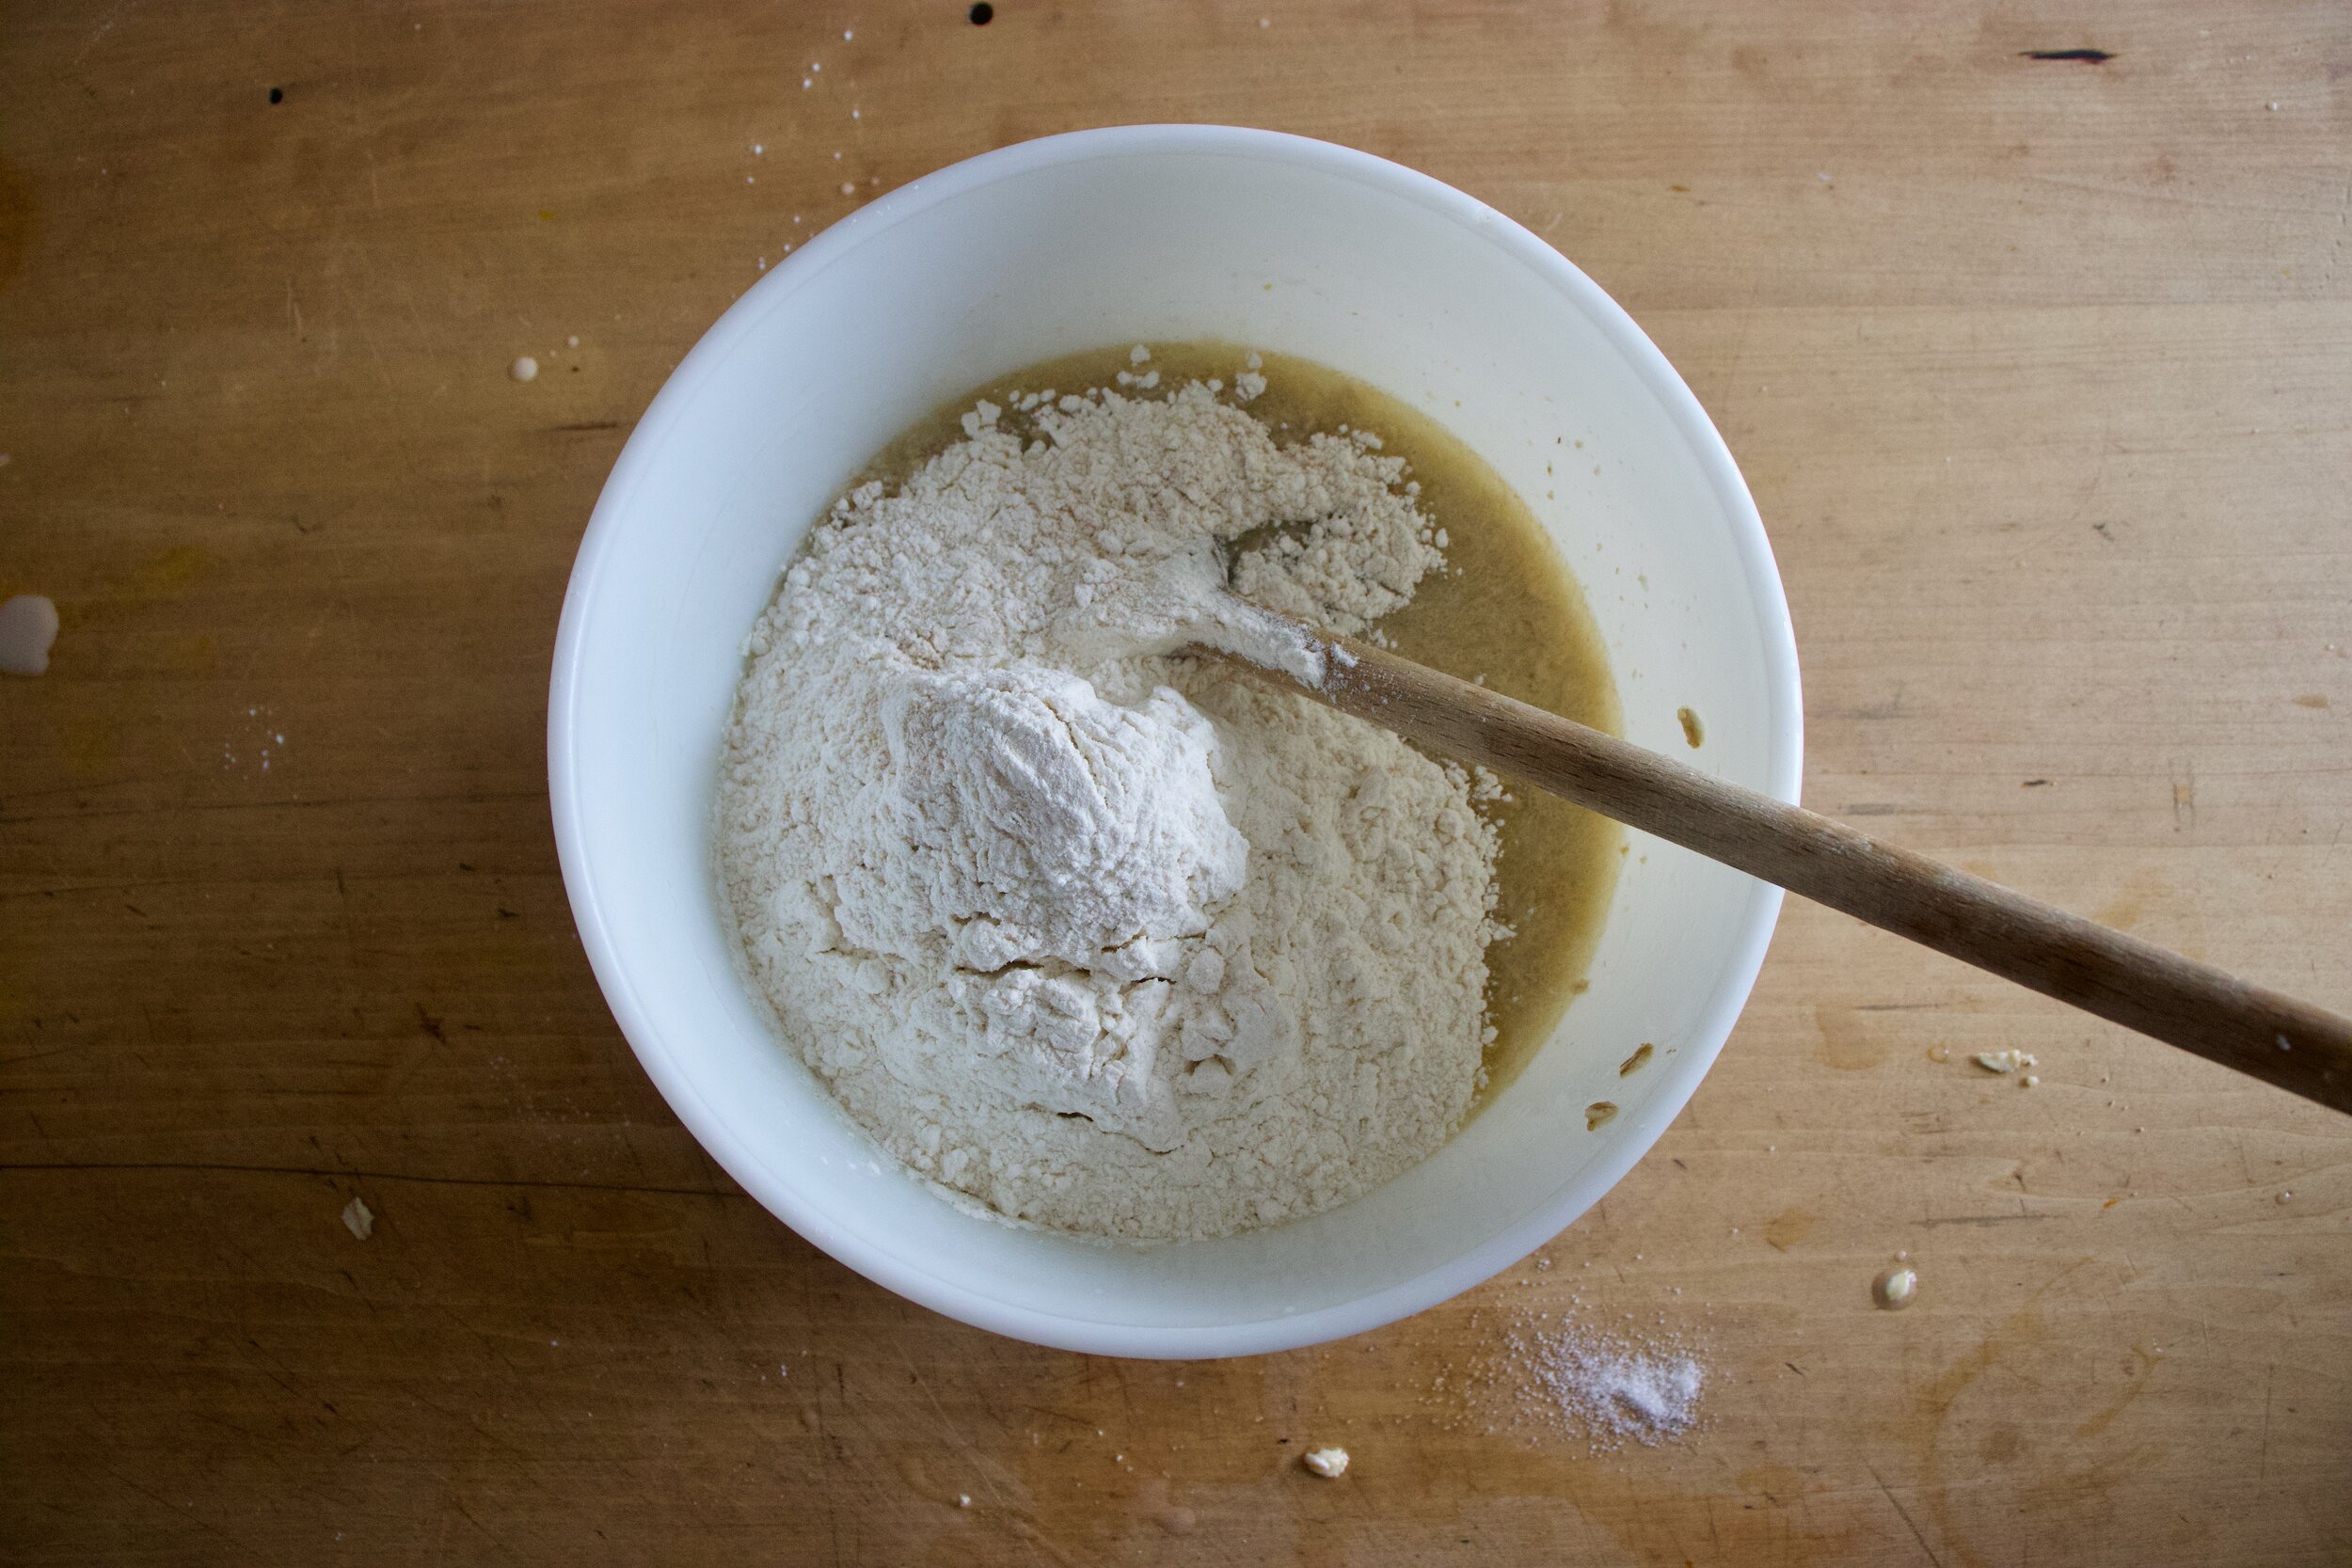
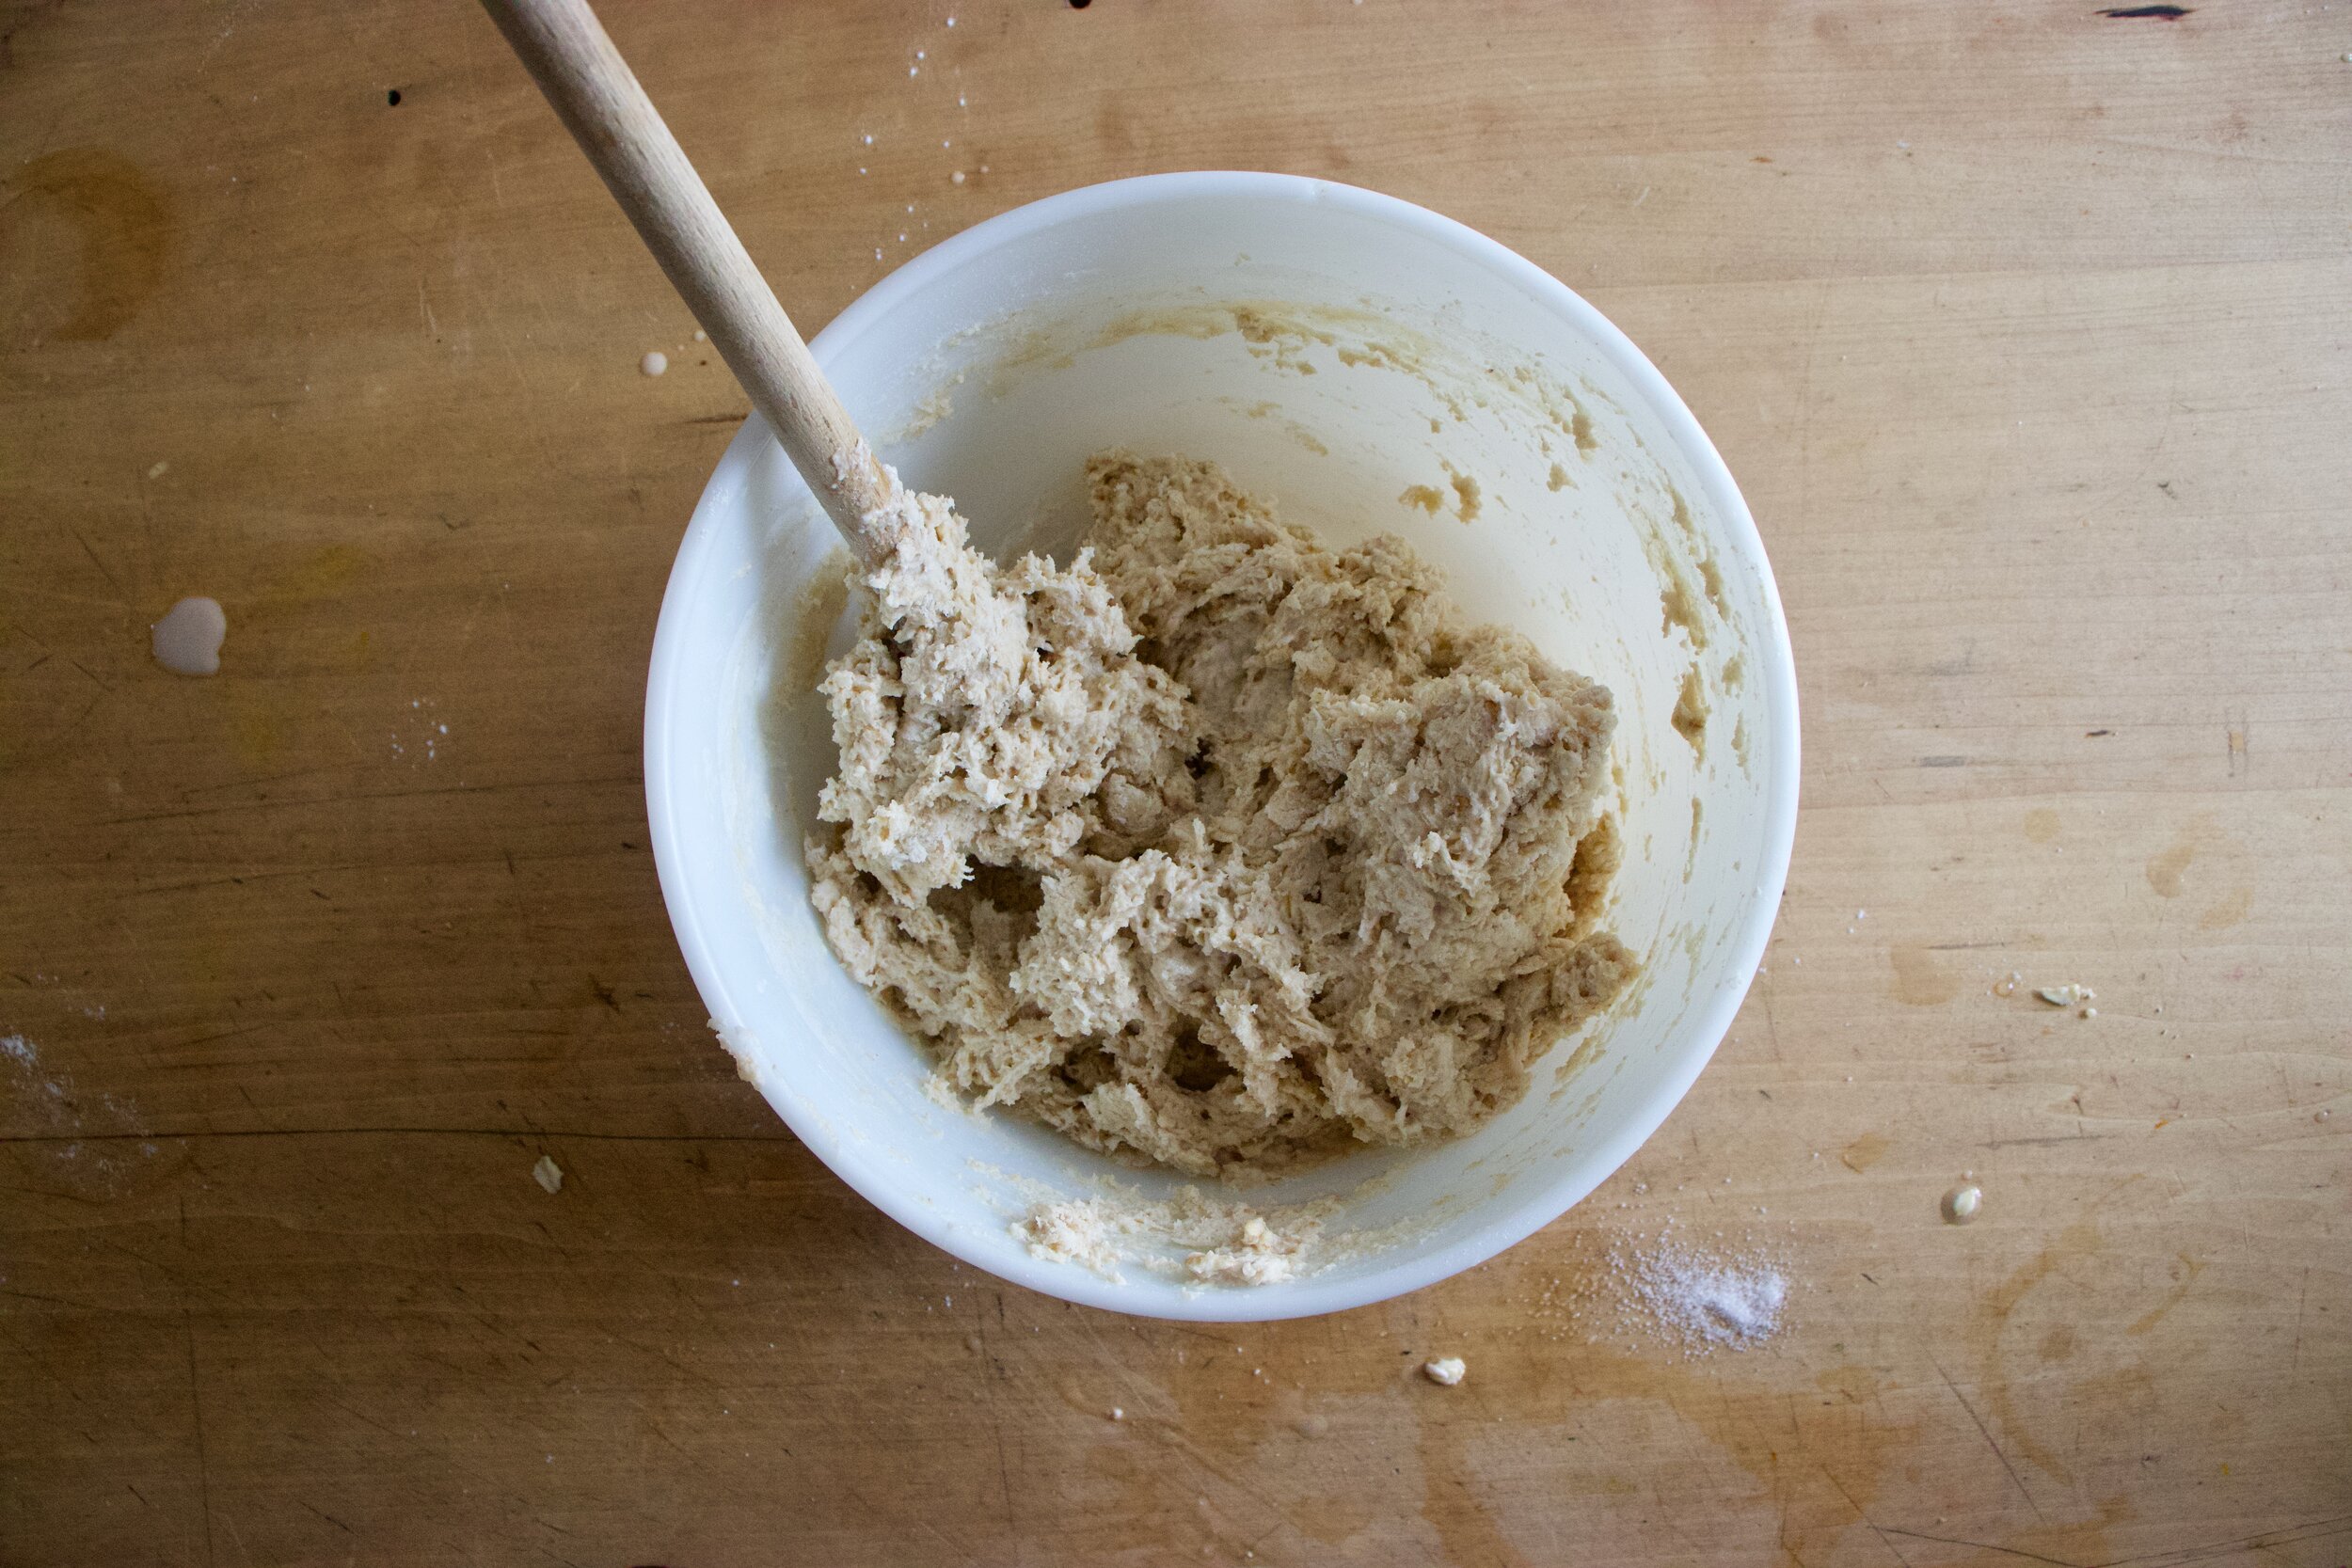
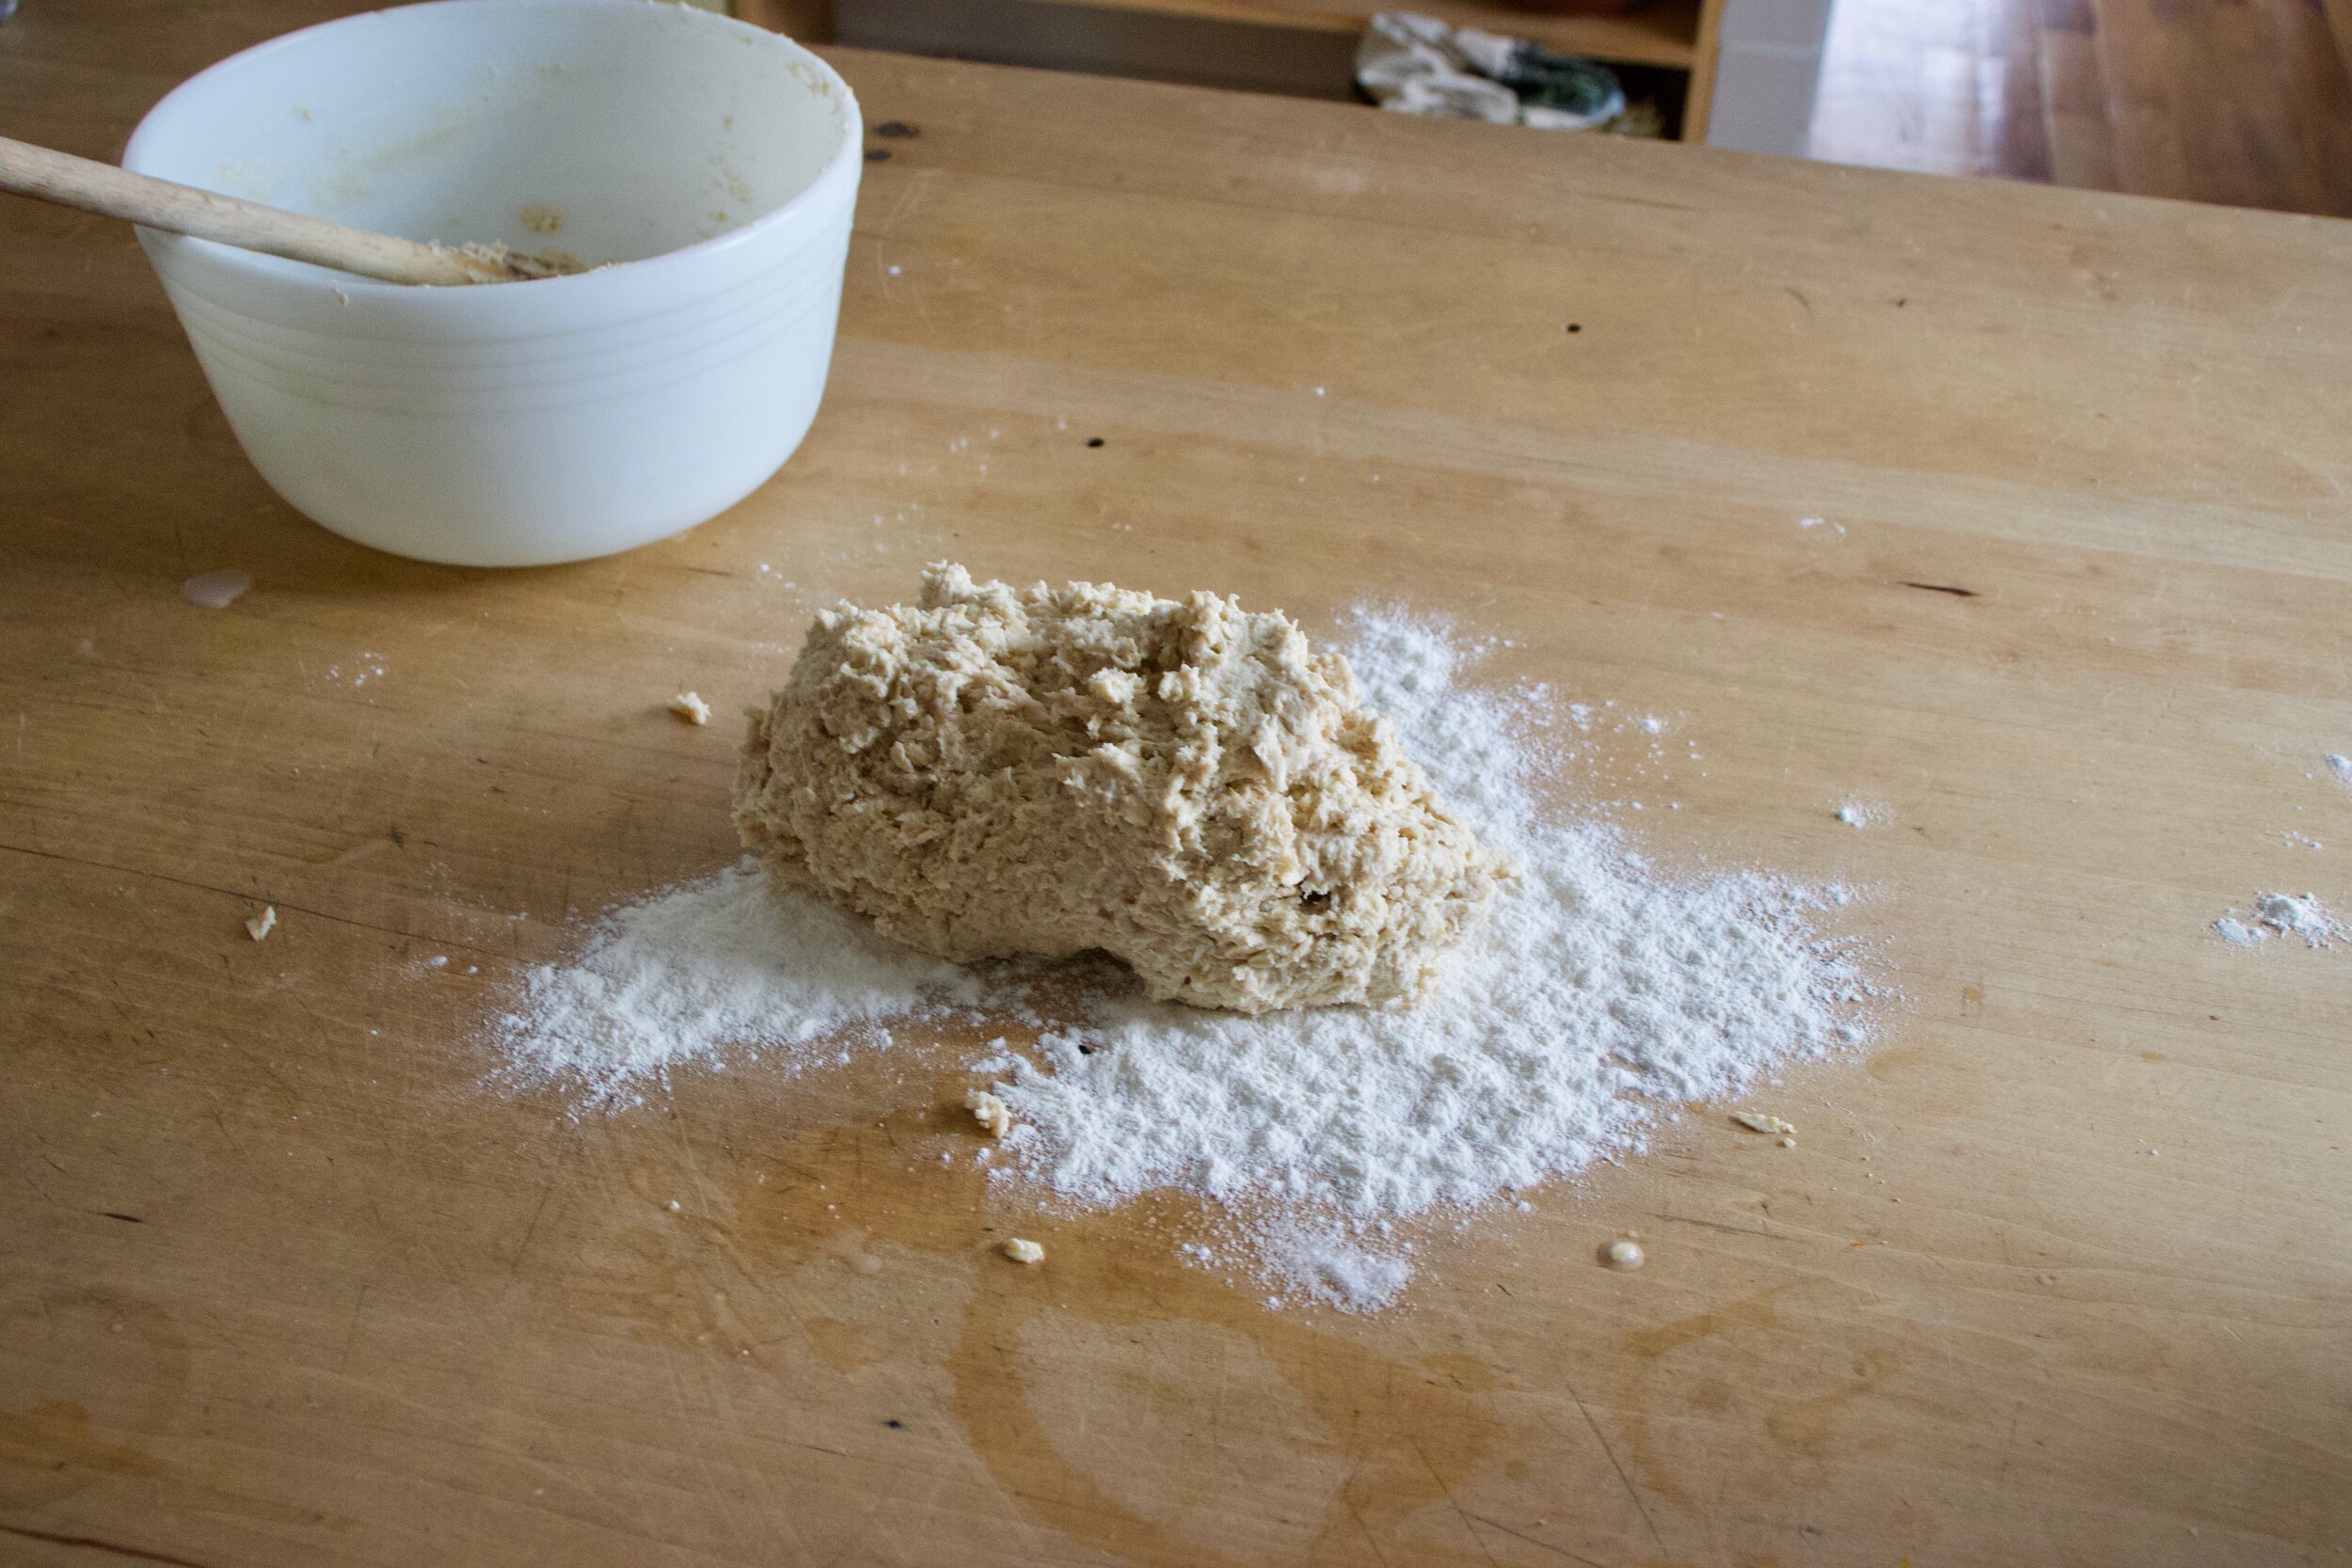
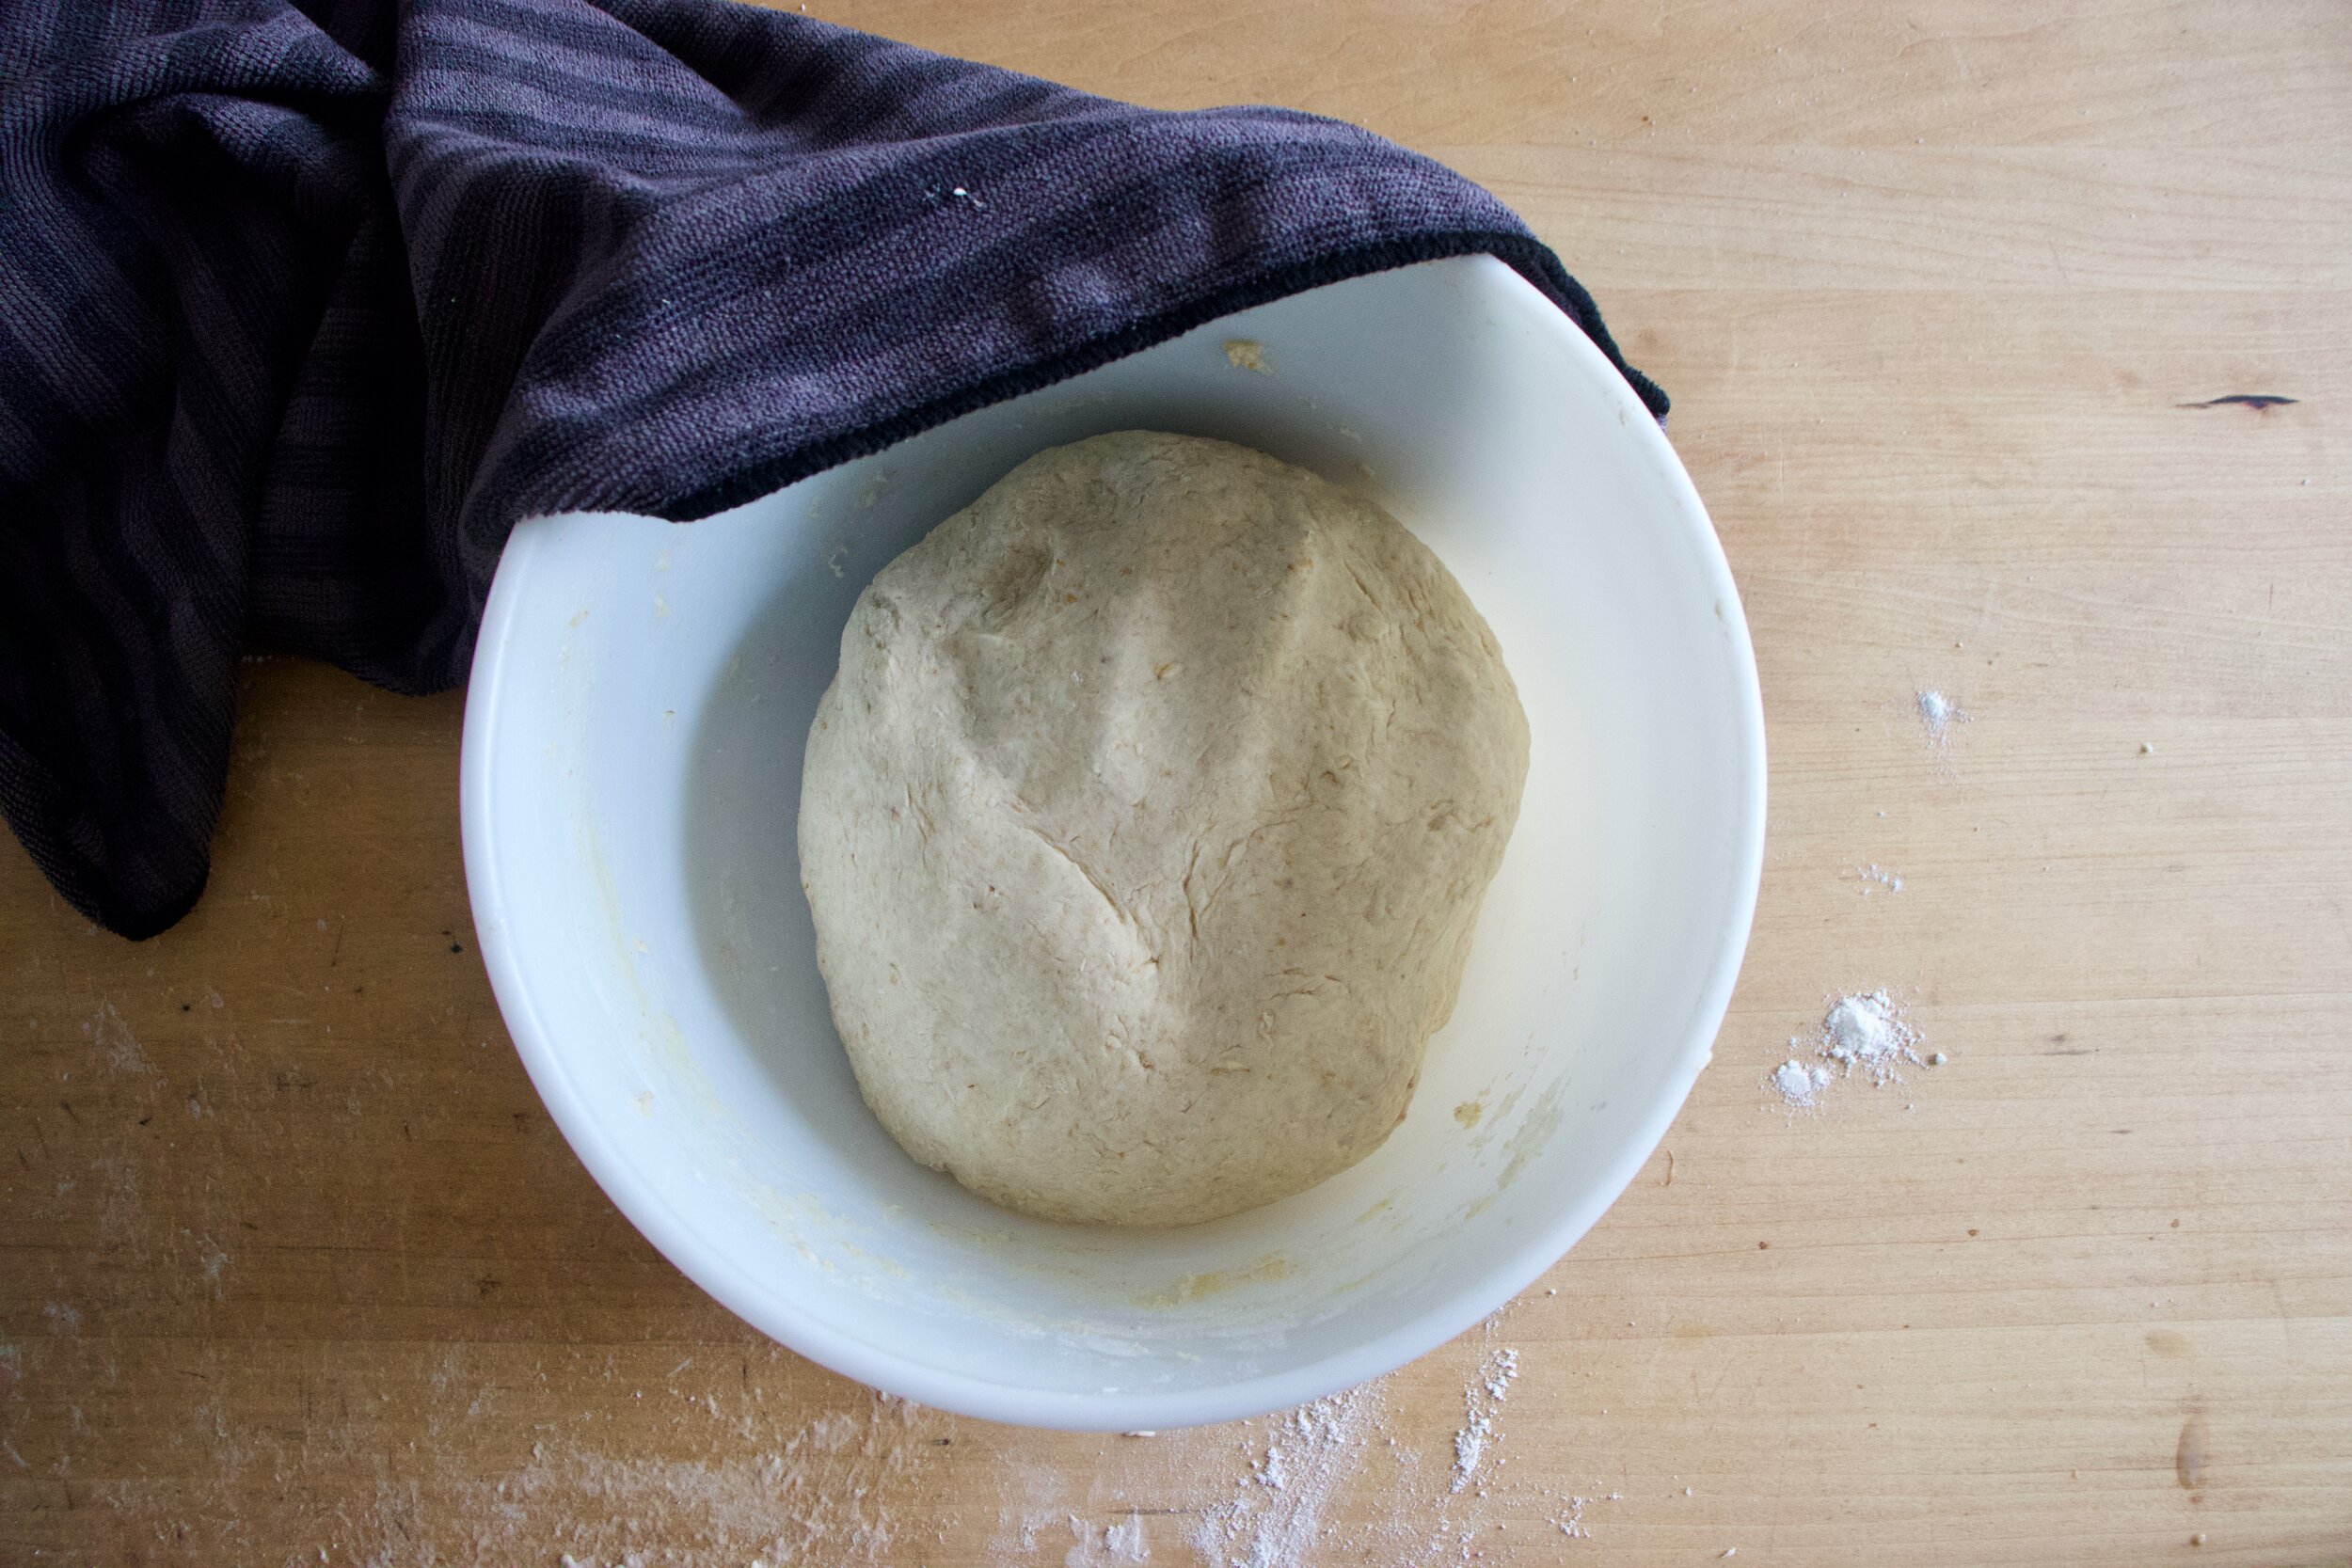
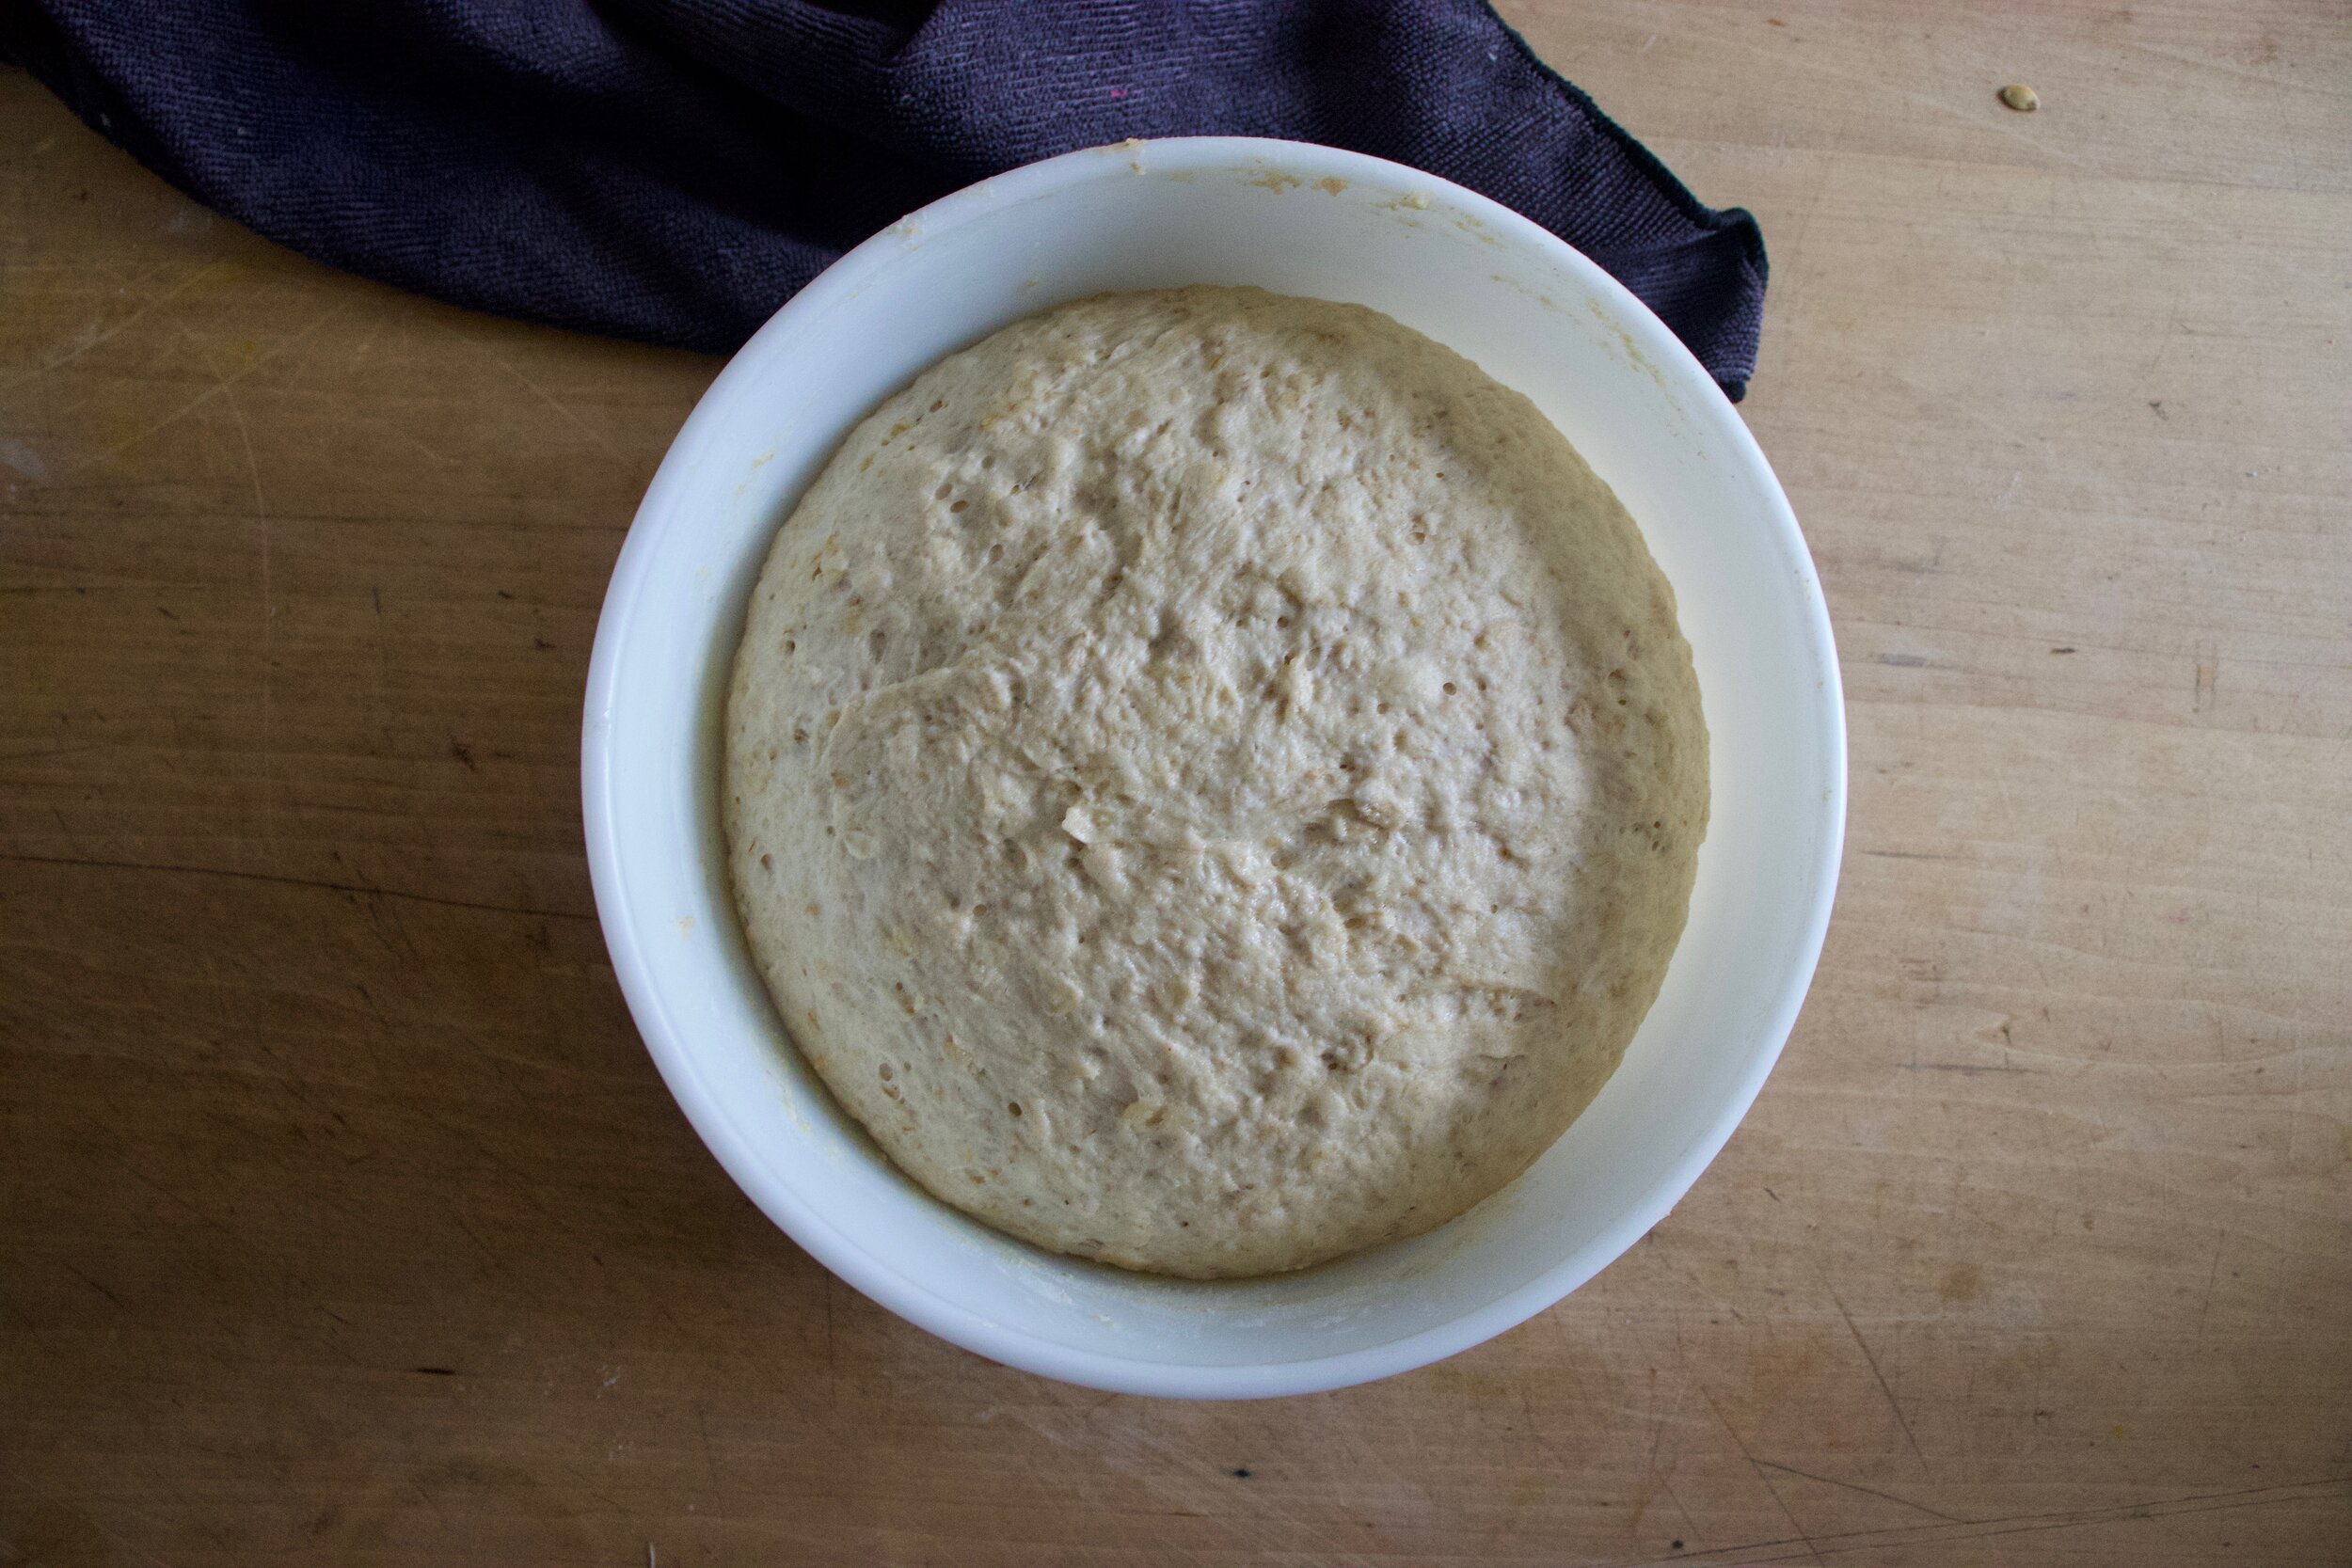
Make dough. Whisk together the dry and grate the butter into it. Toss around with a fork and drizzle in ice water, a tablespoon at a time, until dough looks a little shaggy but can kind of smoosh together into a dough. Dump the dough out onto a piece of plastic wrap and gather together into a tight disk. Wrap completely and place into fridge to rest for about an hour. Also can be made a day or two in advance.

IMG_1997.jpg
IMG_2000.jpg

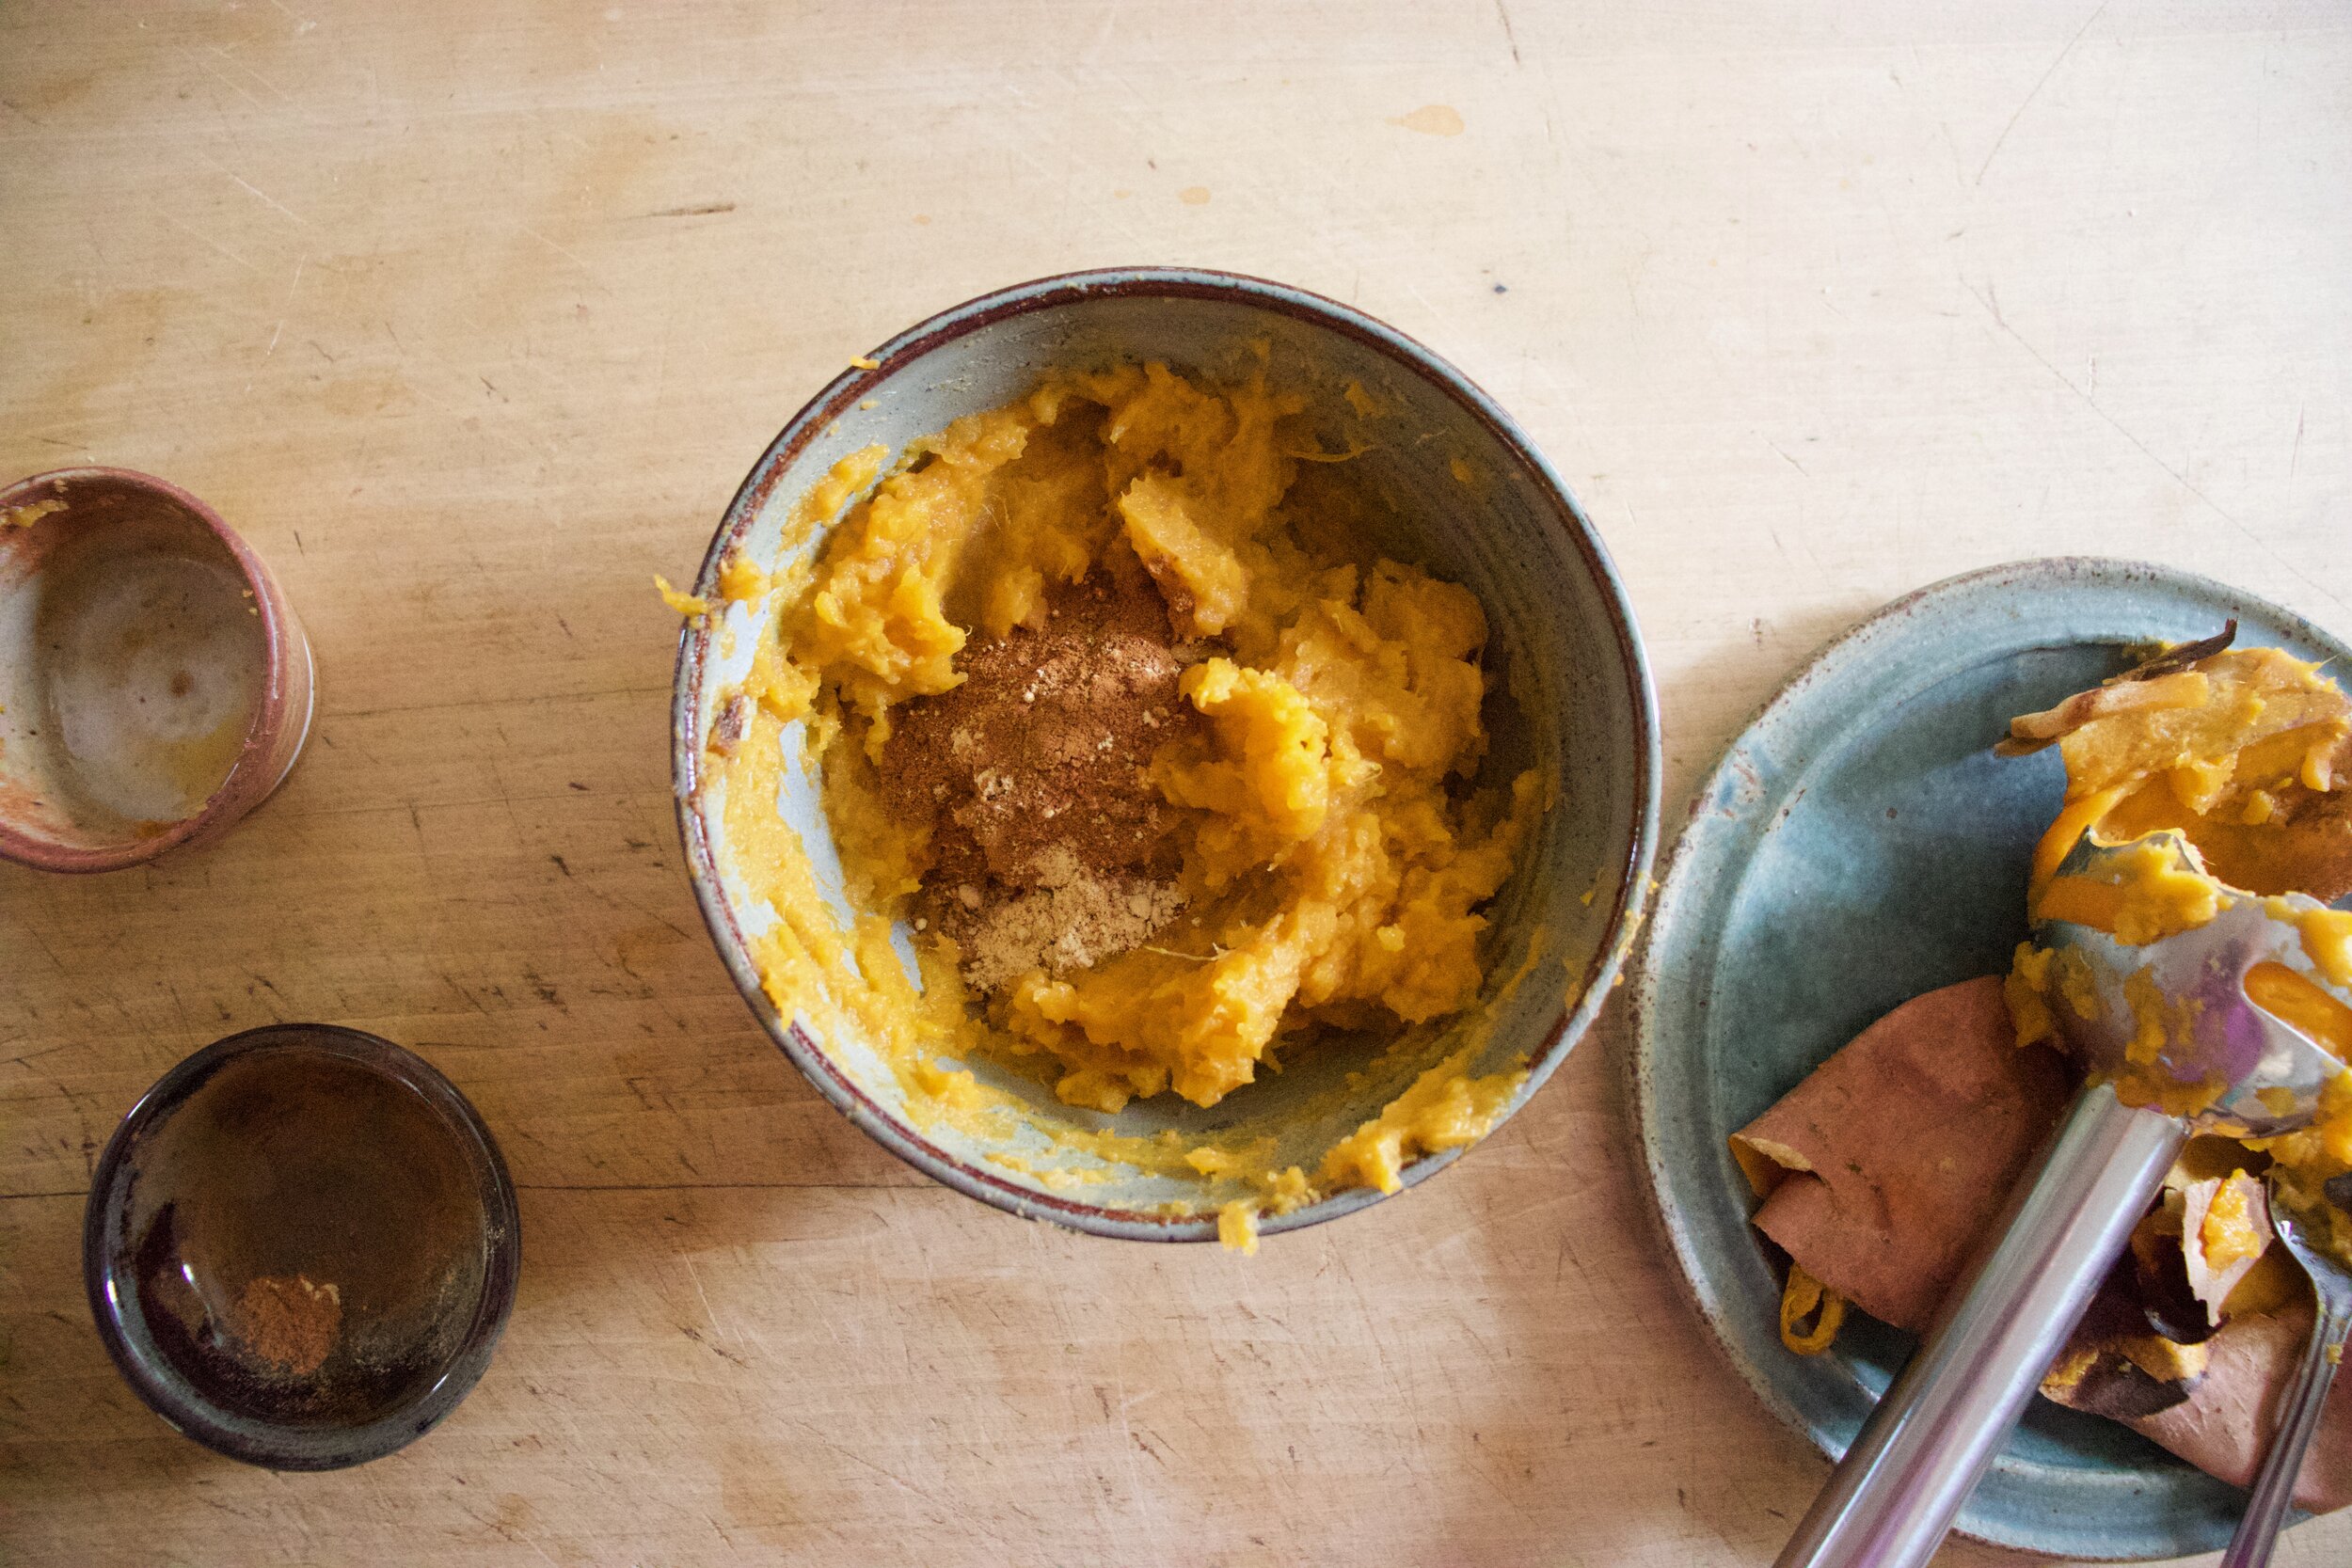
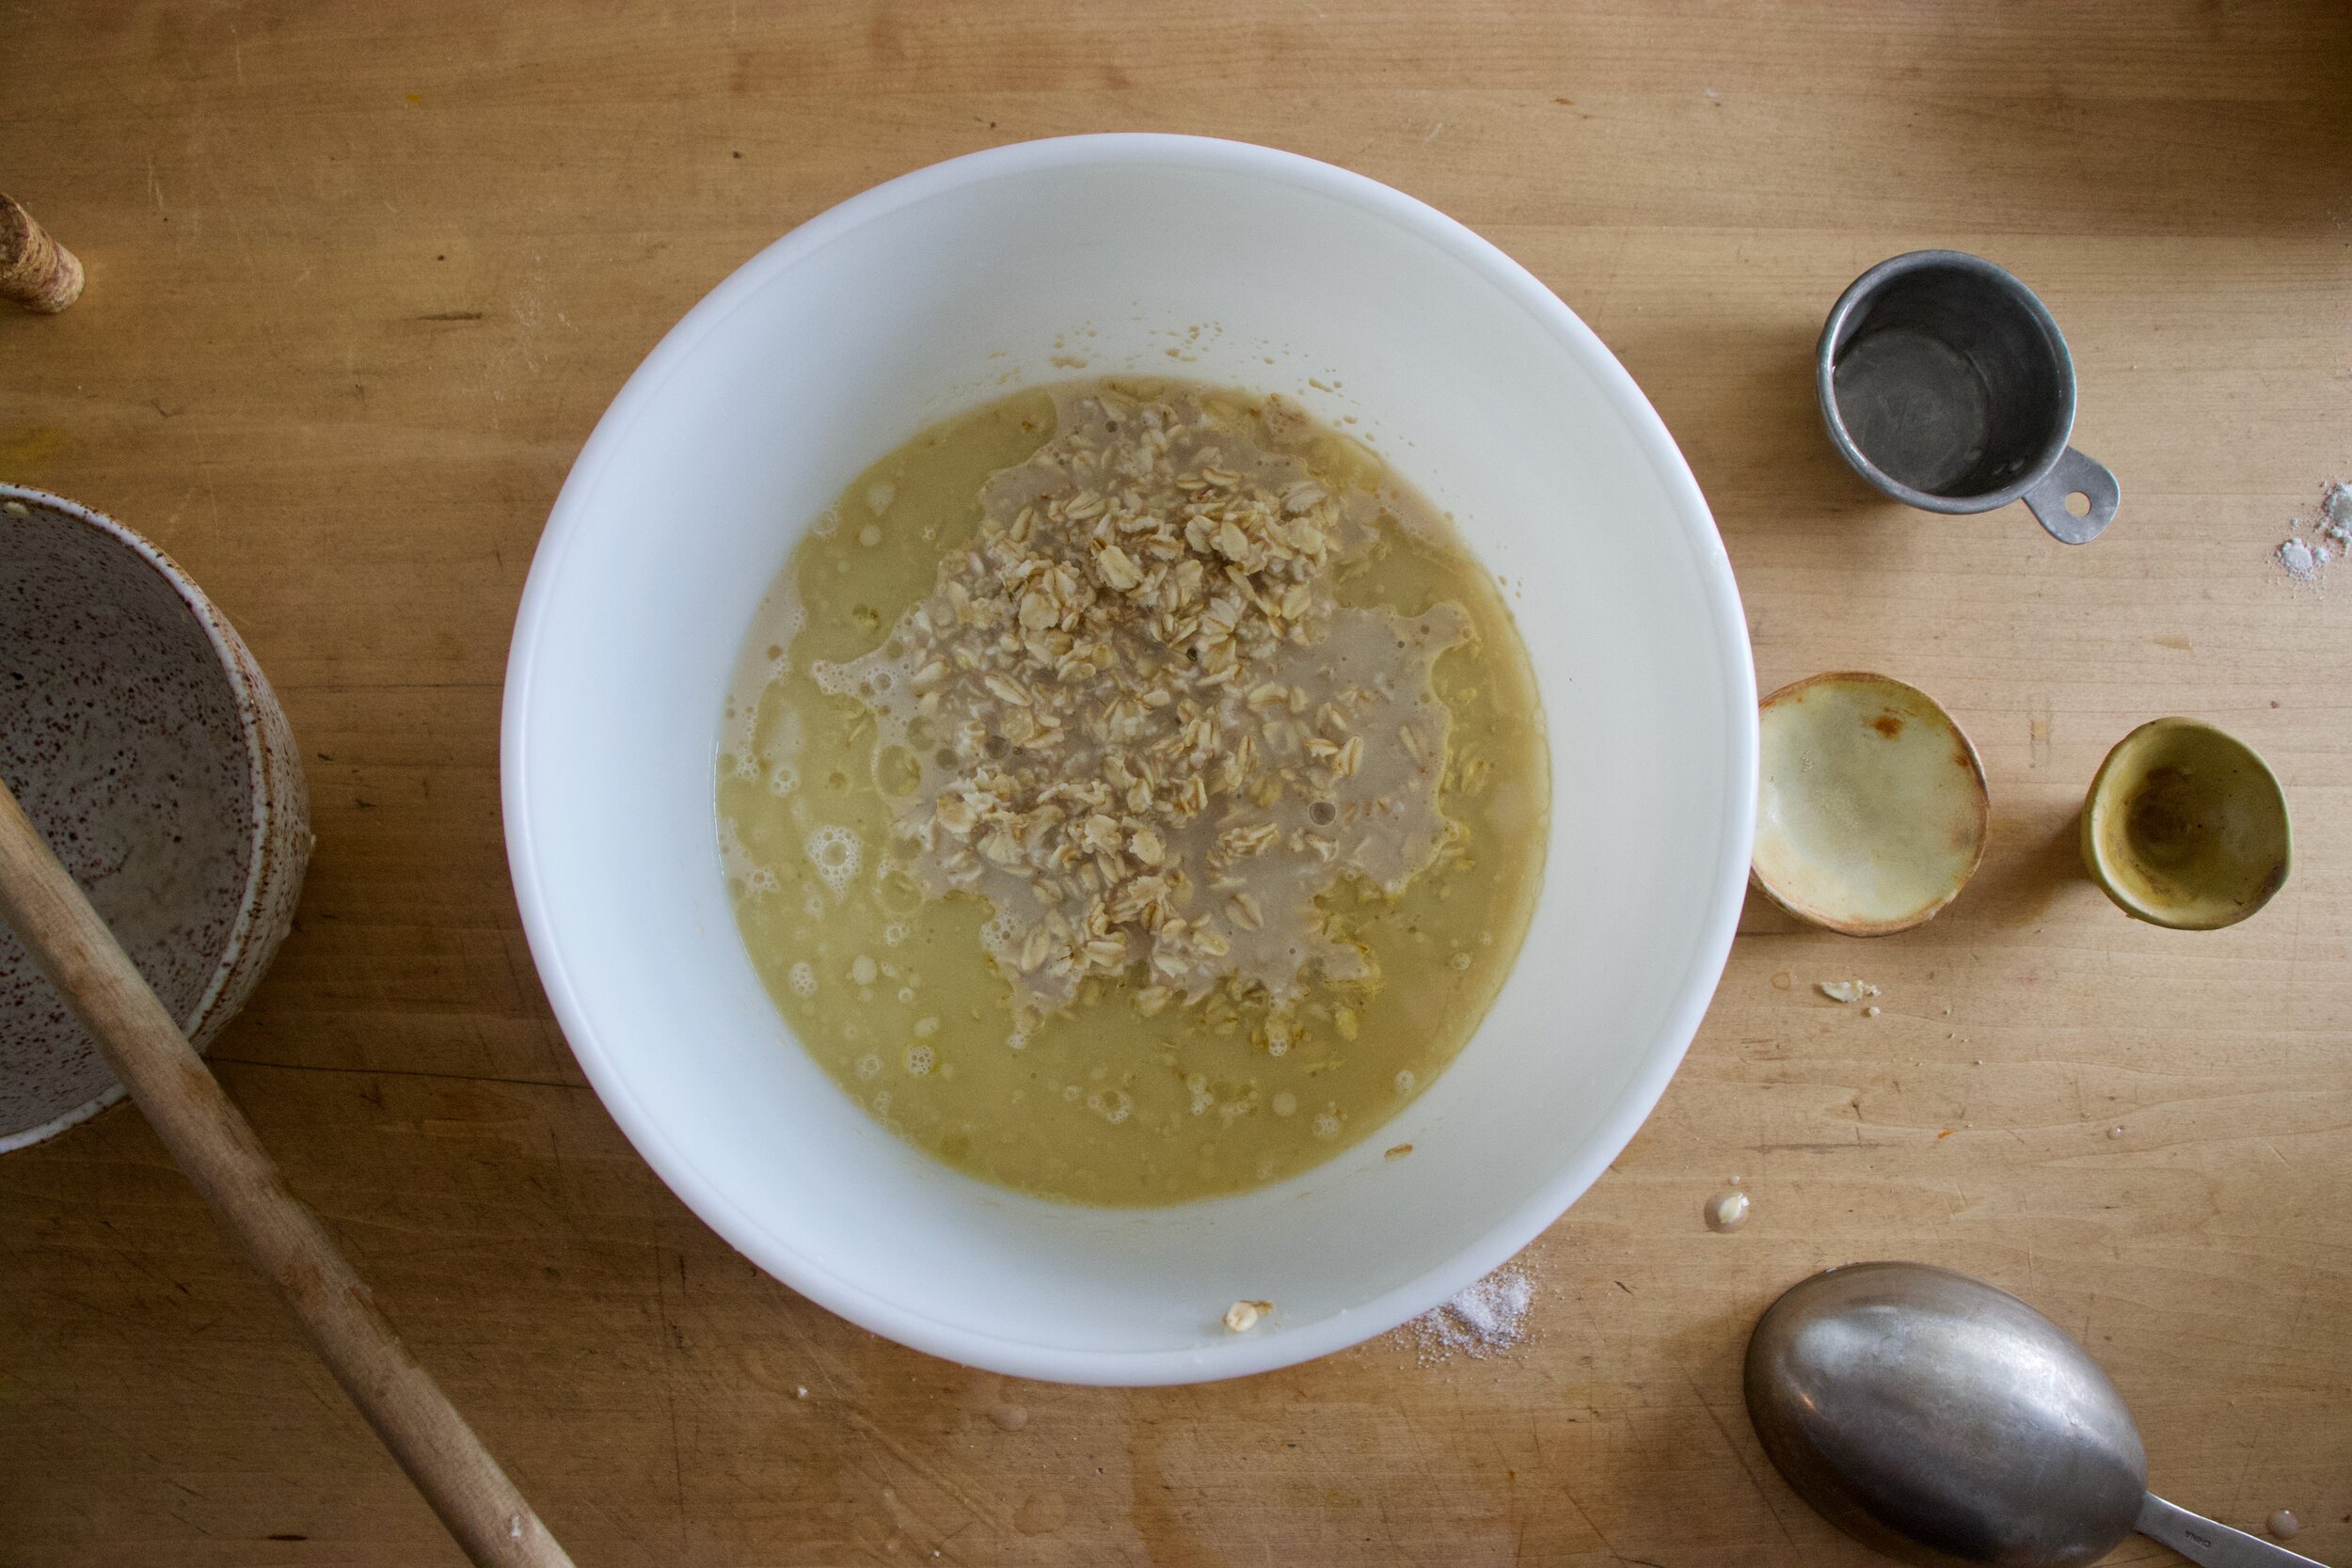
Filling. Just scoop baked sweet potatoes into a bowl, add in the spices and maple, and blend (use a hand blender or normal blender) until mixed and smooth. You could actually just mix it with a fork too if you want, just won’t be as smooth.

Once dough has chilled, place on a lightly flour surface and roll into a large rectangle roughly 12x14 inches.

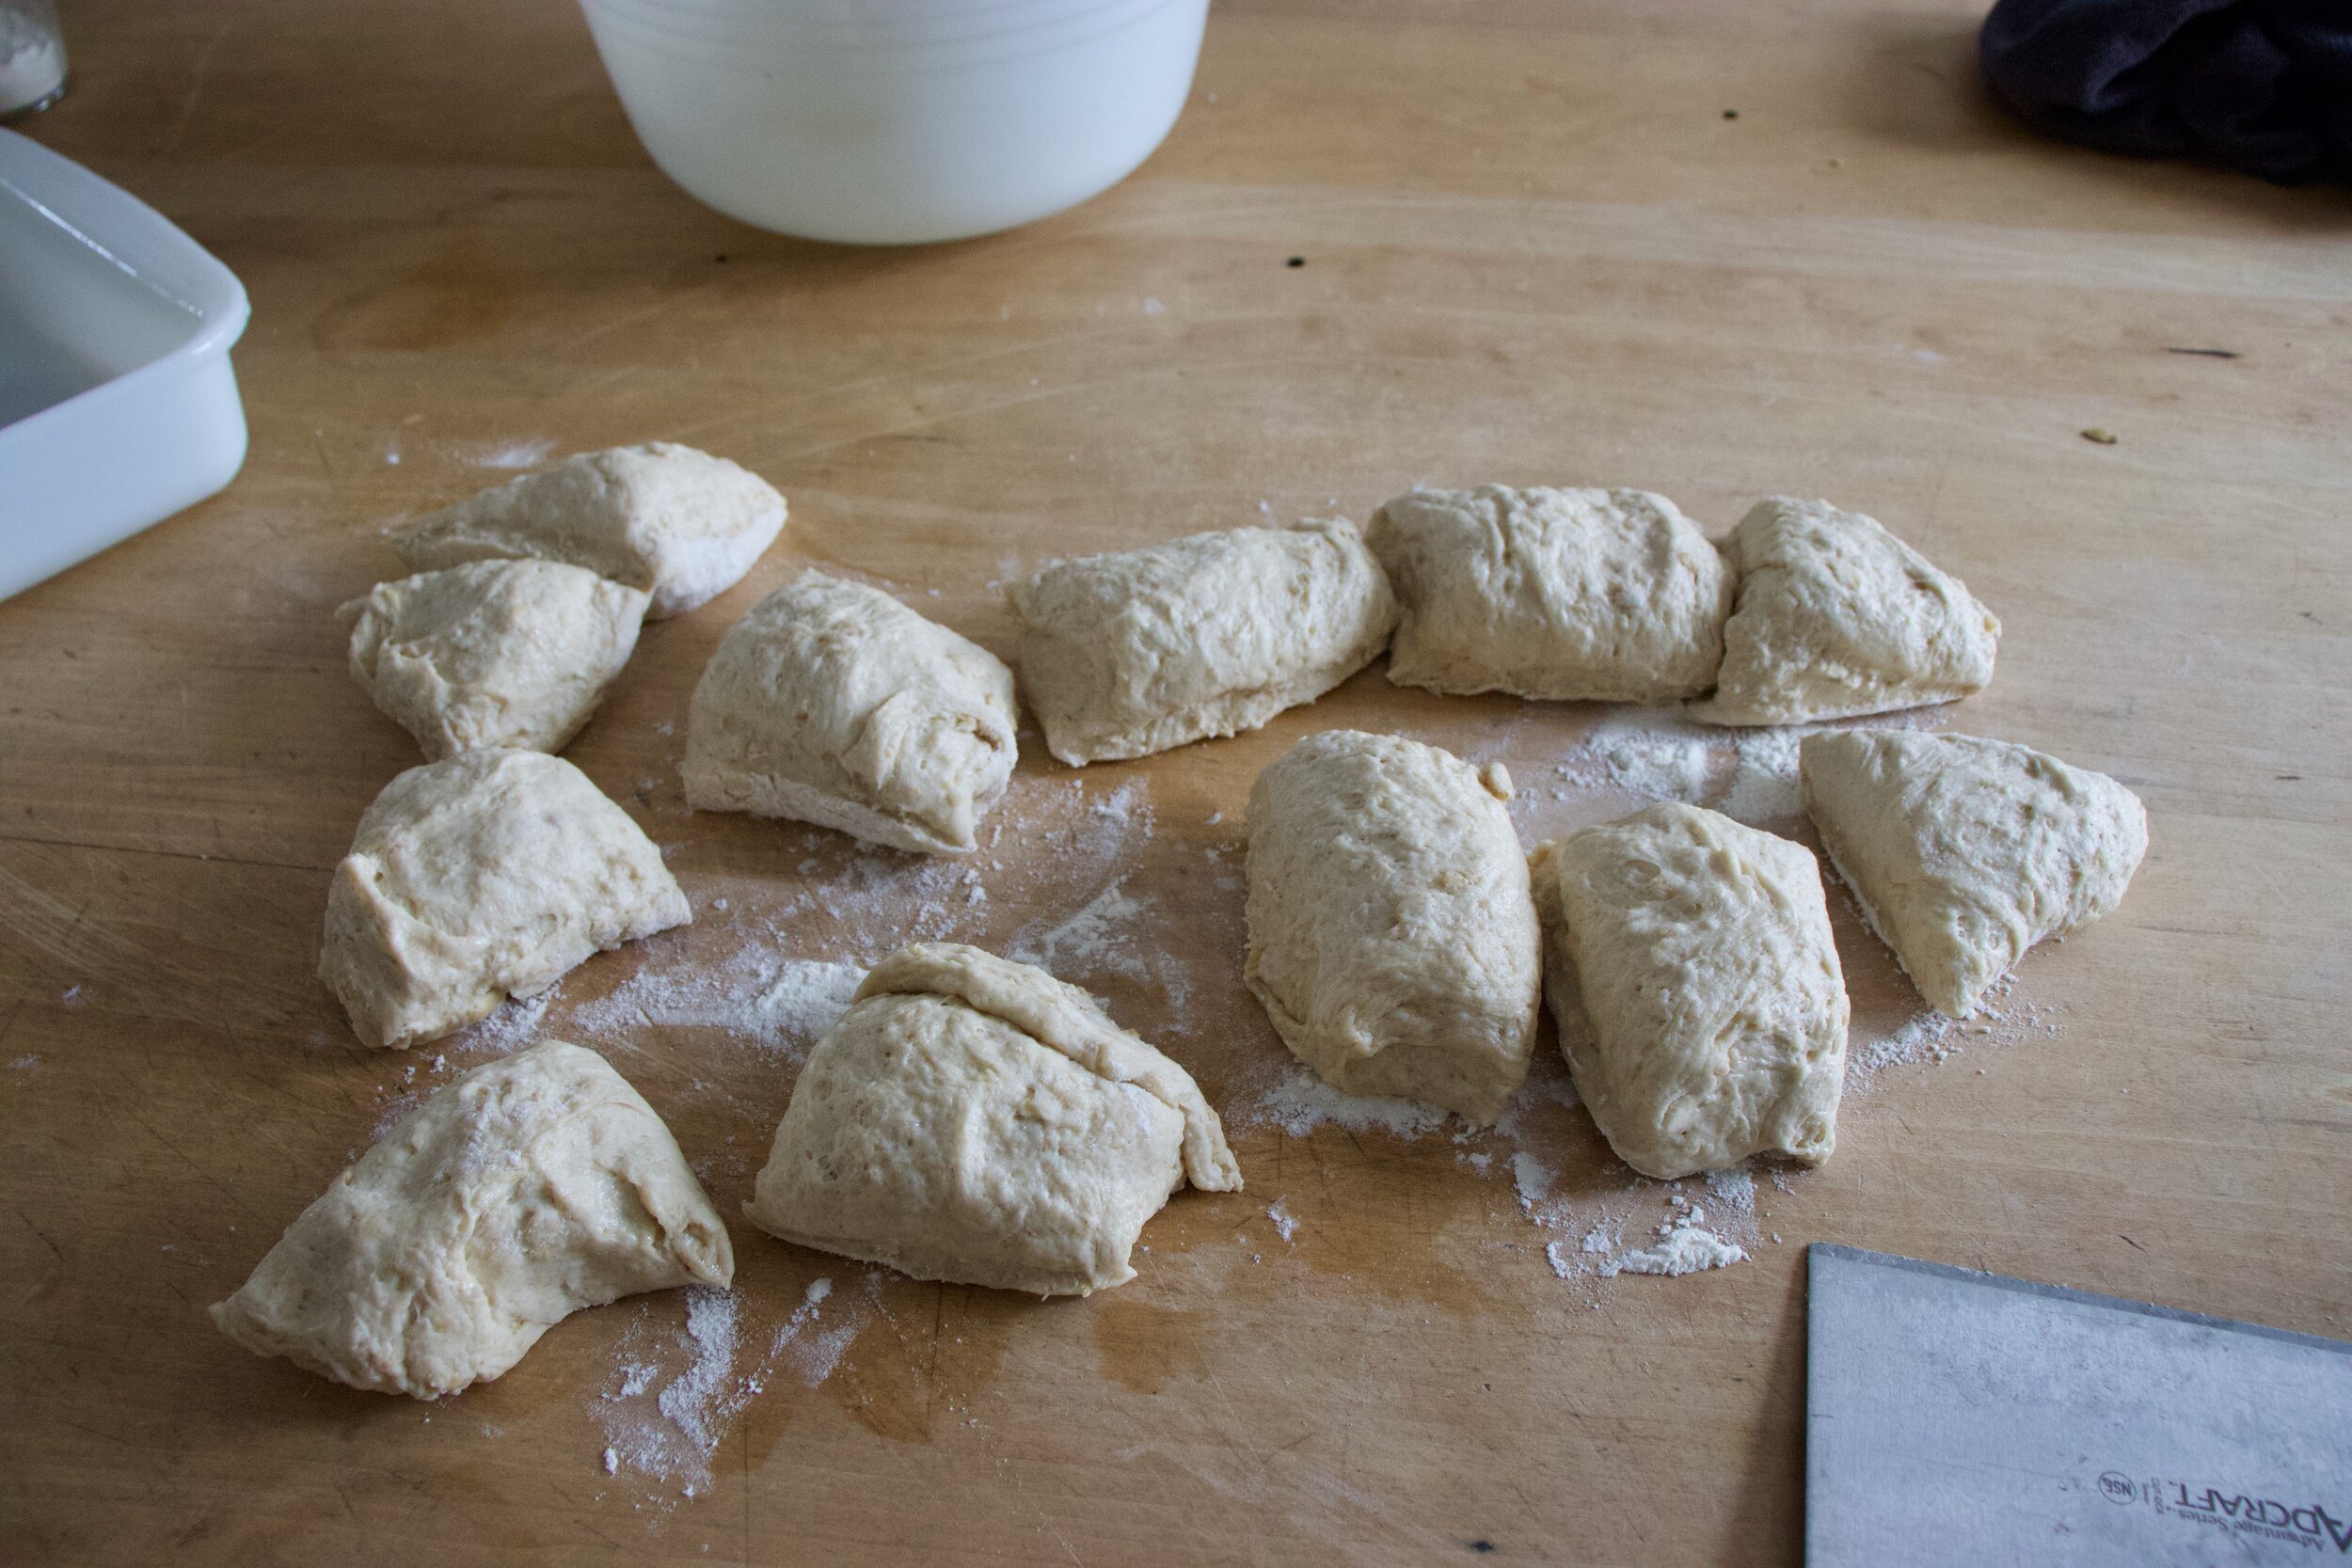
Cut down the center then each side into 4 rectangle pieces.

Scoop filling onto each piece, fold in half and crimp the edges closed with a fork. Poke the tops so they don’t explode, and place on a baking sheet. Once they are all filled and on the beige sheet, pop them into the fridge for about 15 minutes and preheat oven to 350.

Once oven is hot, into the oven they go. Bake for about and hour, give or take a minute or 5.

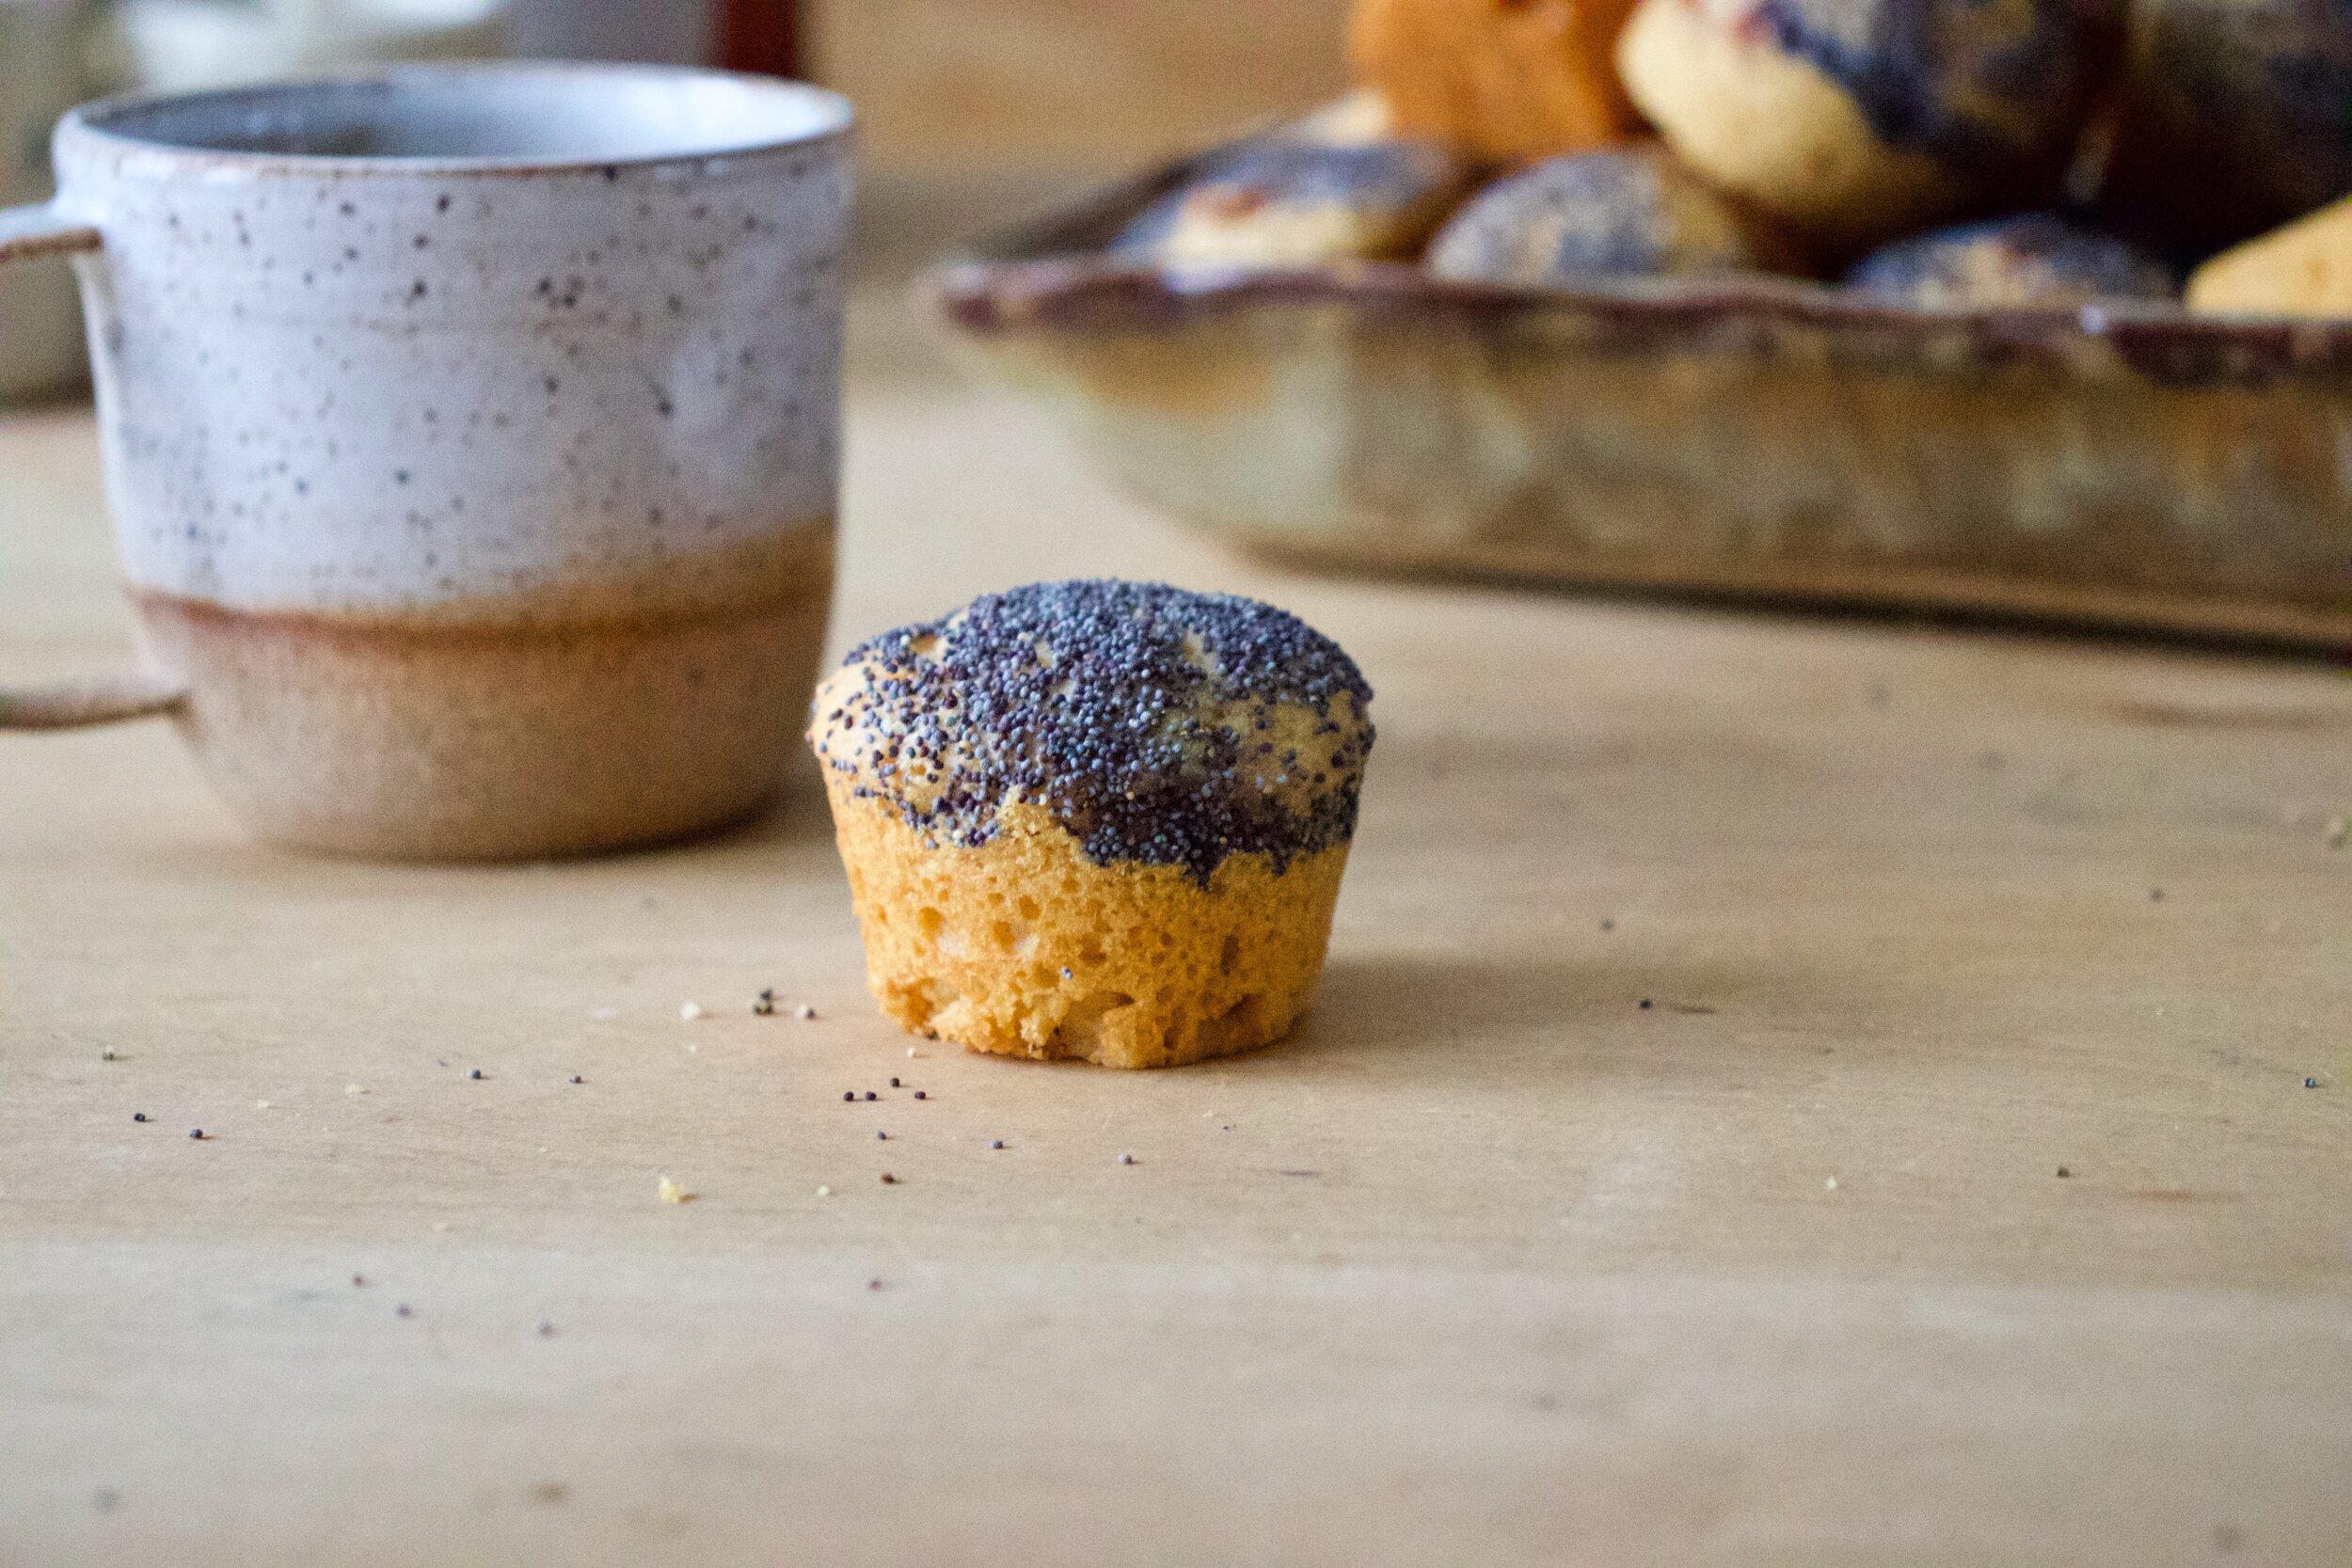
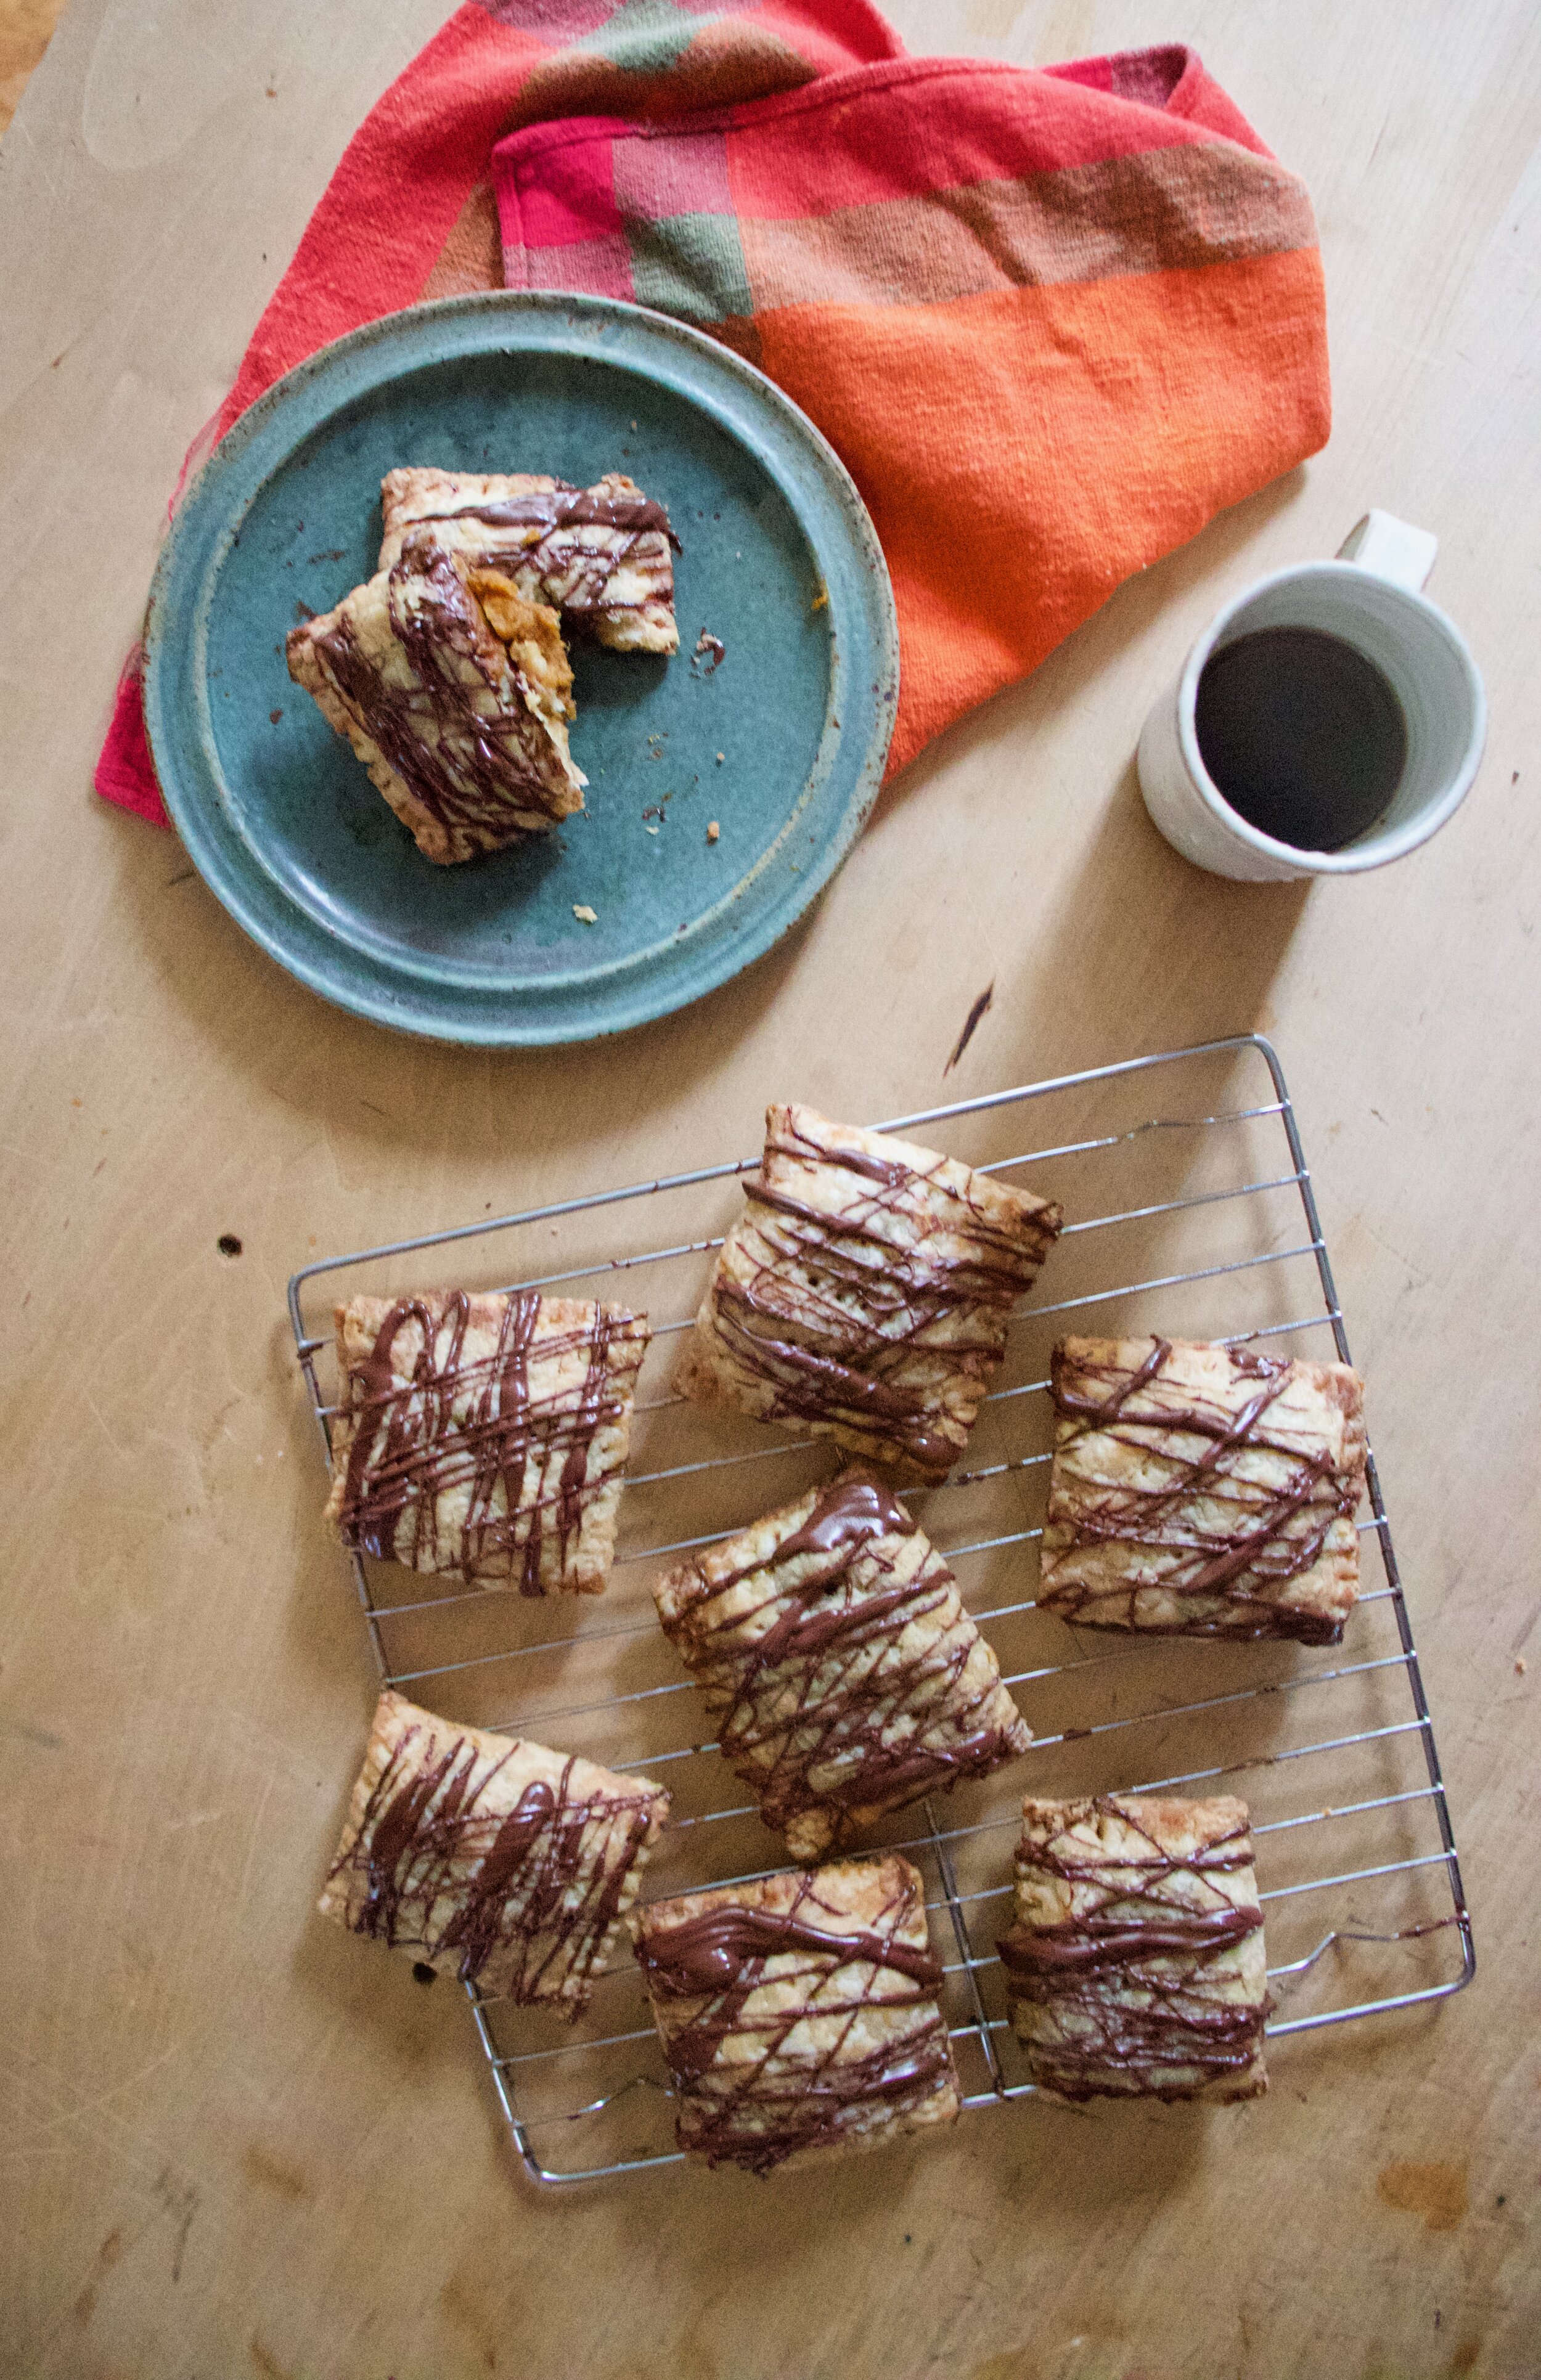
Now would you look at that. Golden brown and damn near perfection. Get them off baking sheet and onto a metal rack to cool.

IMG_2049.jpg
IMG_2052.jpg

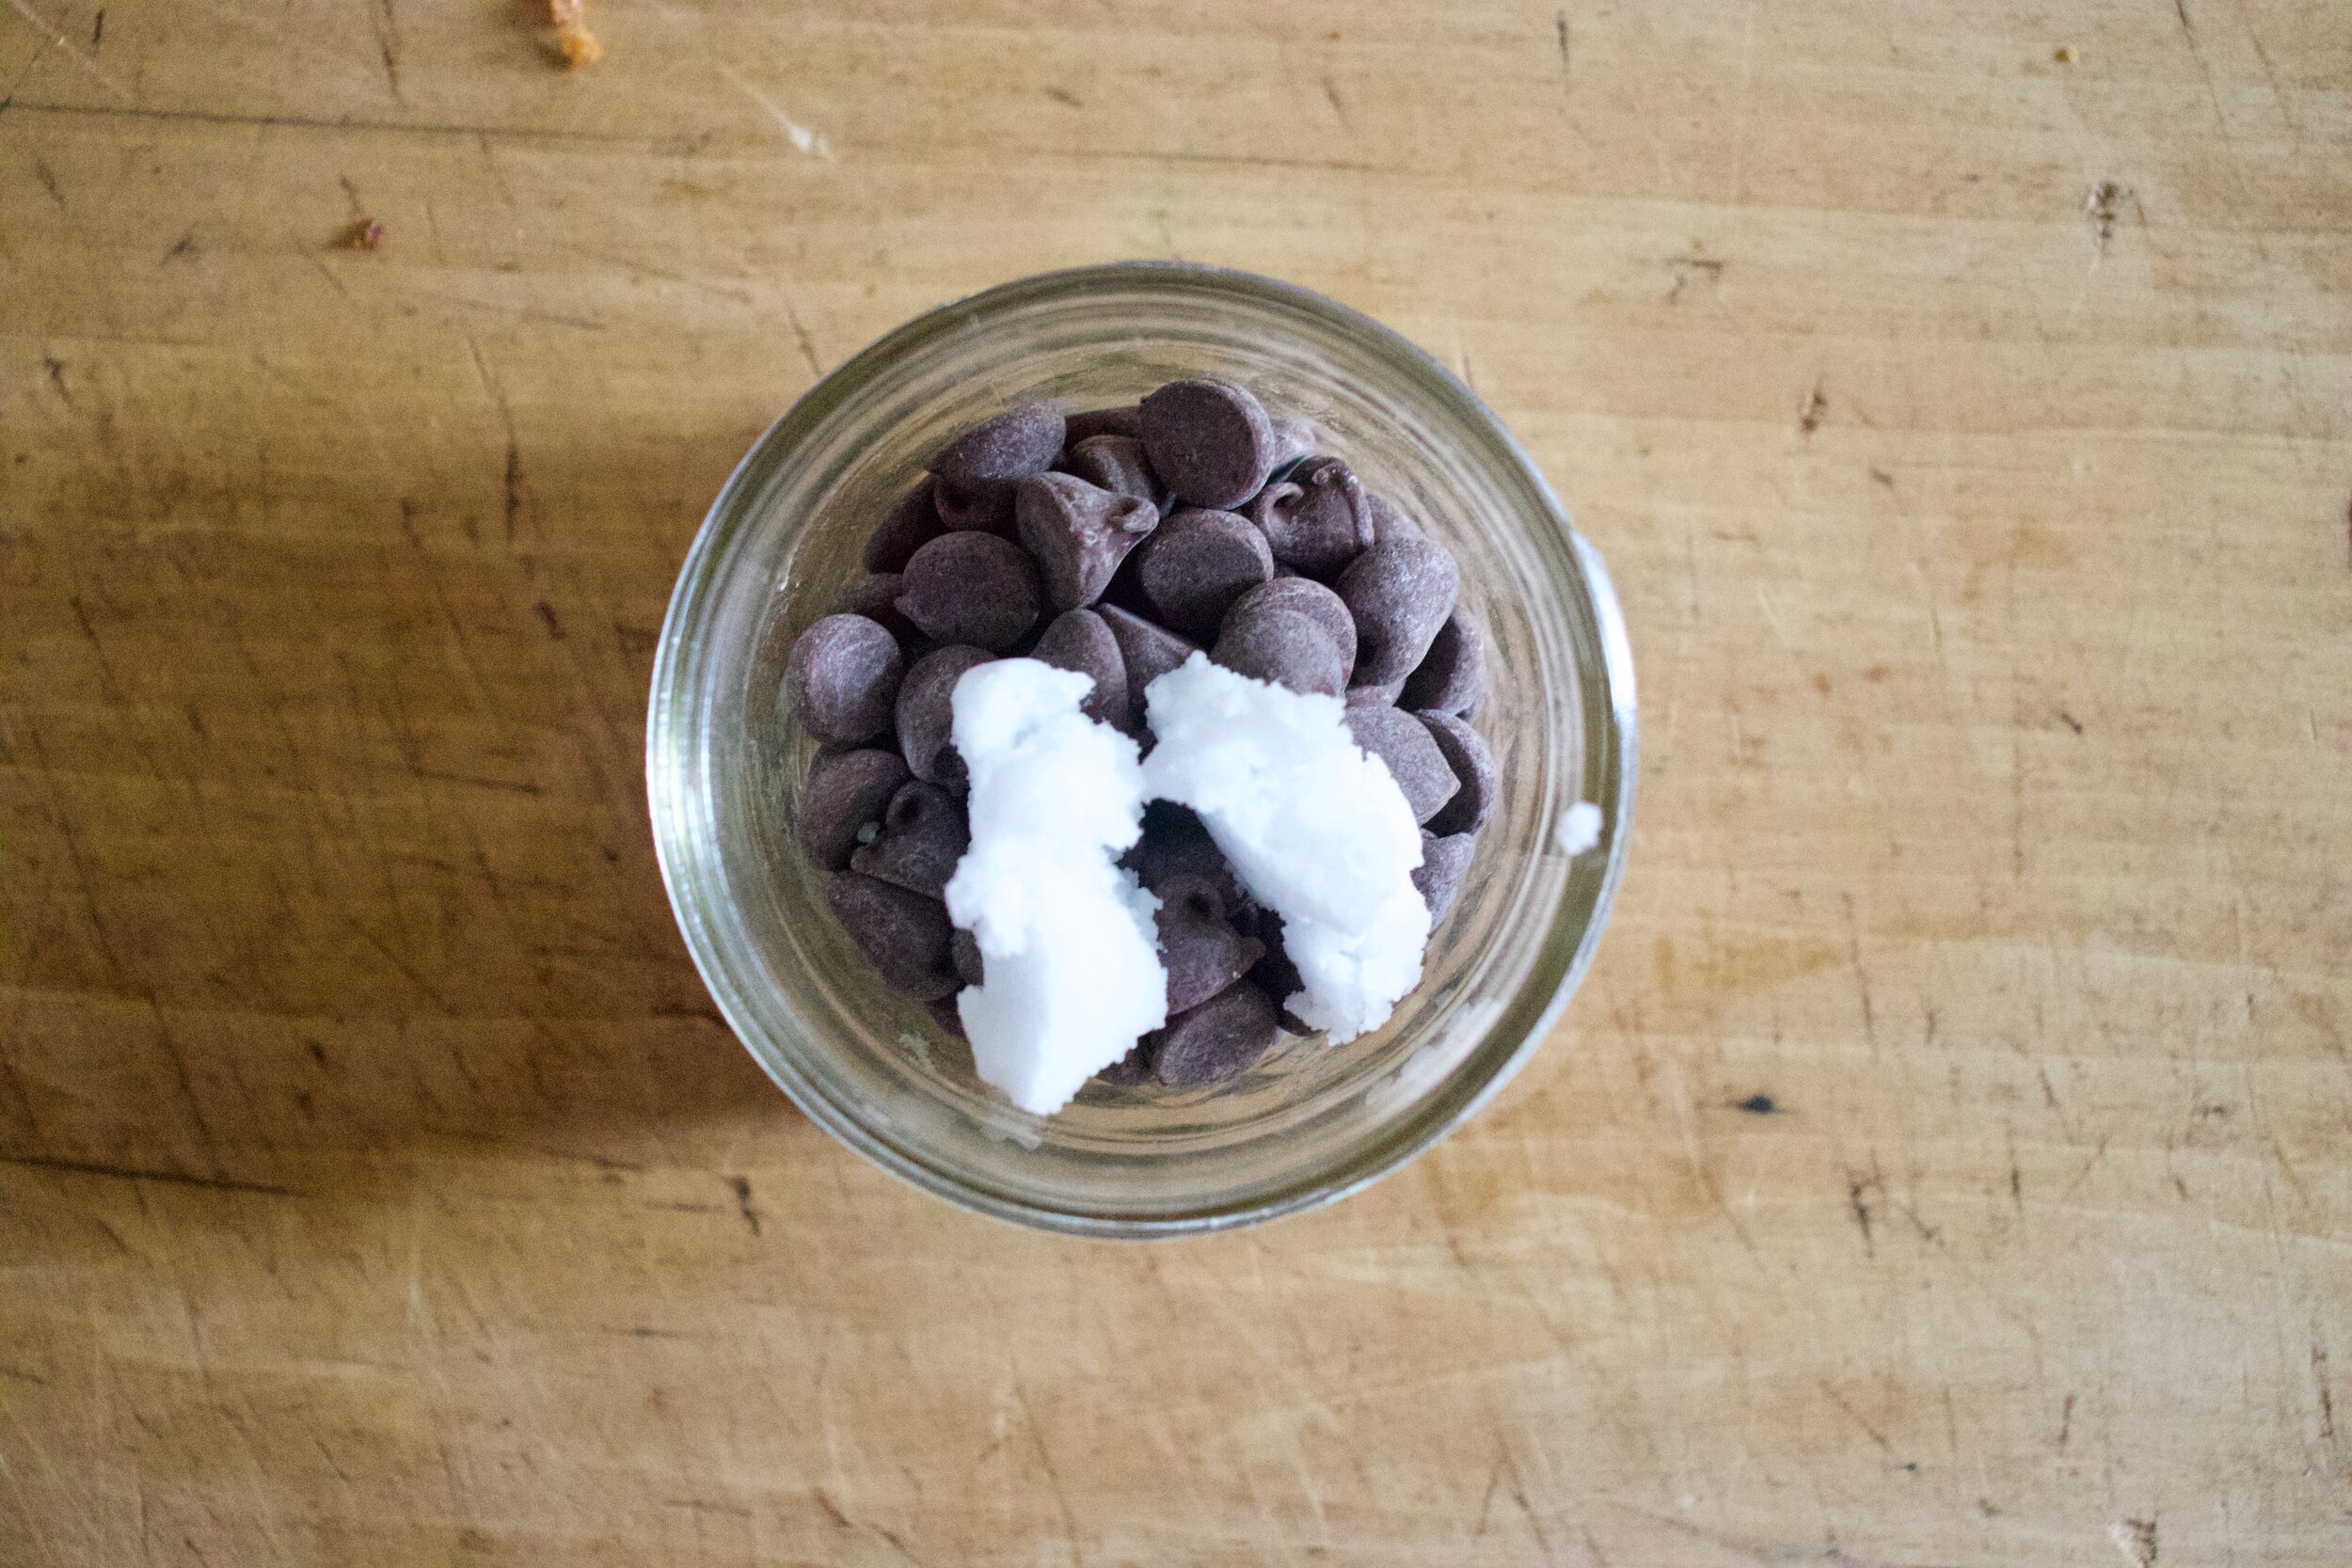
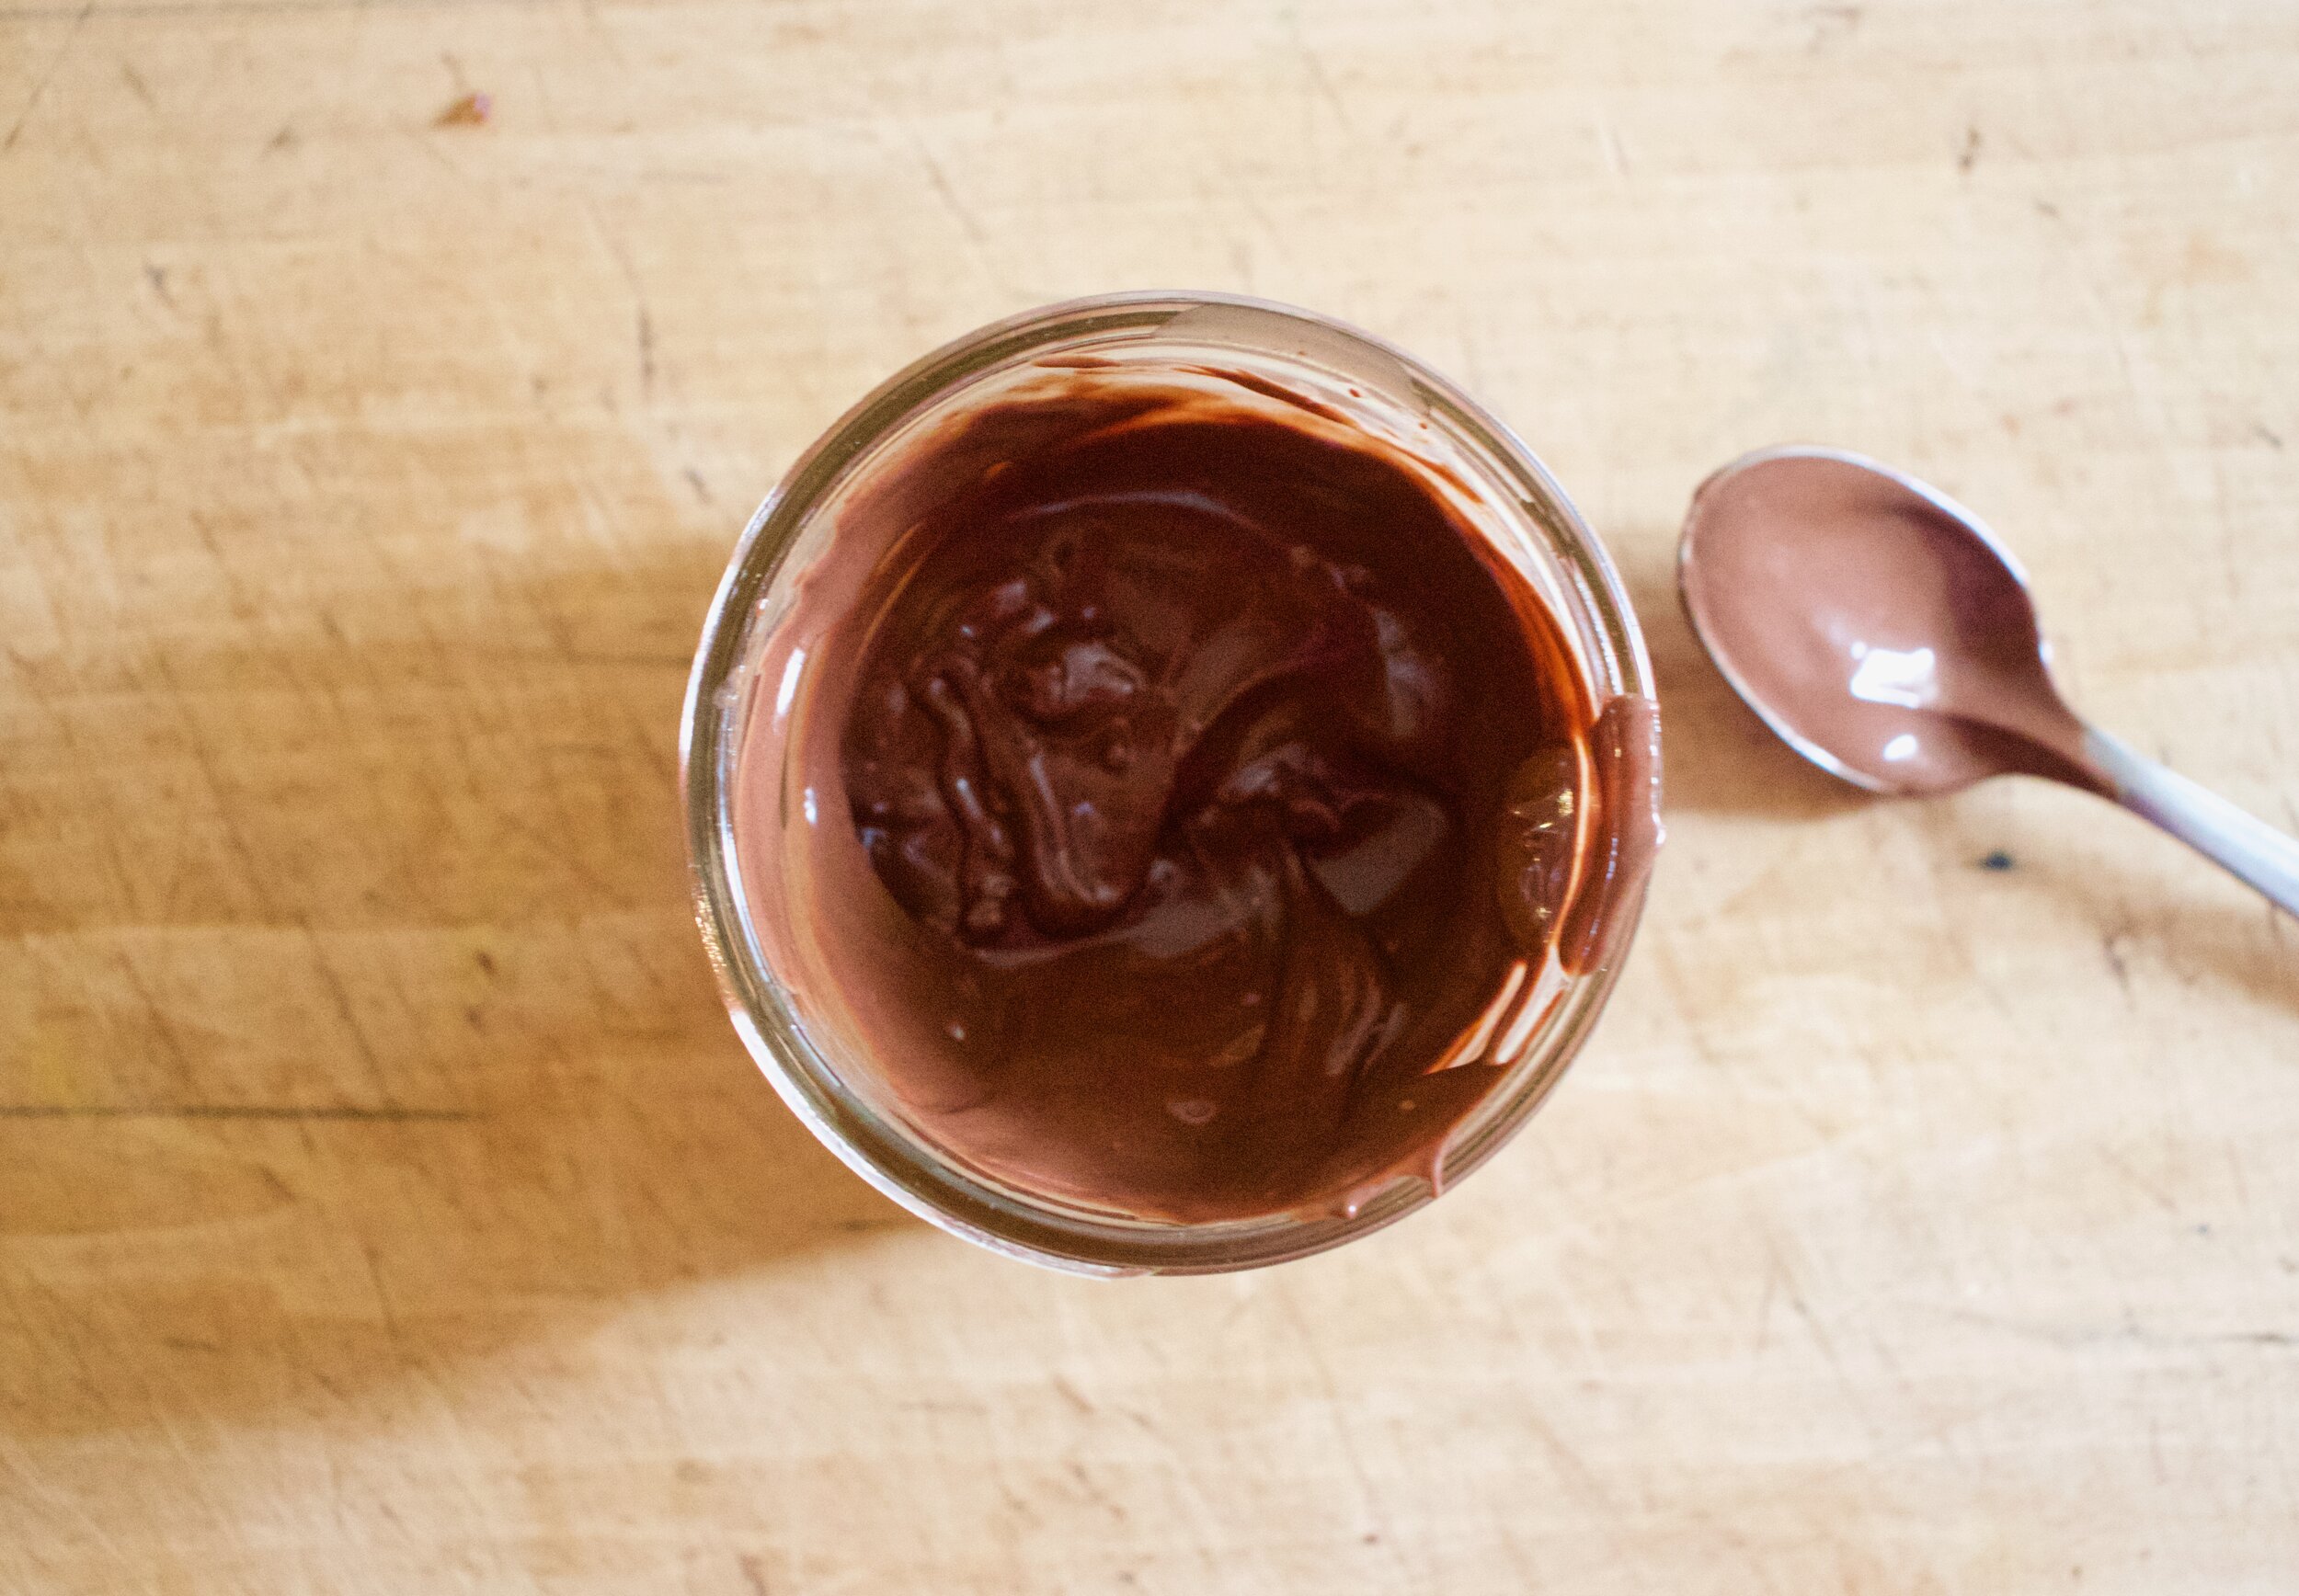
While they are cooling, make up a little chocolate drizzle situation. Chocolate chips and coconut oil. Just pop into microwave (or do it on a stove) for 30 second increments until mostly melted. Stir around until smooth and drizzle able.

Then drizzle, all over. Make it nice!

That is it. You now have hand pies and you now eat one.

Happy Holidays!

-C


Sweet Potato Hand Pies

makes 8 hand pies

  • 1 1/2 cups all purpose flour

  • 1/2 teaspoon salt

  • 1/3-1/2 cup ice water

  • 1 stick or 8 tablespoons vegan butter, FROZEN (country crock vegan butter works amazing, but so does earth balance)

  • 1 tablespoon brown sugar

  • 1 1/2 cups sweet potato puree (Around 2 large baked sweet potatoes)

  • 1 tablespoon maple syrup

  • 1 1/2 teaspoon cinnamon

  • 1/2 teaspoon ginger

  • pinch of nutmeg

  • 1/3 cup chocolate chip

  • 1 teaspoon coconut oil

Start by making dough. Whisk together the flour, brown sugar, and salt. Take the frown stick of butter and grate it into bowl. (Frozen grates so much better). Mix gently with a fork while drizzling in ice water until the dough starts to look shaggy. Grab a clump and smoosh it together. If it completely crumbles, add a little more water until it can smoosh into a dough. Dump it out onto a piece of plastic warp and pulling up the sides, gather it into a tight disk. IF it is still really crumbly, toss in another tablespoon of water. Wrap the dogs tightly and smoosh it into a rectangle and then place in fridge for about an hour. Can also be made a few days in advance.

For filling. Blend together sweet potato puree, the spices, and the maple syrup until smooth.

To assemble. Roll out chilled pie dough into a rectangle around 12x14 inches. Cut the half the long way down then cut each side into 4 equal sized rectangles. Take the filling and place about 2 tablespoons onto the end, leaving a little lip, of each rectangle. Fold in half and with a fork, feel the edges. Poke the tops with fork. Place the assembled pies on a baking sheet and pop the sheet into the fridge for 15ish minutes.

Preheat oven to 350.

After the fridge and when the oven is hot, pop the pie into the oven. Bake for about 60 minutes or until the crusts are golden brown and bottoms are a nice dark(not burnt) brown.

Remove from oven and place pies on wire rack to cool.

For chocolate drizzle just place the chocolate chips into a microwave safe bowl with the coconut oil. Heat for about a minutes or so until the chips start to melt and then mix together until it is smooth and drizzlable. Now drizzle the chocolate all over cooling pies.

And that is it. You can let the pies cool completely and the chocolate will set so it won’t smear, but you can also jus start eating them.

Pies are good for 4-5 days left on counter but really, they will not last that long.

  • 350 for 60 minutes

In Vegan, Sweets, pie, holiday Tags Sweet Potato Hand Pies, Sweet Potato, Country Crock Vegan Butter, pie, hand pies, thanksgiving, Vegan, plant based, easy, desert, holidays, pumpkin, dairy free, king Arthur flour, Food 52, chocolate
Comment

Butternut Squash Apple Soup

November 7, 2020 Colleen Stem
IMG_1674.jpg
IMG_1650.jpg

Soup makes everything better and that friends is a fact. Seriously think about it. When you are cold, a hot cup of soup will warm you. Are you hot, a cold cup a of soup will cool you down. Feeling a little sick or a bit blue? Of course you need soup. And if you are happy as a calm, well soup will just make you happier. There is not one situation were soup doesn’t enhance the situation. Unless it is shitty soup. Or you asked for pizza and got soup, But pizza soup..I bet you would like that.

This butternut squash apple soup is not shitty, it is fantastic so you are good. Creamy and lush and packed full of flavor without being overbearing. It feels indulgent but it is not for it is made of basic ingredients that may sound a little simple, but sometime simple is all you need to really pull a deliciously flavorful soup together. The butternut, when blended, gets super thick and creamy. The apple adds a nice brightness and depth, and there is onion and spices to round it all out. It is just a great soup. And even better for me, I made it the other day when I woke up to the first snow. It really was the best just looking out the window, seeing snow, eating soup.

Snow and soup. My happy place. HA!

Now to the soup!

IMG_1550.jpg

The stuff. Butternut squash, a couple apples, an onion, ground ginger and thyme, apple cider vinegar,a couple cloves of garlic, and salt and pepper. Red pepper flakes if you want a little heat.

IMG_1562.jpg
IMG_1574.jpg

Start by dicing up the onion and garlic. Small pieces are good so you don’t need to be fancy. just cut it up and toss it into a big pot along with the ginger and thyme. Place on the stove on medium heat, add a splash of water, and let it start to cook down.

Now apples. Remove cores and chop 3/4 of the apple into chunks. Reserve a piece and cut into thin pieces. Place the pieces into a bowl and dump the apple cider vinegar on top.

And now the squash. Peel or cut skin from flesh (I have left the skin on before but it gets a little creamier without it so I cut it off and roost the skin separately… The skin is my favorite!) then cut squash into smaller cubes.

IMG_1588.jpg

Once the onions soften up a bit, add in the squash and apple. Add in water and season with a pinch of salt and pepper. Bring heat to high and get water boiling, then place a lid partially on pot and turn heat to medium again. Let cook for about 40 minutes.

IMG_1595.jpg

Tender and falling apart. A few minutes before you take it off the heat, pour the apple cider vinegar from the reserves apples into the soup.

Now it just needs it to be blended. (Immersion or regular blender in small batches will do the trick)

Blended and creamy dreamy good.

IMG_1710.jpg

All is left to do is grab a bowl, ladling in soup, top with some sliced apple, a pinch of red pepper, and lots of black pepper.

Spoon? Why yes, that would be great.

Happy souping!

-C


Butternut Squash Apple Soup

makes 4-6 serving

  • 1 small butternut squash (about 4 cups cubed)

  • 2 Macintosh apples

  • 1 large onion

  • 2 cloves garlic

  • 1/4 cup apple cider vinegar

  • 3 cups water

  • I teaspoon dried thyme

  • 1 teaspoon ground ginger

  • red pepper flakes (optional)

  • salt and pepper

Start with the onion. Remove skin and dice it up into smallish chunks. Grab garlic, remove skin and cut into small pieces. Place it all into a big pot. Add in the thyme and ginger and add a few splashes of water just to wet the onions. Put the pot on stove on medium heat to start to sweat the onions.

Now grab apple. Remove cores. Take about 1/4 of a apple and cut into long thin pieces and place into a small bowl. Dum in apple cider vinegar and set aside. Cut the remaining apple into chunks.

Squash. Cut away or peel the skin, cut in half and remove the seeds (keep both the seeds and skin to roast and eat later) and cut the flesh into chunks.

Add the cut up squash and apple to the pot with cooking onions. Add in water, stir around, and turn heat to high. Once the soup starts to boil, partially place a lid on the pot and bring heat back down to medium. Let cook until the squash is tender and is starting to fall apart, which should take about 40 minutes. A few minutes before you take the soup off the heat stir in the apple cider vinegar from the cut up apples.

Once everything is cooked through it just needs to be blended either with a immersion blender or a regular blender. IF doing a regular blender, just be careful and do it in batches so you don’t burn yourself. Blend until smooth. Taste it and check for seasoning (salt and pepper).

And then you eat it. Ladle into bowls, sprinkle with pepper and red pepper flakes and top with a few pieces of pickled apple slices. Spoon to soup to face.

In soup, Vegan Tags Butternut Squash Apple Soup, Vegan, soup, simple, dairy free, apple, winter squash, easy, dinner, homemade
Comment

Orange Black Bean Chili

January 18, 2020 Colleen Stem
IMG_5050.jpg
IMG_5025.jpg

I have been on a severe citrus kick lately. Oranges, limes, lemons, kumquats. I want it all and have been eating it all. A lot of it all. Espeically the oranges which are just so good right now. We have been going through bags of them faster then ever and I am not mad about it.

Which then brings us to chili. Chili is one of the things that I make on a very regular bases. It’s beans, veggies, tomatoes, and a ton of spices. Easy as can be, most people like it, and I never get sick of it. I mean, how could you get sick of it, it is so good! Anyway. Chili, its great but have you ever added orange to it? Oh man is it amazing. Bright and acidic and sweet. The whole pot of chili just radiates more goodness, more intensity, more, moreness. (I know that doesn’t make sense but you get it.) It’s a whole new level of chili and I don’t if there will ever be a time when I don’t add orange to my chili again. Well at least during citrus season.

But enough about all that, what you really want is to just start making this orange black bean chili so you can eat it. I hear you, so I’ll let you at it.

To the chili!

The stuff. Oranges, black beans, crushed tomatoes, an onion, a couple carrots, a pepper, and jalapeños. Also lots of cumin, chili powder, ground ginger, garlic powder, and salt and pepper.

Small dice up the pepper, onion, carrots, and jalapeños. Don’t want it super spicy, don’t add the jalapeños.

IMG_4980 2.jpg

All that stuff gets tossed into a big pot along with all the spices, some salt and pepper, and a little water too. Place on stove to start cooking down the veggies.

Slightly tender and smells amazing.

IMG_5008.jpg

Now add in the beans, the tomatoes, and the zest and juice of an orange. Mix it all up, set it back on stove and keep on cooking,

Done and ready.

Now eat your chili, with extra orange slices to squeeze all over it of course. And maybe you want to serve it with some corn bread? That is entirely up to you, but who would be made about it?

-C


Orange Black Bean Chili

Serves 4-6 people

  • 1 pound cooked black beans drained (about 5 cups or 3 cans)

  • 5 cups crushed tomatoes (or 2 28oz cans)

  • 2 oranges (navel or cara cara work)

  • 2 carrots

  • 1 large onion

  • 1 bell pepper

  • 2 jalapenos (optional)

  • 2 heaping tablespoons cumin

  • 2 tablespoon chili powder

  • 2 teaspoons garlic powder

  • 2 teaspoons ground ginger

  • salt and pepper

Start by chopping up the veggies. Small dice the carrot, the onion and the pepper. If using jalapeño, dice that into small little bits too. And remove seeds for less heat or leave them if you like it. Once that is all cut up, dump it all into a large heavy bottom pot along with the cumin, chili powder, garlic and ginger powder, and about a teaspoon or so each of salt and pepper. Add about 1/2 cup water, mix it all up, and place the pot on stove on medium heat and start to cook the veggies and spices until they begin to smell fragrant and are ever so slightly tender, which should take 5-10 minutes.

Now add in the beans, the tomatoes, and the zest and juice of one orange. Mix together and keep cooking on medium heat, partially lidded, for about 45 minutes to an hour, stirring once in a while, until the chili has thicken and tastes good to you.

Once done, season to taste with more salt and pepper and either stir the juice of the second orange into the whole pot or serve with slices of orange to squeeze on top.

Eat. Store any left overs in fridge. Tastes delicious cold too.

In beans, dinner, one pot meal, soups/stews/chilis, Vegan, Vegetables Tags Orange Black Bean Chili, Vegan, beans, pulses, vegan dinner, one pot meal, plant based, grain free, gluten free, citrus, orange, heathy, dinner, food, delicious, tasty, yummy, protein
Comment

Poppy seed Crusted Apricot Jam Muffins

January 11, 2020 Colleen Stem
IMG_4908.jpg
IMG_4949.jpg
IMG_4917.jpg

Mid week, I was doing a little pantry cleaning/ inventorying of what I had and needed when I came upon not one, not two, or even three. No, six. SIX, jars of jam. And there are 2 that are already opened in the fridge. I don’t know why, but knowing that there was that much jam in the house made me a little uneasy. Six unopened jars is about 3 jars past my comfort zone. Sure there are so many things you can do with a jar of jam (jelly, preserves, and marmalade included) and now that I am thinking about it, is one of the reasons why I bought a few jars a while back. Then there was Christmas and I think we got at least two jars as gifts so it’s not all my fault, but still, that is just too many jars of jam. Right there I needed to get rid of at least one jar. So muffins. Jam muffins, with poppyseed crust because it’s pretty and nobody ever complains about poppy seeds, or at least they don’t until after they eat them and have poppy seeds stuck in their teeth all day. But that is just our mouths way of saving a little for later, am I right? HA

Anyway, a quick and simple muffin recipe for all of you people out there that might have a jar or two too many of jam in the fridge or pantry (I used apricot but any flavor(s) would work) and could use yourself a tasty little muffin situation. I mean who doesn’t want a tasty muffin?

To the muffins.

IMG_4798.jpg

The stuff. In the bowl is white and white whole wheat flour, baking powder and soda, and salt. Also have apricot jam, oil, almond milk, apple cider vinegar, and orange, and some poppy seeds.

Grab a zester and zest the orange into the bowl with all the dry stuff. Whisk to combine.

IMG_4805 2.jpg

Jam, oil, milk, and vinegar. All on top of dry. Whisk that up until just combined. No over mixing. You will get tough (not in a good way) muffins.

IMG_4812 2.jpg

Apricot muffin batter.

IMG_4816.jpg
IMG_4822.jpg

Scoop into well greased muffins tins then cover the tops with poppy seeds.

Ready for that hot oven.

IMG_4854.jpg

And out of the oven, looking all pretty like.

IMG_4894.jpg

Pop those muffins out of the tins and cool on a wire rack for a bit. And by all means, don’t wait until they are completely cool.

Now eat you a warm muffin and if they are mini, grab a few. You can’t just eat one mini muffin, that is just crazy.

-C


Poppy seed Crusted Apricot Jam Muffins

Make 12 normal size muffins or 24 mini muffins

  • 1 cup all purpose flour

  • 1 1/4 cups white whole wheat flour

  • 2 teaspoon baking powder

  • 1/2 teaspoon baking soda

  • 1/2 teaspoon salt

  • 1 cup plant milk

  • 1/3 cup neutral oil

  • 1 tablespoon apple cider vinegar

  • zest of an orange

  • 1 heaping cup apricot jam or preserves (can sub in any flavor you like)

  • 1/3 cup poppy seeds

Preheat oven to 350

In a large bowl whisk together the flours, salt, baking powder and soda, and the zest of the orange. Add in the oil, milk, jam, and vinegar and whisk until just incorporated. Scoop batter into well grease muffin pans (12 regular or 24 mini) then cover the tops with poppy seeds. Pop into hot oven and bake until risen and a tester comes out clean when one is poked. For mini muffins, check after 13 minutes, for normal muffins, after 16 minutes.

Once baked, remove from oven and pop out of pans when cool enough to handle. Place on a wire rack to cool completely or just start eating them warm.

Store left over muffins in an airtight container for 3-4 days at room temperature. They also freeze well.

In breakfast, Vegan, sweet breads and muffins, quick and easy, Dairy Free Tags Poppy seed Crusted Apricot Jam Muffins, Vegan, Vegan muffins, poppyseeds, jam, breakfast, fast, easy, no fuss, plant based, dairy free, home made, fresh, baker, recipe, delicious, king Arthur flour
2 Comments

Soft and Fluffy Oatmeal Wheat Dinner Rolls

November 23, 2019 Colleen Stem
IMG_3788 2.jpg
IMG_1440.jpg

What’s up with dinner rolls? Do people eat them all year round, like on a Tuesday in the middle of March or maybe a nice blue sky sunny day in July? Is that a weird question? But seriously, think about it. Dinner rolls, at least in my world of people, are pretty much only eaten in and around Thanksgiving and Christmas. Huh. Kind of strange seeing that dinner rolls are bread which everyone eats all the time and are basically made specifically for dinner (although can and should be eaten for breakfast and lunch as well) which most people eat. Every. Single. Day. Well, whatever the reason, it’s weird. So yes, I am making these here dinner rolls now at the traditional holiday time but I think as of now, I am going to start making them all the time. It’s going to be my new thing. Fourth of July dinner rolls. Yup.

And so yes, we need dinner rolls right now for the holiday food feasts and these dinner rolls are the perfect accompaniment to any and all dinners. They are nice and fluffy and all dinner roll like, just as any good roll should be, but also slightly more nutty and soft and healthy because oats and wheat flour and homemade which is always the best.

And if you are like, hell yes I am a dinner roll person and hell no I am sticking to store bought cause that is that and how it’s done, well hey, no judgment here. I made these for my people for our family Thanksgiving, (which is happening today at my house. There are going be so many people) and I know that everyone will love and be happy to eat them, but I too also bought some of those super white, take and bake ones that I know if I don’t have on the table next to these gorgeous and amazing rolls, that I will probably get punched in the face. So we will have both. And then at dinner I can bask in the glory of all the comments about how much better my rolls are then the store bought ones. (Secretly why I am having both. Fishing for compliments. HAHA!)

Now to those soft and fluffy dinner rolls!

The stuff. Old fashion oats, all purpose and white whole wheat flour, yeast, oil, water (hot and room temperature), maple syrup, and salt.

First, take the boiling water and pour it over the oats. Mix them and let them soak and cool for 10 or so minutes.

IMG_3715.jpg
IMG_3720.jpg
IMG_3722.jpg
IMG_3725.jpg

While oats are soaking, add the room temp water to a big bowl with the yeast. Once the oats are soft and cooled off a bit, add them to the yeast mixture along with the oil, and maple. Mix together. The add the flours and mix until combined.

Dump dough onto a floured surface and knead for about 3-5 minutes, adding a little more four as needed to keep from being to sticky, but don’t over flour. The dough is and should be a little tacky.

Soft and supple. Kneaded and ready.

IMG_3745.jpg
IMG_3746.jpg

Place the dough back into the bowl and cover with a damp towel. Leave alone and let rise for about an hour or until it doubles in size.

Once the dough doubles, dump out onto a lightly floured surface and cut into 12-16 equal sized pieces .

IMG_3758.jpg

Roll each roll into a roll shape and place them in a lightly greased baking dish. Cover for another 15-20 minutes to let rest and rise a little more.

Rolls risen again, just a little plumper. And now right before you place them in the oven, brush tops with a maple/water mixture and sprinkle with a few oats. To look pretty. And into the oven they go, 30ish minutes, until nice and golden brown.

IMG_3788.jpg

Baked to golden dinner roll perfection.

And there you have it. Soft and fluffy dinner rolls. Warm out of the oven, looking and smelling like all the good things that you want and need.

And can, and should, be made now and all year round.

-C


Soft and Fluffy Oatmeal Wheat Dinner Rolls

makes 12-16 rolls

  • 1 1/2 cups old fashion oats

  • 2 cups all purpose flour plus more for kneading

  • 1 1/2 cups white whole wheat flour

  • 2 cups boiling water

  • 1 cup room tempature water plus 2 tablespoons for brushing tops

  • 2 teaspoons salt

  • 2 tablespoons maple or honey

  • 2 teaspoons yeast

  • 1/4 cup neutral oil

In a bowl, mix oats with boil water and let sit and soak for about 10 minutes. In the meantime, in a large bowl, mix the room temp water with the yeast and 1 tablespoon of maple and mix. Once oats have soaked and cooled to a point that they are not super hot, but still just warm, mix them in with the yeast mixture. Add the salt and oil and mix then and both the white and white wheat flour. Mix until combined. The dough is going to be sticky, but that how is should be. Dump the dough onto a lightly floured surface and knead for 3-5 minutes, adding a little flour as needed to keep from sticking too much, until dough is nice and uniformed in texture. Place dough back into big bowl (after you clean it out and lily oil it) and cover with a damp towel. Place somewhere warm for about an hour until it doubles in size.

Once dough has doubled, dump out onto a lightly floured surface and with a knife of dough cutter, cut into 12- 16 equal sized pieces. Roll each piece into a ball, pinching any ends together and place them into a 9x13 inch baking pan. Once all pieces are in, over and let rest for another 15 minutes.

While dough is resting again, preheat oven to 350.

After the dough has rested, and right before you place them in the oven, mix 1tablespoon of maple with about 2 tablespoons warm water and brush the tops of the rolls. Sprinkle with a handful of oats and then place them into the oven to bake. 30-35 minutes, until they are a nice golden brown.

Once baked remove from oven and let cool to a reasonable temperature and serve.

These can certainly be made a few days ahead of time of eating. Just remove baked rolls from pan and let cool completely then place the into an airtight bag. To reheat, just place on a baking sheet and stick in a hot oven until warm.

In bread, Vegan, holiday, grains, Dairy Free Tags Soft and Fluffy Oatmeal Wheat Dinner Rolls, Vegan, rolls, dinner rolls, easy, whole grain, whole wheat, holiday, bread, king Arthur flour, thanksgiving, oatmeal, healthy, plant based, home made, yeasted bread, dairy free
Comment
Older Posts →
 

https://thelovelycrazy.squarespace.com/config#/|/about/

Me. Food Maker.Food eater. Woo HOO!

STEM+NODE  SMALL BATCH AND ONE OF A KIND POTTERY

stem+node ceramics


____________________

Subscribe

GET NEW POSTS IN YO EMAIL

You are AWESOME!!!


@thelovelycrazy 2014-2021