• stem+node ceramics
  • HOME
  • Food Recipes
  • About
  • Contact
Menu

The Lovely Crazy

Street Address
City, State, Zip
Phone Number

Your Custom Text Here

The Lovely Crazy

  • stem+node ceramics
  • HOME
  • Food Recipes
  • About
  • Contact

arugula walnut chickpea burgers with quick pickled radishes and onions 

April 21, 2018 Colleen Stem
IMG_5321.jpg
IMG_1552.jpg

I love me some spring time fresh greens, especially arugula. The last farm share pick up there was arugula for the first time since late fall and as soon as I saw it my mouth started to water for the fresh springy, peppery taste of  fresh spring time greens. As I bagged my greens, I shoved a fist full into my mouth. Ah, nothing better then a mouth full of fresh greens after a long long winter. Am I right or am I right?

I ate  a lot of those greens fresh, but did you know that arugula makes for a nice accompaniment to walnuts and chickpeas? And if you mashed all that together with a few other things and shaped the mixture into patties and you get yourself some dank ass burgers?  Well now you know. And now you can make them for yourself and experience the greatness of spring fresh arugula. Just make sure you have enough fresh to shove a handful into your mouth. It is spring time refreshing. 

The stuff. Chickpeas, arugula, walnuts, and big onion, and some radishes. Also a couple carrots, some oats, a few cloves of garlic, a Leon, salt and pepper, red wine vinegar, and a little olive oil. 

IMG_1449.jpg

To start, halve the onion. Thinly slice one half and thinly slice the radishes

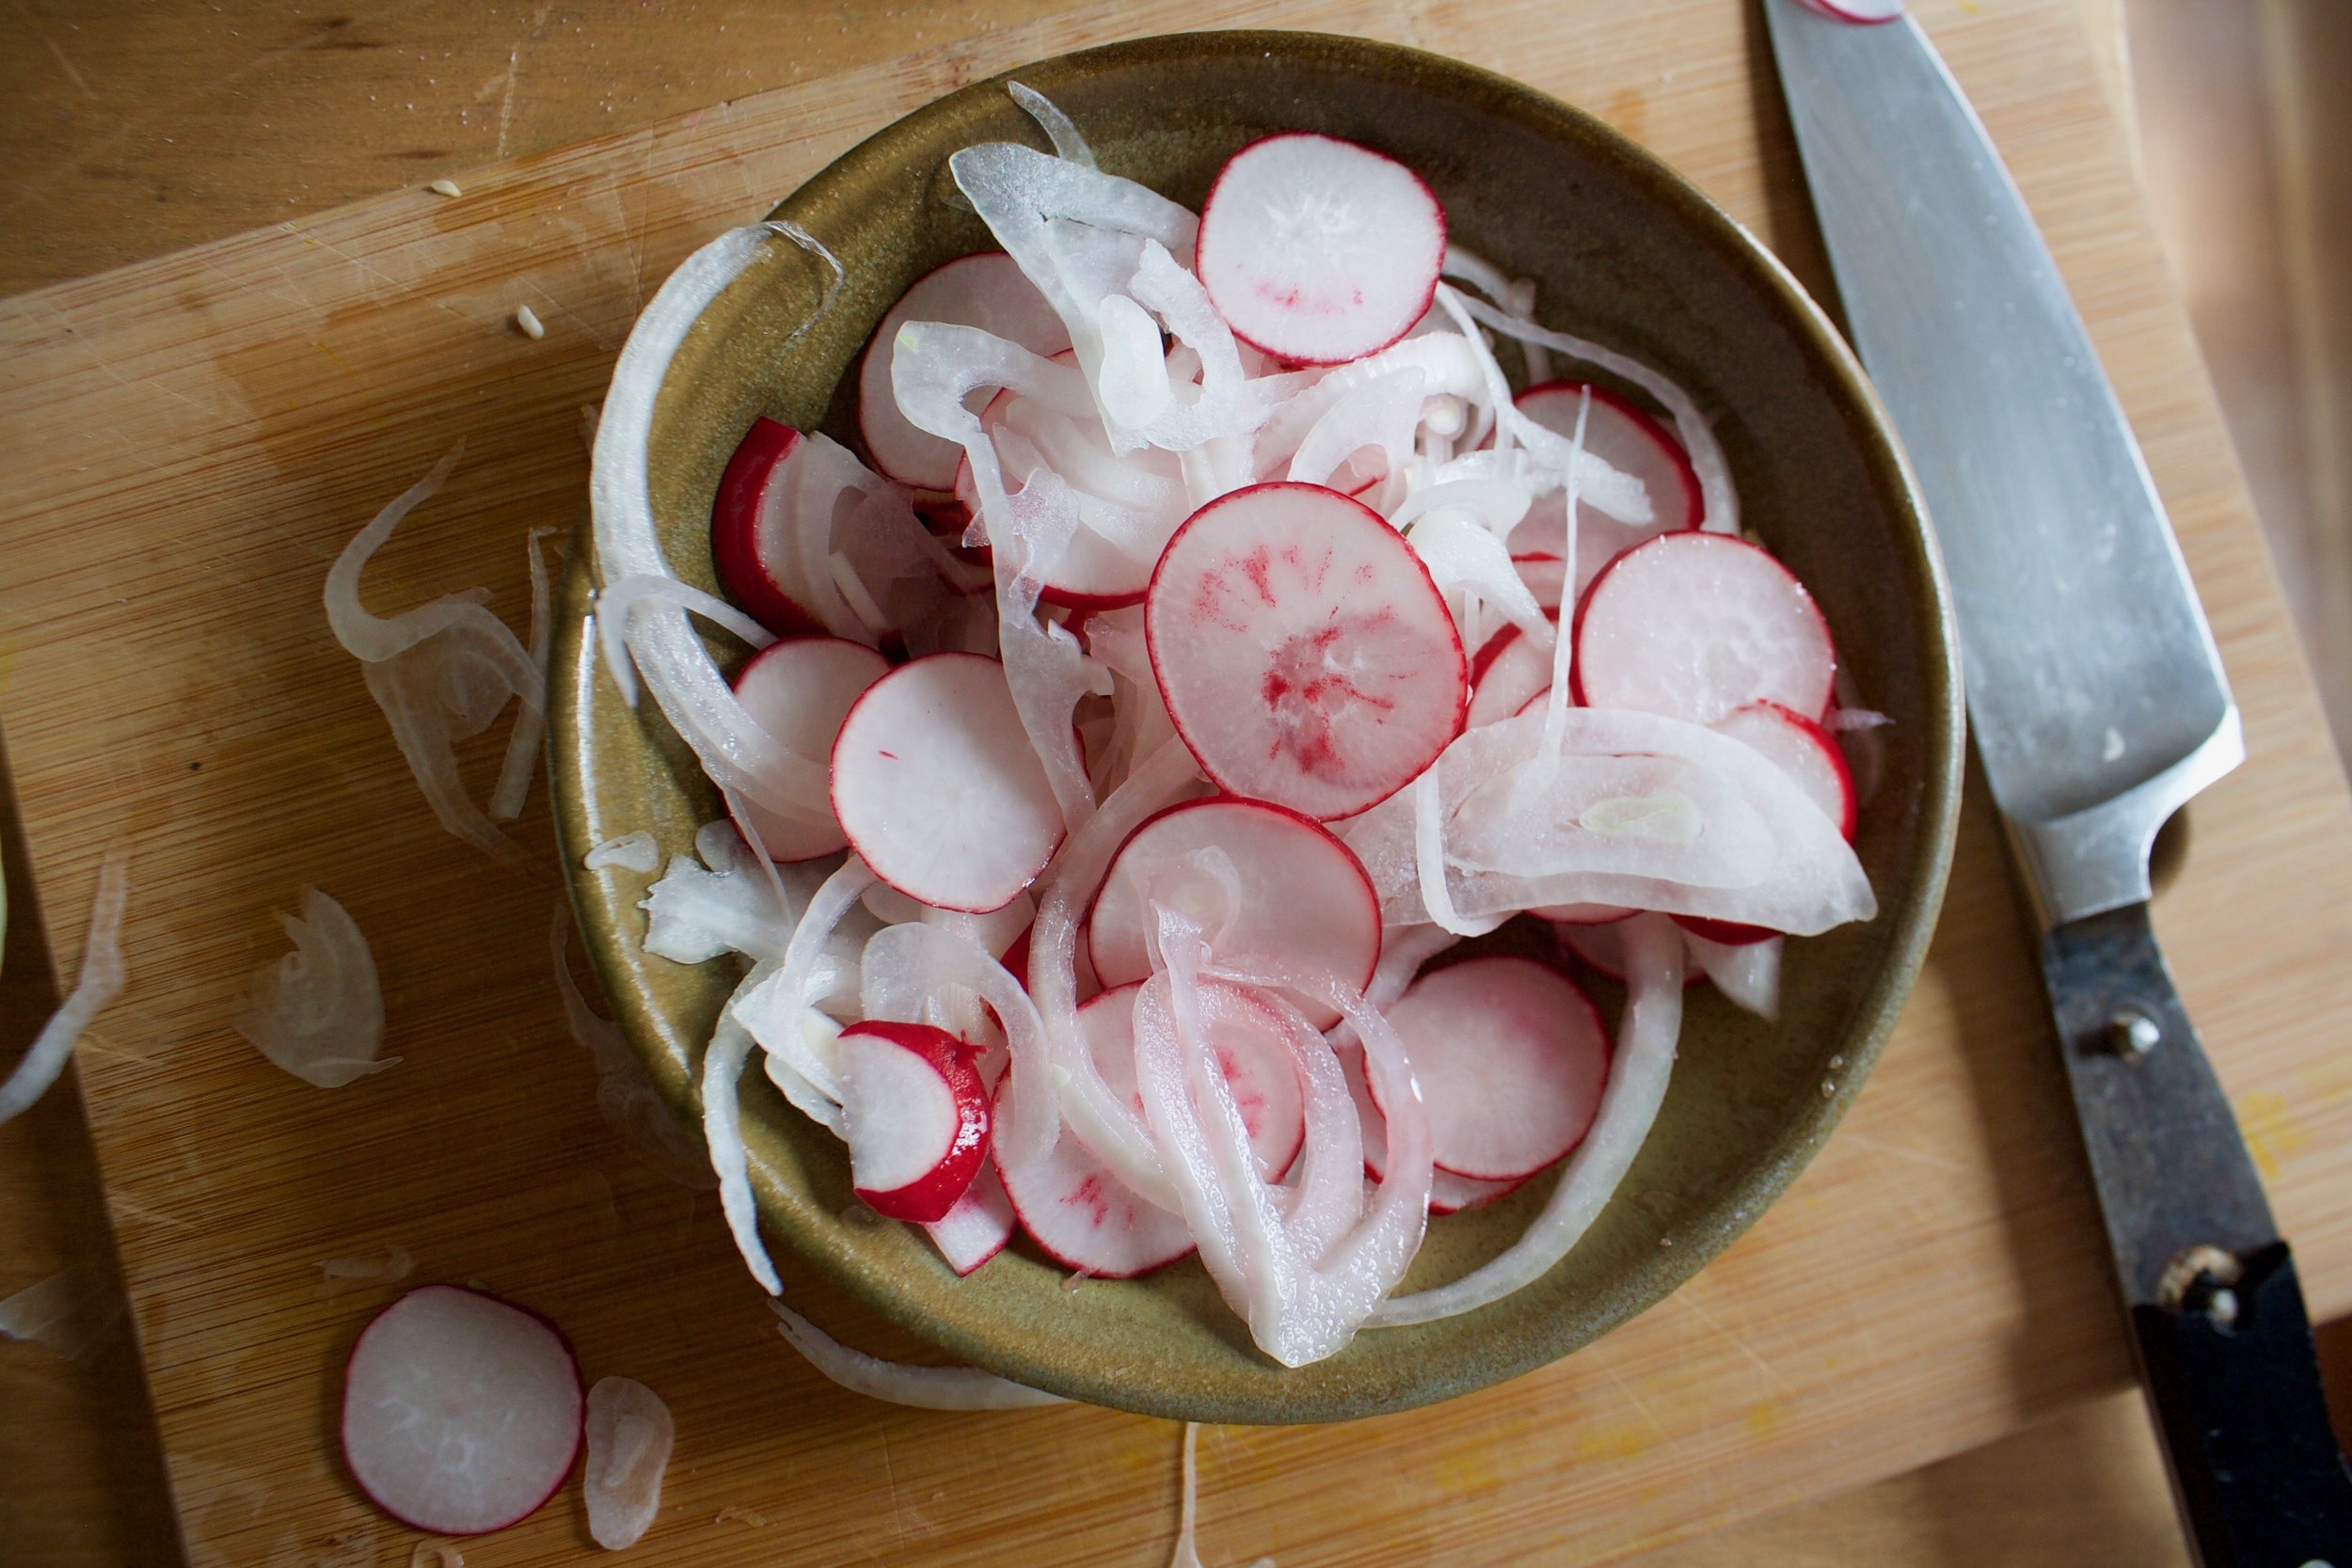
Scoop it all into a bowl, sprinkle with salt and toss in vinegar. Set aside on the counter to do it's thing. 

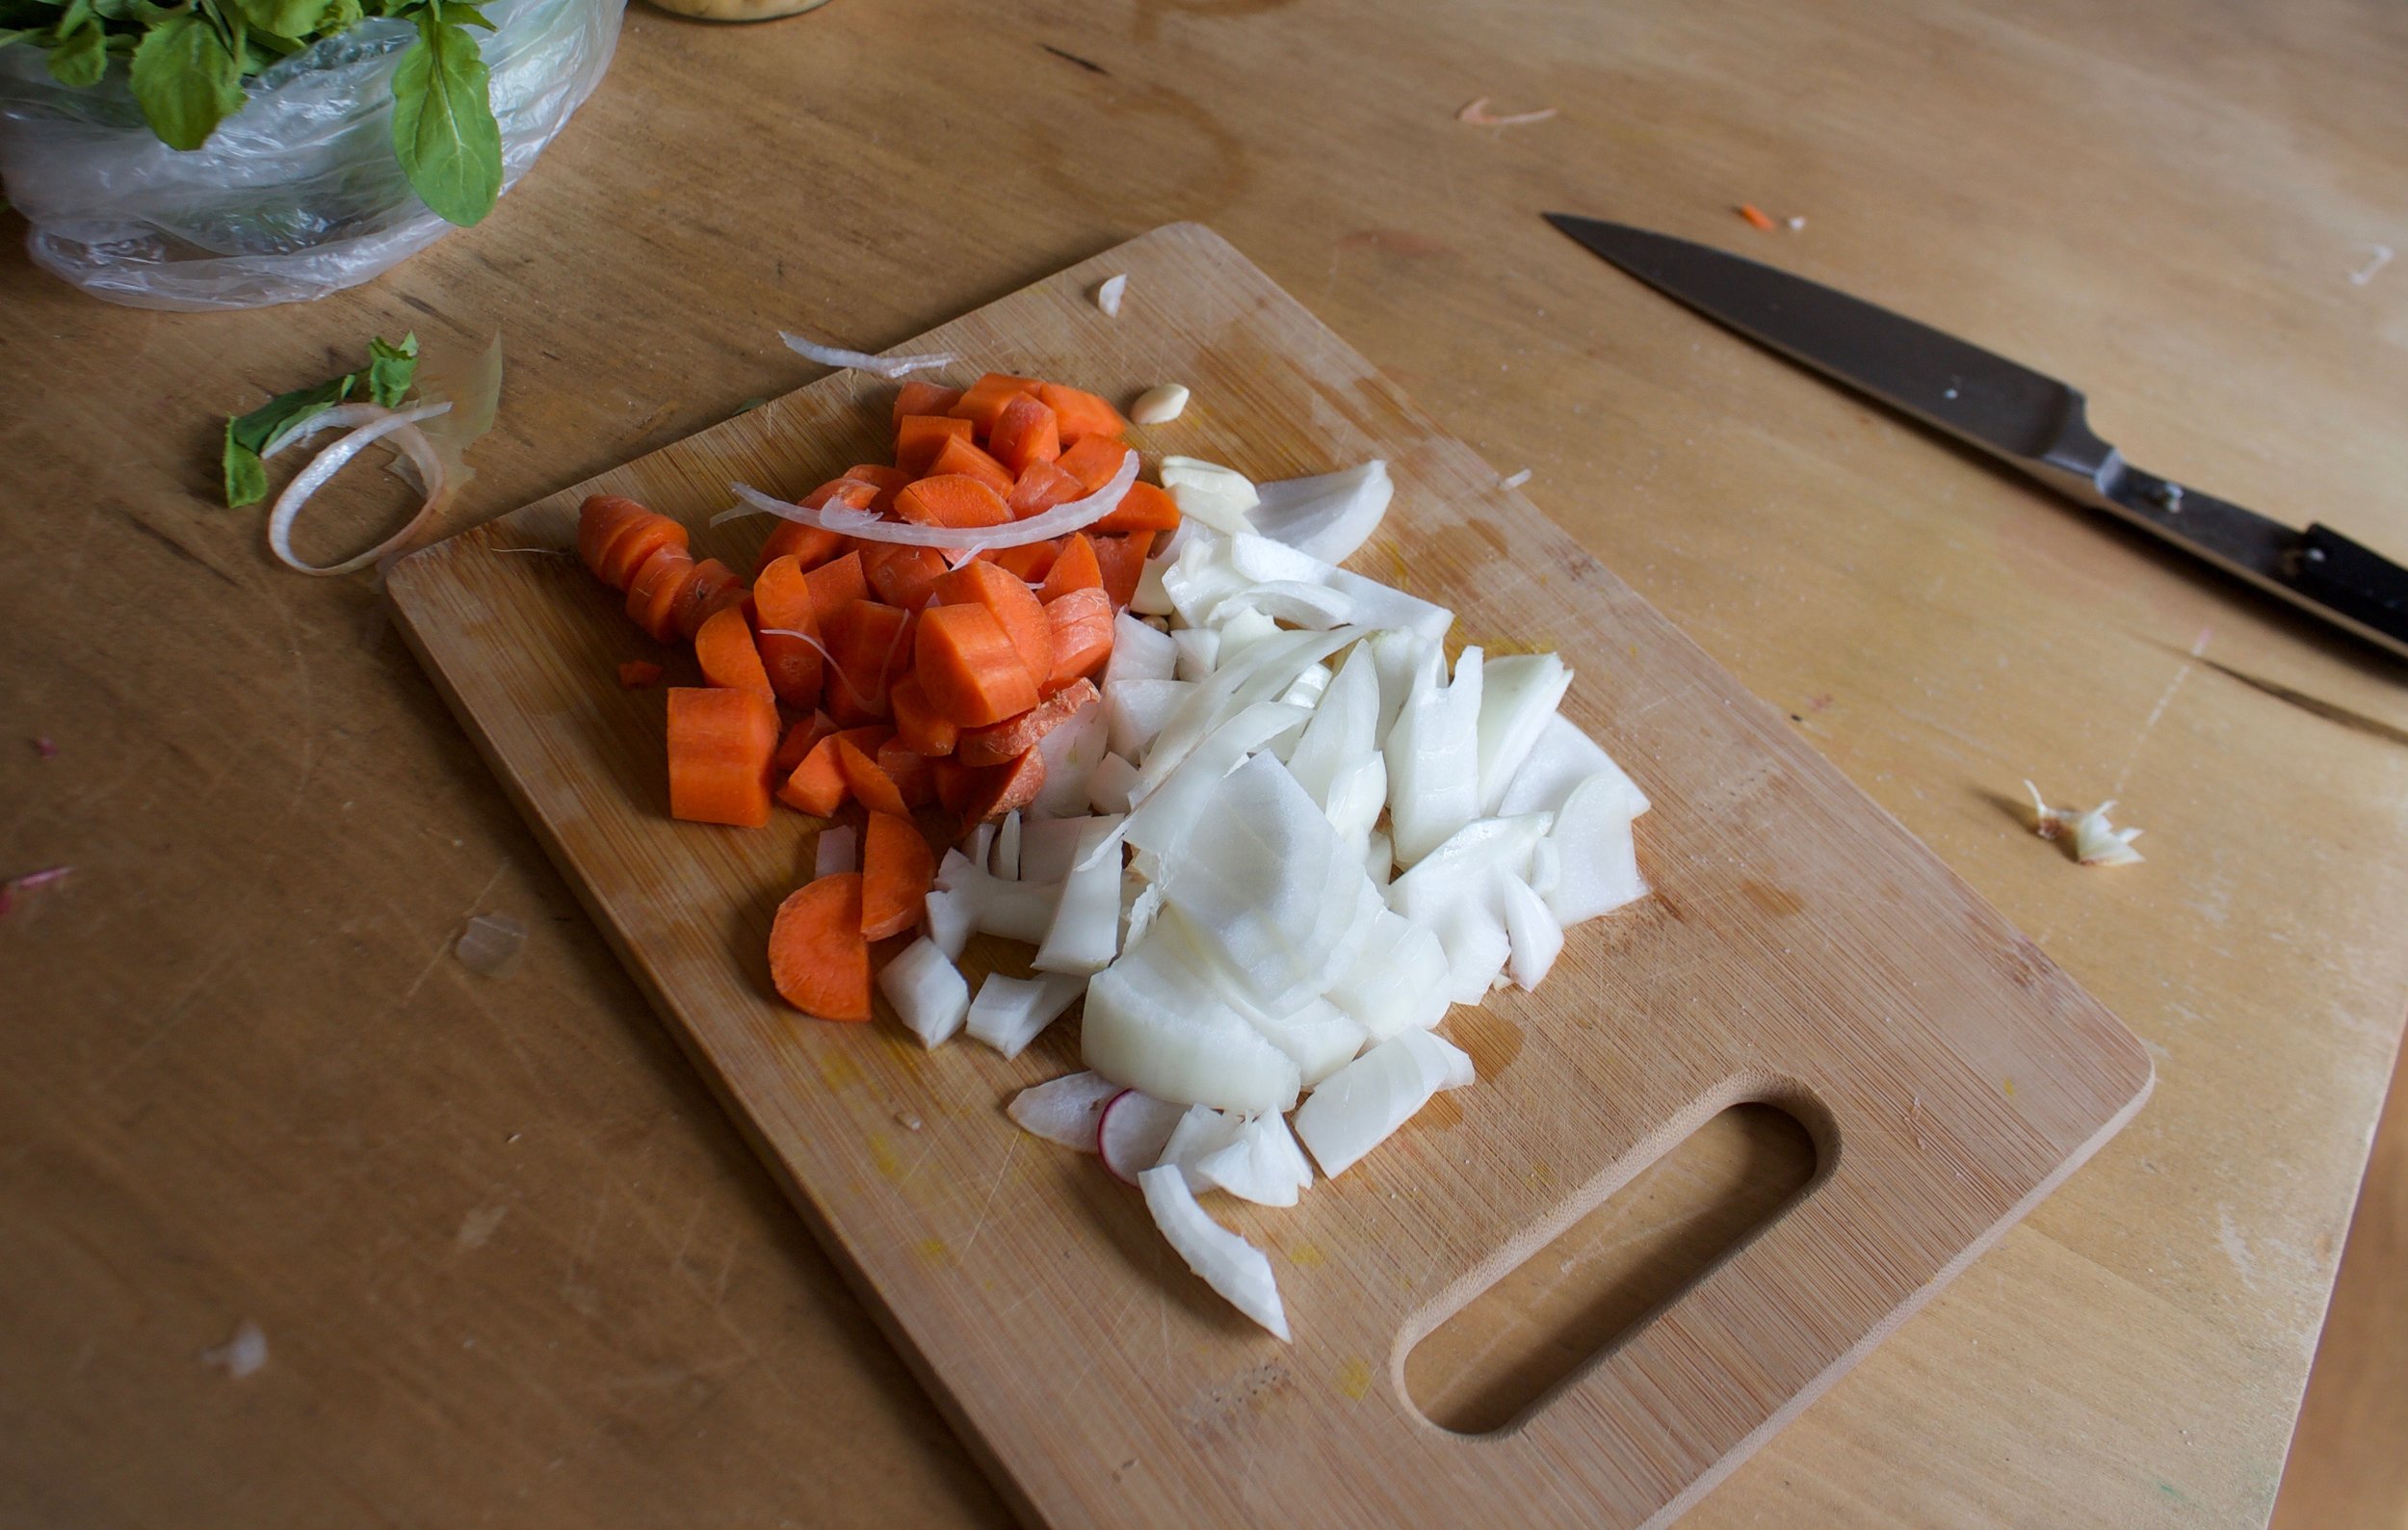
Chop the rest of the onion, the carrots, and the garlic into small chunks.

IMG_1464.jpg
IMG_1468.jpg

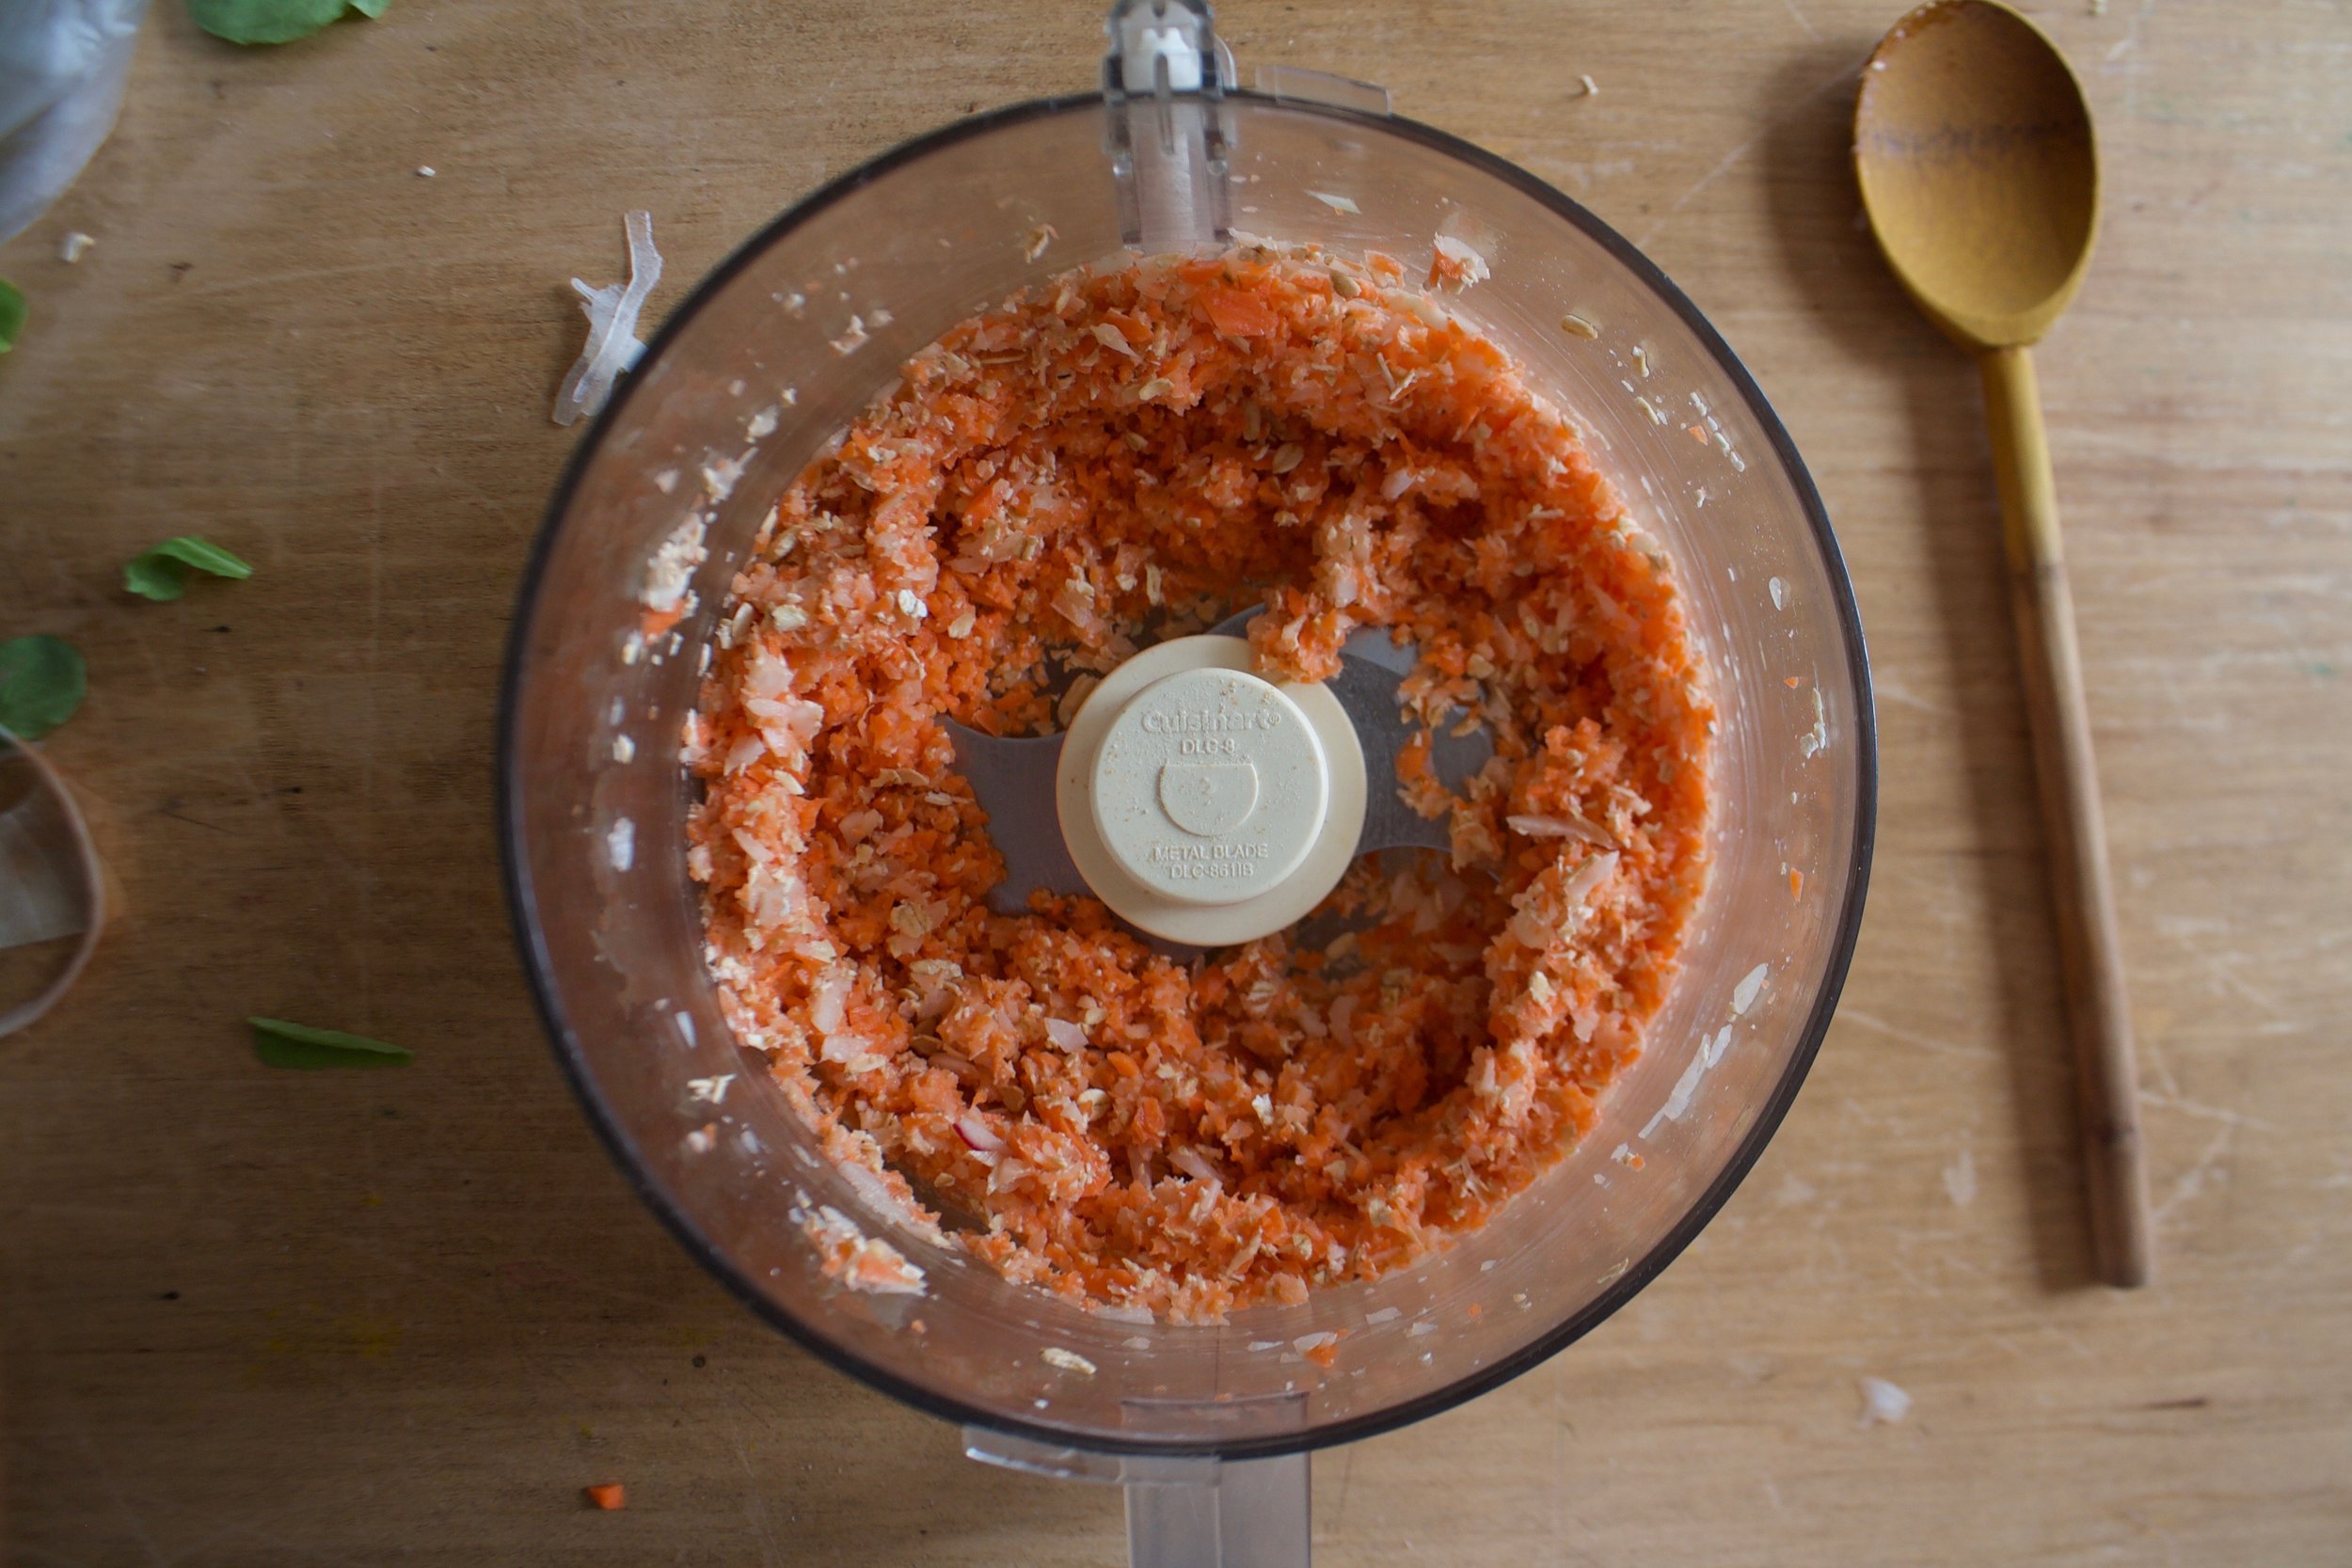
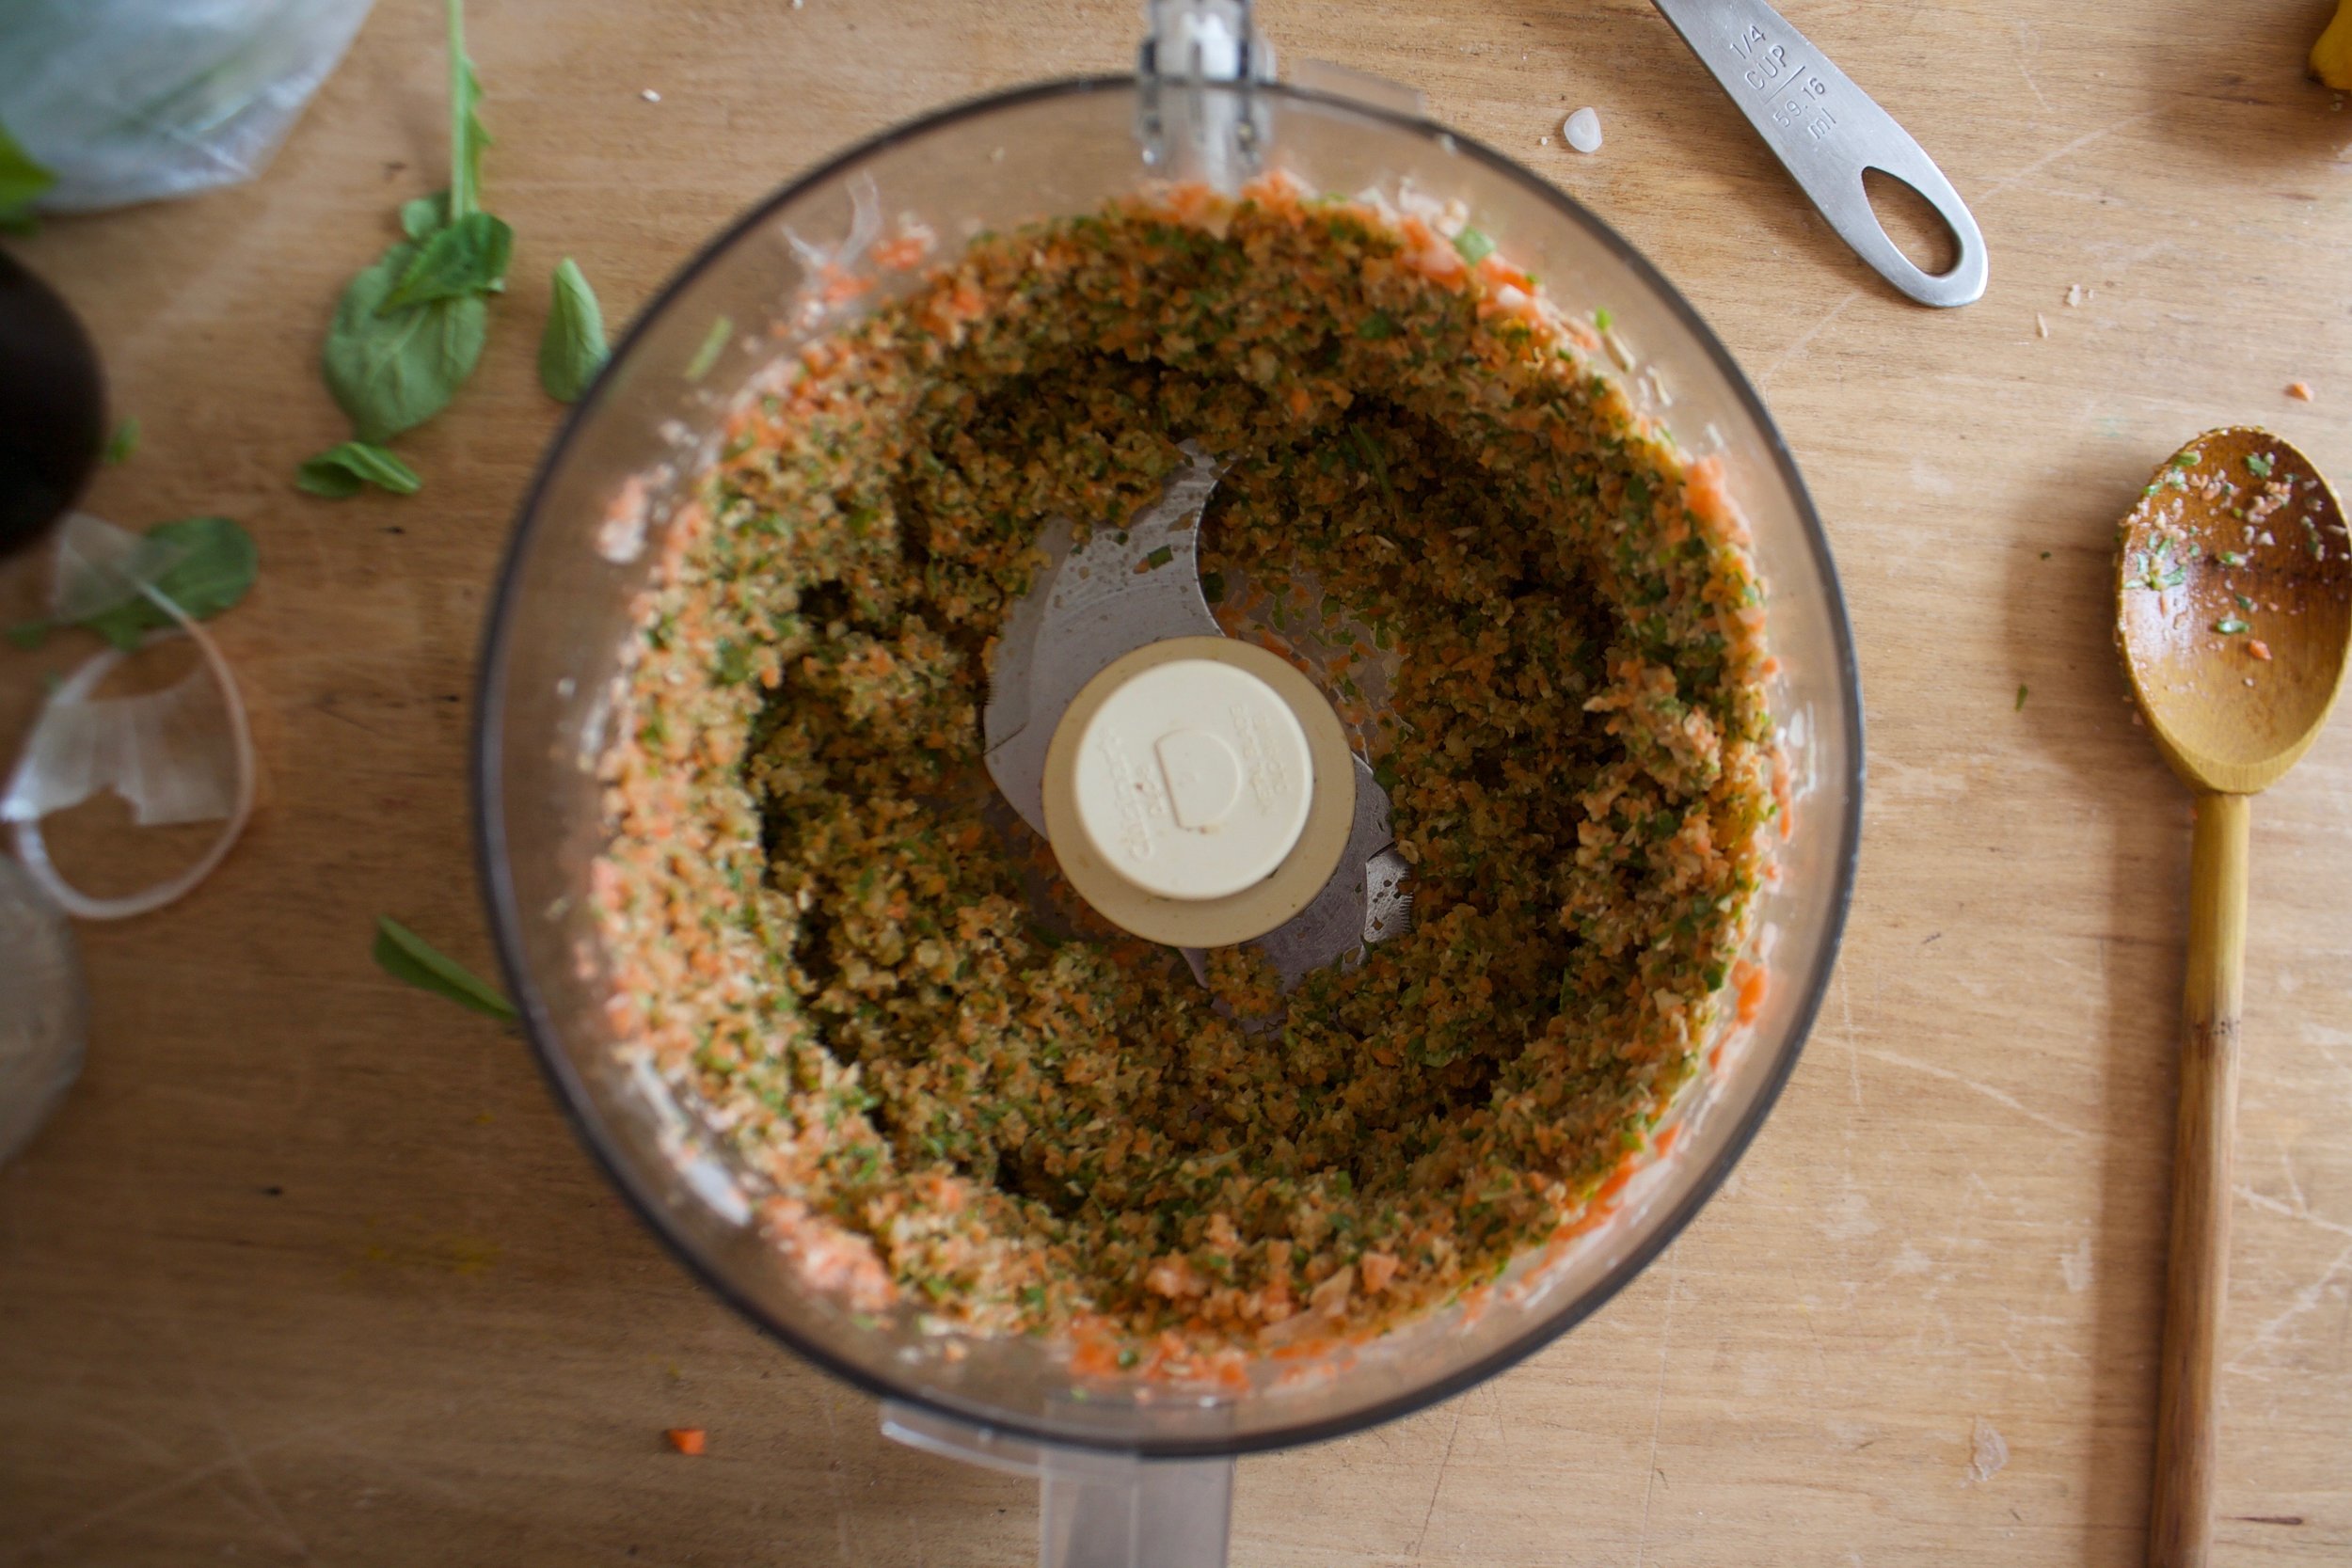
Carrot, onion, garlic, and oats go into the food processor and pulsed until a medium crumble.

Walnuts and arugula next. 

IMG_1481.jpg
IMG_1489.jpg

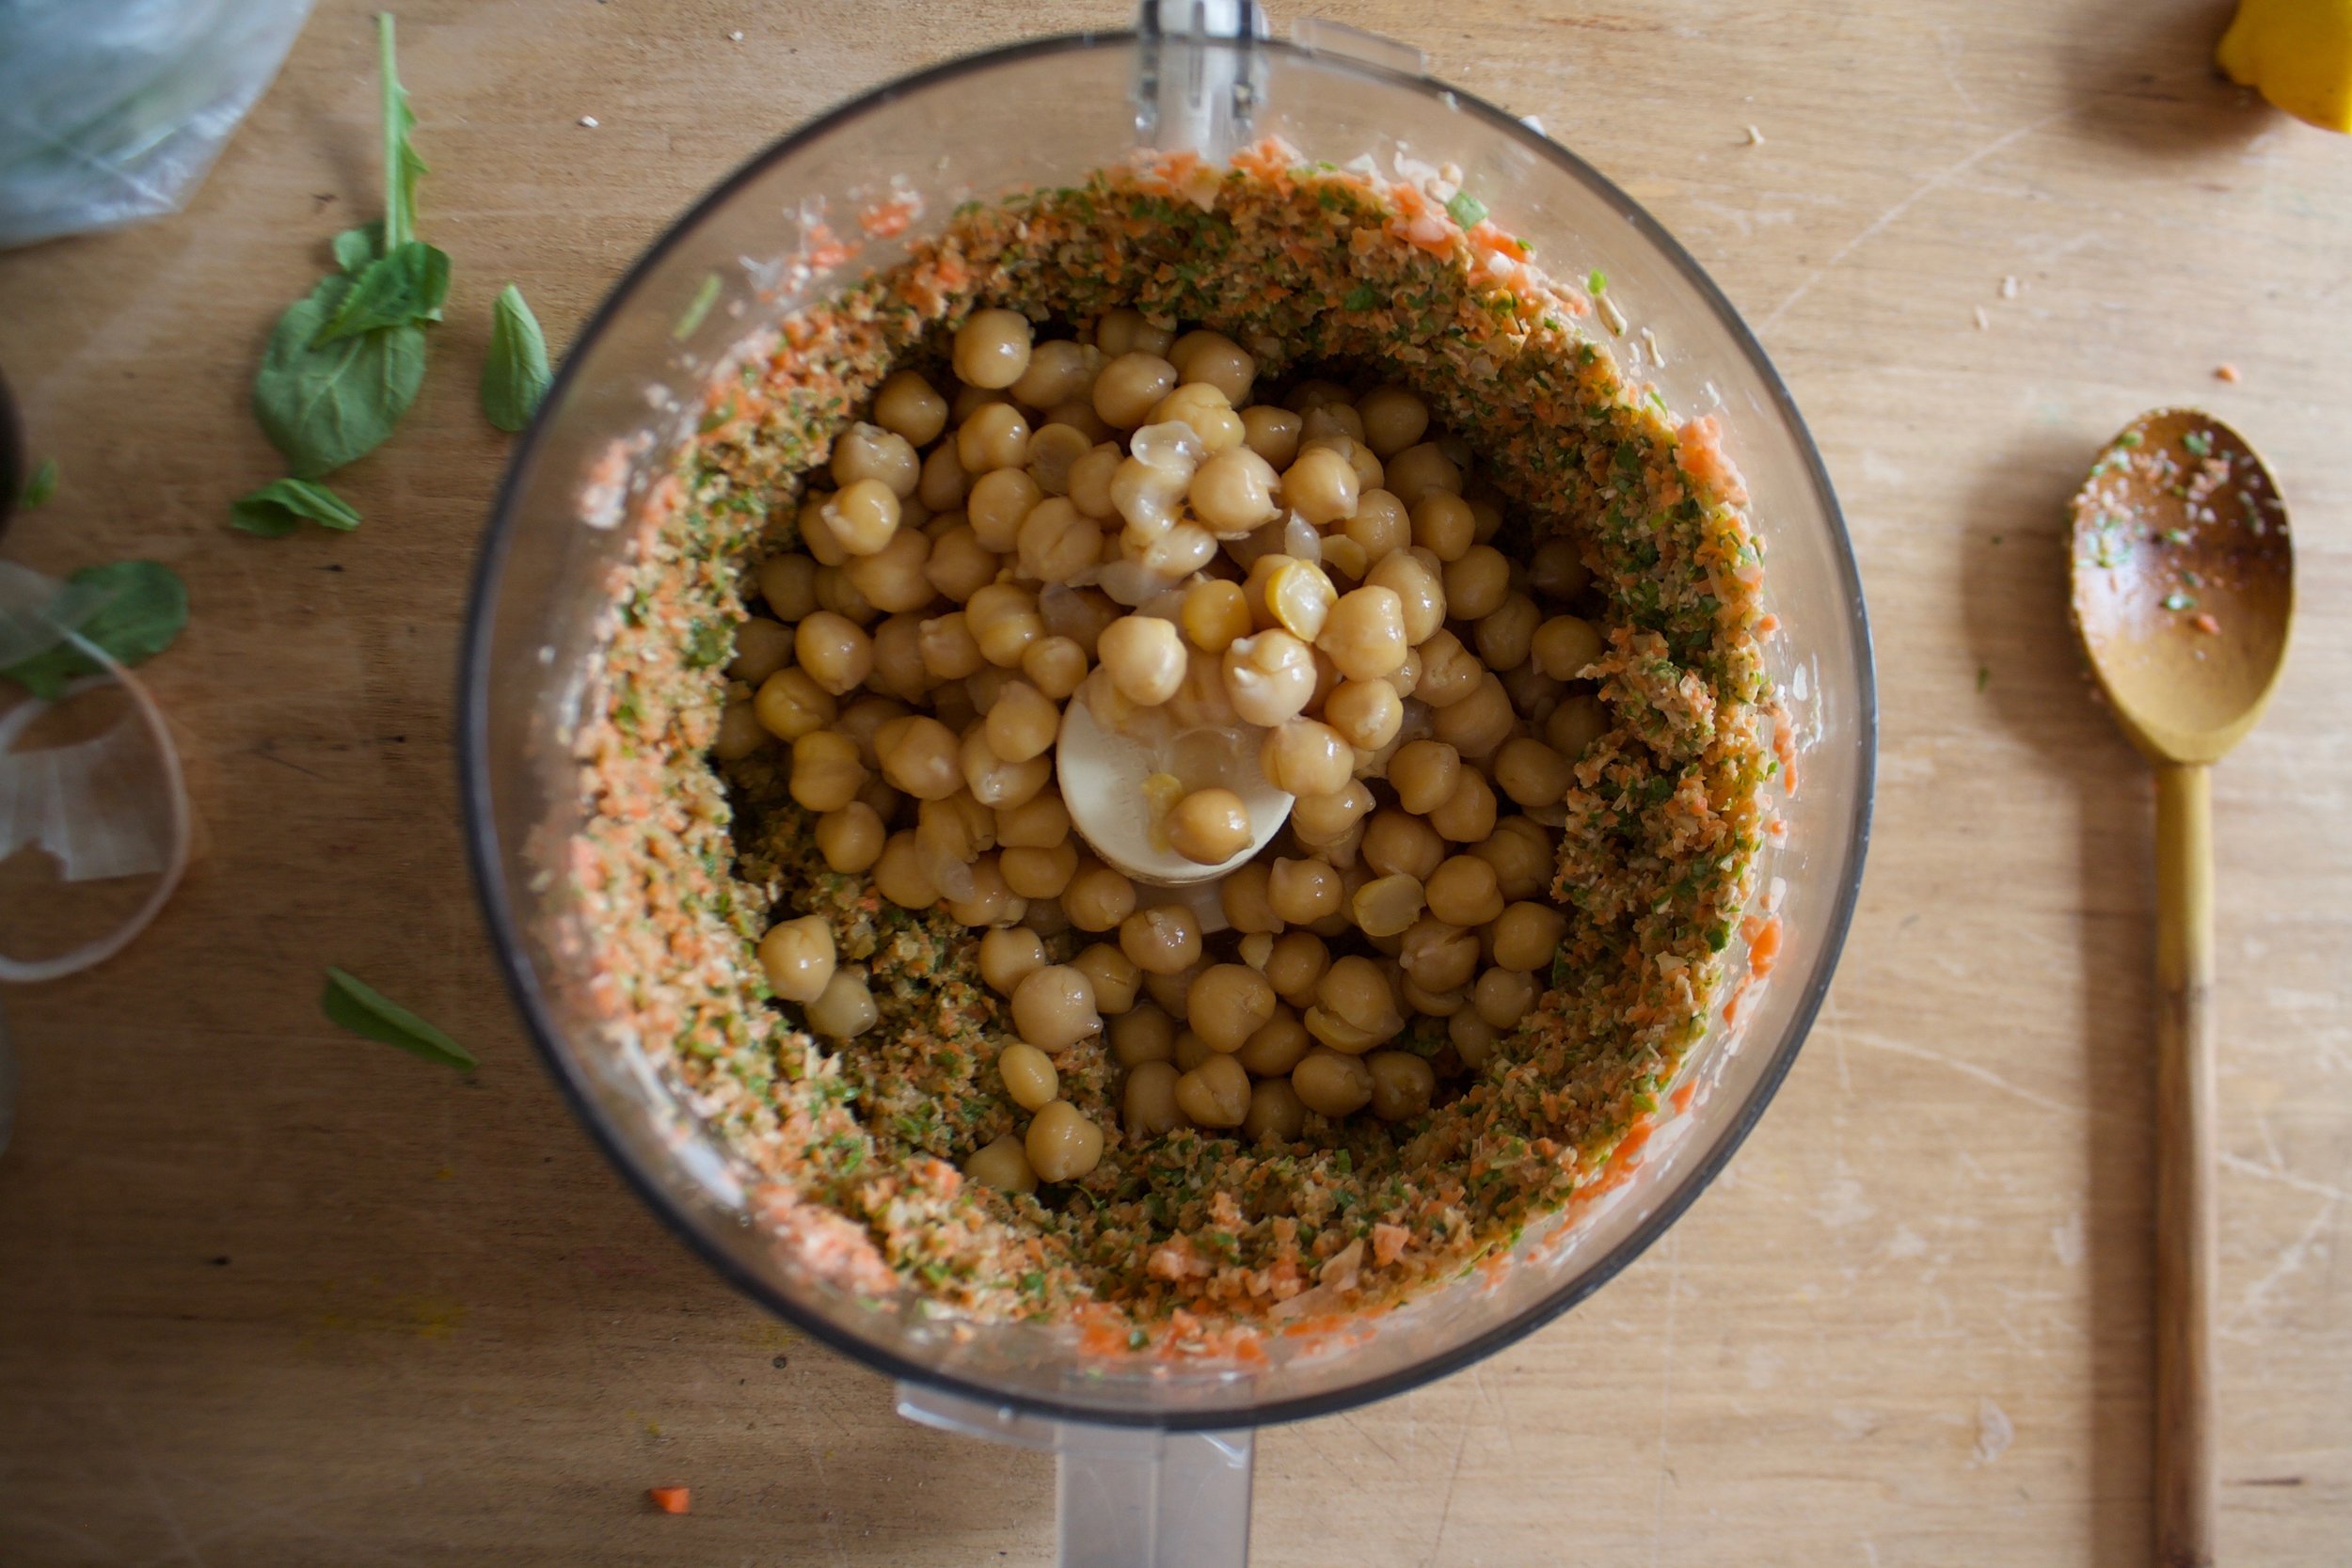
Pulsed until combined then add in the juice of the lemon a good pinch of salt and pepper, and the drained chicken peas.

IMG_1493.jpg

Pulse until just combined. Some big chunks are good, you just want the mixture to be able to hold together.

IMG_1499.jpg

Dump the mixture into a bowl and place in the fridge for at least and hour and up to a day. 

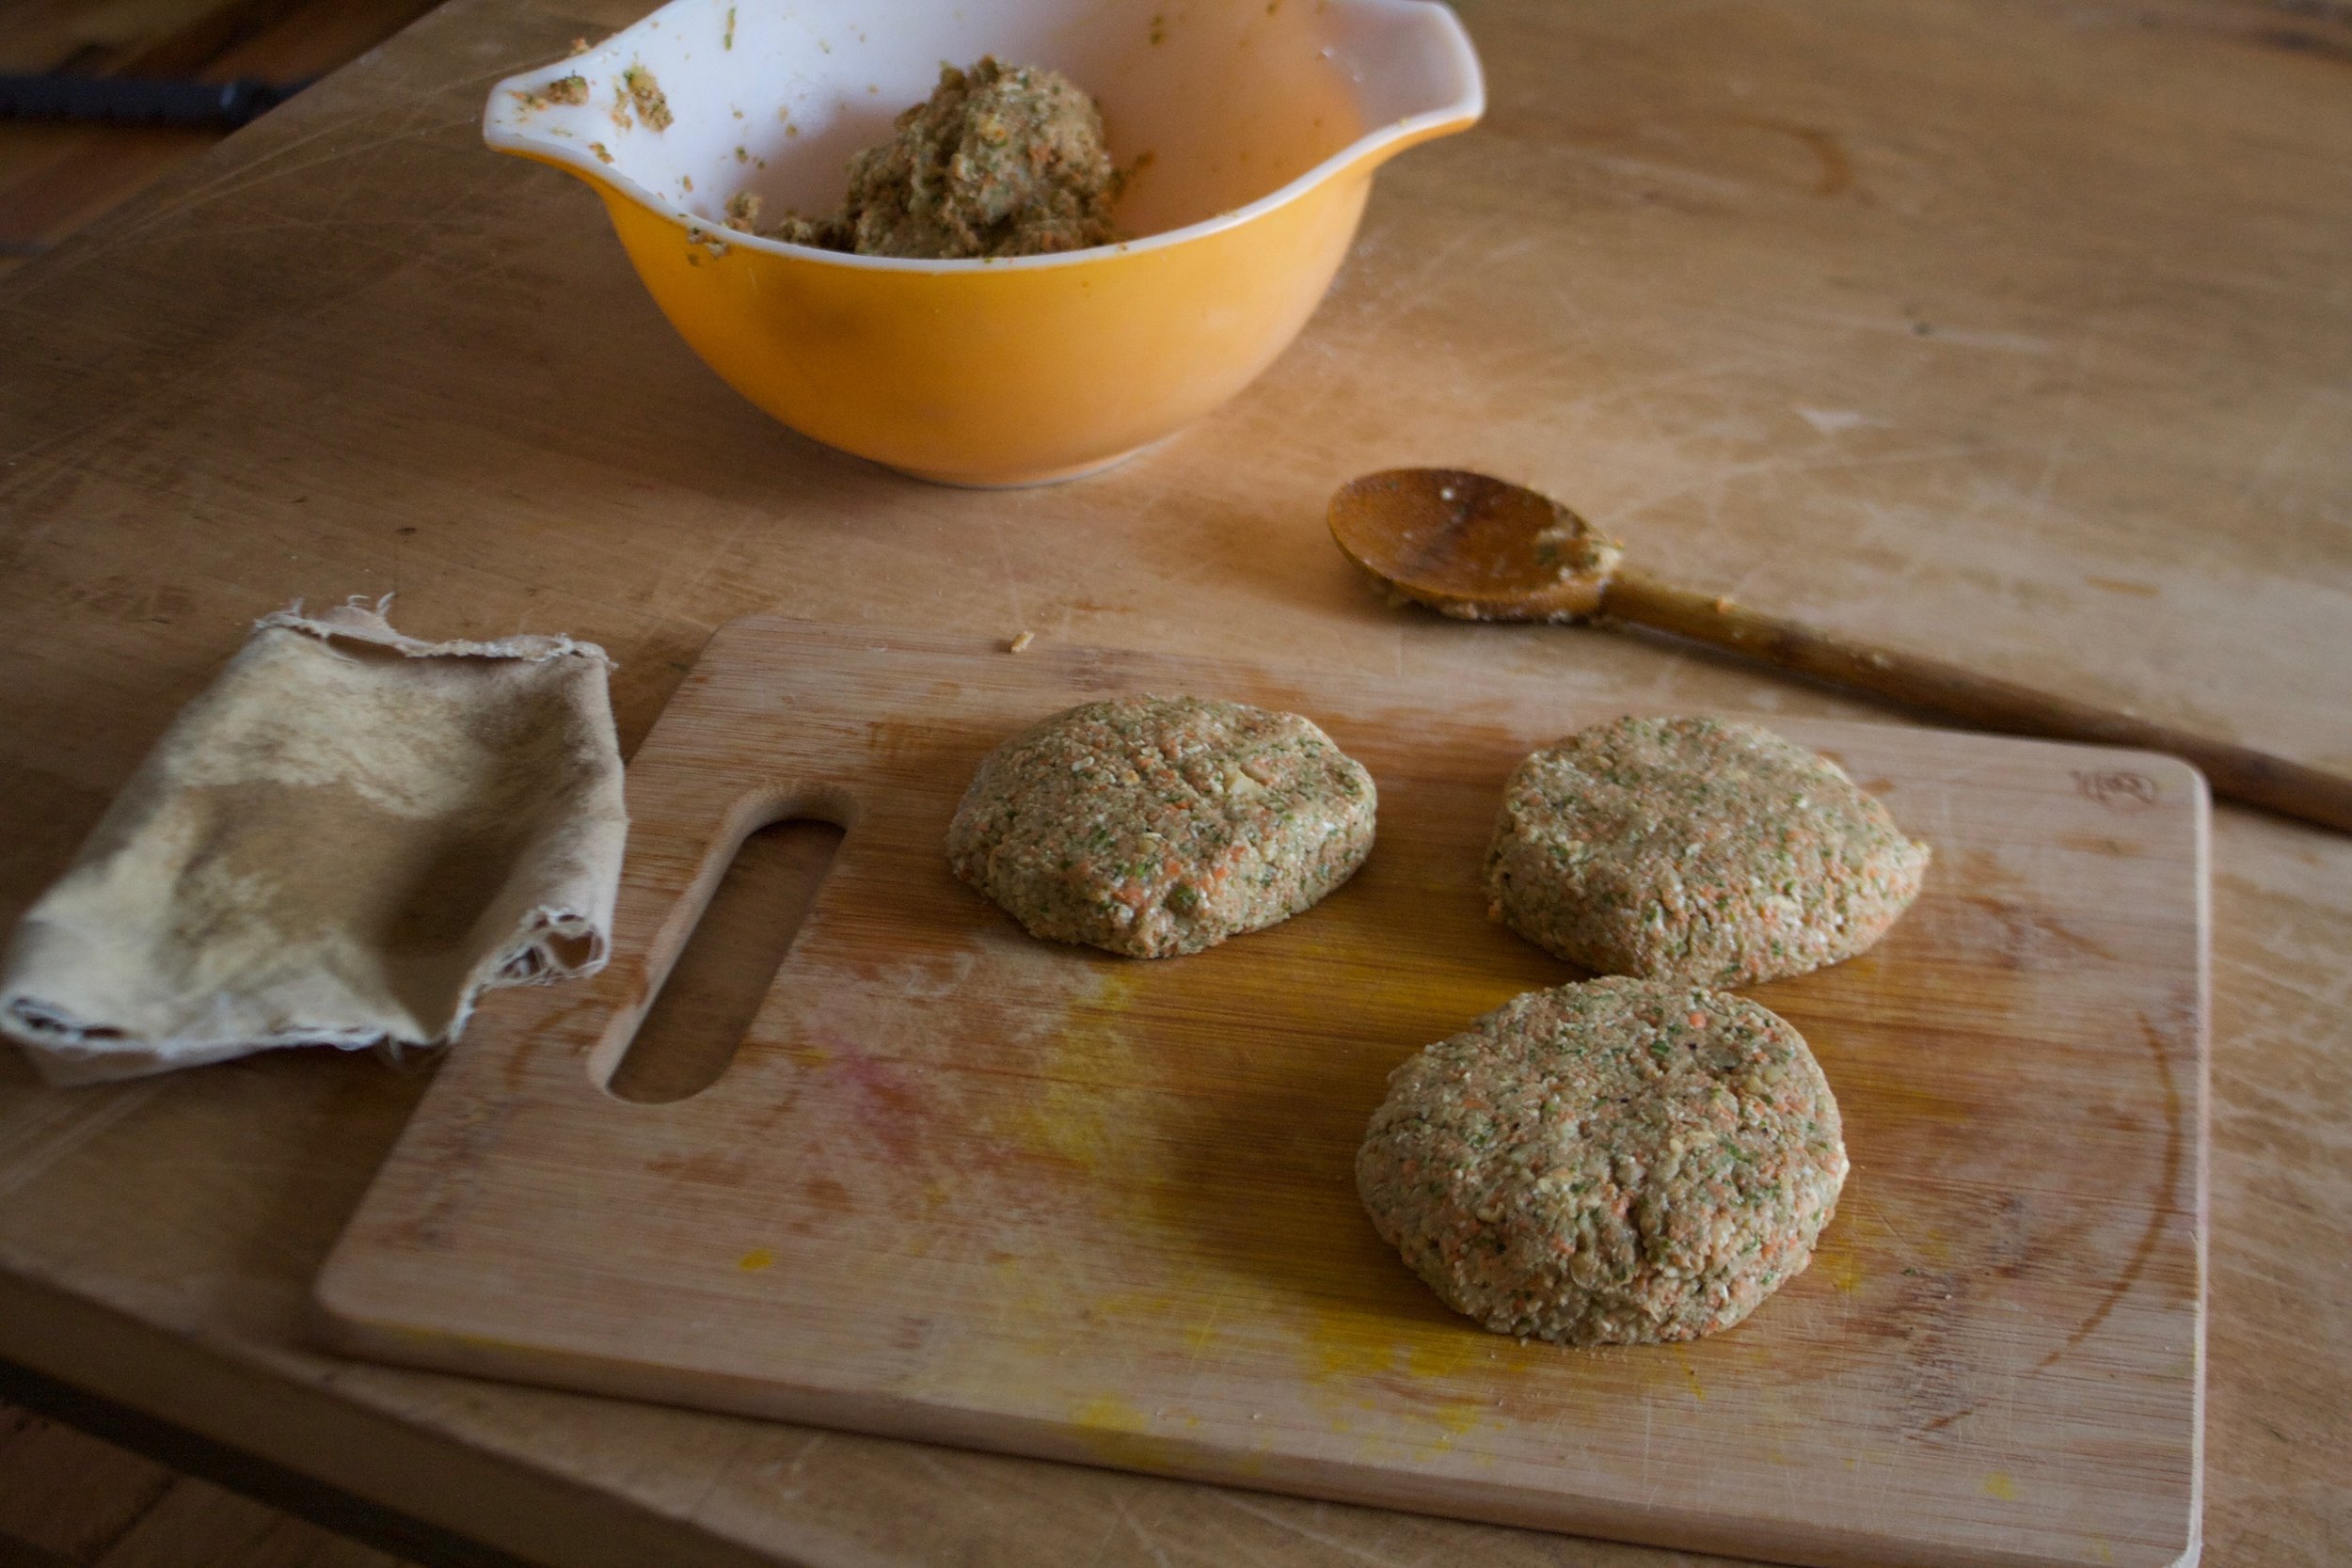
After the time in the fridge, divide the mixture into 6 equal parts and form each into a patty about an inch think. Take a clean cloth and pat each applies dry on both sides.  

IMG_1525.jpg

Grab a skillet, lightly oil it, and place on a medium heat. Sear each side of each burger until browedthen place on a lightly Ould baking sheet. 

IMG_1529.jpg

Place the burgers into a preheated oven to finished cooking. 40 minutes, flipped after 20.

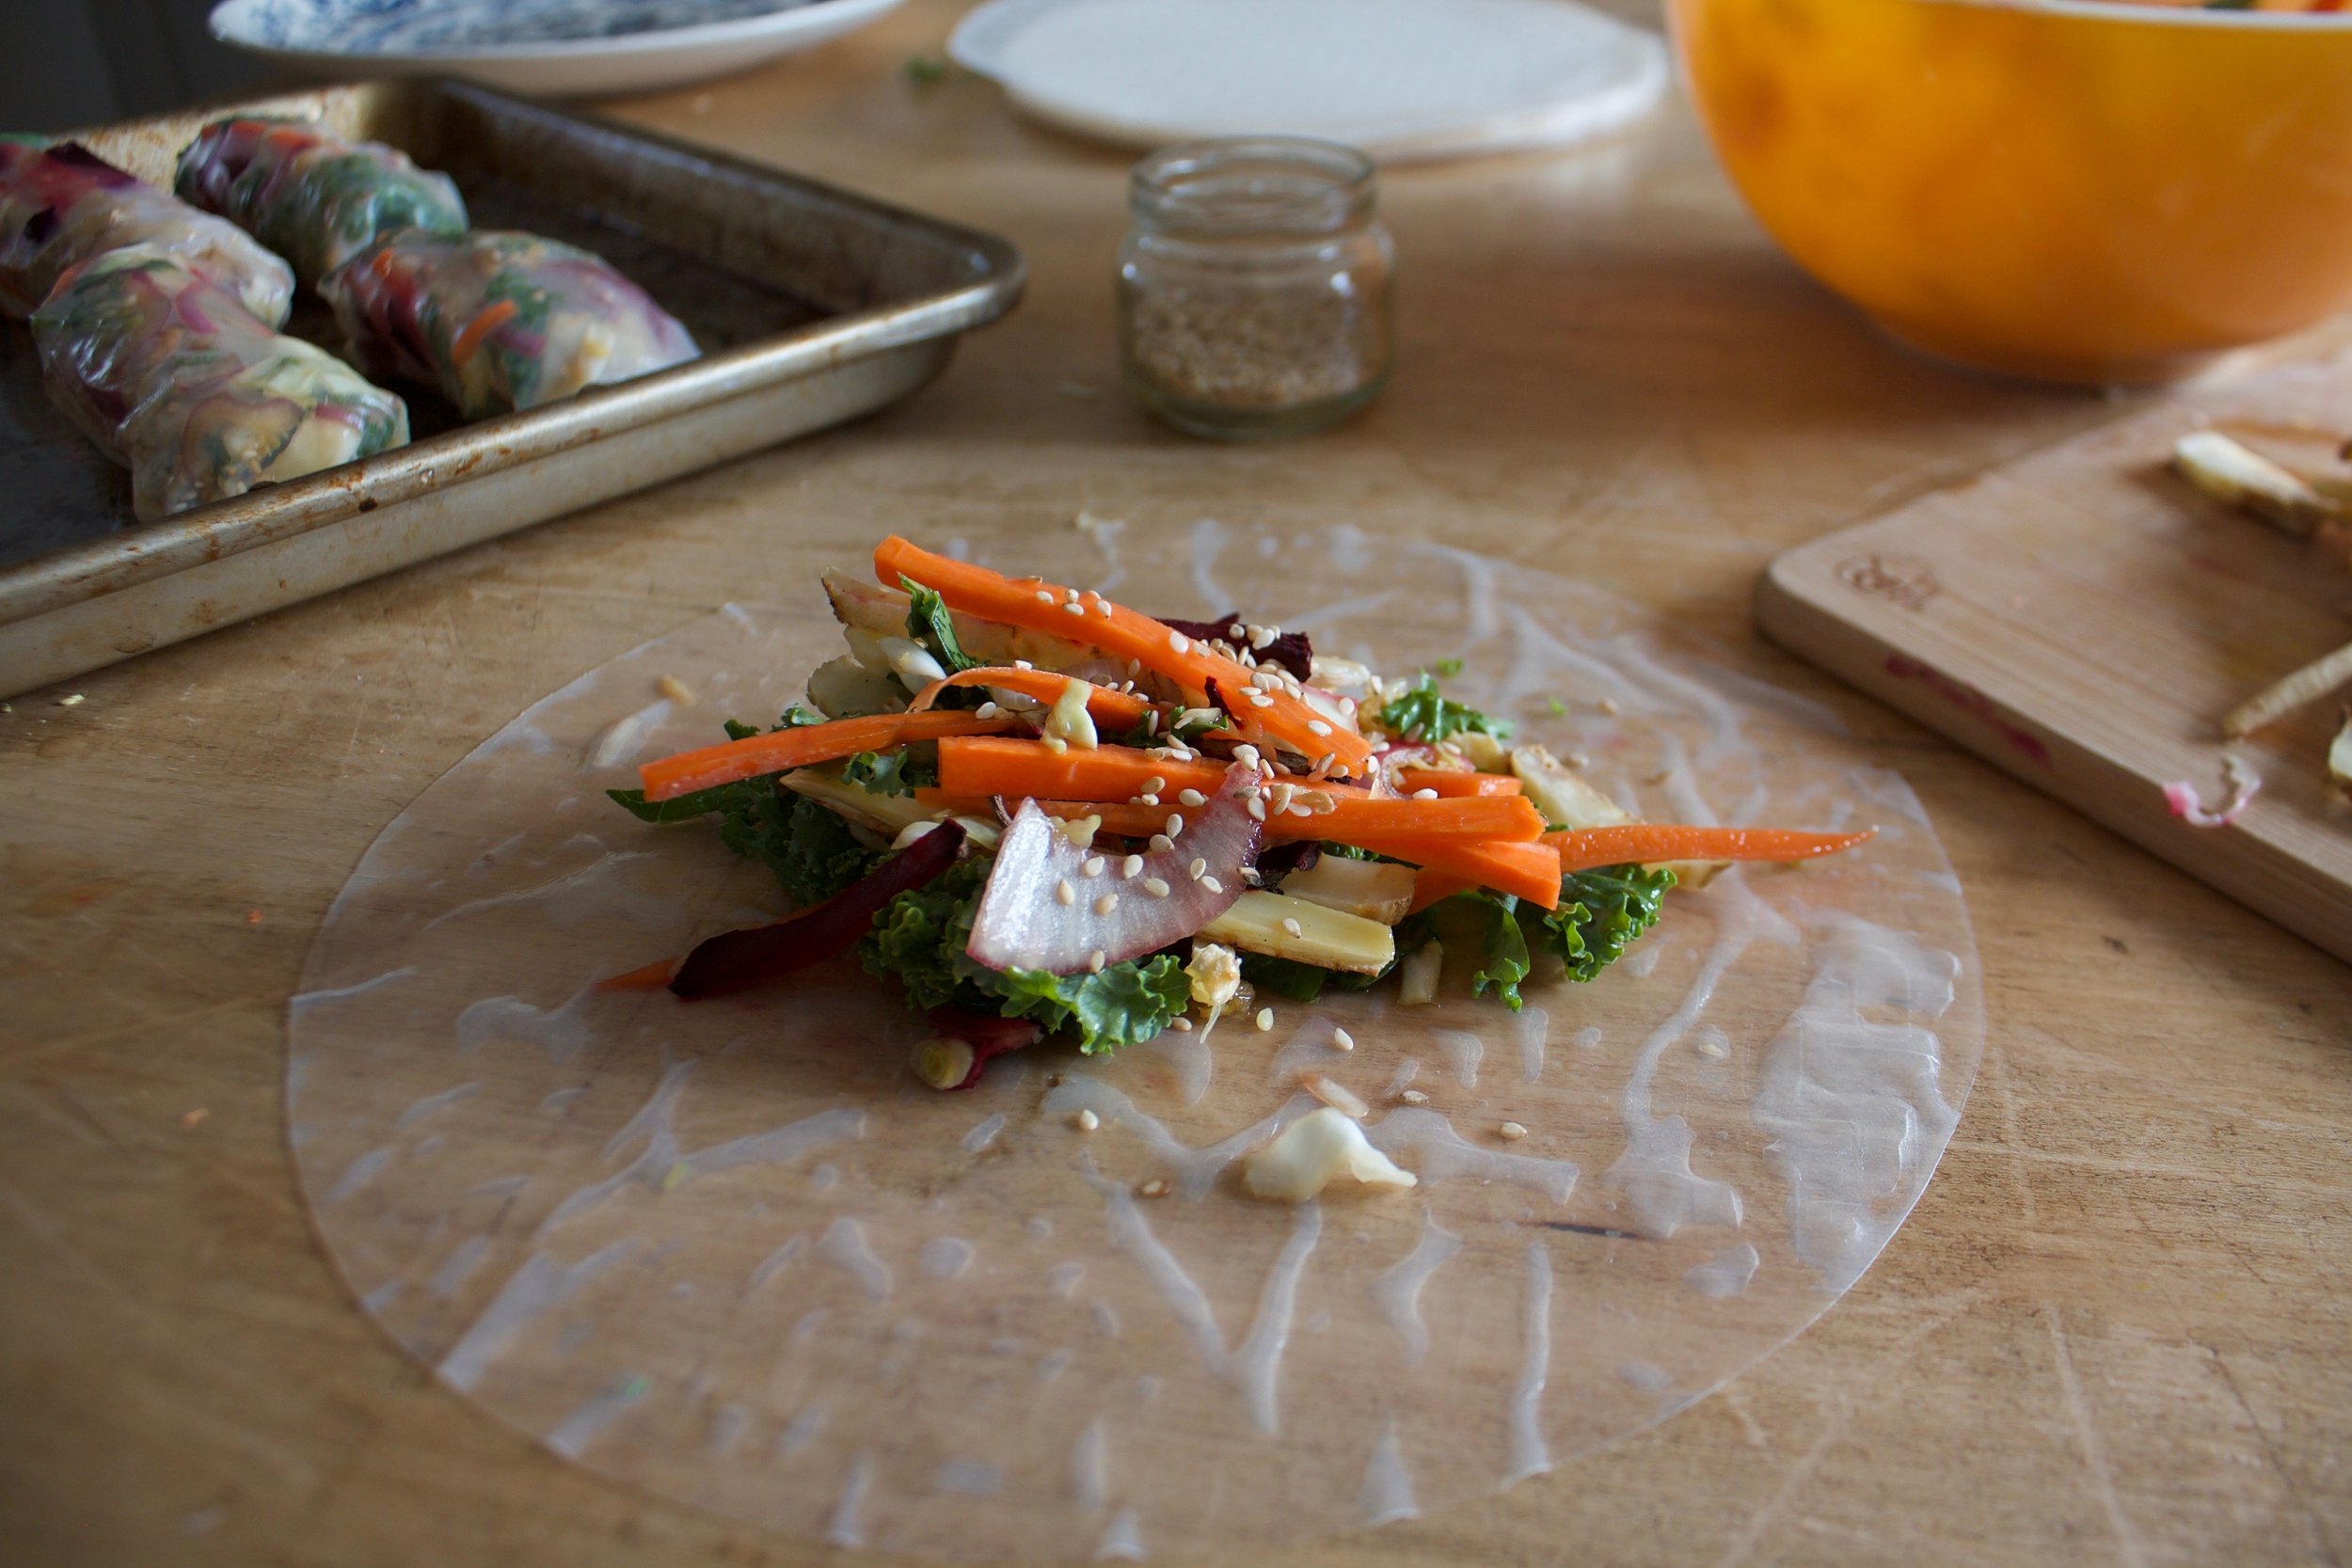
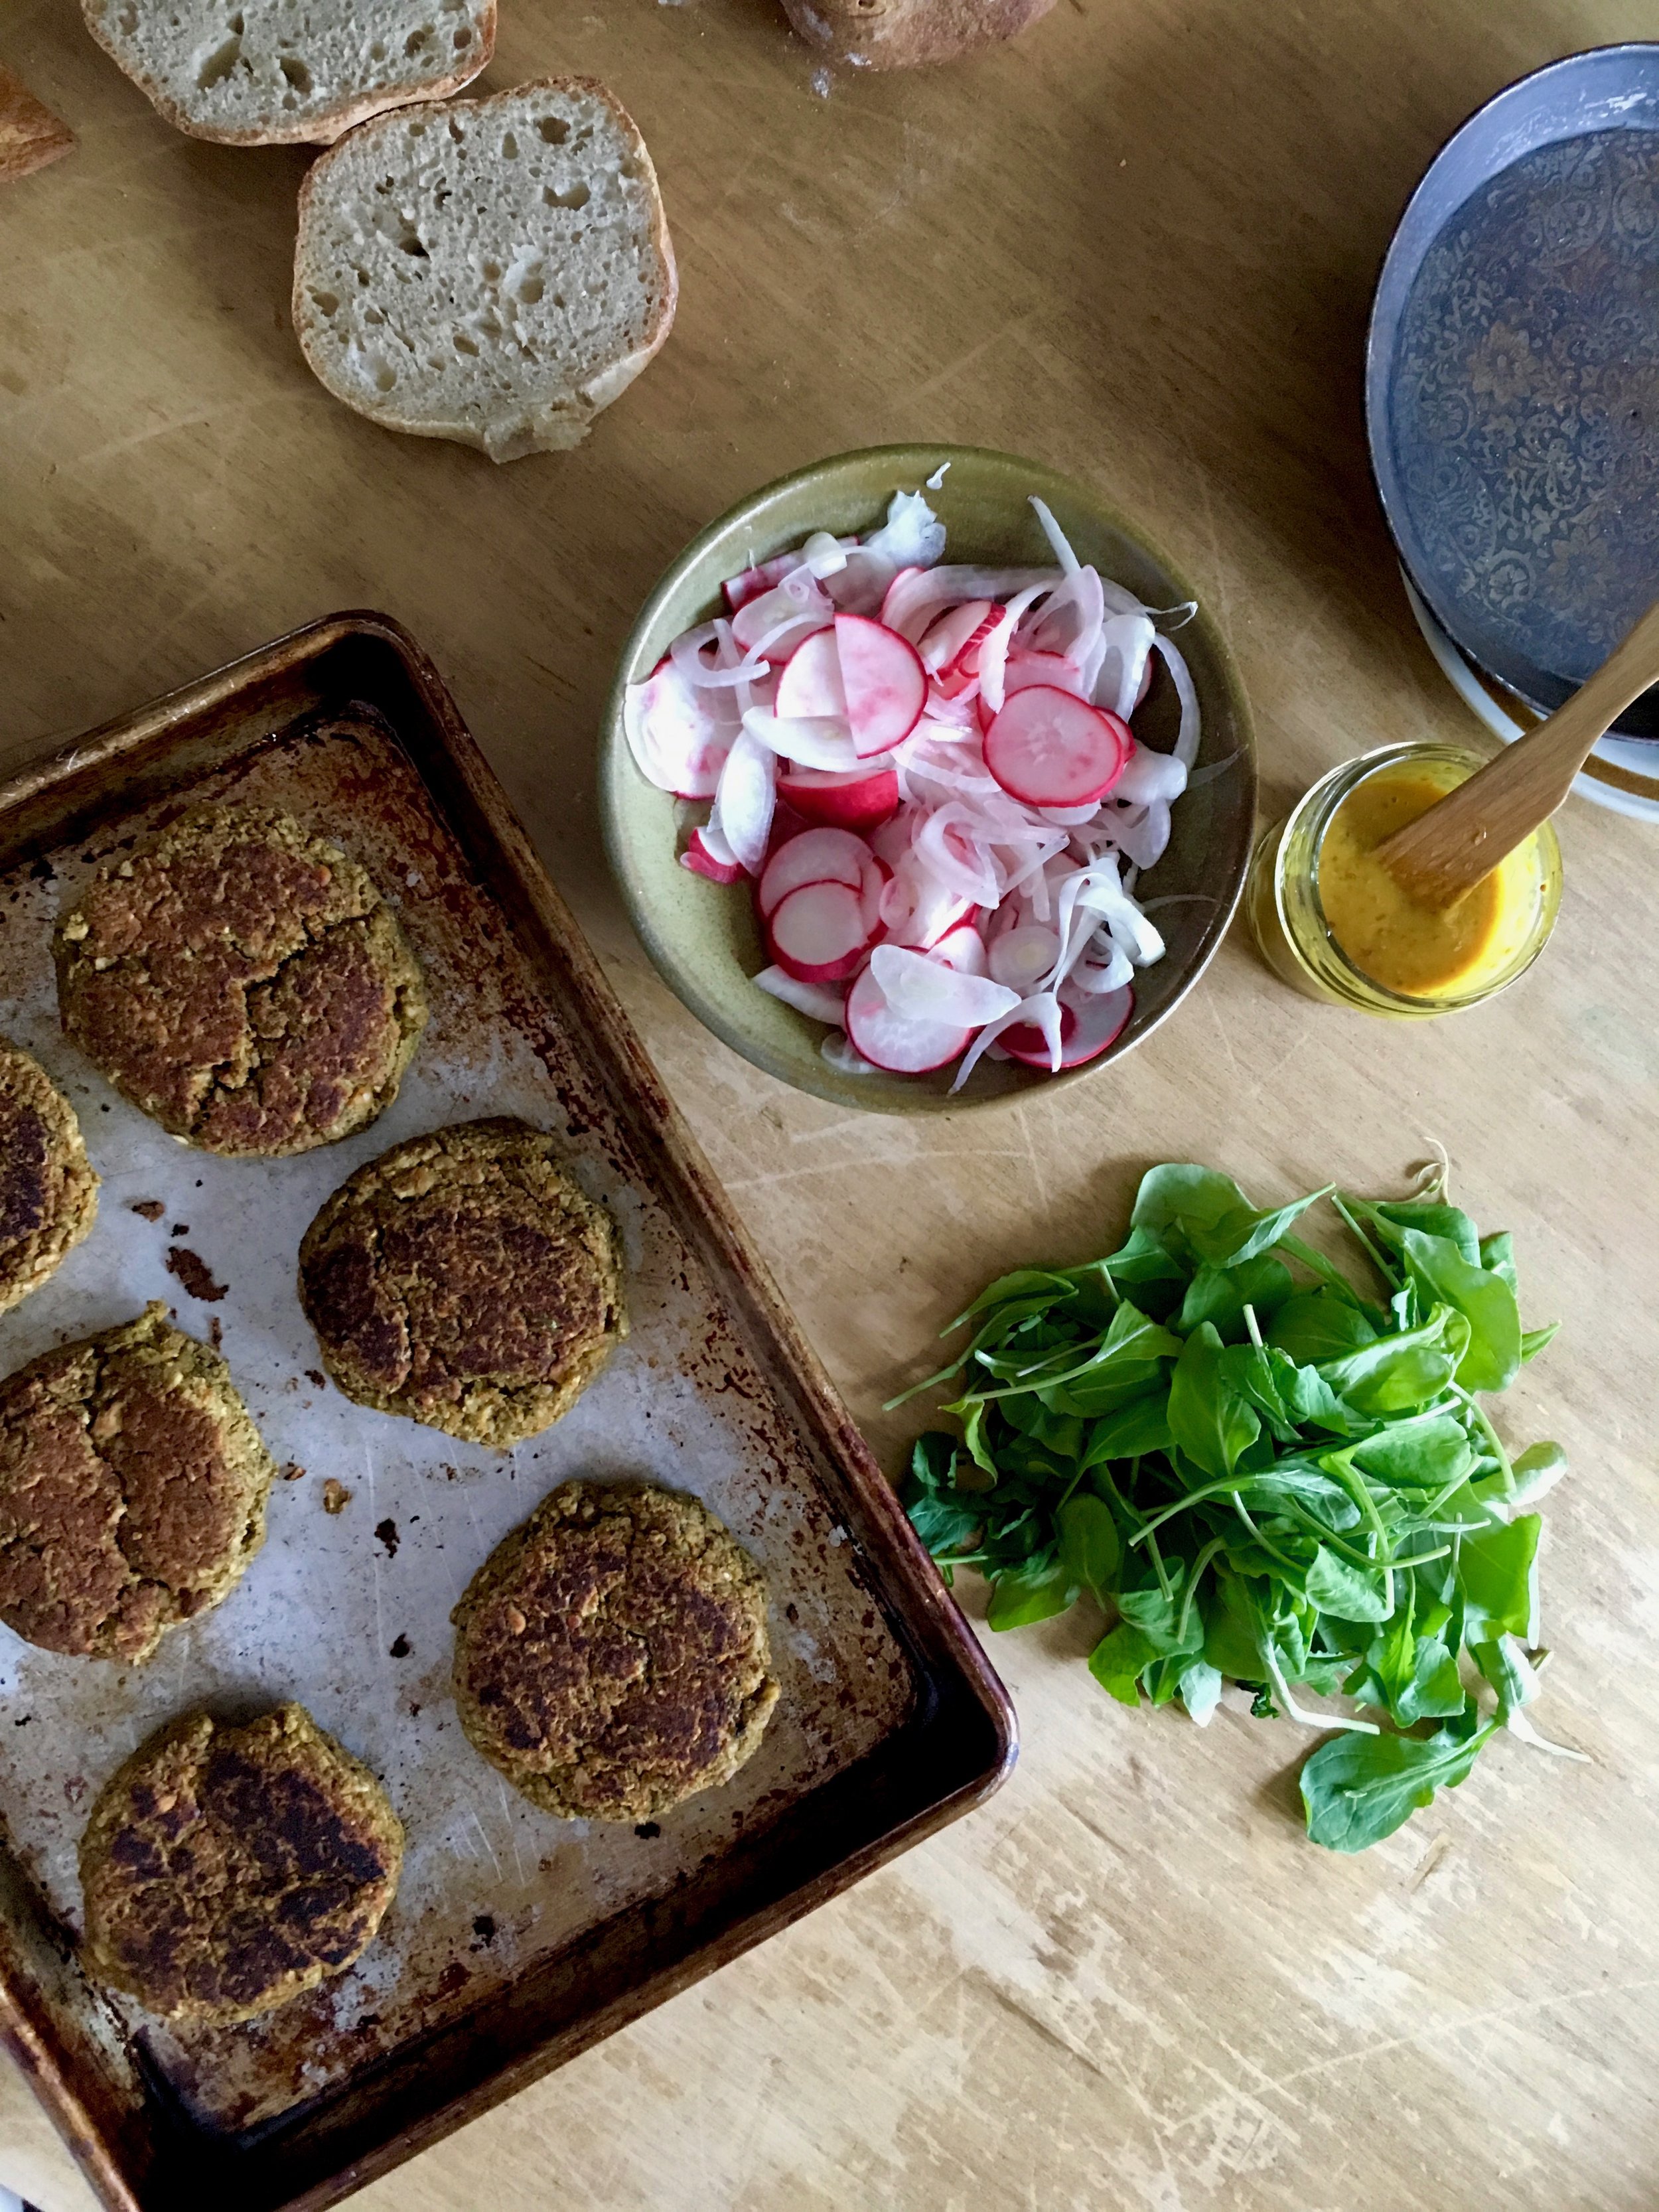
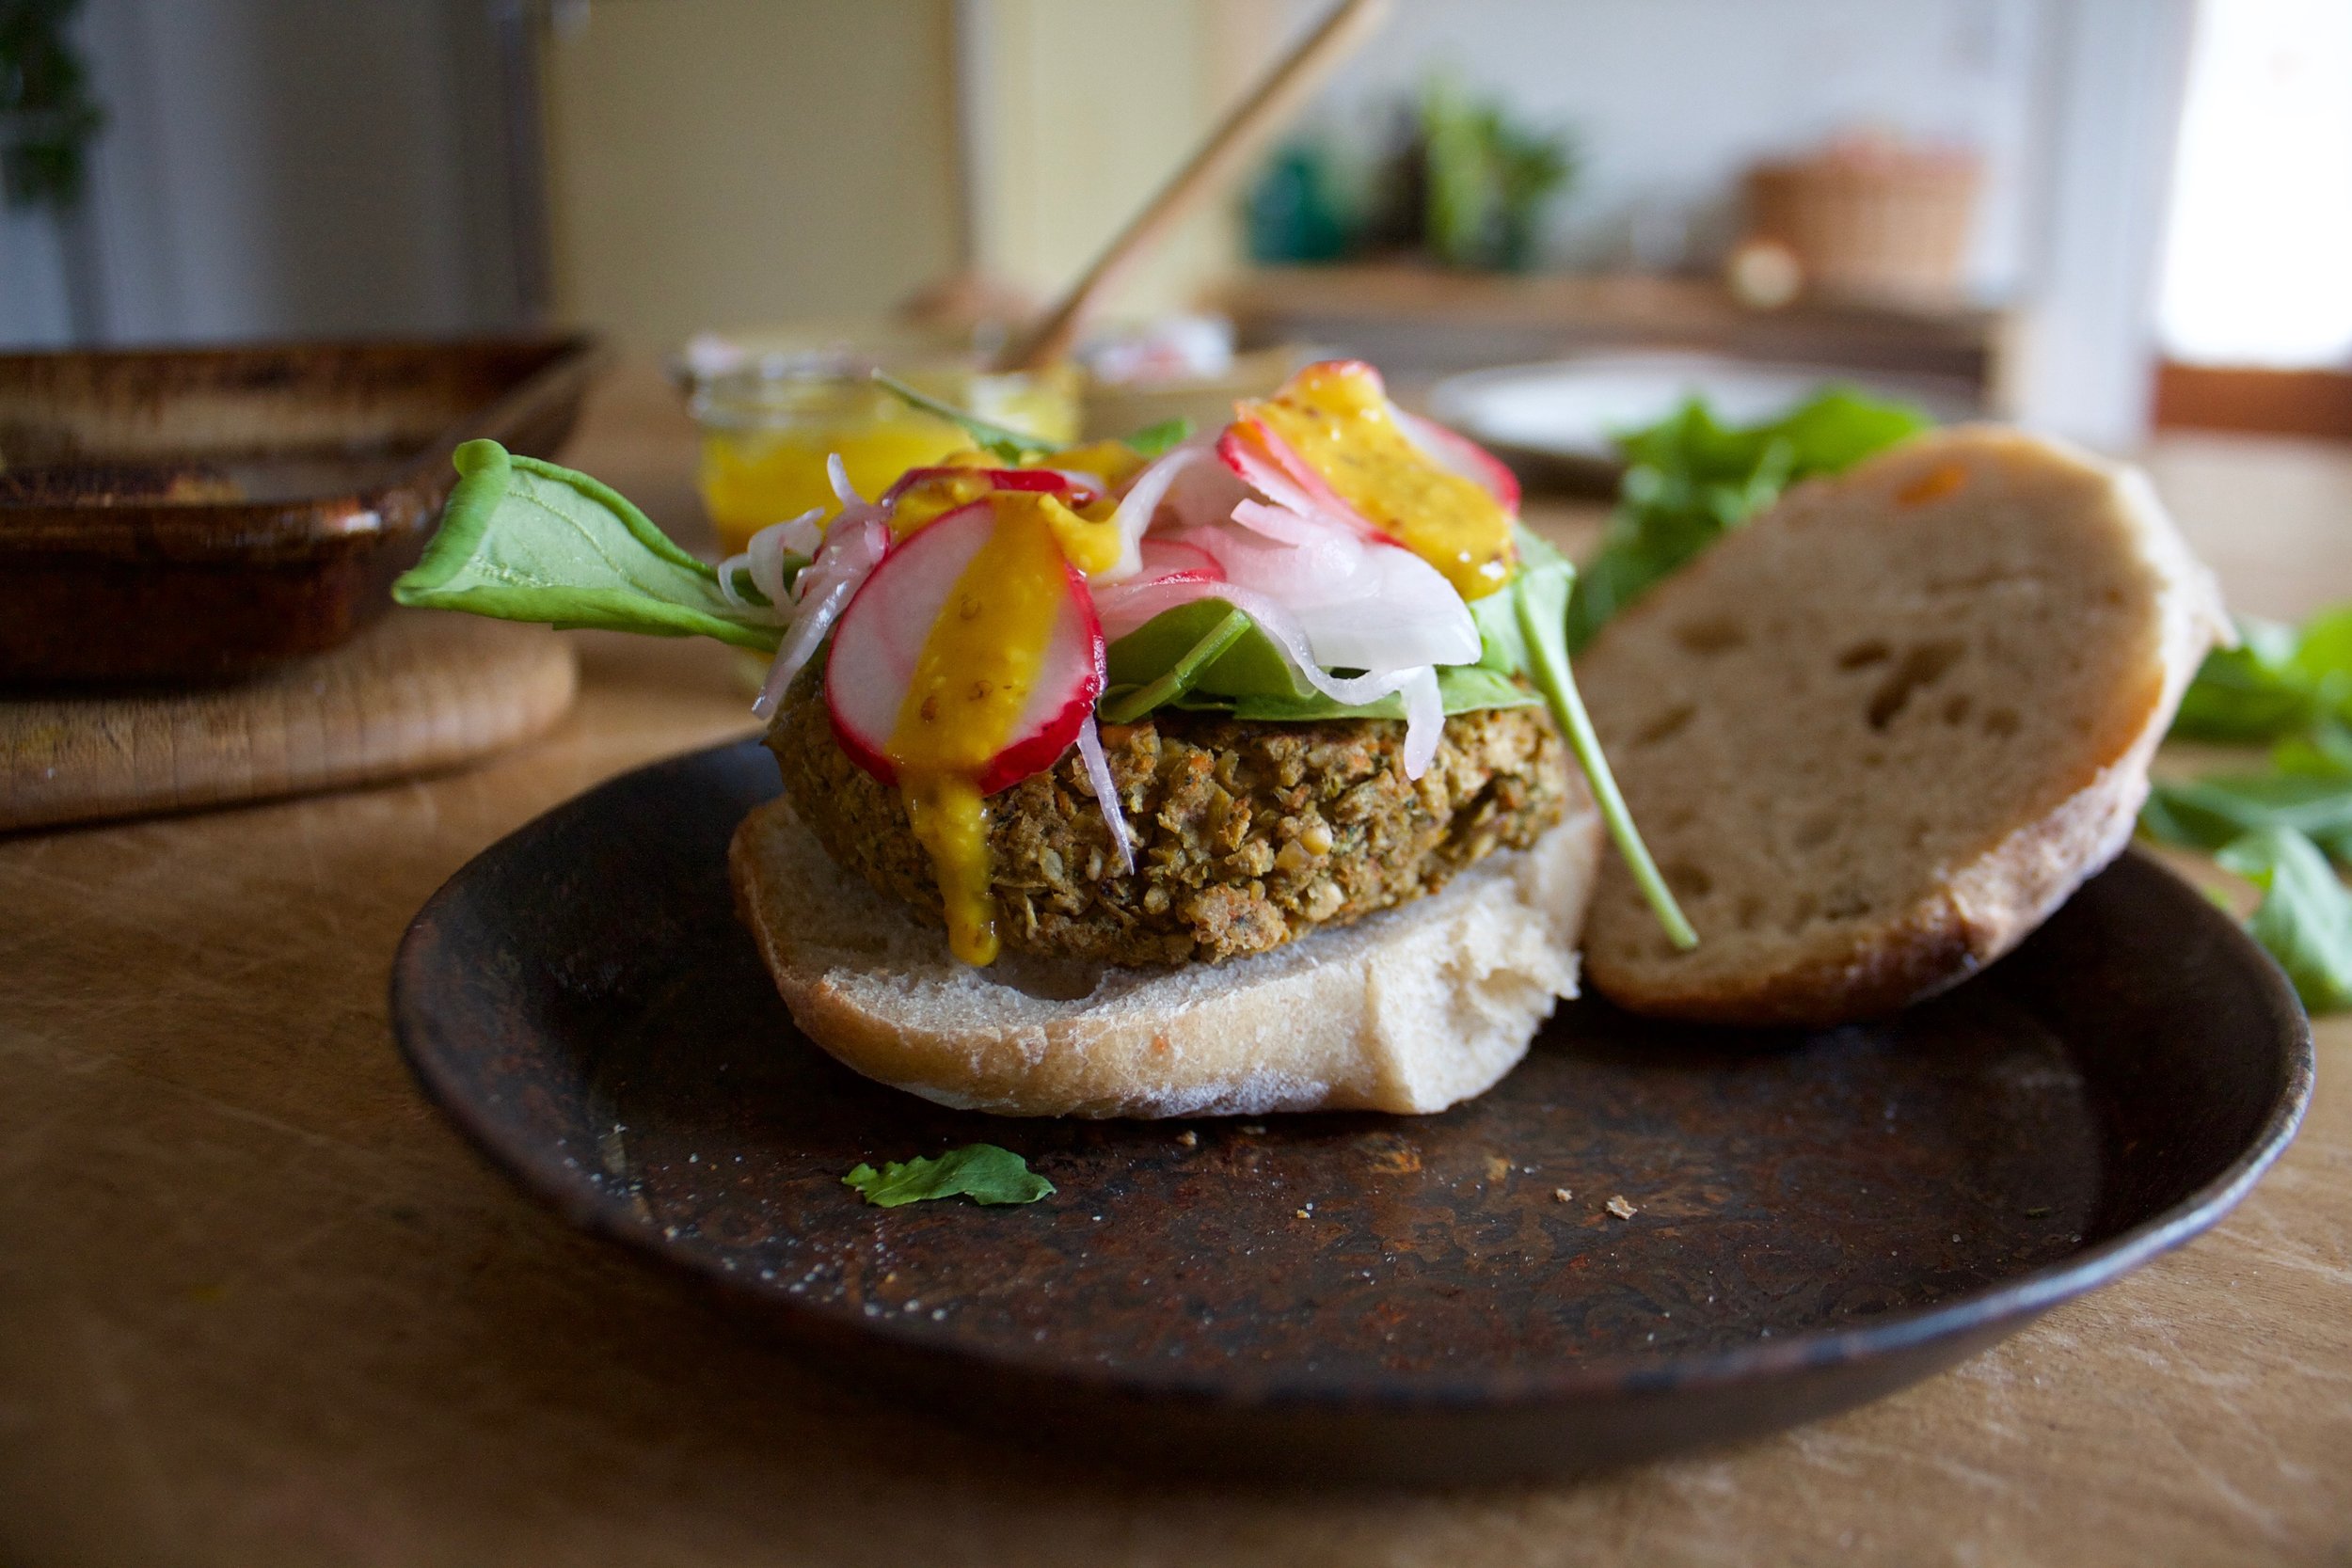
After the burgers are cooked, it time to assemble. Bread or buns of some kind(I used sourdough rolls) the pickled radish and onion mixture, some mustard( I used honey mustard) and more fresh arugula.

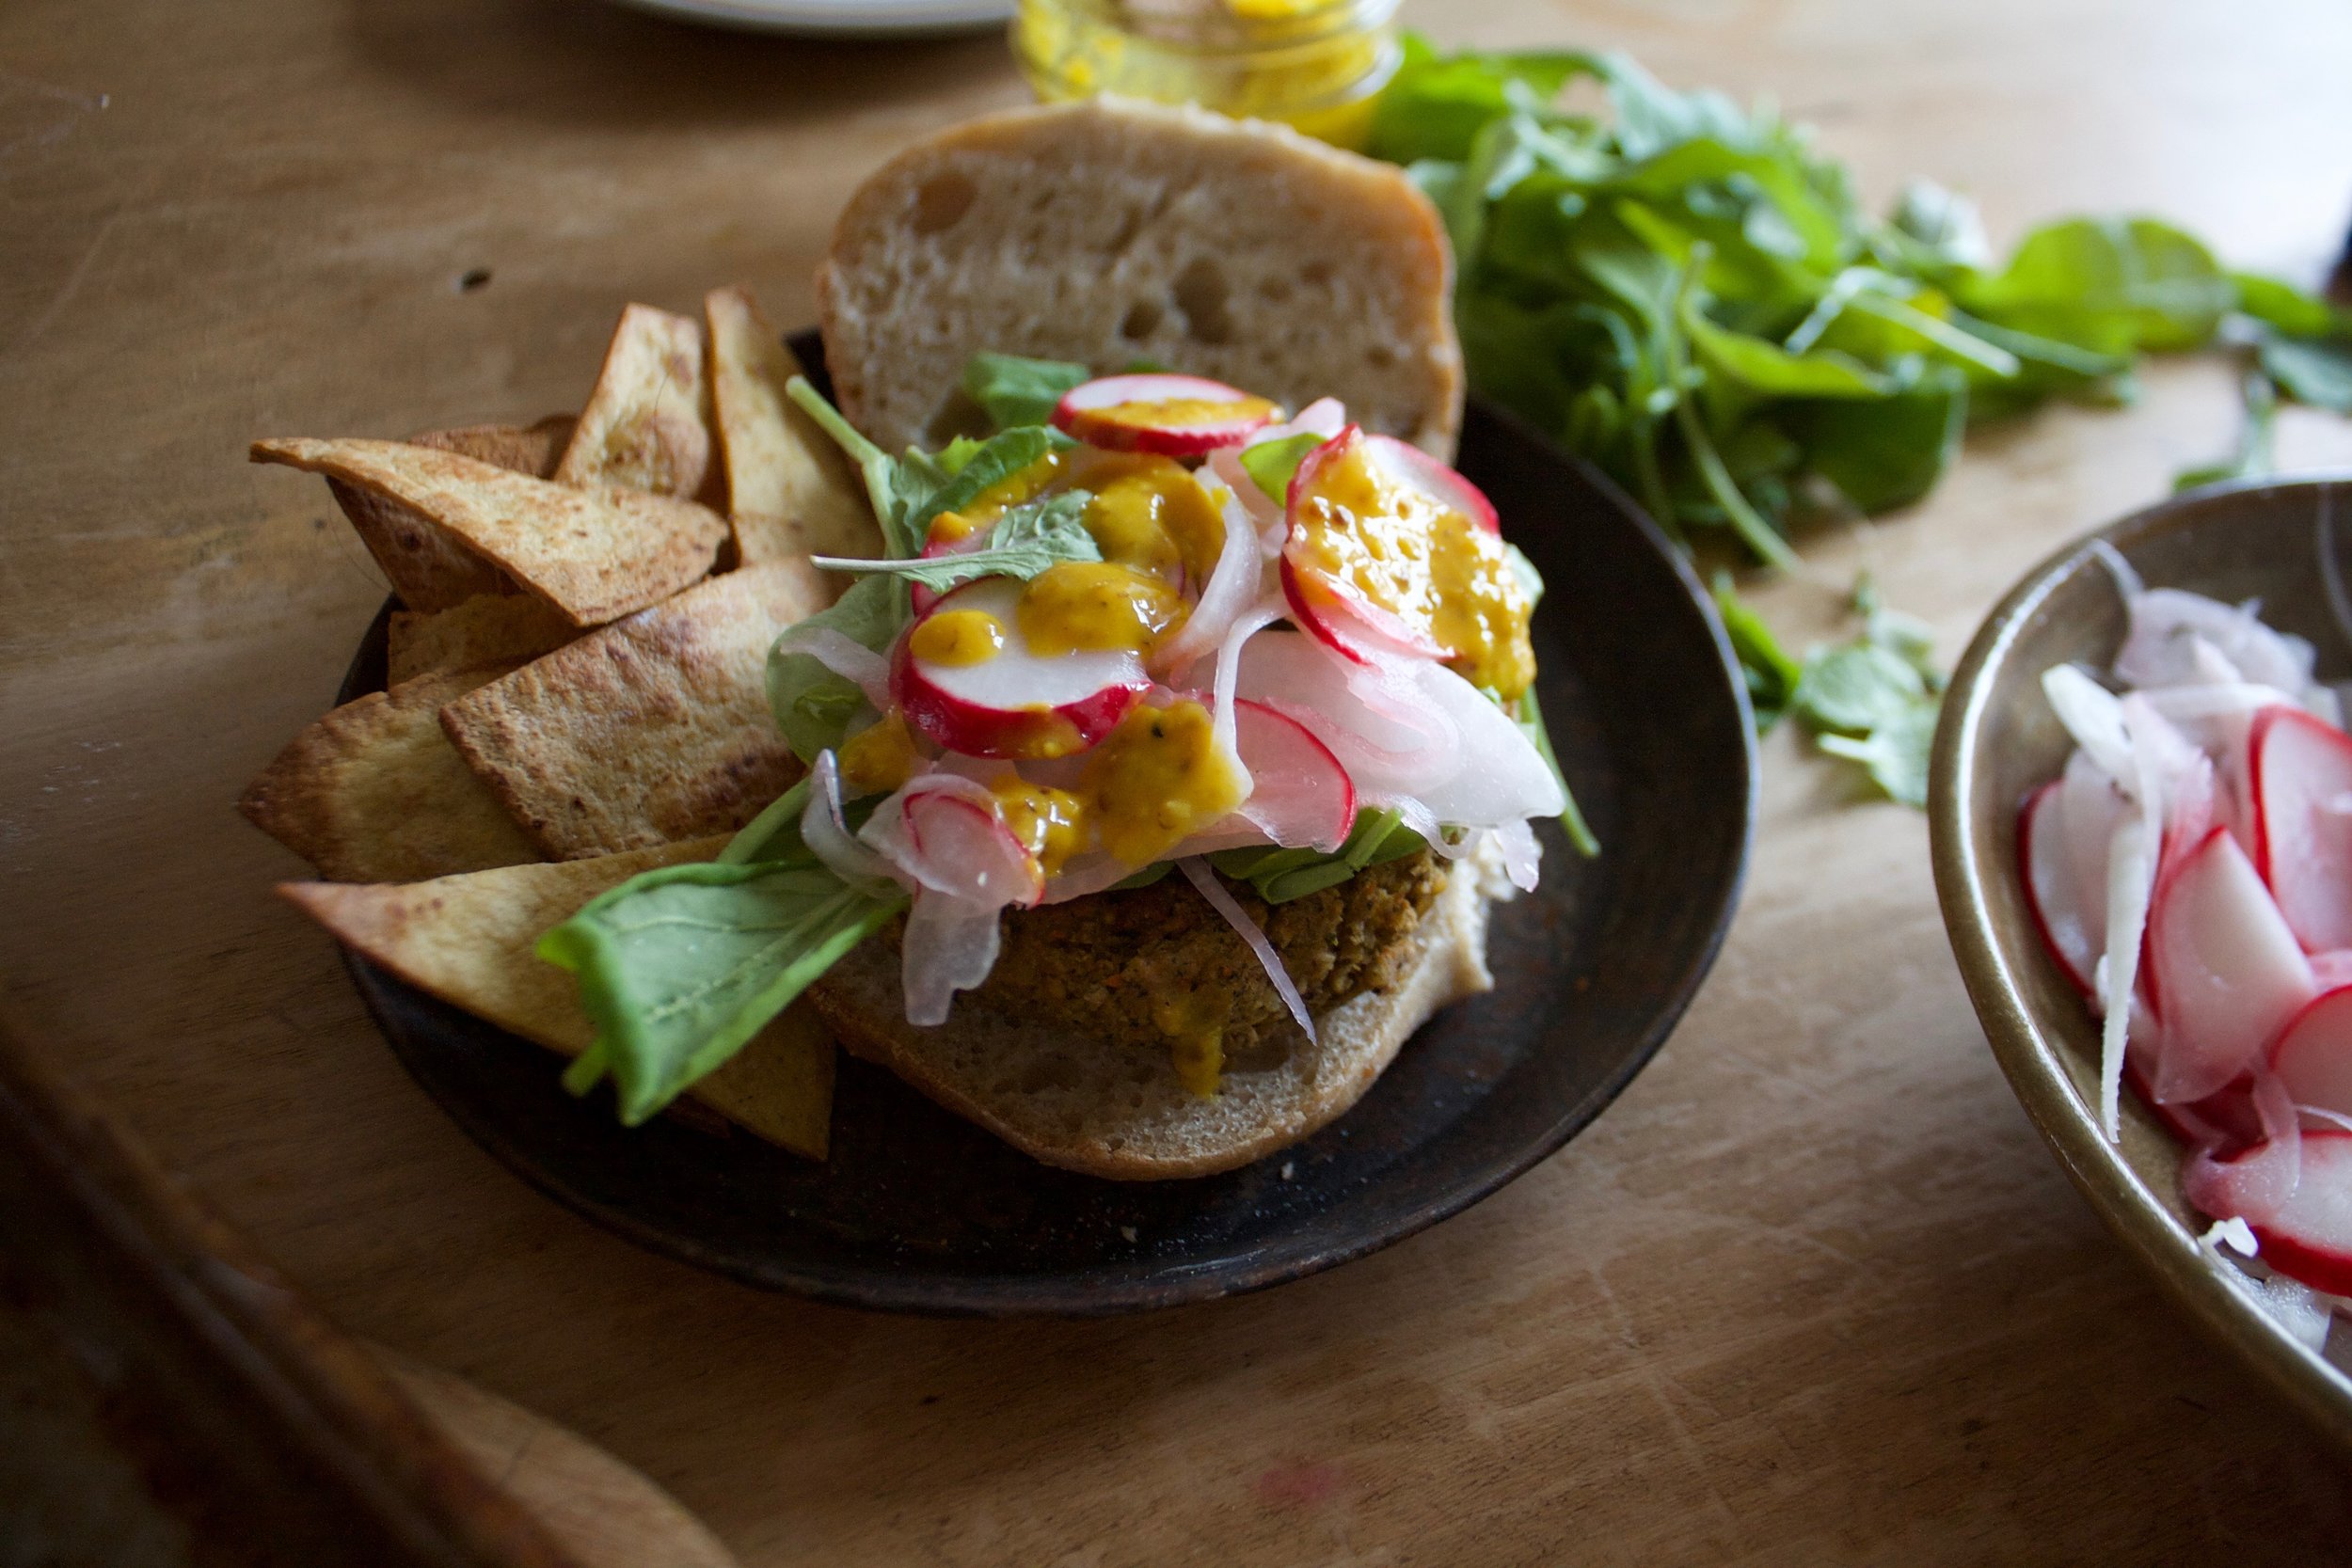
Do it up, do it right. Serve with some fries or chips and eat while knowing that spring is here, even if as you are eating, it is snowing. Damn snow. 

At least we have arugula. 

-C


Arugula Walnut ChickPea Burgers with Quick Pickled Radishes and Onions 

makes 6 burgers 

  • 1 can or 2 cups  cooked chick peas drained
  • 2 large handfuls arugula  (about 2 packed cups)
  • 1 large sweet onion
  • 2 small carrot
  • 1 cup old fashion oats
  • 1/3 cups walnuts
  • 2-3 cloves garlic
  • A lemon
  • salt and pepper
  • 2 tablespoon red wine vinegar
  • handful of radishes (5-7 of them)
  • salt and pepper
  • olive oil

To assemble burgers

  • Burger buns or baguettes
  • Maple or honey mustard
  •  fresh arugula 

Start by cutting half of the onion as thinly as you can. Do the same with the radishes and place the onions and radishes in a bowl with a sprinkle of salt and drizzle the vinegar all over Toss around and set the bowl aside.

Grab the food processor and dump the oats in. Roughly chop the other half of onion, the carrots, and the garlicand toss those into the processor too. Pulse until a medium crumble. Add in the arugula, the juice of the lemon, the walnuts, the chickpeas, and a good pinch each of salt and pepper. Pulse again until just combined and the mixture has come together. Taste and make sure the salt and pepper are good for you then dump the mixture into bowl and set in fridge for at least a half hour or as long as a day.

Preheat oven to 400.

When ready for burgers, take mixture out of the fridge.  Place a lightly oiled skillet on the stove on medium heat. 

Divide the mixture into 6 equal balls and pat into inch think patties. Take a clean cloth and pat eat patties dry.  Place each burger on hot skillet and cook each side for 4-6 minutes or until each side is nicely browed. Transfer burgers onto a lightly greased baking sheet then place them all into the oven to finish cooking for  40 minutes, flipping them after 20 minutes.

Once burgers are cooked, remove from the oven. They will be slightly fragile, but will firm up if you let them set  for 5-10 minutes.

Assemble the burgers. Grab a bun or bread of some kind (if you want), top with a good fork or two full of the pickled radish onion mixture, drizzle with some mustard and top with more fresh arugula.

Get on to eating it. 

If you don't eat all the burger at one time, the freeze really well. I almost prefer them after they have been frozen. 

In Vegetables, Vegan, Spring, pulses, Nuts, Gluten Free, entree, dinner, Dairy Free, beans Tags Arugula Walnut Chickpea Burgers With Quick Pickled Radishes And Onions, Vegan, Vegan Burgers, Veggies Burgers, Pulses, Beans, Burgers, Vegan Food, food, Pickled onion and radishes, spring, Walnuts, Nuts, Protien
Comment

Spring Cleaning the Refrigerator and Use it up Soup

April 14, 2018 Colleen Stem
IMG_5246.JPG
IMG_1392.jpg
IMG_1416 2.jpg

What are you doing this weekend? It is suppose to be cold and rainy (if not snowy) and crappy and just not a good weekend to be hanging outside, which makes it the perfect weekend to spend some time inside, SPRING CLEANING! Haha. Doesn't cleaning get you excited? No, well, sorry for you. Me, I like to clean, and I really like to tackle jobs that really really need to be tackled, like cleaning out the fridge. And a crappy weather spring weekend is probably the best time to do it. 

The refrigerator. My pride and joy of the kitchen. It's an old harvest gold Fridgaire from like 1970. This is the fridge I spent almost a year hunting down and finally finding on craigslist from a man who was cleaning out his dead mothers house. The fridge that I almost gave up on when I couldn't find it and almost bought a big stainless steal thing instead.mBut last minute, I found it, like it was  meant to be. And this fridge has a story all of it's own. It was a prize won by on of the ladies daughters from a cereal company contest. The family kept it for all these years and took such good care or it because of that. A well cared for and loved fridge. It is a good one with faux wood trim and metal shelving. It keeps my food cold and frozen  (sometimes frozen when it shouldn't be. The back top shelve  in the fridge has a few cold spots the might freeze whatever is there. My solution to that is to not stick things in the cold spots.) and is just as pretty as can be. Some people question it, don't understand why I didn't just buy a matching fridge to my stainless steal stove, but you know what, if you don't like it, well I really don't care. It makes me happy and I love it.

And to what goes on on the inside. To know me is to know what is inside of my refrigerator. It is always packed. There is and always will  be carrots, beets, lemon, cabbage, turmeric, greens, greens, and more greens in there. There will always be some hummus of some kind, mustard, bread dough, tofu, and lots and lots of any and every veggies you can think of. Plus a bunch of  jars and container, which I have a bad habit of not placing lids on all the time, full of lentils and beans, rice, and quinoa.  There is usually a  baked sweet potato or some squash and more likely the not, tomatoes and plant milk. In the freezer, well that's getting pretty empty now, but after harvest in the fall, it is packed to the brim with bags of frozen veggies. Now it has a few bags of veggies, frozen bananas and berries,flours, and nuts. But the fridge, The fridge is always full. And it an get a little messy....

And now I it's time to clean it out. 

I spot clean and straighten it out often. Usually before I pick up farm share I go through it and tidy up, make more space, and pull stuff out that needs to be eaten first. But that is just the surface cleaning. Stuff gets sticky, stuff gets stuck, and especially with veggies, stuff gets dirty.  Spot cleaning has a place but it's not cutting it anymore. It's spring and it's time for a full fledge deep clean. 

Now I know most people have their own methods for cleaning but here are a few tips and techniques that I have to tackle the beast.

-Prepare. You don't want to just go at it without a plan and supplies. Get out your cleaning supplies. Grab a recycling can and a compost bucket, and have a big lean surface ready to place stuff on. The vacuum or a broom should be handy too. 

-Cleaning solutions. It is a fridge so you don't want to be cleaning it with a bunch of chemicals. What I use is a vinegar solution. 50/50 white vinegar and water and a squirt of dish soup. It cleans, degreases, disinfects, and won't kill you. 

-An empty sink or bathtub to wash all the drawers and shelving off. 

-A few clean containers. Just have them on hand, with lids, to place stray things roaming around in there. 

-Clean from  top to bottom. This avoids crap falling into something you already cleaned.

-Labels. Any containers that are not clear might benefit from a label. And if you tend to leave things in the fridge for a long time, a label for the date of opening is also a good idea. 

-Inventory. Knowing what is in the fridge is very important, this prevents food waste.

-Too many condiments. I don't know how many times I have looked in peoples fridges and seen 5 different bottles of ketchup or Italian dressings open. Consolidate.  And if you don't like it or don't use it, get rid of it.

-Wipe it all down. Not just the fridge itself, but all the stuff going back into it. So many times I have stuck the soy sauce in the door and had it leaked all over. 

-Know your fridge and place accordingly. Most people don't have super old fridges, but even the new ones have some quirks. Know if there are cold spots or dead zones or places that things get stuck and place food accordingly. Also think about where you are placing food. It don't make sense to but the milk way in the back if you use it all the time.

-Under and behind. Don't forget to clean under the fridge and behind the fridge. It will be dusty, maybe a little gross, but it must be done.

-Music. A good playlist is always going to make you better are cleaning.

As for the Use it Up Soup, do just that. This is the perfect time to use up what you got. I know that I have way more veggies then the average person, but don't let that stop you. You could even pull stuff out and fill in missing ingredients form the store if you want. And be creative,  pickled hot peppers, all the frozen veggies, any wilted greens. Even almost empty bottles of mustard. If you think it sounds good in soup, use it up. Add some canned tomatoes and a handful of spice, you are gonna end up with something tasty.

. A clean fridge and soup, how can it get any better? 

The before. Veggies all over. Jars and containers stacked, with and without lids. A stray half of banana, and empty water bottle, and a half eaten salad in a bowl just having out.  The shelves are kind of gross. The veggie drawers are nasty, and I think almost everything is wet because I dumped over a container of tofu the other day and all the tofu water leaked all over...... This deep clean was a long time coming.

IMG_1396.jpg

I always have so many bags and containers of veggies and beans in the fridge.

The stuff in the door too. This is actually a lot of crap. The last dinner party we had someone brought over salad dressings. The mr and I don't use salad dressing, but I guess it's not so bad to have them here. The littles like them and I know that they will be eaten.

IMG_1376.jpg

And the stuff that is going to be soup. I found a wrinkly parsnip, some celery, carrots, a few cooked potatoes, some cooked butternut squash and a half a kale and carrot salad. The jar of almost gone lentils, and jar of tomatoes. Some ginger and turmeric root which is always is the fridge. A rutabaga, some cabbage, an onion, and I also grabbed some frozen green beans and the rest of the frozen rhubarb ( resh rhubarb is on it's way) 

I chopped it all up, tossed it into a big pot. Added some spices and  water and stuck it on the stove to cook away while I got to the cleaning. 

IMG_5225.JPG

Empty fridge. 

IMG_5234 2.JPG

After. Clean fridge wand clean food. All organized and pretty.

IMG_5212.JPG

The freezer before. It looks a little crazy but there really isn't that much in there. 

After. I pulled it all out, wiped it down, and put it all back, organized, and wth lids (again, my bad habit of no lids) 

IMG_1413.jpg

And all the while I was cleaning, the soup was cooking.

Clean refrigerator. Makes this lady happy here. 

And the reward for all of your cleaning. A big bowl of soup.

-C

In dinner, home, how to, kitchen tips, one pot meal, soup, Spring Tags Spring Cleaning The Refrigerator And Use It Up Soup, Spring cleaning, food waste, vintage refrigerator, fridge, cleaning, tips, Spring, soup
Comment

Sunday Happy

April 8, 2018 Colleen Stem

Freshly showered, clean pj's, popcorn, and chocolate bars. I am good at movie night  Notice the mr and his lack of candy... He hadn't taken his shower yet. HA.

The week, oh the week. It has been a full one. The lists have begun. Materials have been bought. Projects are scheduled and ready to go just as long as it doesn't snow again. Aggh. (Waking up the other morning to white stuff was, if not very beautiful, somewhat like a kick I the gut. But it's gone. And sure still is brisk out, but this is it guys, for real this time. Spring) We had Megan's birthday party over here the other night. I made pizza and salad and cake (that I am still finding al over the floor. I swear the people in my family do not know how to eat cake without getting it all over the f-ing place) and everyone was happy. I think. And that is the last birthday happening here for a while. (there are not more birthdays until late summer. HOORAY!) 

The littles have been here a lot this week. Having dinner, playing outside, and just pretty much beating on the mr. As a matter or fact, those little are currently asleep in the other room right now. Coco is at the hospital again so the big ones are with us. Never a dull moment here. We spent the day constructing houses out of cardboard, painting them and also getting paint all over the dinning room table. There was some scootering around the neighborhood, chalk art, and just doing stuff outside that we should be doing. We (or they) watched a movie (I cleaned) and then the beginning of my hellish night began. A stomach ache and a head ache for the girl and the boy has been coughing up a lung. Miley just needed to go to sleep but Judah just couldn't. The mr hooked u the humidifier and I have been pushing honey water down his throat every hour all night. I think he finally got himself to sleep at like 2. As for me, I have had no sleep, not a freaking wink. All I could do was listen to his coughing and if he stopped for a few minutes, I would worry and wait for the coughing to start.  And when I wasn't focused on his coughing, I was thinking how tired I was but then I started to think about the  taxes which then gave me an anxiety attack. And the mr started to snore very very loudly.  Plus I was getting up to check on the boy every hour. But both are asleep now and I am not. And it's pushing 5am. I am feeling pretty crazy and think the time for sleep has passed me by.

Not exactly sure what is going on today. All I know is that there are pancakes to be made, popcorn to clean up, and modern cardboard boxes to be finished.  Judah is hoping to install a pool off the side of his house and I think Miley was talking about a bounce castle. (how does one make a bounce castle out of an old yogurt container?) I just hope that they wake up feeling better and that Coco gets to come home today. Then they can go home I can pass the fuck out. 

Fun from the internet 

-What’s the Best Medicine for a Cough?.  Honey and humidity, it helped a whole heck of a lt. 

-The Intimacy of Socializing in Silence This makes me feel understood. 

-Good peanut butter is of upmost importance in life. Have to agree with the Trader Joes... It's one of the best, The Best Natural Peanut Butter Is Also the Easiest to Find

-Isle of Dogs. I really want to see this one, even though it pulls at all my sad heart strings. .

-I know I have posted things about this before, but forest bathing...got to do it. Suffering From Nature Deficit Disorder? Try Forest Bathing

-Plant life. 5 TIPS FOR CARING FOR FIDDLE LEAF FIGS and 5 Overlooked Plants That Can Survive In The (Almost) Dark

-20 Creative Ideas for Decorating a Kid's Bedroom We don't have any kids of our own, but we do have a kids room because we always have kids. These rooms are good inspiration and not just for the kid room but for our room too.

-Utah's 'Free-Range' Parenting Law Protects Parents So Kids Can Roam . I know some 7-8 year olds I would trust with my life. I also know some 13 year olds that I would never ever leave alone for fear of many many things. It all depends on the kid. But I love this. As long as it is done right and for the right reasons . 

-Healing with Poultices. Mash them up and smear them on and they never let me down. 

-Where the Streets Have MLK's Name. A man worth of having his name on all the street. 

Pictures from the week. 

IMG_5042.jpg
IMG_5046.JPG
IMG_5066.JPG
IMG_5067.JPG
IMG_3210.JPG
In vermont, sunday happy, Spring, life, internet links, photography Tags family, sunday happy, everyday life, internet links, phtography, pictures, vermont
Comment

Green Salad with Candied Almonds, Avocado, And A Blueberry Lemon Vinaigrette

April 7, 2018 Colleen Stem
IMG_1338.jpg
IMG_1329.jpg
IMG_1362 2.jpg

We need fresh, we need green, we need color.

We need salad.  

The other night I made Megan's birthday dinner which consisted of pizza and salad. The pizza was pizza and everyone loved it and ate it, but what surprised me was how everyone was really into the salad. A big ass bowl or fresh greens with onions and I think carrots and cabbage and some cranberries I pulled form the freezer and candies almonds. Simple and not fussy, and everyone was just so happy to eat it. I felt like a salad genus and now I am full on into making fun awesome spring salads. (I have to keep reminding myself that yes, it is indeed spring. So what we got snow yesterday, it will melt, right???? ) 

So I bring to you a a bowl of fresh crispy spring greens with crunch and bite and creaminess and flavor. A salad that will bring you joy and satisfaction and maybe even anticipation for your next salad adventure. Not to mention a salad that looks so dang pretty. 

Get into the green. You will be as happy as a rabbit in a garden. 

The stuff. Greens, red onion, an avocado, almonds, blueberries, and a lemon. Also need some maple syrup, olive oil, red wine vinegar, and salt and pepper. 

A couple teaspoons of maple  go in with the almonds. Really toss make sure they are all coated.

IMG_1270.jpg

Place the almonds into a hot skillet cook for about 5-7 minutes or until the maple has become sticky and the almonds no longer raw. 

IMG_1278 2.jpg

When they are done, dump them onto a piece of parchment to cool. Don worry if they clung a little, you can break them apart once they are hard. 

Easy ass dressing. Blueberries. juice from the lemon, olive oil, vinegar, a tiny splash of maple, and a good pinch or pepper. 

Blended then done. Taste and season with salt if needed. 

IMG_1309.jpg

Avocado gets cut into small chunks and the onion get s thinly sliced.

It's all ready, so now make a salad

IMG_1331.jpg

And now eat a salad. 

-C


Green Salad With Candied Almonds, Avocado, And A Blueberry Lemon Vinaigrette

Makes 2-3  salads 

  • 1/4 pound greens ( I used spring mix but mesclun mix or spinach is good too) 
  • 1/2  red onion
  • 1 avocado

For the Almonds 

  • 1/3 cup raw halved or slivered almonds
  • 2 teaspoons maple syrup 

For the Blueberry lemon Vinaigrette 

  • 1/3 cup blueberries (I used  frozen)
  • 1 lemon
  • 1 Tablespoon olive oil
  • 2 Tablespoon red wine vinegar
  • 1/2 teaspoon maple syrup
  • pinch or salt
  • pinch or pepper

To make the  candied almonds, preheat a skillet to on medium heat on top of the stove. Place almonds into a small bowl and drizzle with maple syrup. Stir to coat. When the pan is hot, dump the maple covered almond into it and spread them out. Cook for a 3 minutes, then give a stir and cook for a 3 or so more minutes or until the maple has evaporated and the almonds are starting to brown. Dump the almonds directly onto a piece of parchment paper to cool and hardened. Do worry if they stick together a bit, you can break them apart after. 

To make the vinaigrette, place the berries into a jar (if using stick blender) or blender with the juice of the lemon, olive oil, vinegar, maple, and a pinch of pepper Blend until smooth. Taste then add a very small pinch of salt or more to taste. 

For salad. Thinly slice the onion and dice the avocado. Place greens into bowl(s) and toss with onions and avocado. Top with  candied almonds and drizzle all over with the vinaigrette. Grab a fork and eat.

Any left over dressing will last in fridge for about a week and left over almonds will be good for.a few weeks in a airtight container.   

In breakfast, brunch, Dairy Free, dinner, Dressing, fruit, Gluten Free, grain free, Nuts, salad, Spring, Vegan, Vegetables Tags Green Salad With Candied Almonds, Avocado, And A Blueberry Lemon Vinaigrette, Vegan, Salad, Candies Almonds, Maple, Blueberry Lemon Vinaigrette, Fresh, Spring, Greens, Vegetables, plant based, gluten free, grain free, healthy, avocado, breakfast salad, lunch salad, dinner salad
Comment

Winter Roots Spring Rolls

March 24, 2018 Colleen Stem
IMG_1081.jpg
IMG_1021 2.jpg

Are you so excited that it is spring? I know I am.  But I am also realistic and know that even though it is "officially" spring, it is not going feel like spring here for a little while. There are still a few more weeks of potential snow storms and cold weather and then there is mud season before we really get to spring and things growing and green.  And plus there are still plenty of roots to finish up before we get into all the fresh spring veggies. You can't plant broccoli and pea into frozen snow covered soil. 

I love me some root veggies, they are some of my favorite, although like every year around this time I am starting to tire of them. But what are you going to do? Stop complaining and stuff them into a spring roll with some lighter veggies and enjoy while you can because once the roots are gone, they are gone (until the fall).  

These spring rolls are good, I mean really really good. The combination of the roasted roots with a fresh tangy mixture of crispy crunchy veggies and fresh ginger and soy and they are just really good. When I made these, it was still vey cold outside so I even went an extra step and baked the rolls to give them a little crispiness to the wrapper  because crispy warm food is kind of nice when its cold out. Because it is still cold out. 

Happy Spring!!!

The stuff. For roots we are using beet, celeriac, parsnip, and carrot. Then we need onion, kale, cabbage, garlic, fresh ginger and rice spring roll wrapper. Also some sesame seeds, soy or tamari, apple cider vinegar, and a little oil or avocado oil. 

IMG_0956.jpg
IMG_0959.jpg

First thing to do is get the roots roasting. Cut the roots into !/4 inch thick disks  and place right onto a lightly oiled baking sheet then stick into the oven to roast until browned and tender. 

As soon as the roots are in the oven, chop the kale nice and small. Thinly slice the onion and the cabbage and mince and grate the ginger and garlic. Cute the carrot into very thin matchsticks. 

IMG_0978 2.jpg

Toss it all into a bowl and mix with the soy and the vinegar... (this mixture is so very very good.. might just be a salad here soon) 

Don't be gentle, toss with your hands. You can lick then after too. 

IMG_0989.jpg

Roasted and cooled roots get a nice matchstick chop so they fit into the rolls. 

IMG_1017.jpg

About time for assembly time. Damp wrapper with a pile of the  cabbage, kale, carrot, onion mixture and a few pieces of each of the roots topped with a sprinkle of sesame.  Oh so pretty all waiting to be wrapped up. 

IMG_1032.jpg
IMG_1034.jpg
IMG_1035.jpg

Fold sides over, fold bottom up, and roll nice and tight. Easy peasy. 

Place the rolls on a lightly oiled baking sheet. Lightly brush each roll with a little oil as well and stick them into the oven. After 10 minutes, flip them over was bake for 8 or so minutes more until both sides are lightly crisp.

IMG_1060.jpg

And the they be done. Eat right away and serve with extra soy sauce. 

See, we are still happy to eat our roots. And spring veggies will be here before you know it. 

-C


Winter Root Spring Rolls

make 6-8 spring rolls

  • 1 beet
  • 1 parsnip
  • a small bulb of celeriac (celery root)
  • 1 carrot
  • 1/4 head of cabbage
  • 1 small red onion
  • 2-3 kale leaves
  • 1 tablespoon soy or tamari 
  • 1 tablespoon fresh grated ginger
  • 2 cloves garlic
  •  2 tablespoons apple cider vinegar
  • tablespoon oil
  • about 2tablespoons sesame seeds
  • 6-8 rice spring roll wrappers 

Preheat oven to 400.

Slice the parsnip, celery root, and beet into 1/4 inch thick  disks and place on a lightly oiled baking sheet. Bake for 15 minutes, flip, then bake for 10 or so more minutes  or until the veggies are browned and tender.

When the roots are in the oven, thinly slice the cabbage and  onion and toss into a bowl. Chop the kale into small pieces and thinly slice the carrot into matchsticks about 2-3 inches long. Place it all into the  bowl with the grated ginger, minced garlic, vinegar and soy sauce. Toss it all around and let it sit while the other veggies are roasting.

Once the roots have cooked, remove form oven and let cool. Keep oven on. When they are cool enough to handle,  slice the disks into matchsticks 2-3 inches long.

Time to assemble. Grab all the veggies

Take a shallow dish that can hold a little water and is big enough for a wrapper to fit and add warm water to it.

Keep your baking sheet from the veggies close and lightly oil it again.

Place a wrapper in warm water then place on a wet surface. (keep surface slightly wet or the wrapper will stick)  Add a good pinch or so or the cabbage/kale/carrot veggie mix into the center of the wrapper then add a few of each of the matchstick roots on top. Sprinkle with sesame seeds and then roll. Once rolled, place on baking sheet. 

When all the rolls are made, lightly brush the tops with oil and  place into the oven and bake foe 10-15 minutes, flipping half way through

Remove from oven when each slide is lightly crispy and serve right away, preferably with more soy sauce to dip in. 

In winter, Vegetables, Vegan, Spring, snack, side dish, Gluten Free, Dairy Free, appetizers Tags Winter Roots Spring Rolls, Spring rolls, baked spring rolls, roots, root vegetables, vegetables, gluten free, vegan, plant based, side dish, easy, appetizer, vegan side dish, fresh, local, Farm food, Winter root veggies
Comment
← Newer Posts Older Posts →
 

https://thelovelycrazy.squarespace.com/config#/|/about/

Me. Food Maker.Food eater. Woo HOO!

STEM+NODE  SMALL BATCH AND ONE OF A KIND POTTERY

stem+node ceramics


____________________

Subscribe

GET NEW POSTS IN YO EMAIL

You are AWESOME!!!


@thelovelycrazy 2014-2021