• stem+node ceramics
  • HOME
  • Food Recipes
  • About
  • Contact
Menu

The Lovely Crazy

Street Address
City, State, Zip
Phone Number

Your Custom Text Here

The Lovely Crazy

  • stem+node ceramics
  • HOME
  • Food Recipes
  • About
  • Contact

Plum Cake

September 2, 2017 Colleen Stem
IMG_1395.JPG
IMG_1397.jpg
IMG_1396.JPG

This summer I have gotten like 5 lbs of blackberries, a humongo bowl of raspberries, so so so many pears, and lots of random veggies, all from my neighbors and their gardens We live in a very giving and generous neighborhood. And it helps that they can't possible eat all that they grow and that I am always willing to take it off their hands (and put it into my mouth) In return we have given out rhubarb and jars of honey and overall charm and smiles. (the charm and smiles are on the mr to give out)

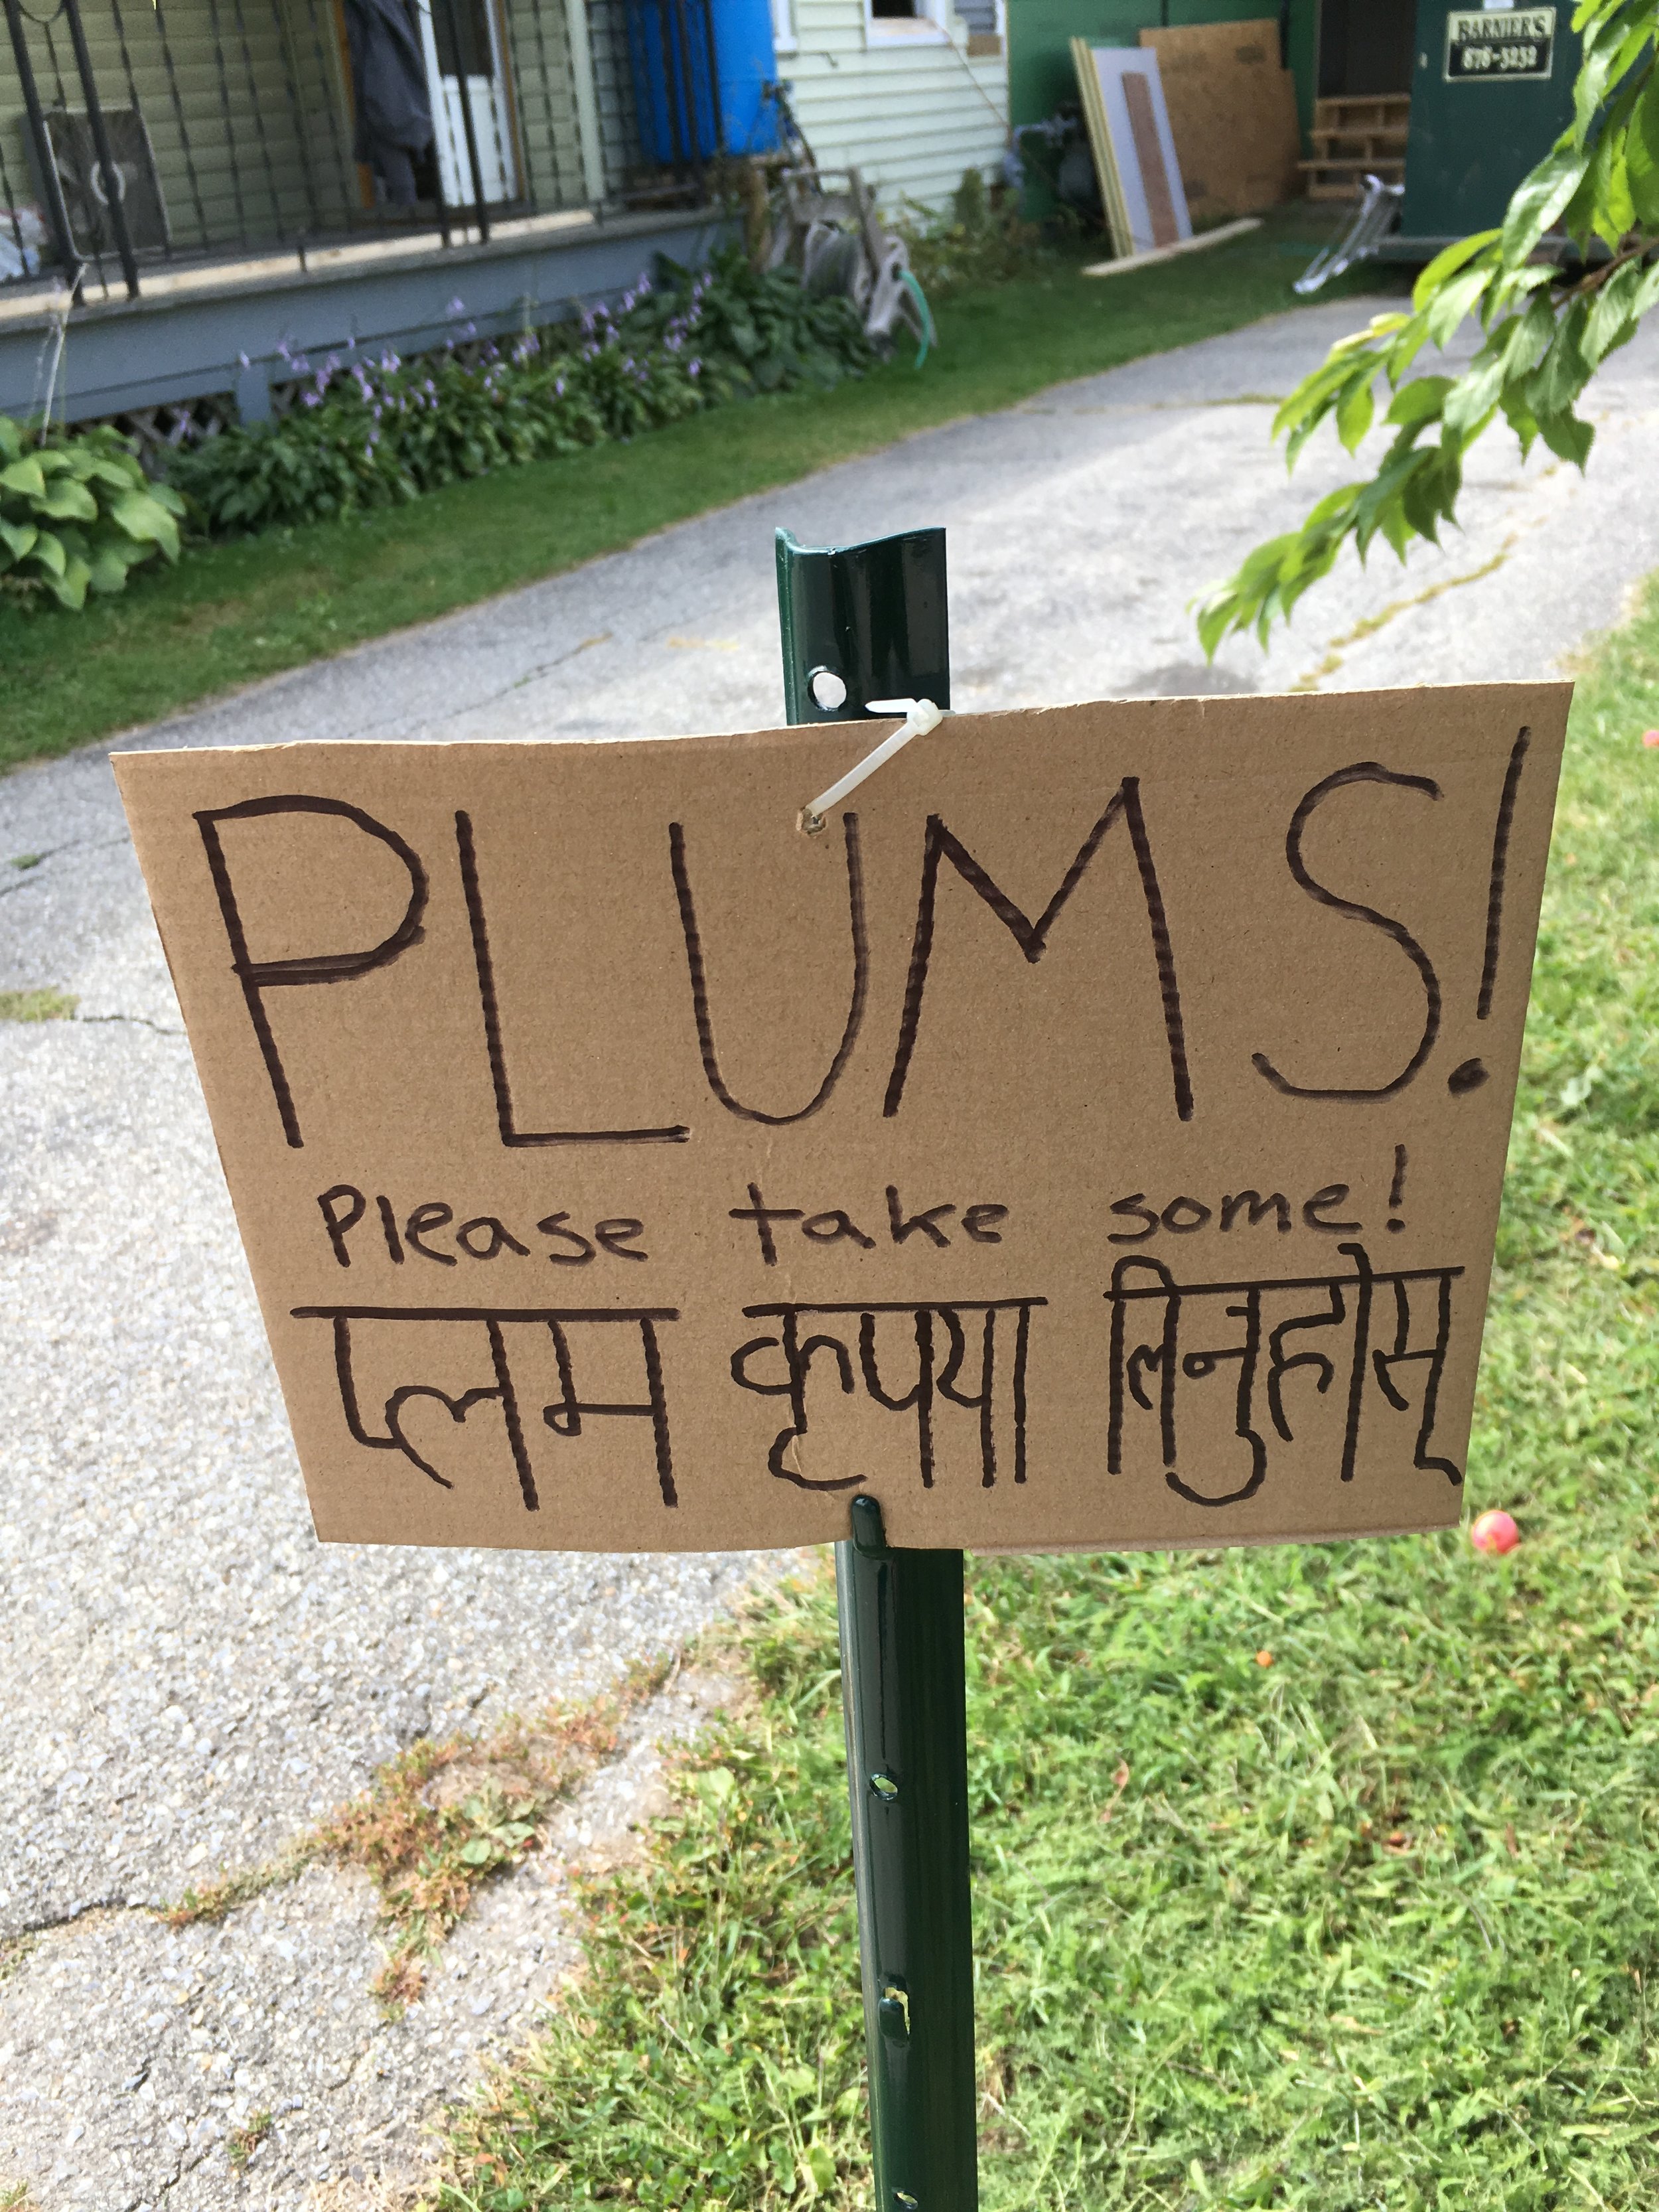
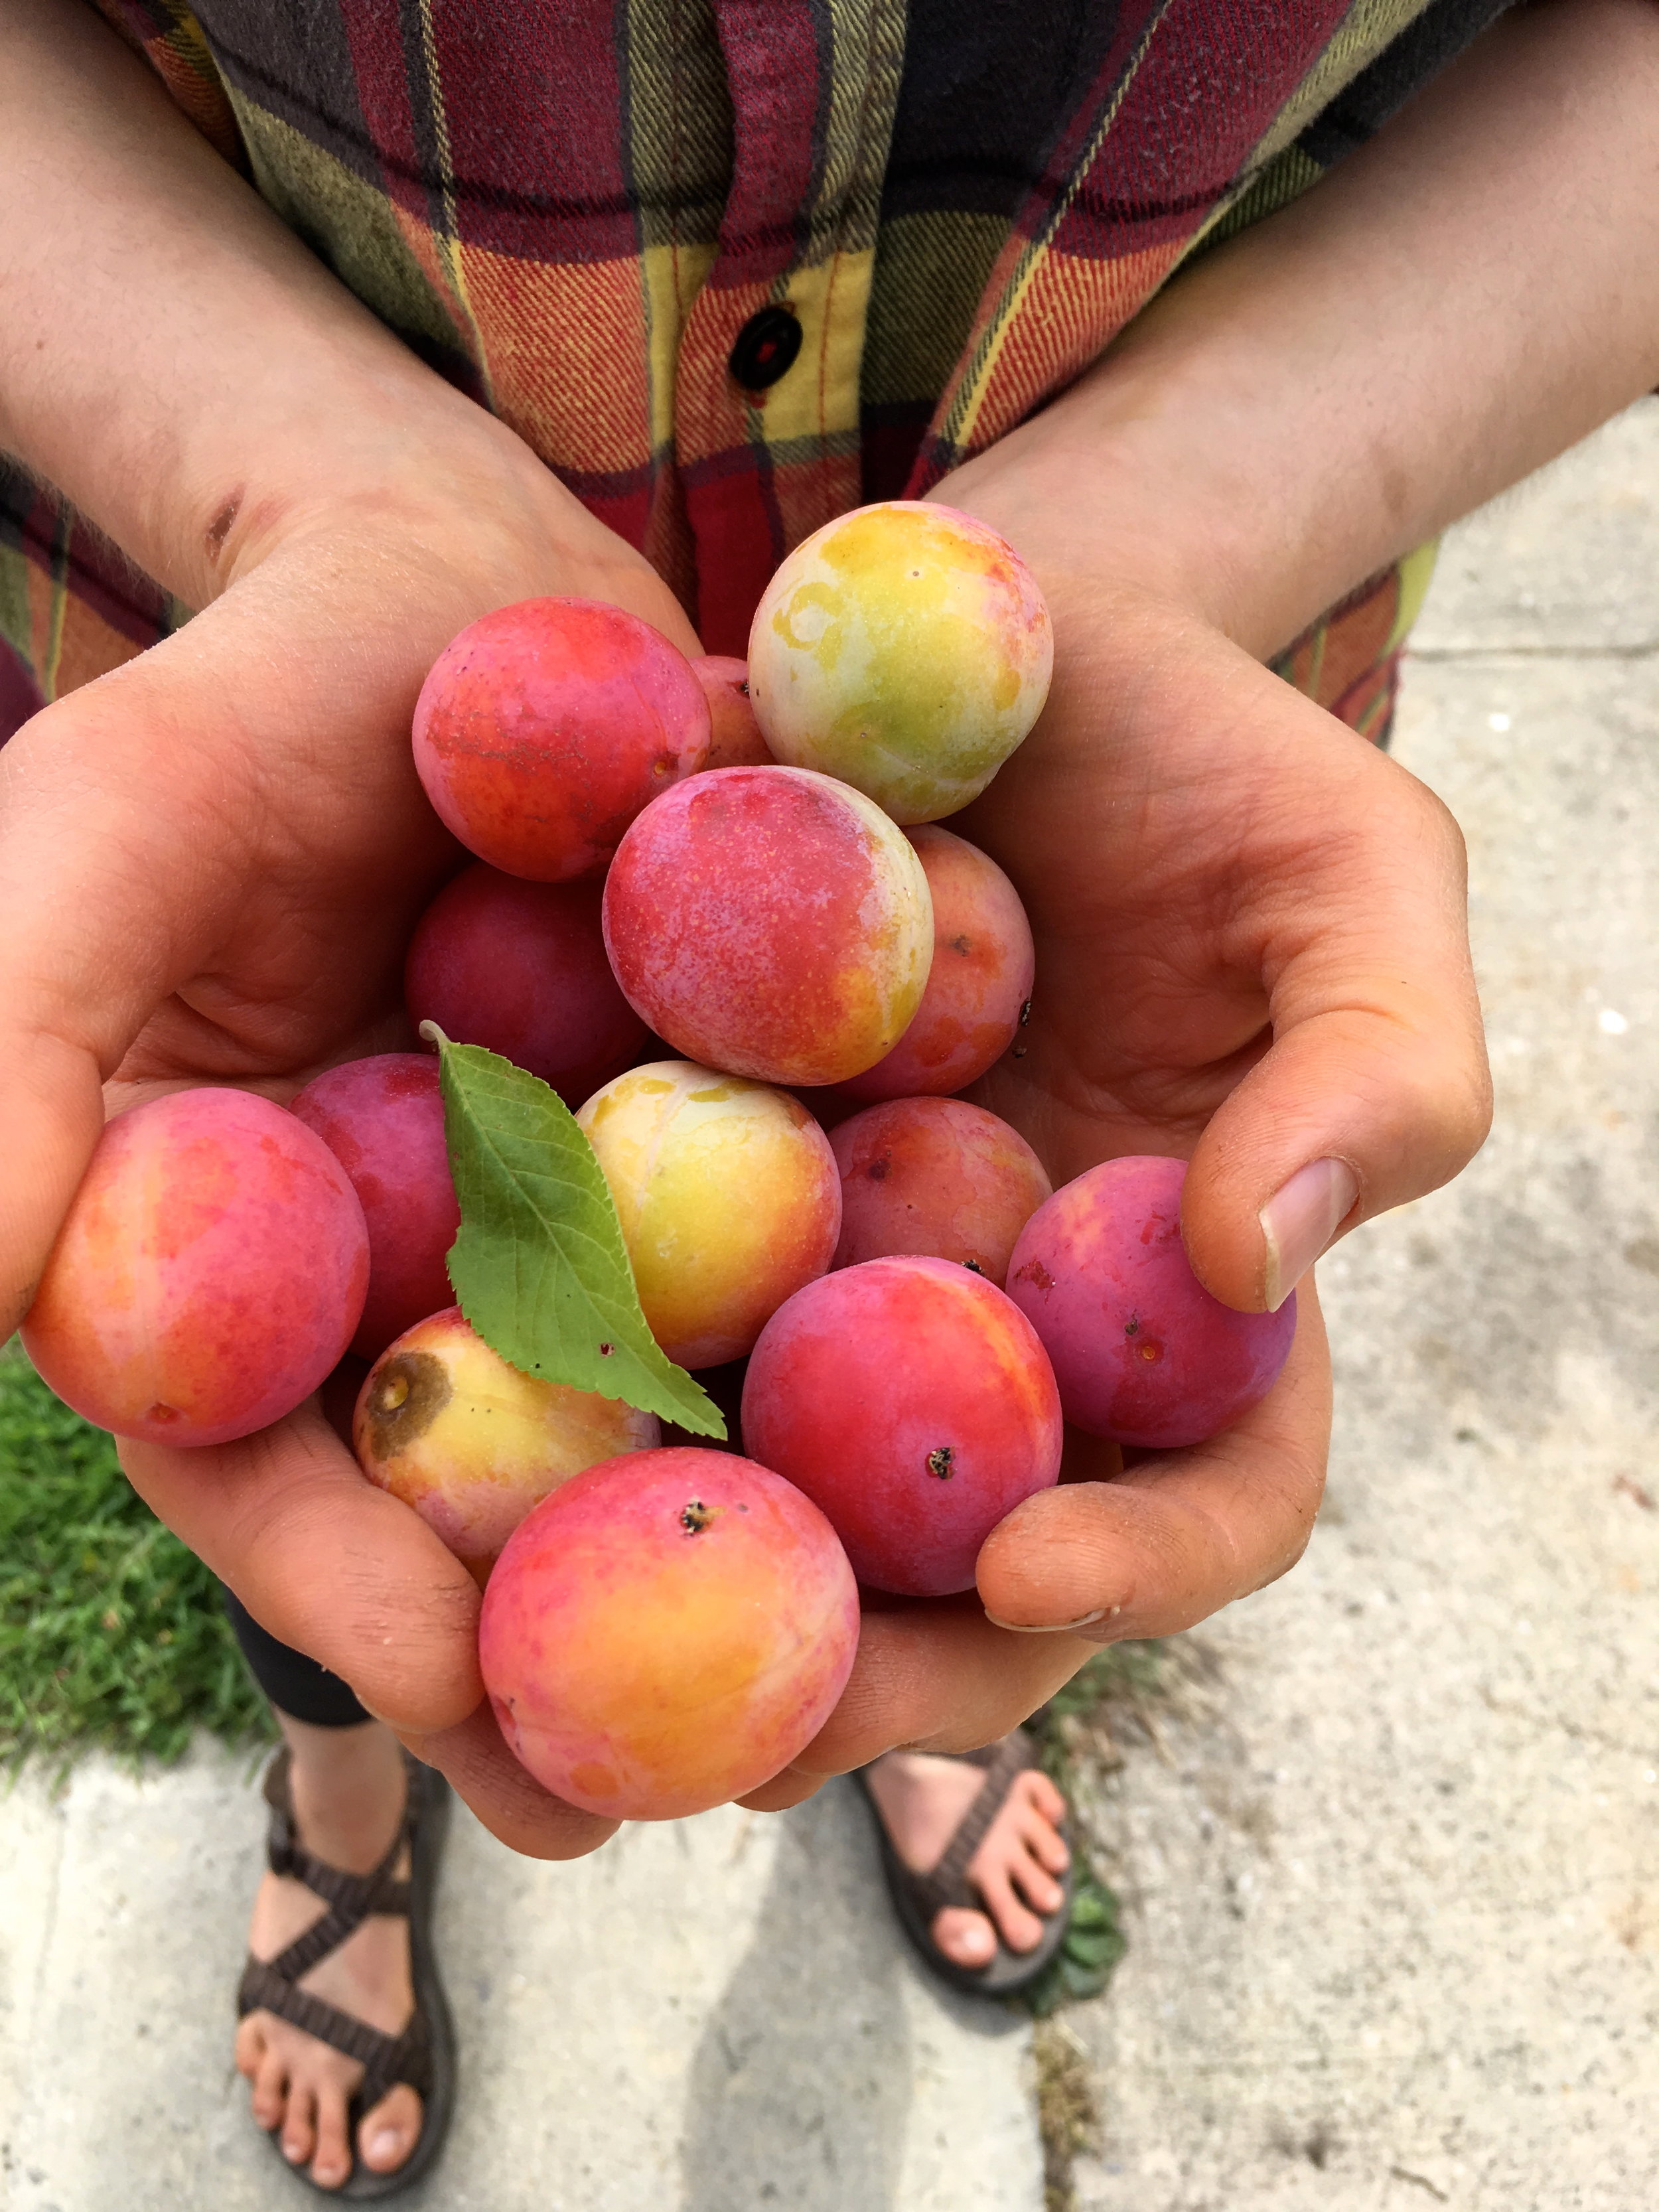
The other day on a walk, the mr and I saw this sign outside of a neighbors house. Plums, please take some! Well pull my arm, I guess I will have too, because the sign said please right? Anyway, these little plums, not sure what kind they are, but they are so good. Sweet and bite sized and pretty. I ate a few then decided that I needed to share my shared plums and went about making a cake to stick those said share plums into.

I made the cake, invited my mom and a couple of sibs over. Mom didn't come but Barb and Paul did so they got the cake, Well they got half the cake, the mr ate the rest. I was told that this cake is one of the best. I bet it is when you used share plums because sharing is caring and sharing cake is all that good stuff.

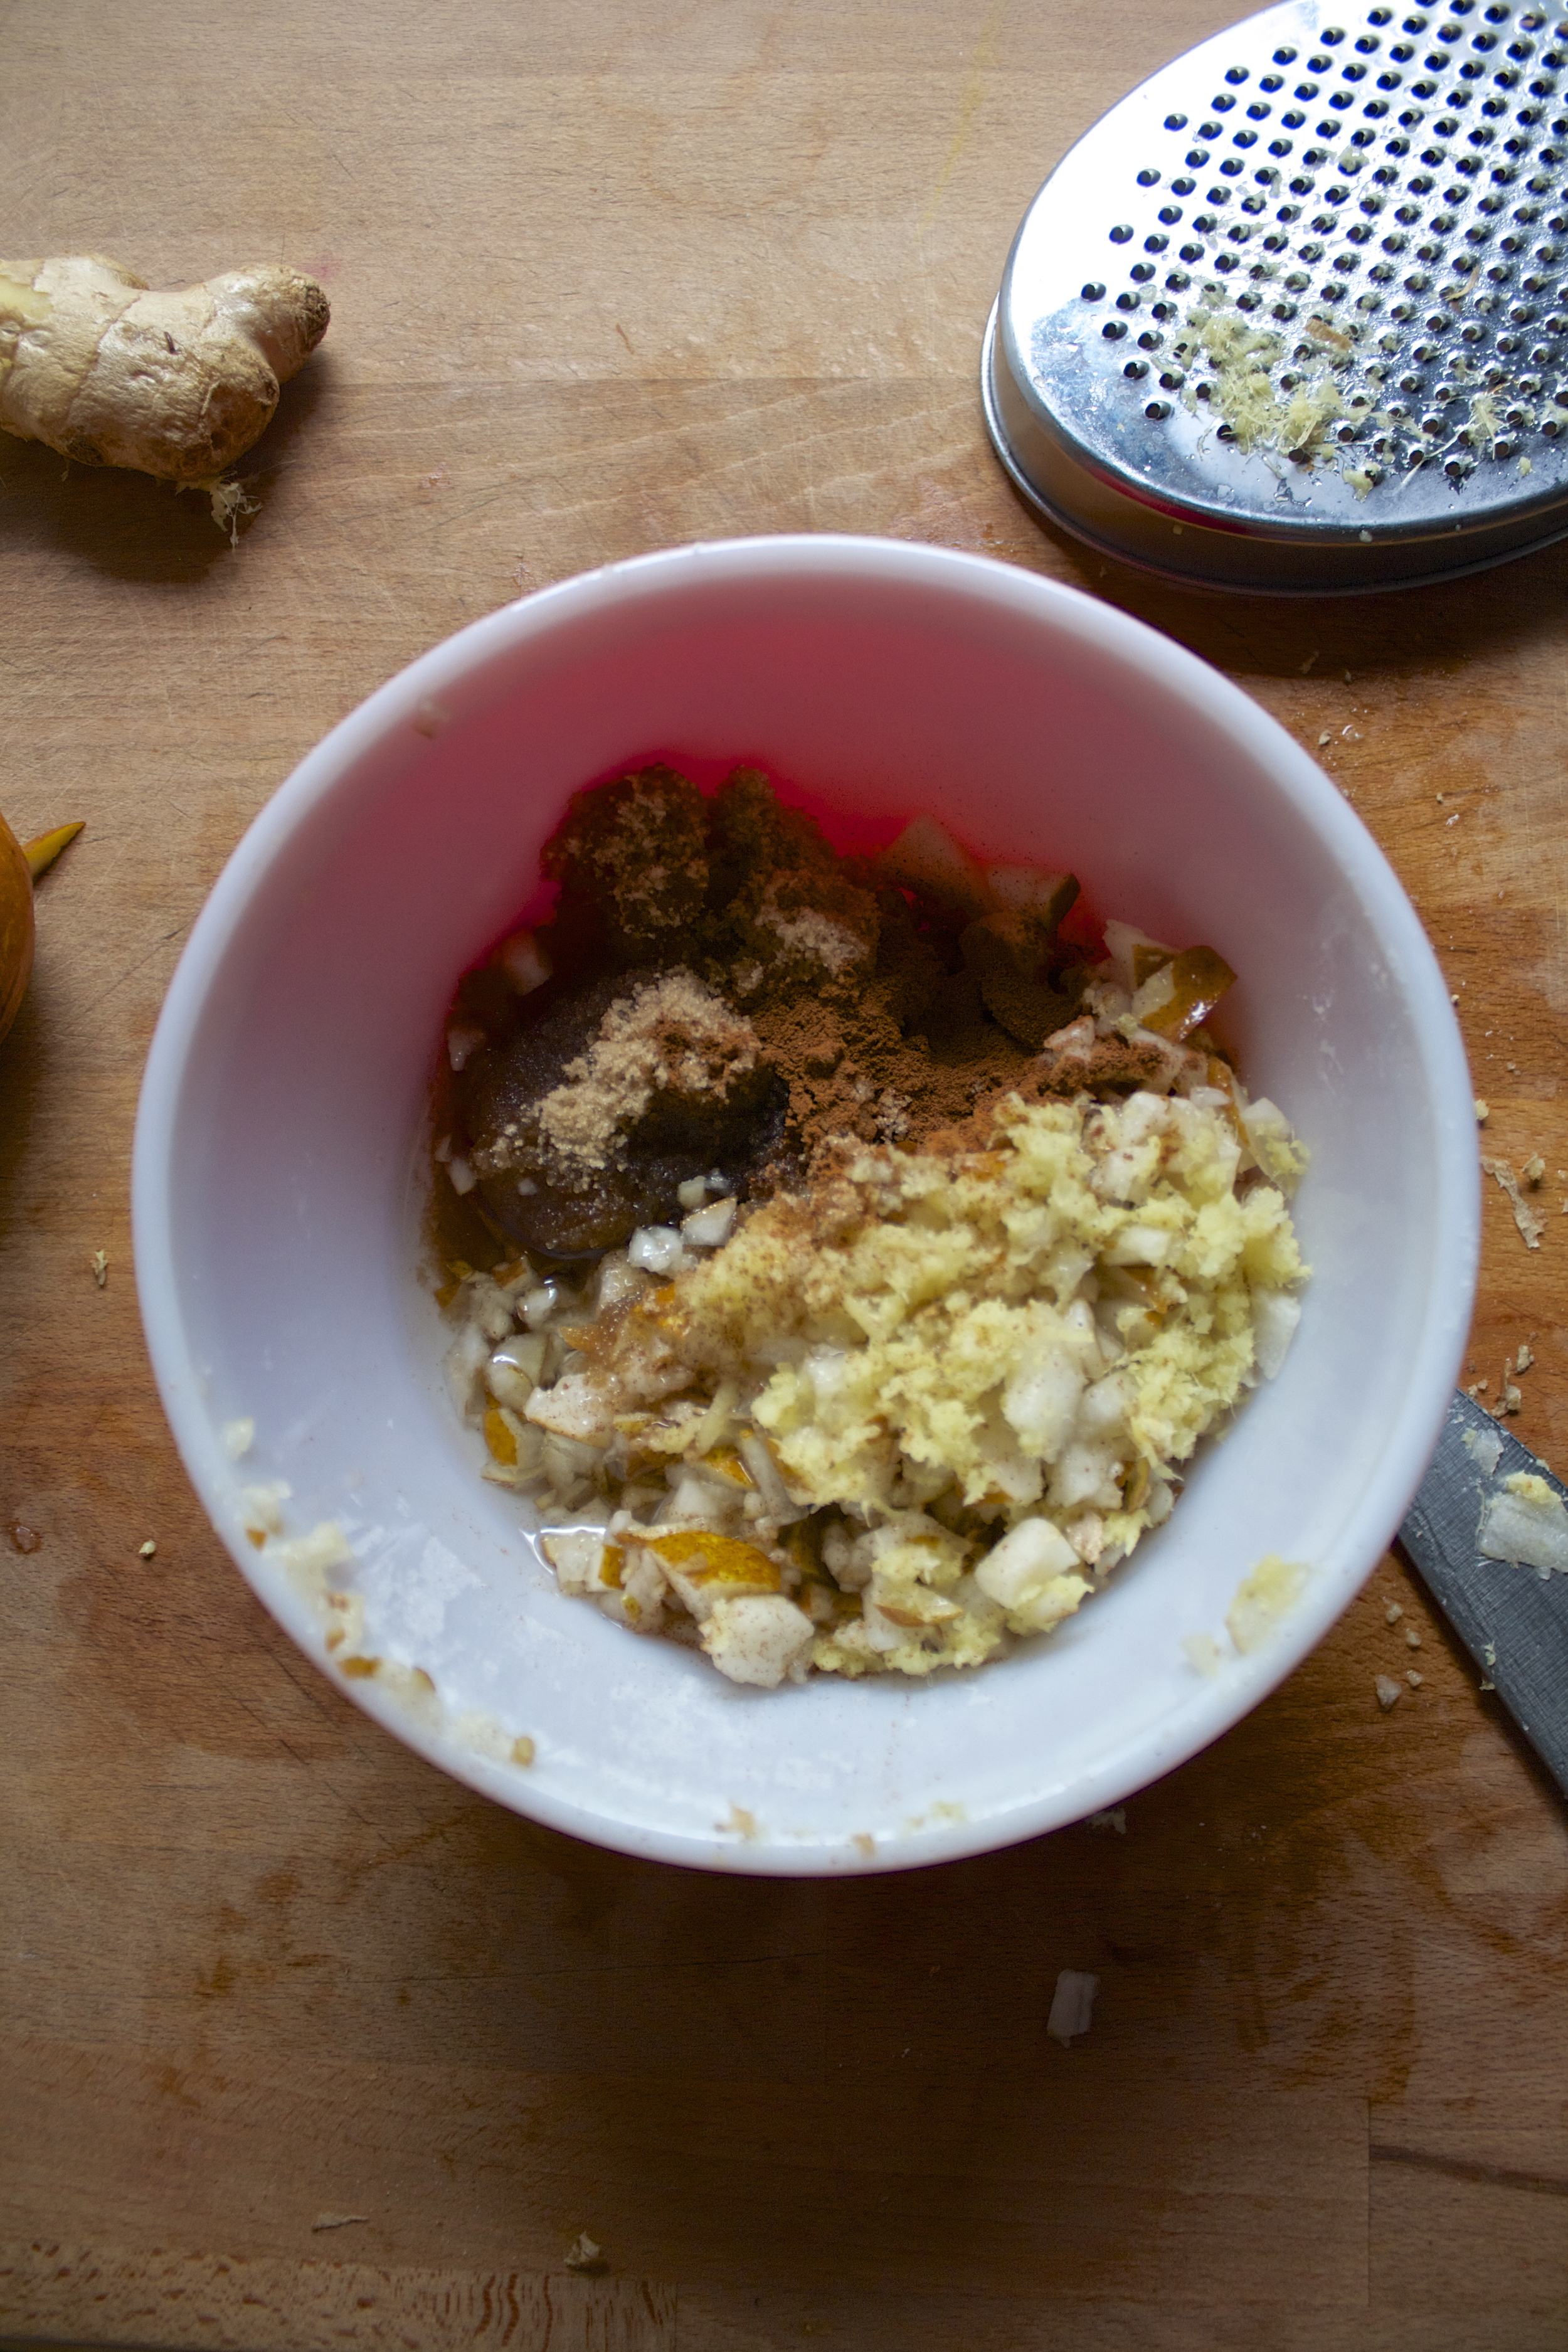
The stuff. A bowl with flour, baking soda baking powder, and slat. Then you have brown sugar, coconut oil. vanilla extract, soy milk, and a little apple cider vinegar. And plums of course.

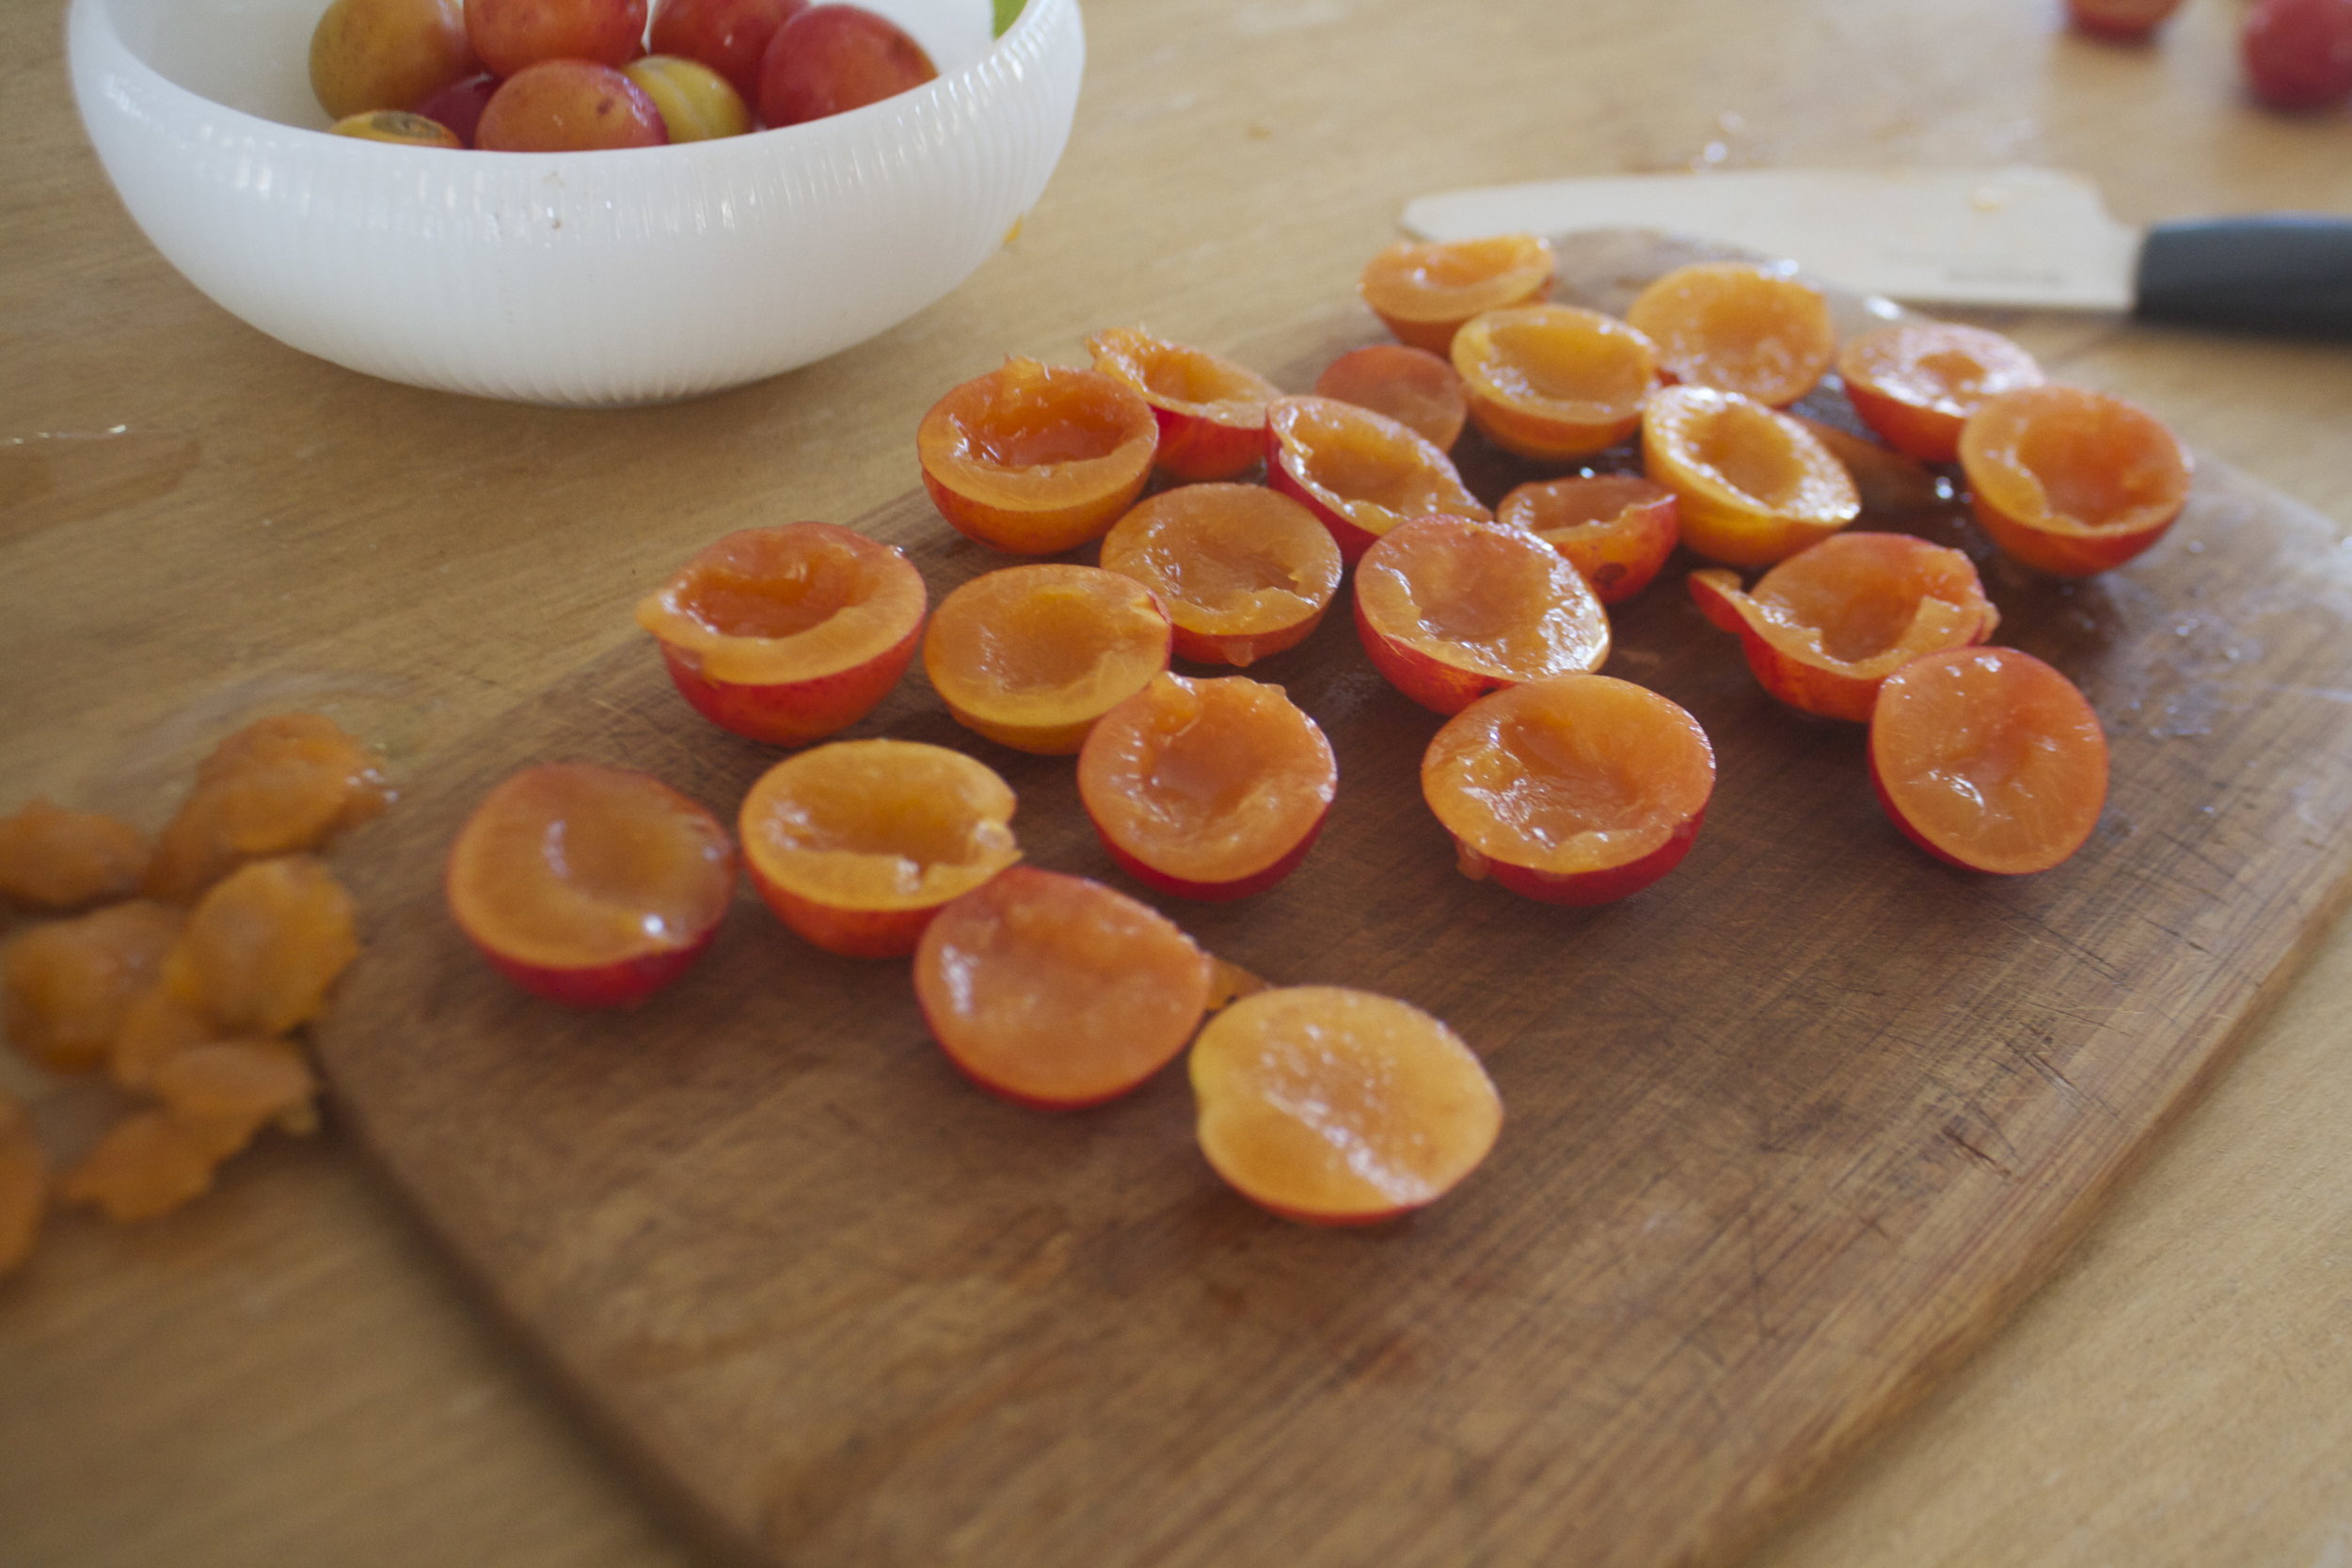
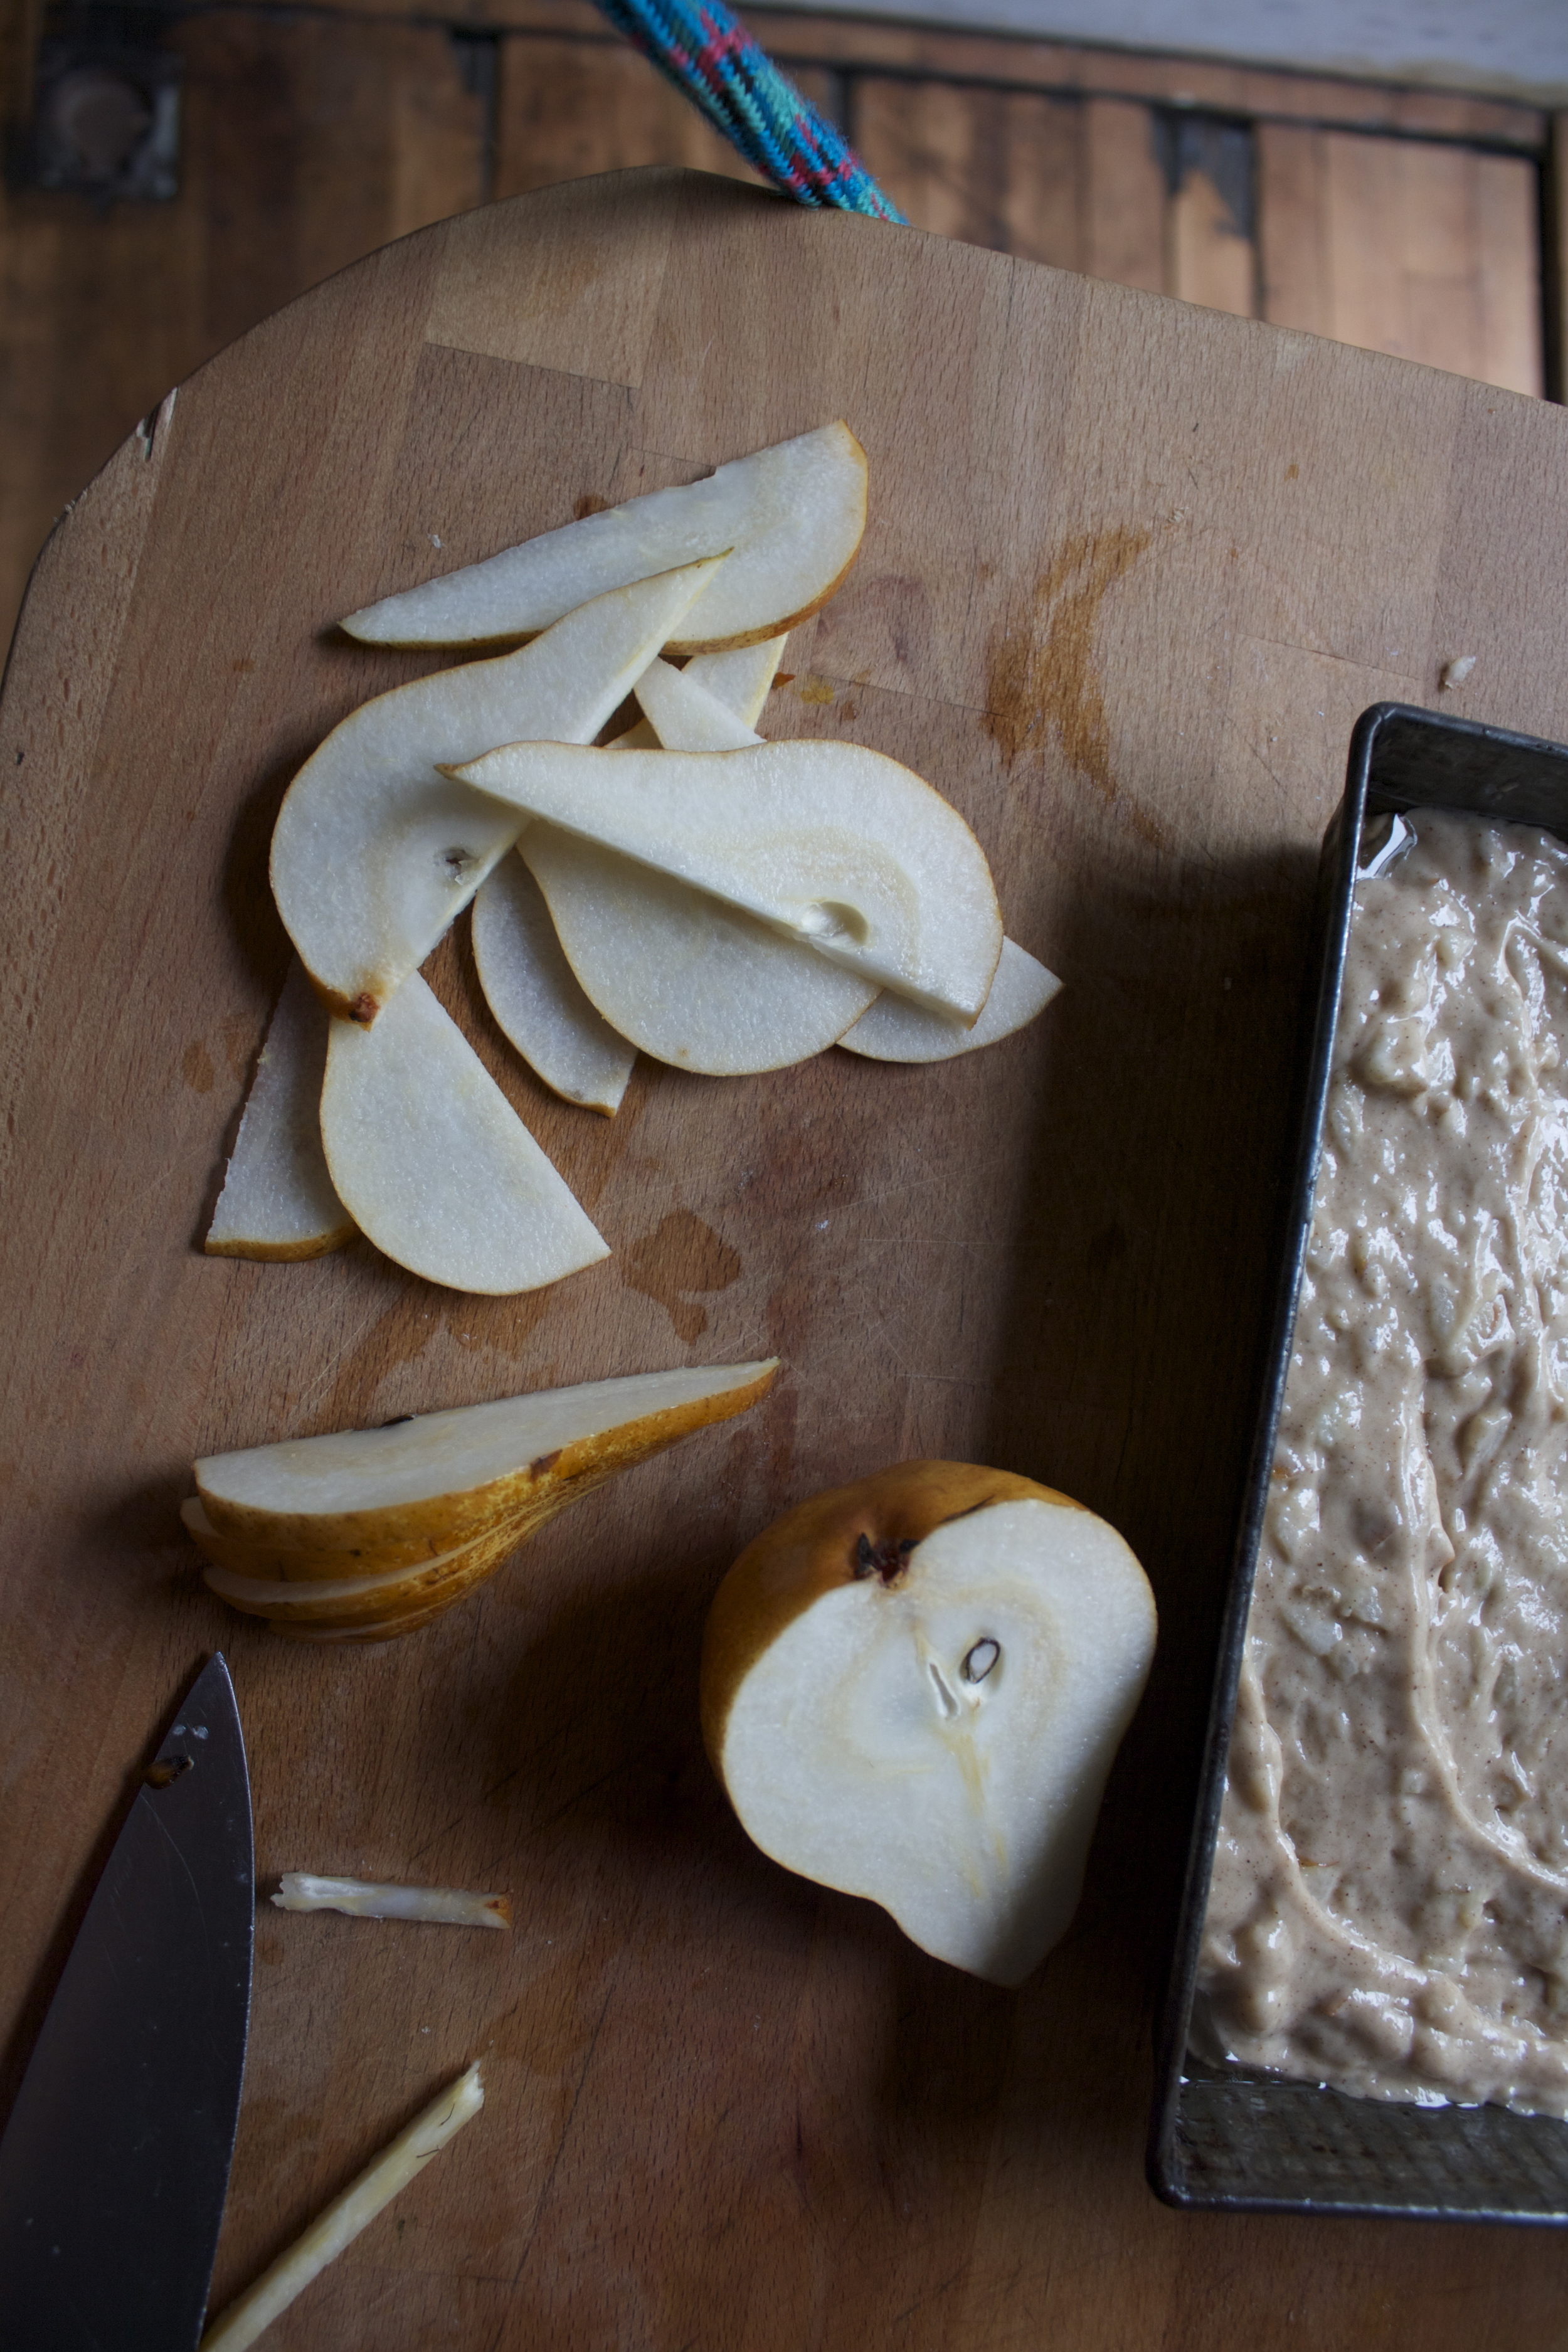
Once you have started preheating the oven, cut your plums in half and remove the pit.The best way to do this is to run the knife along the pit all the way around the plum and then twist to break in half. Pop the pit out with you finger.

Set plums aside while mixing cake

IMG_6773.jpg
IMG_6780.jpg

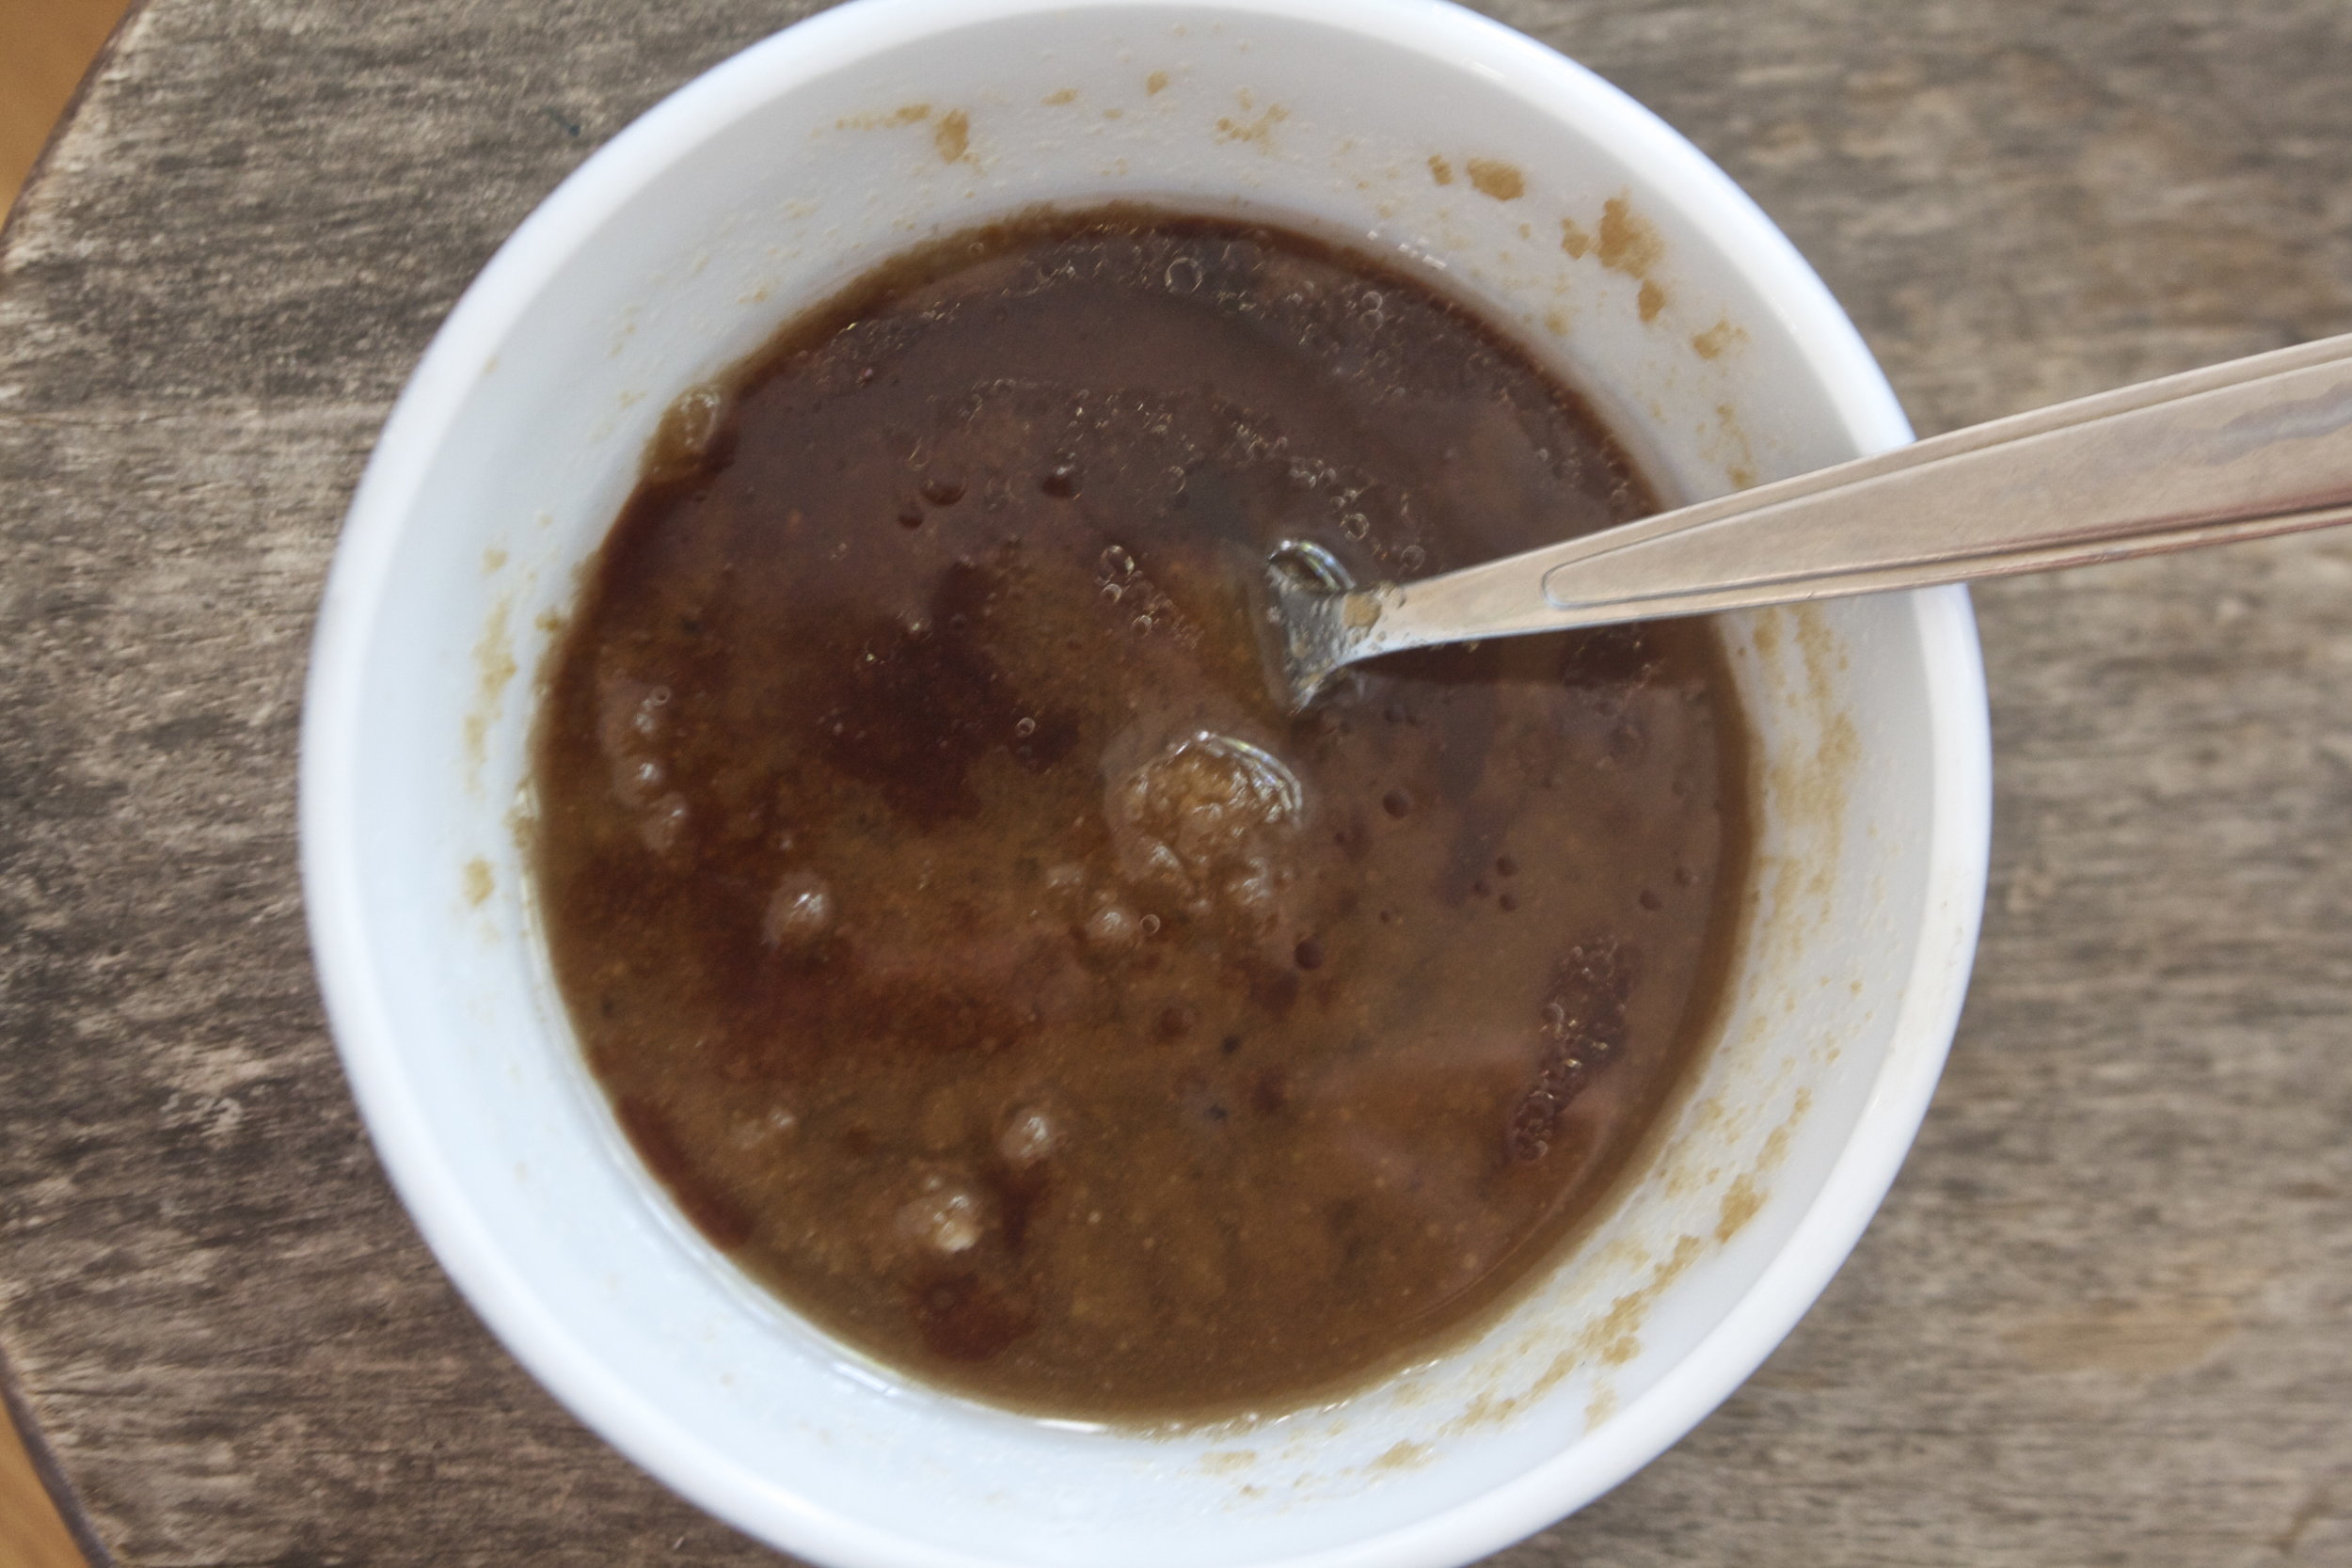
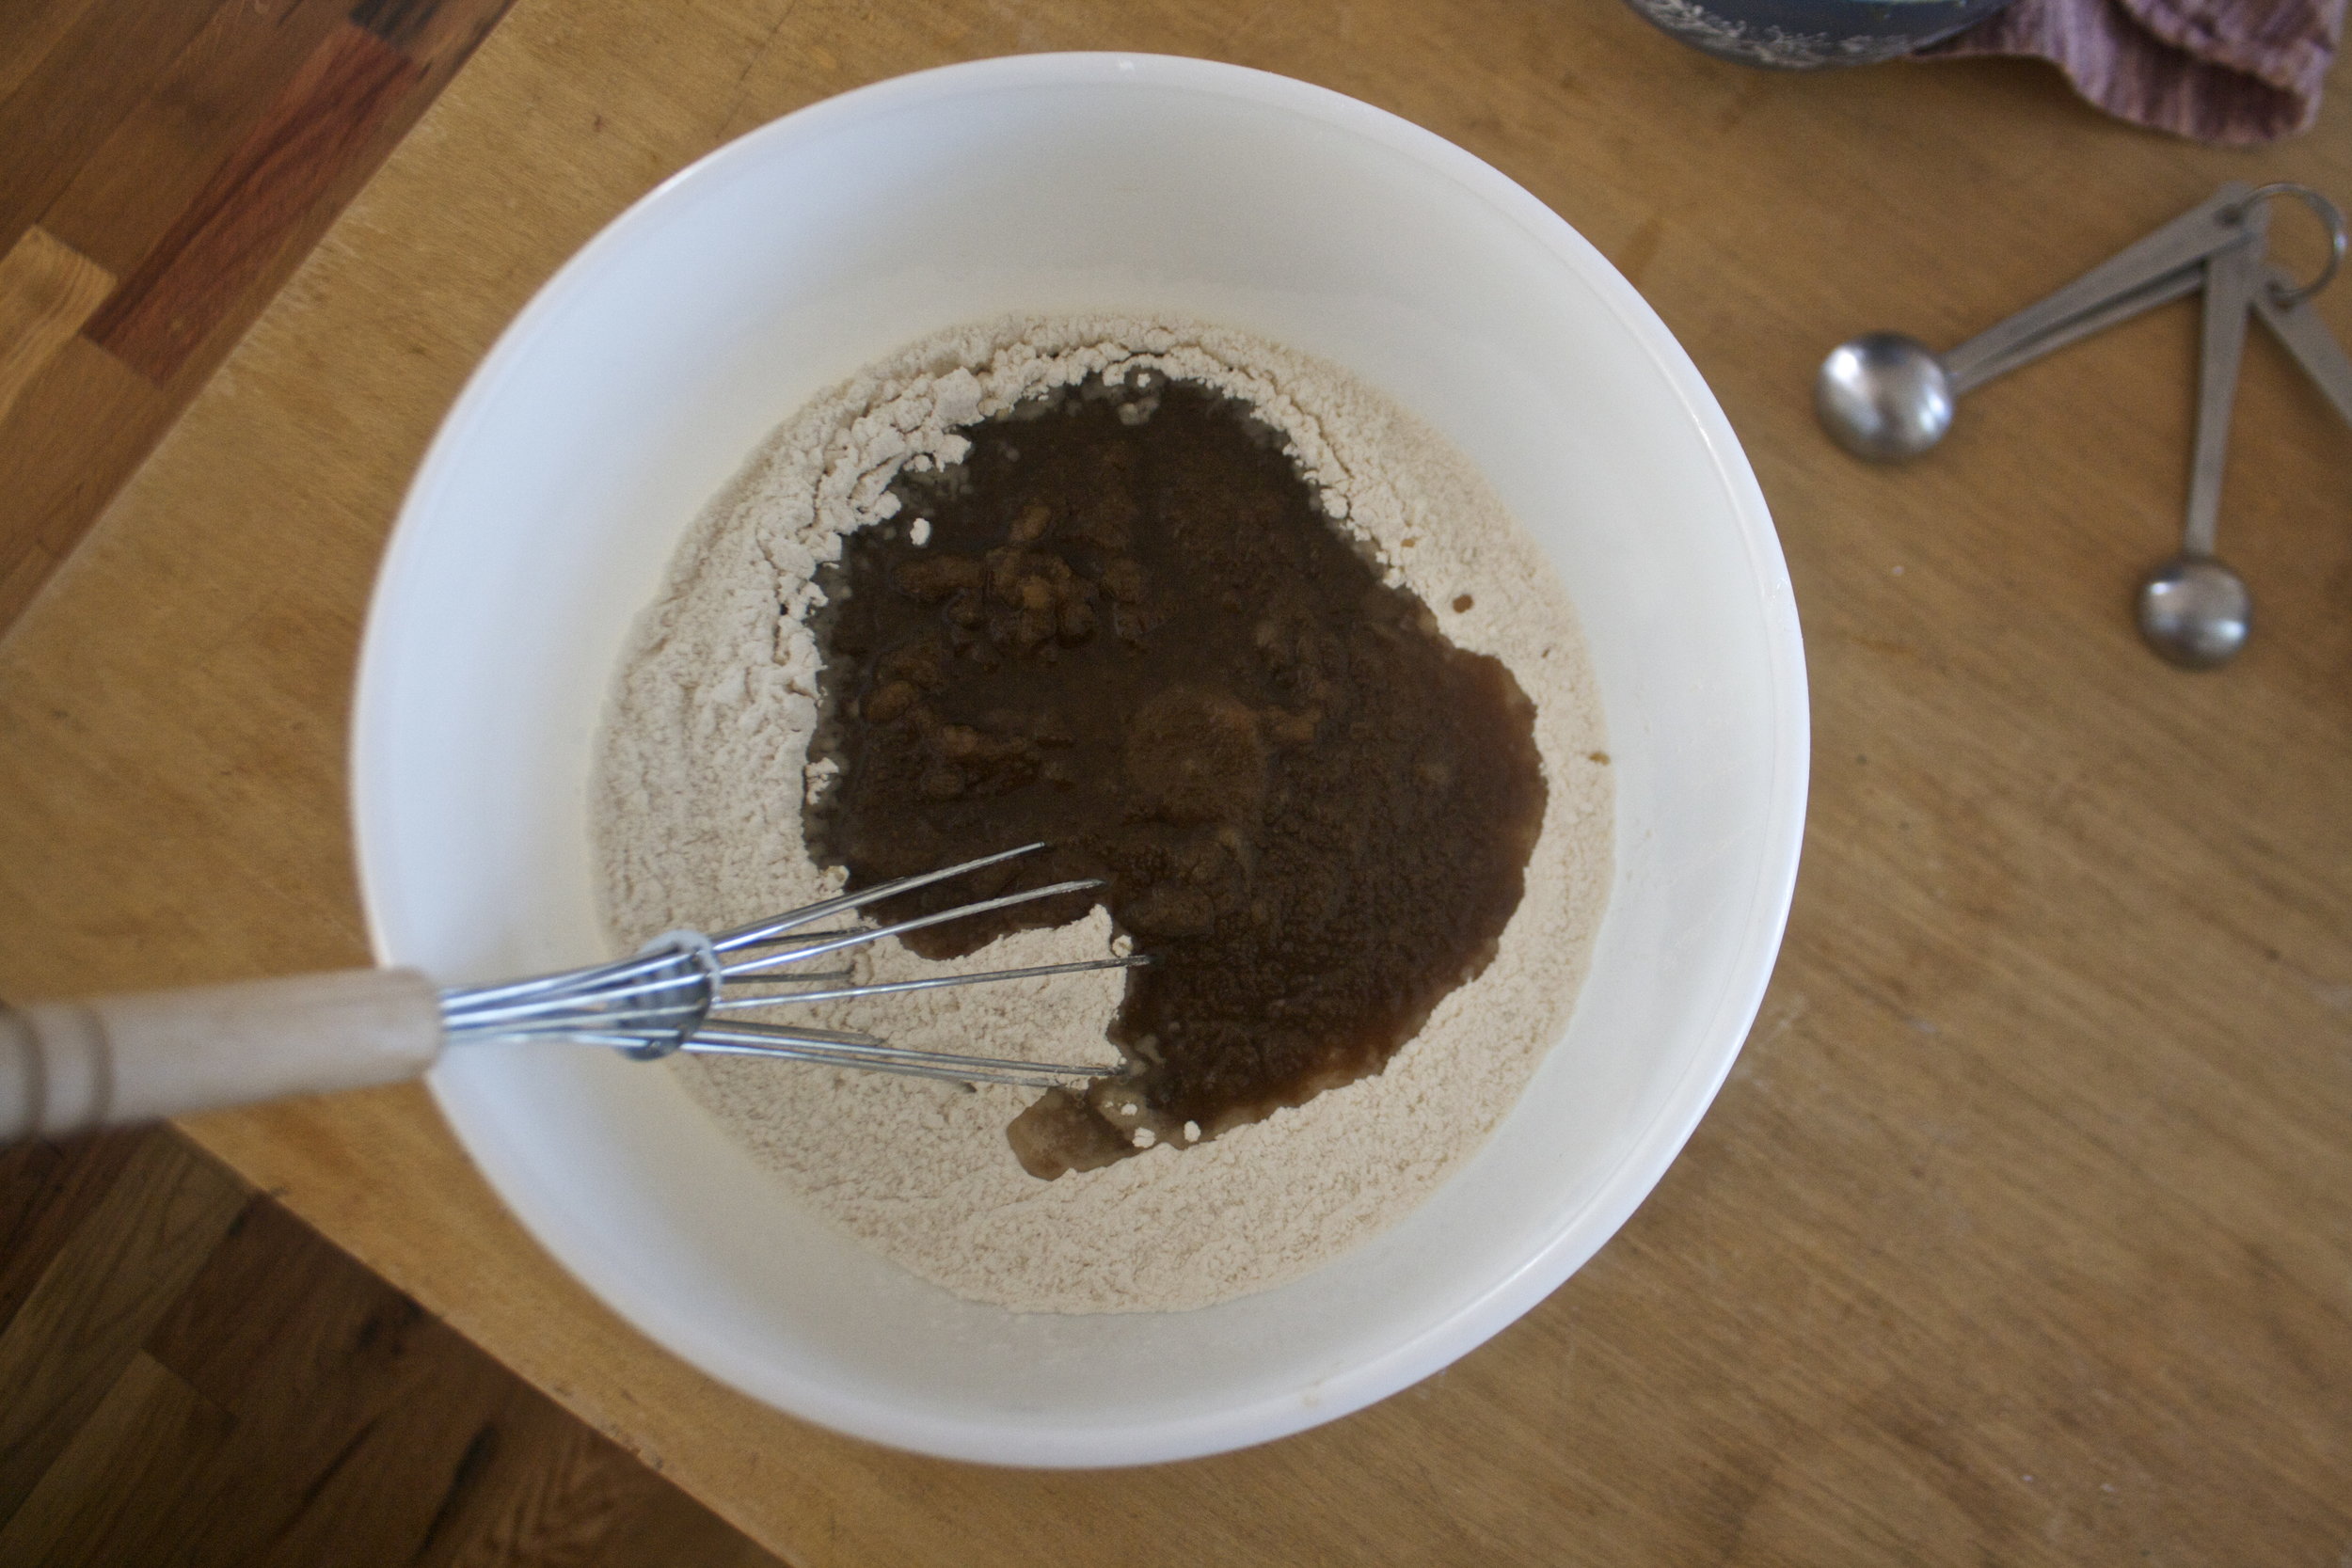
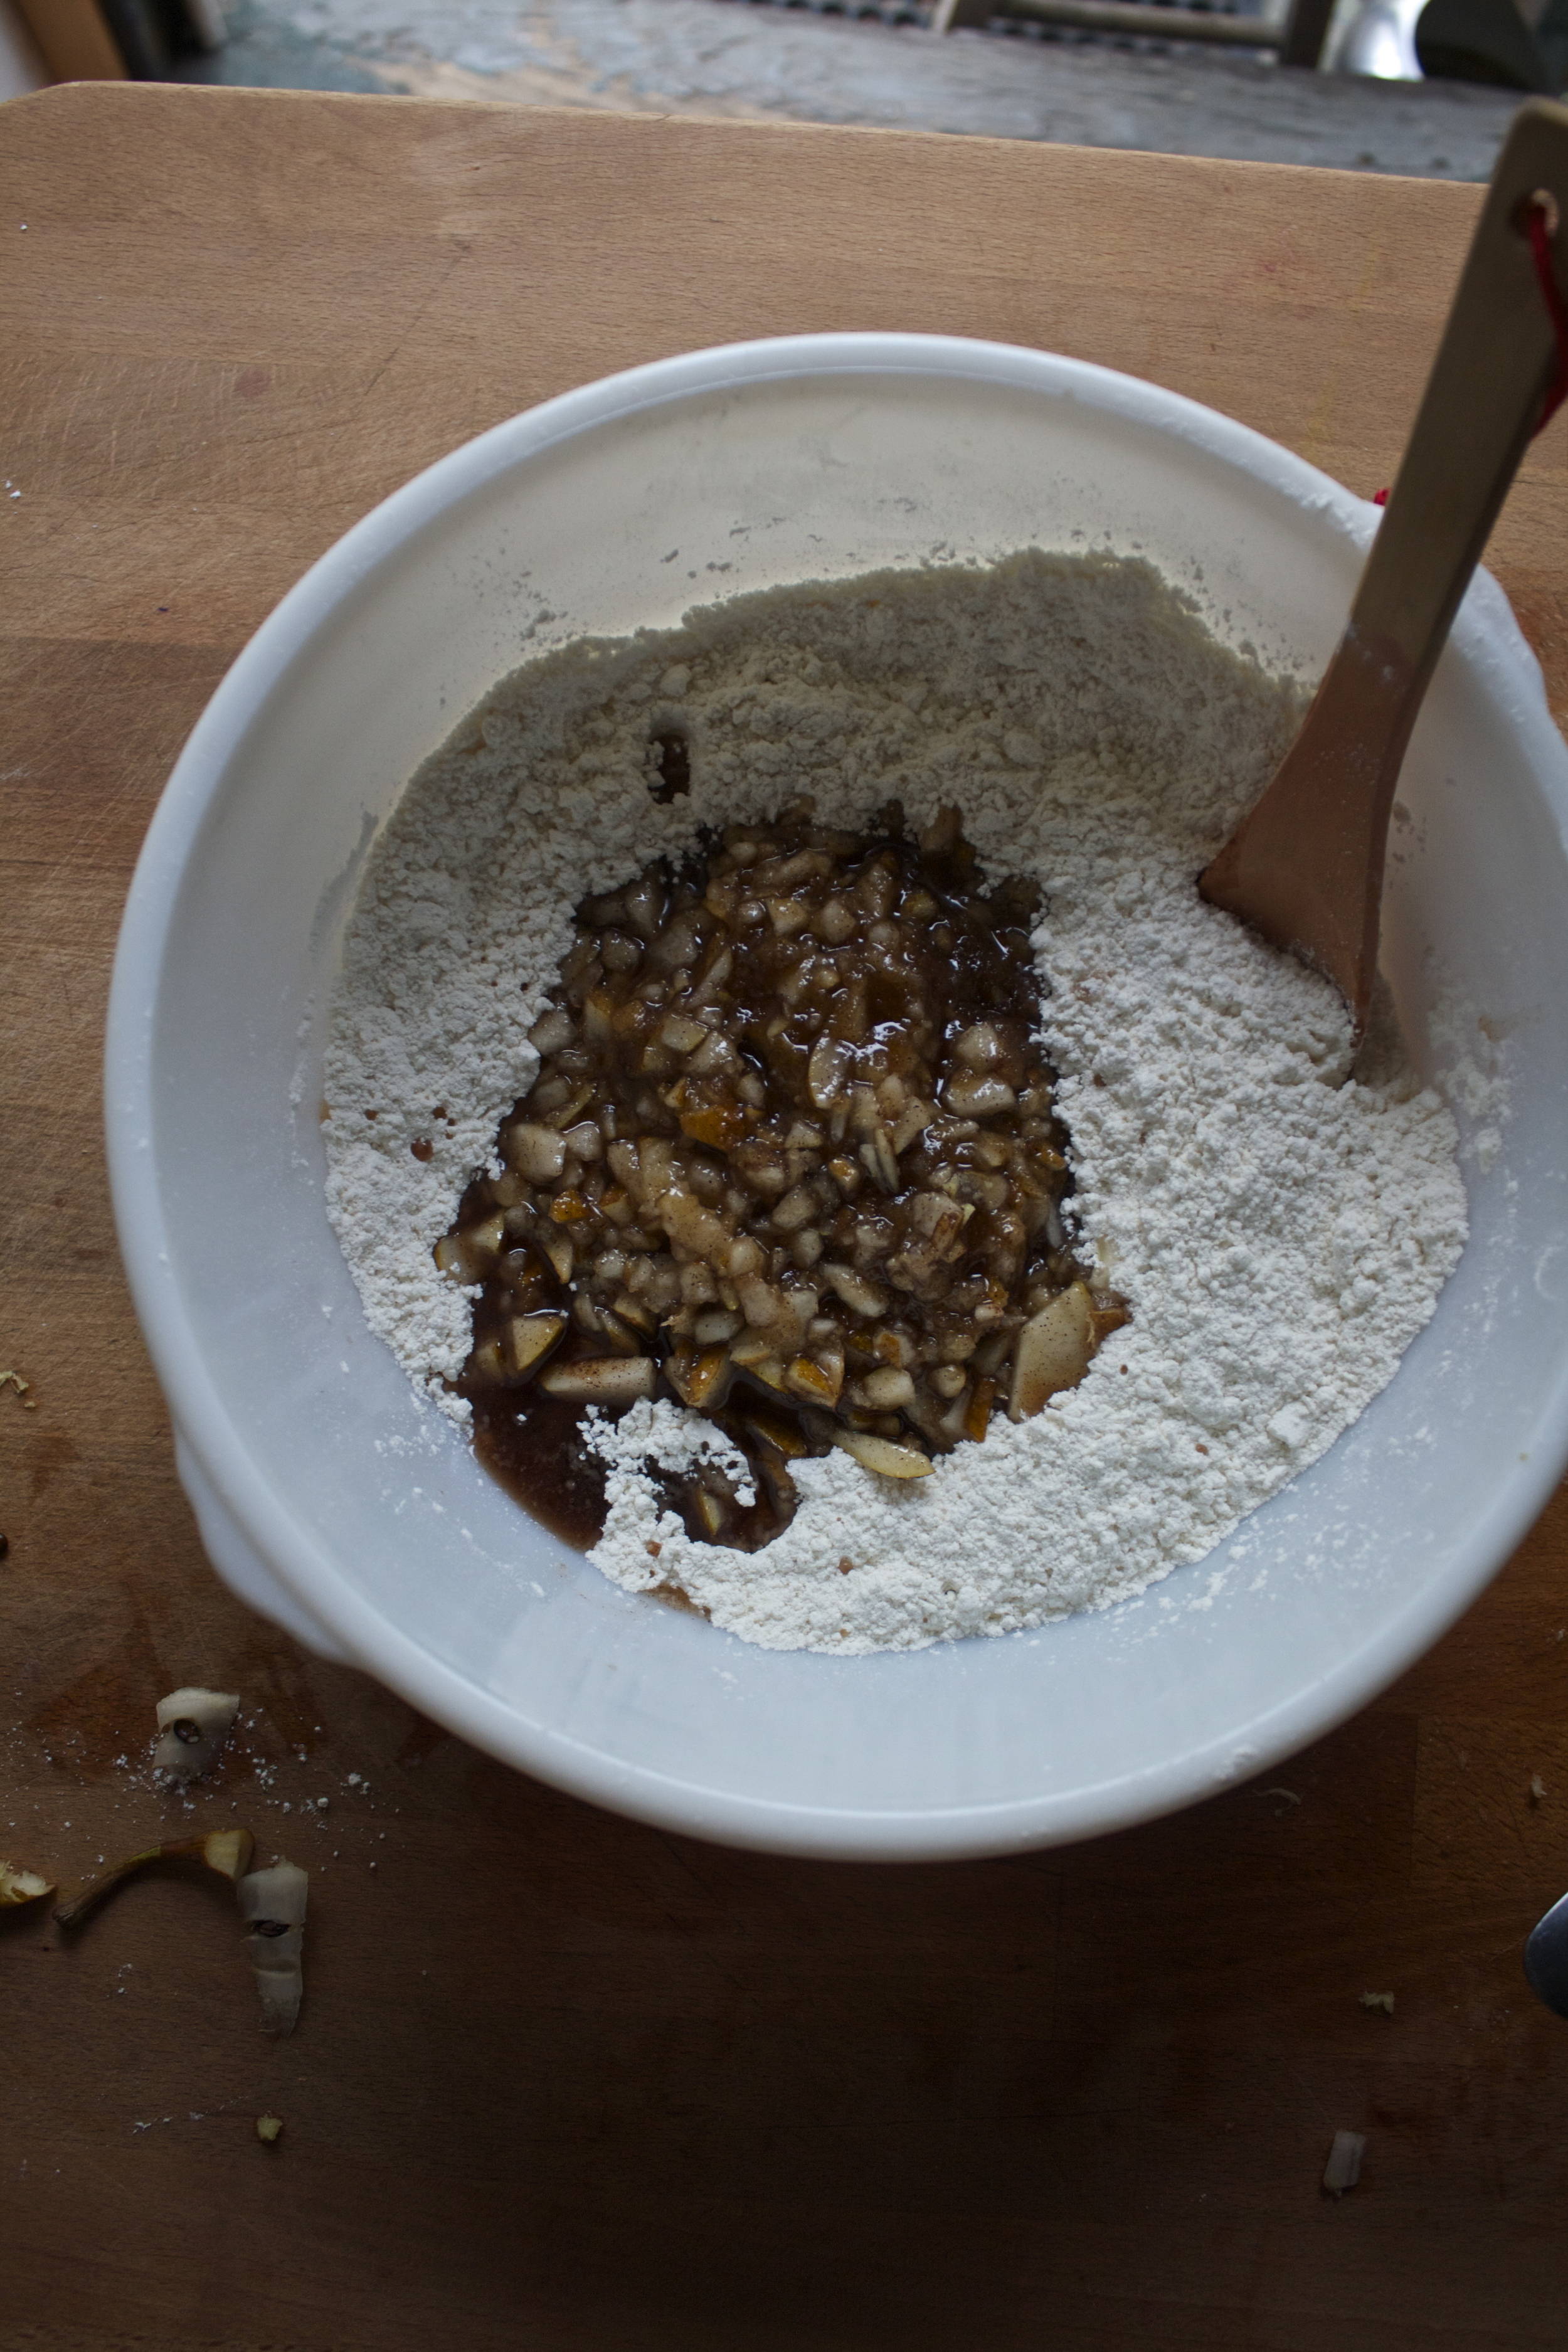
Warmed coconut oil, brown sugar, and vanilla all get mixed together into a smooth consistency then dumped into the bowl of dry stuff.

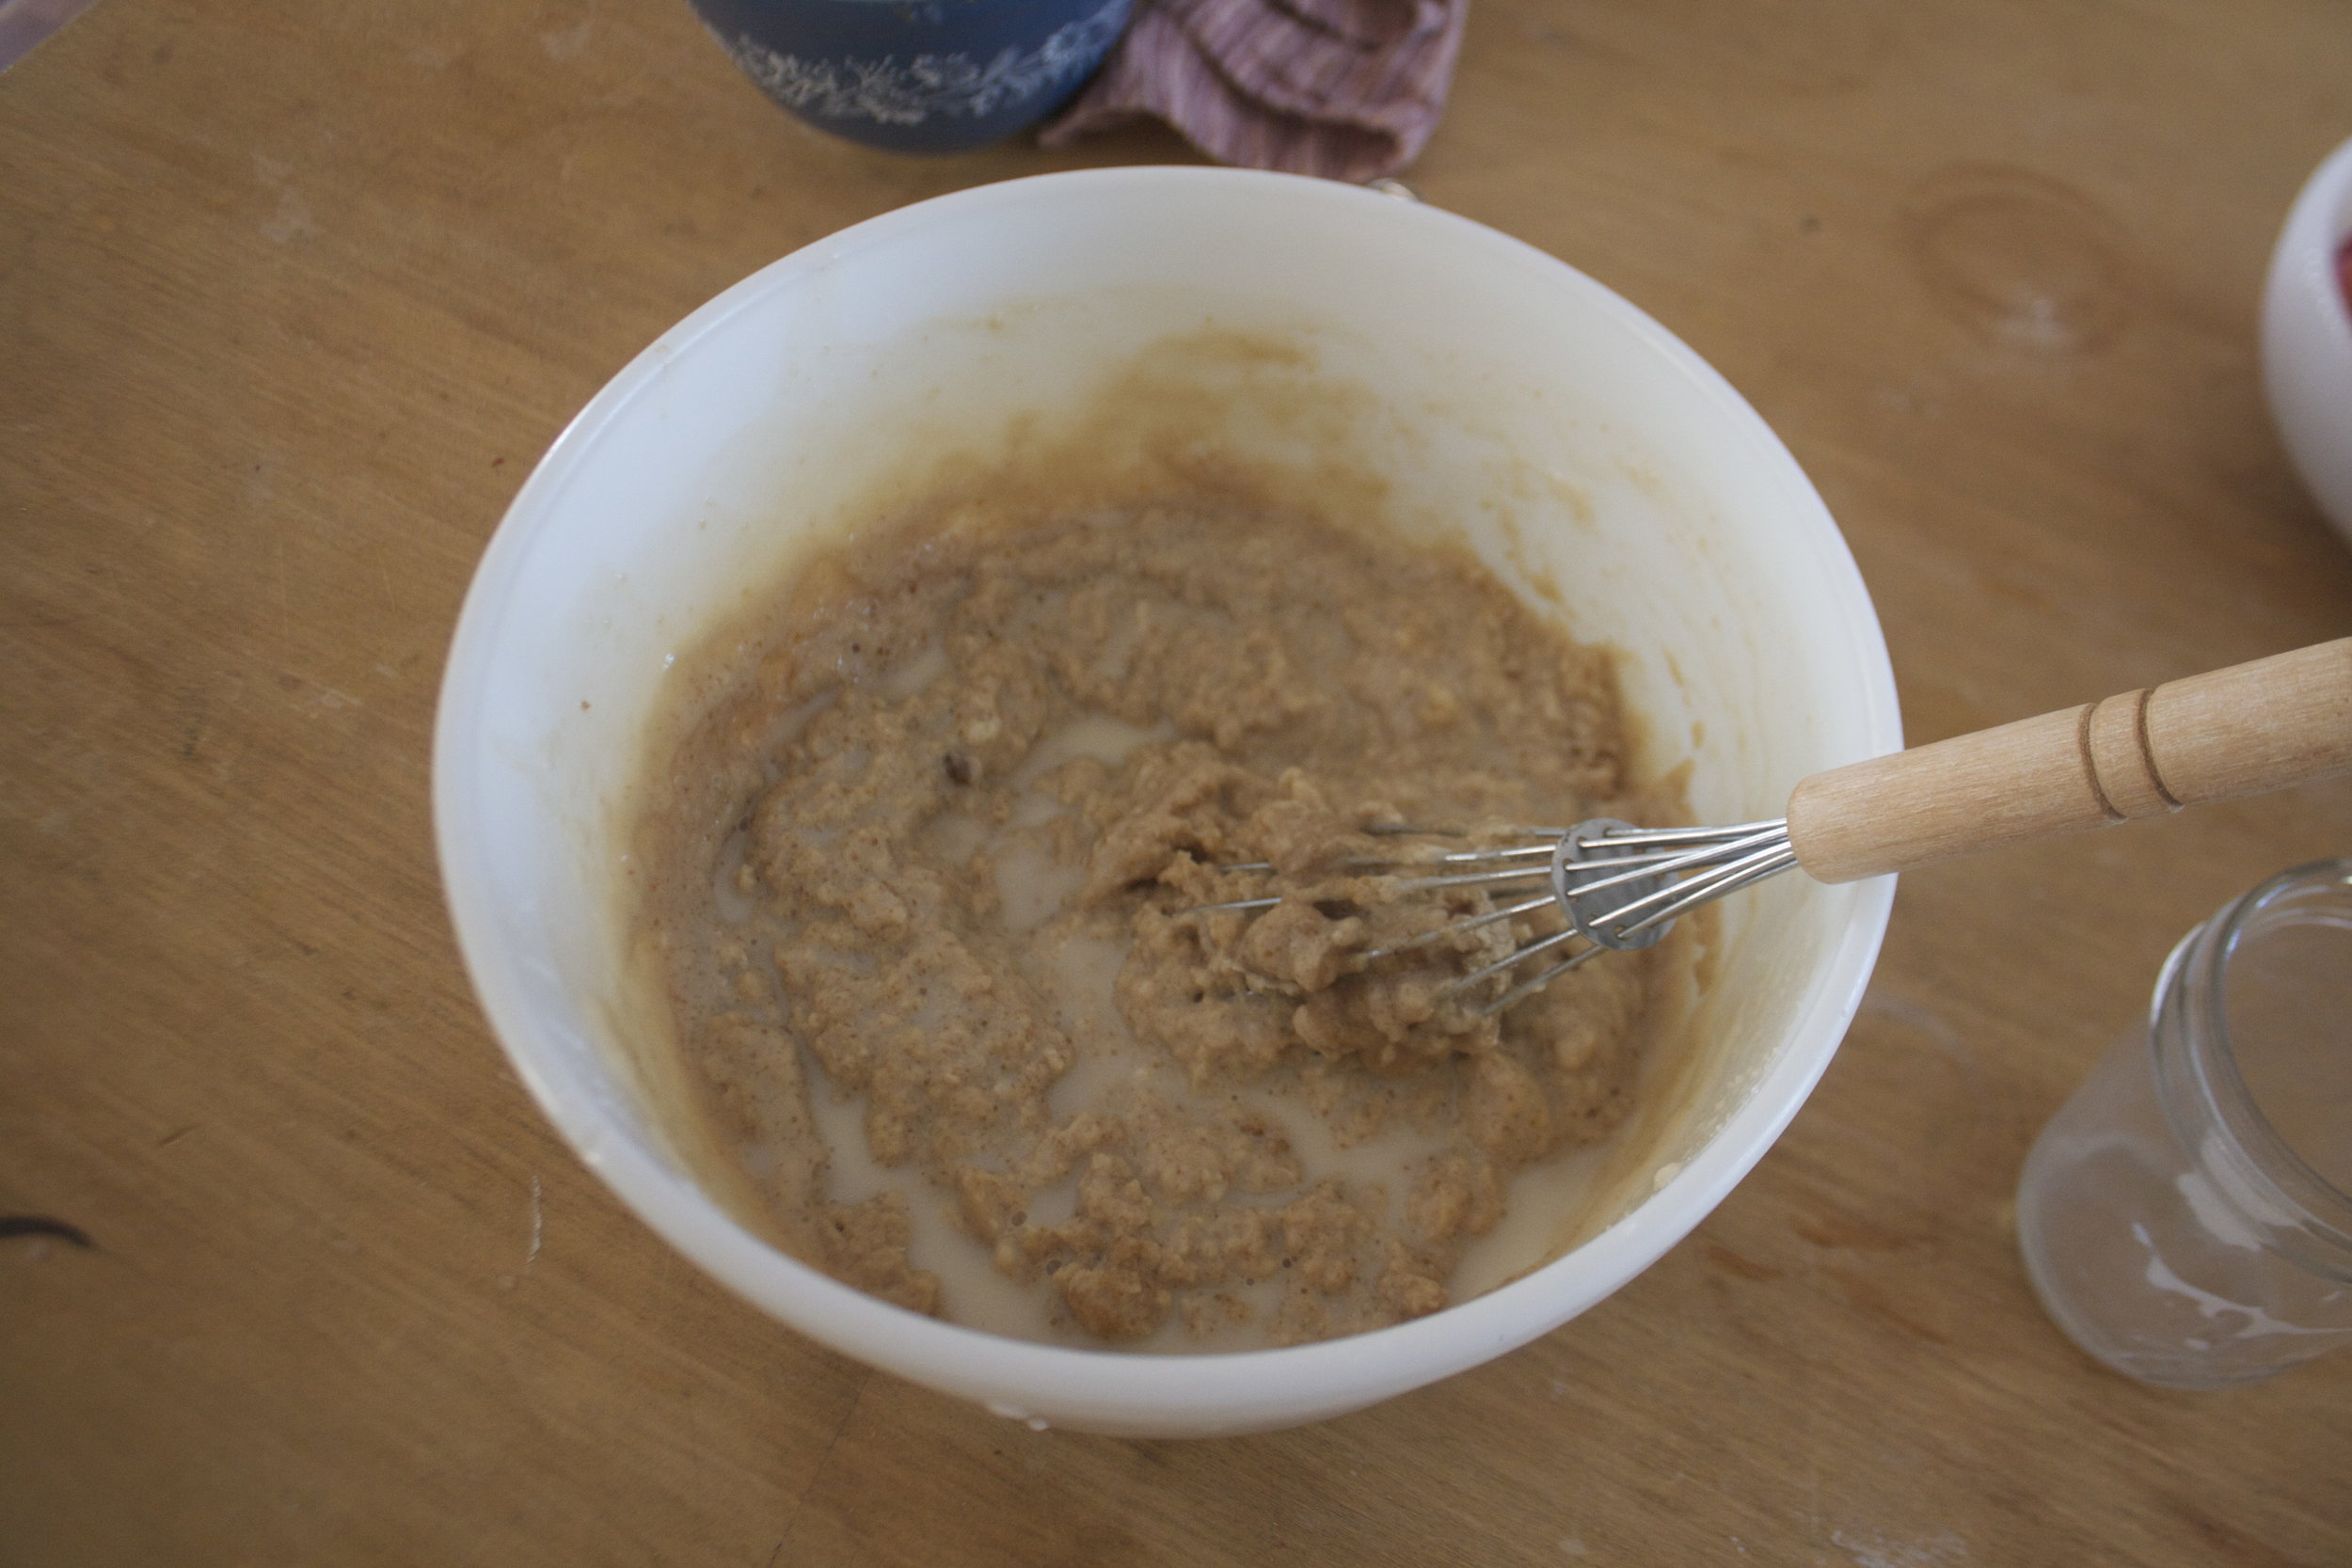
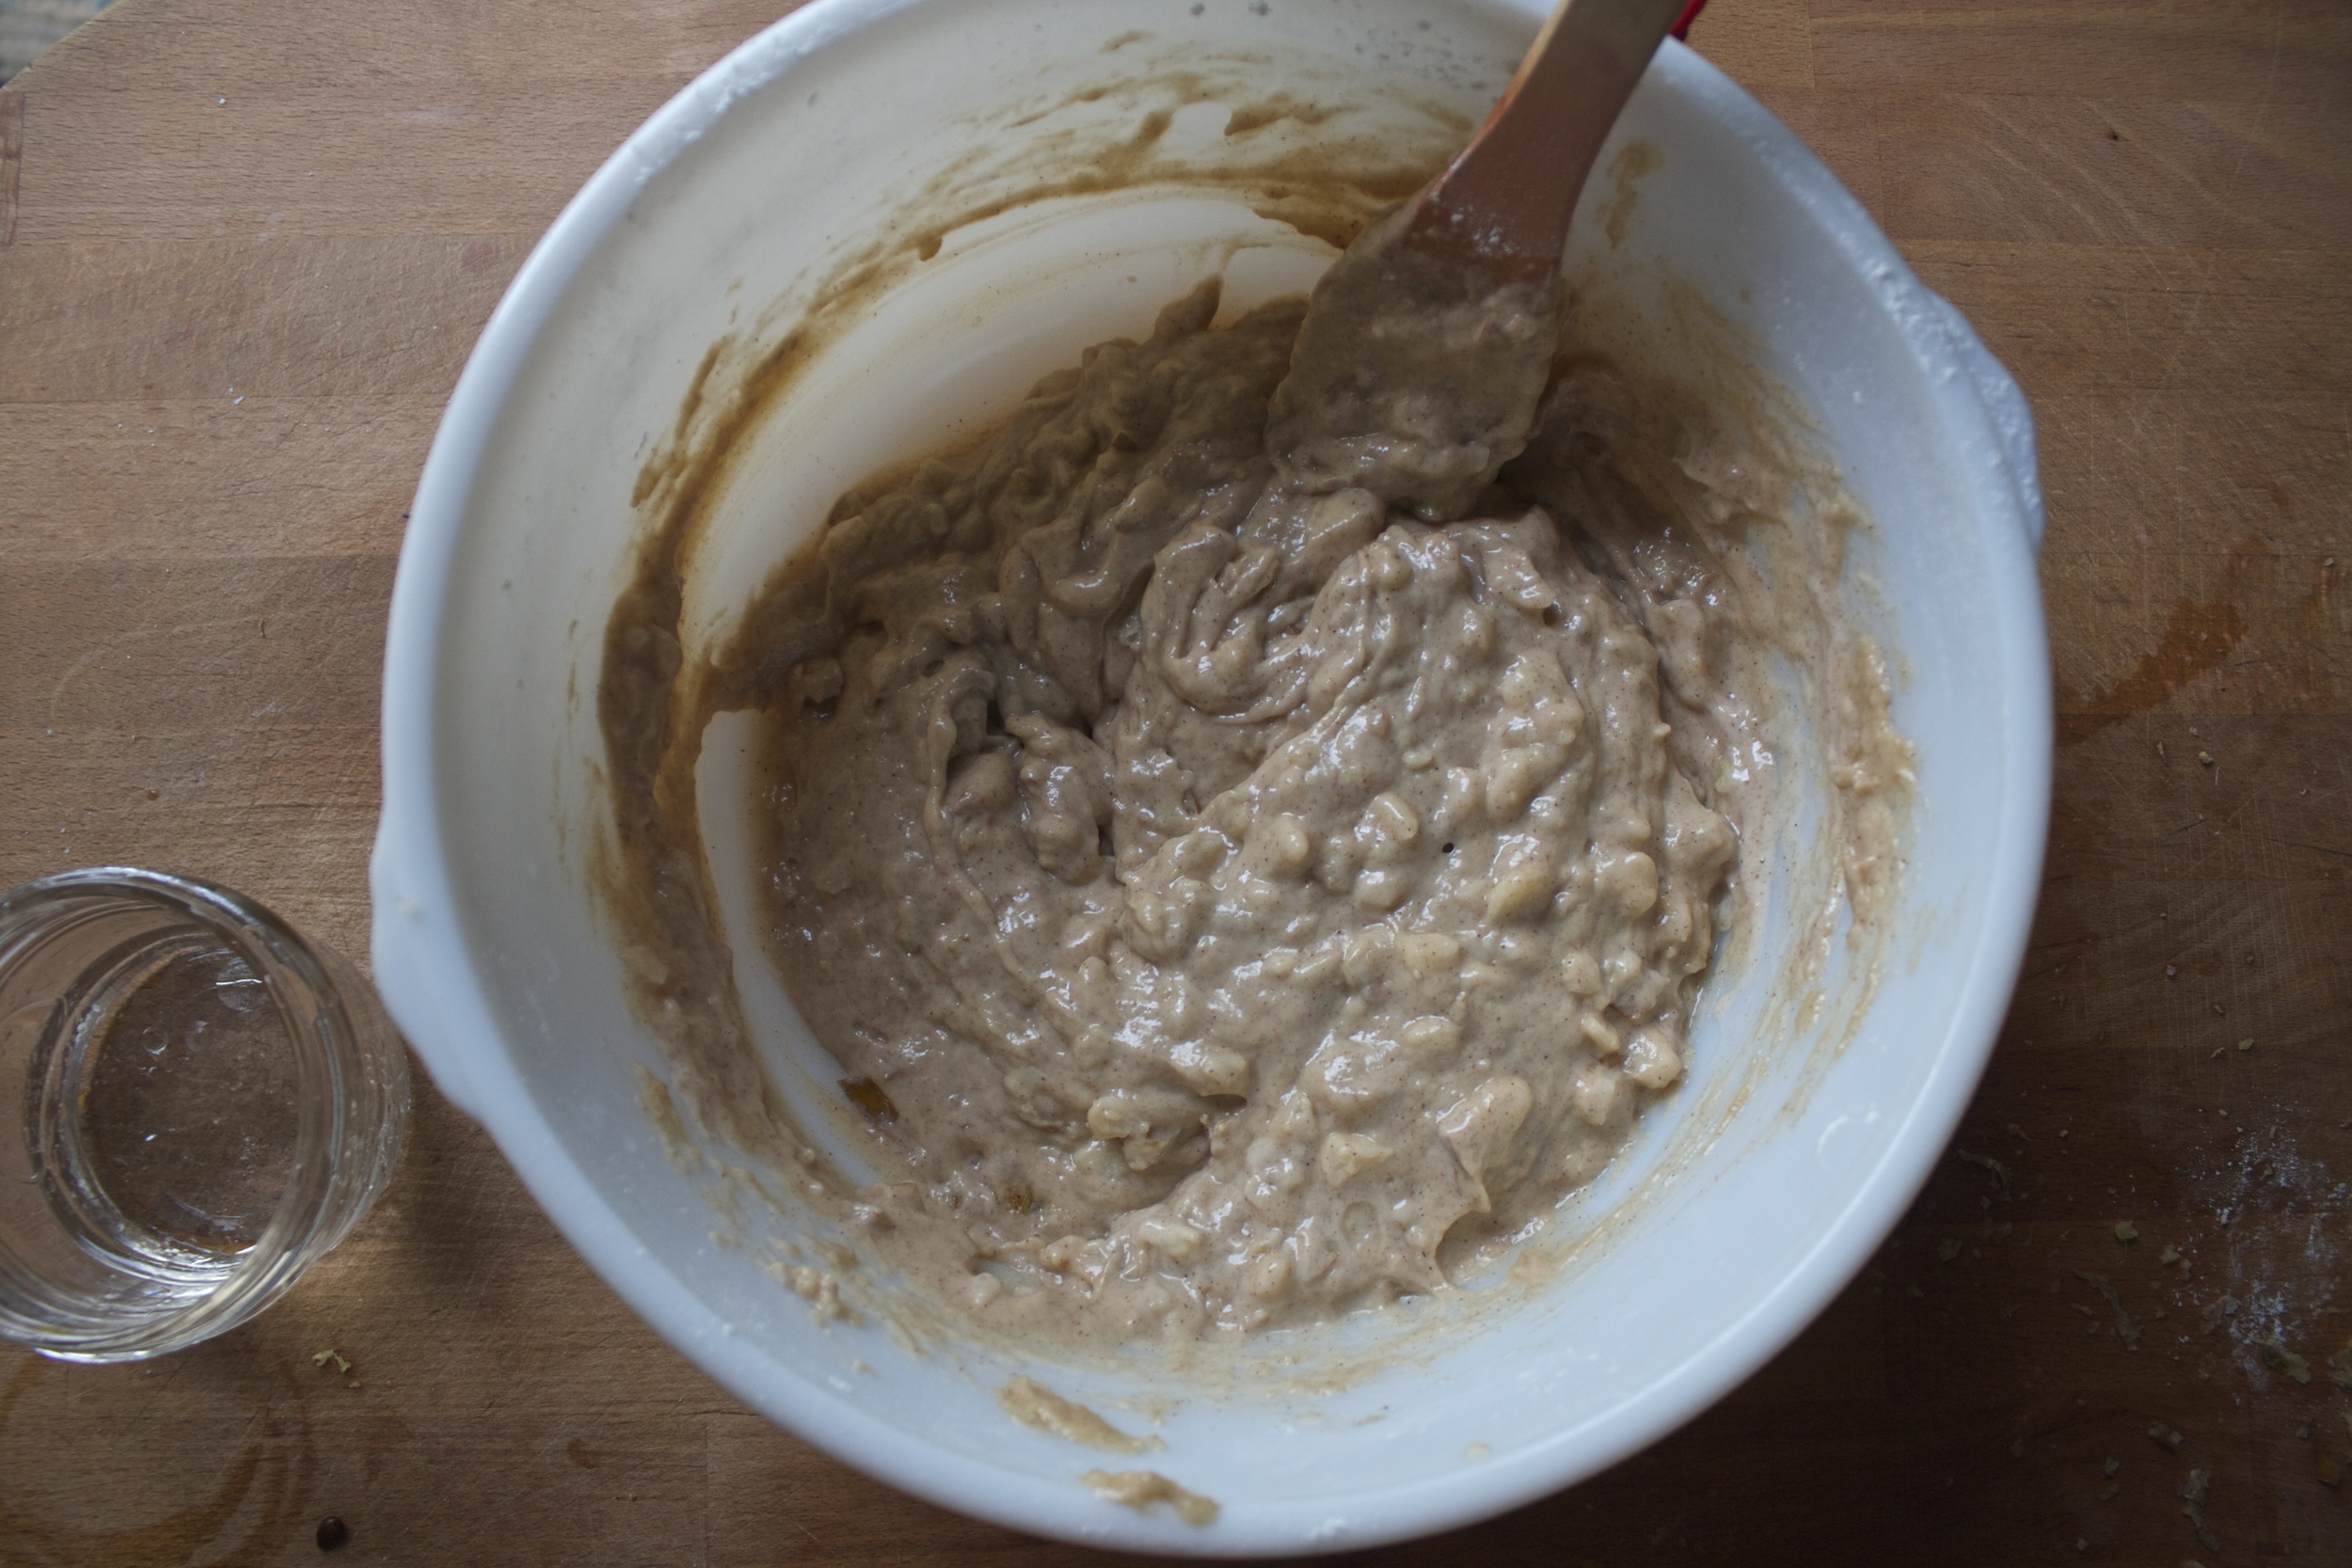
Soy milk and vinegar get added and mixed in.

Cake batter ready to go.

IMG_6807.jpg

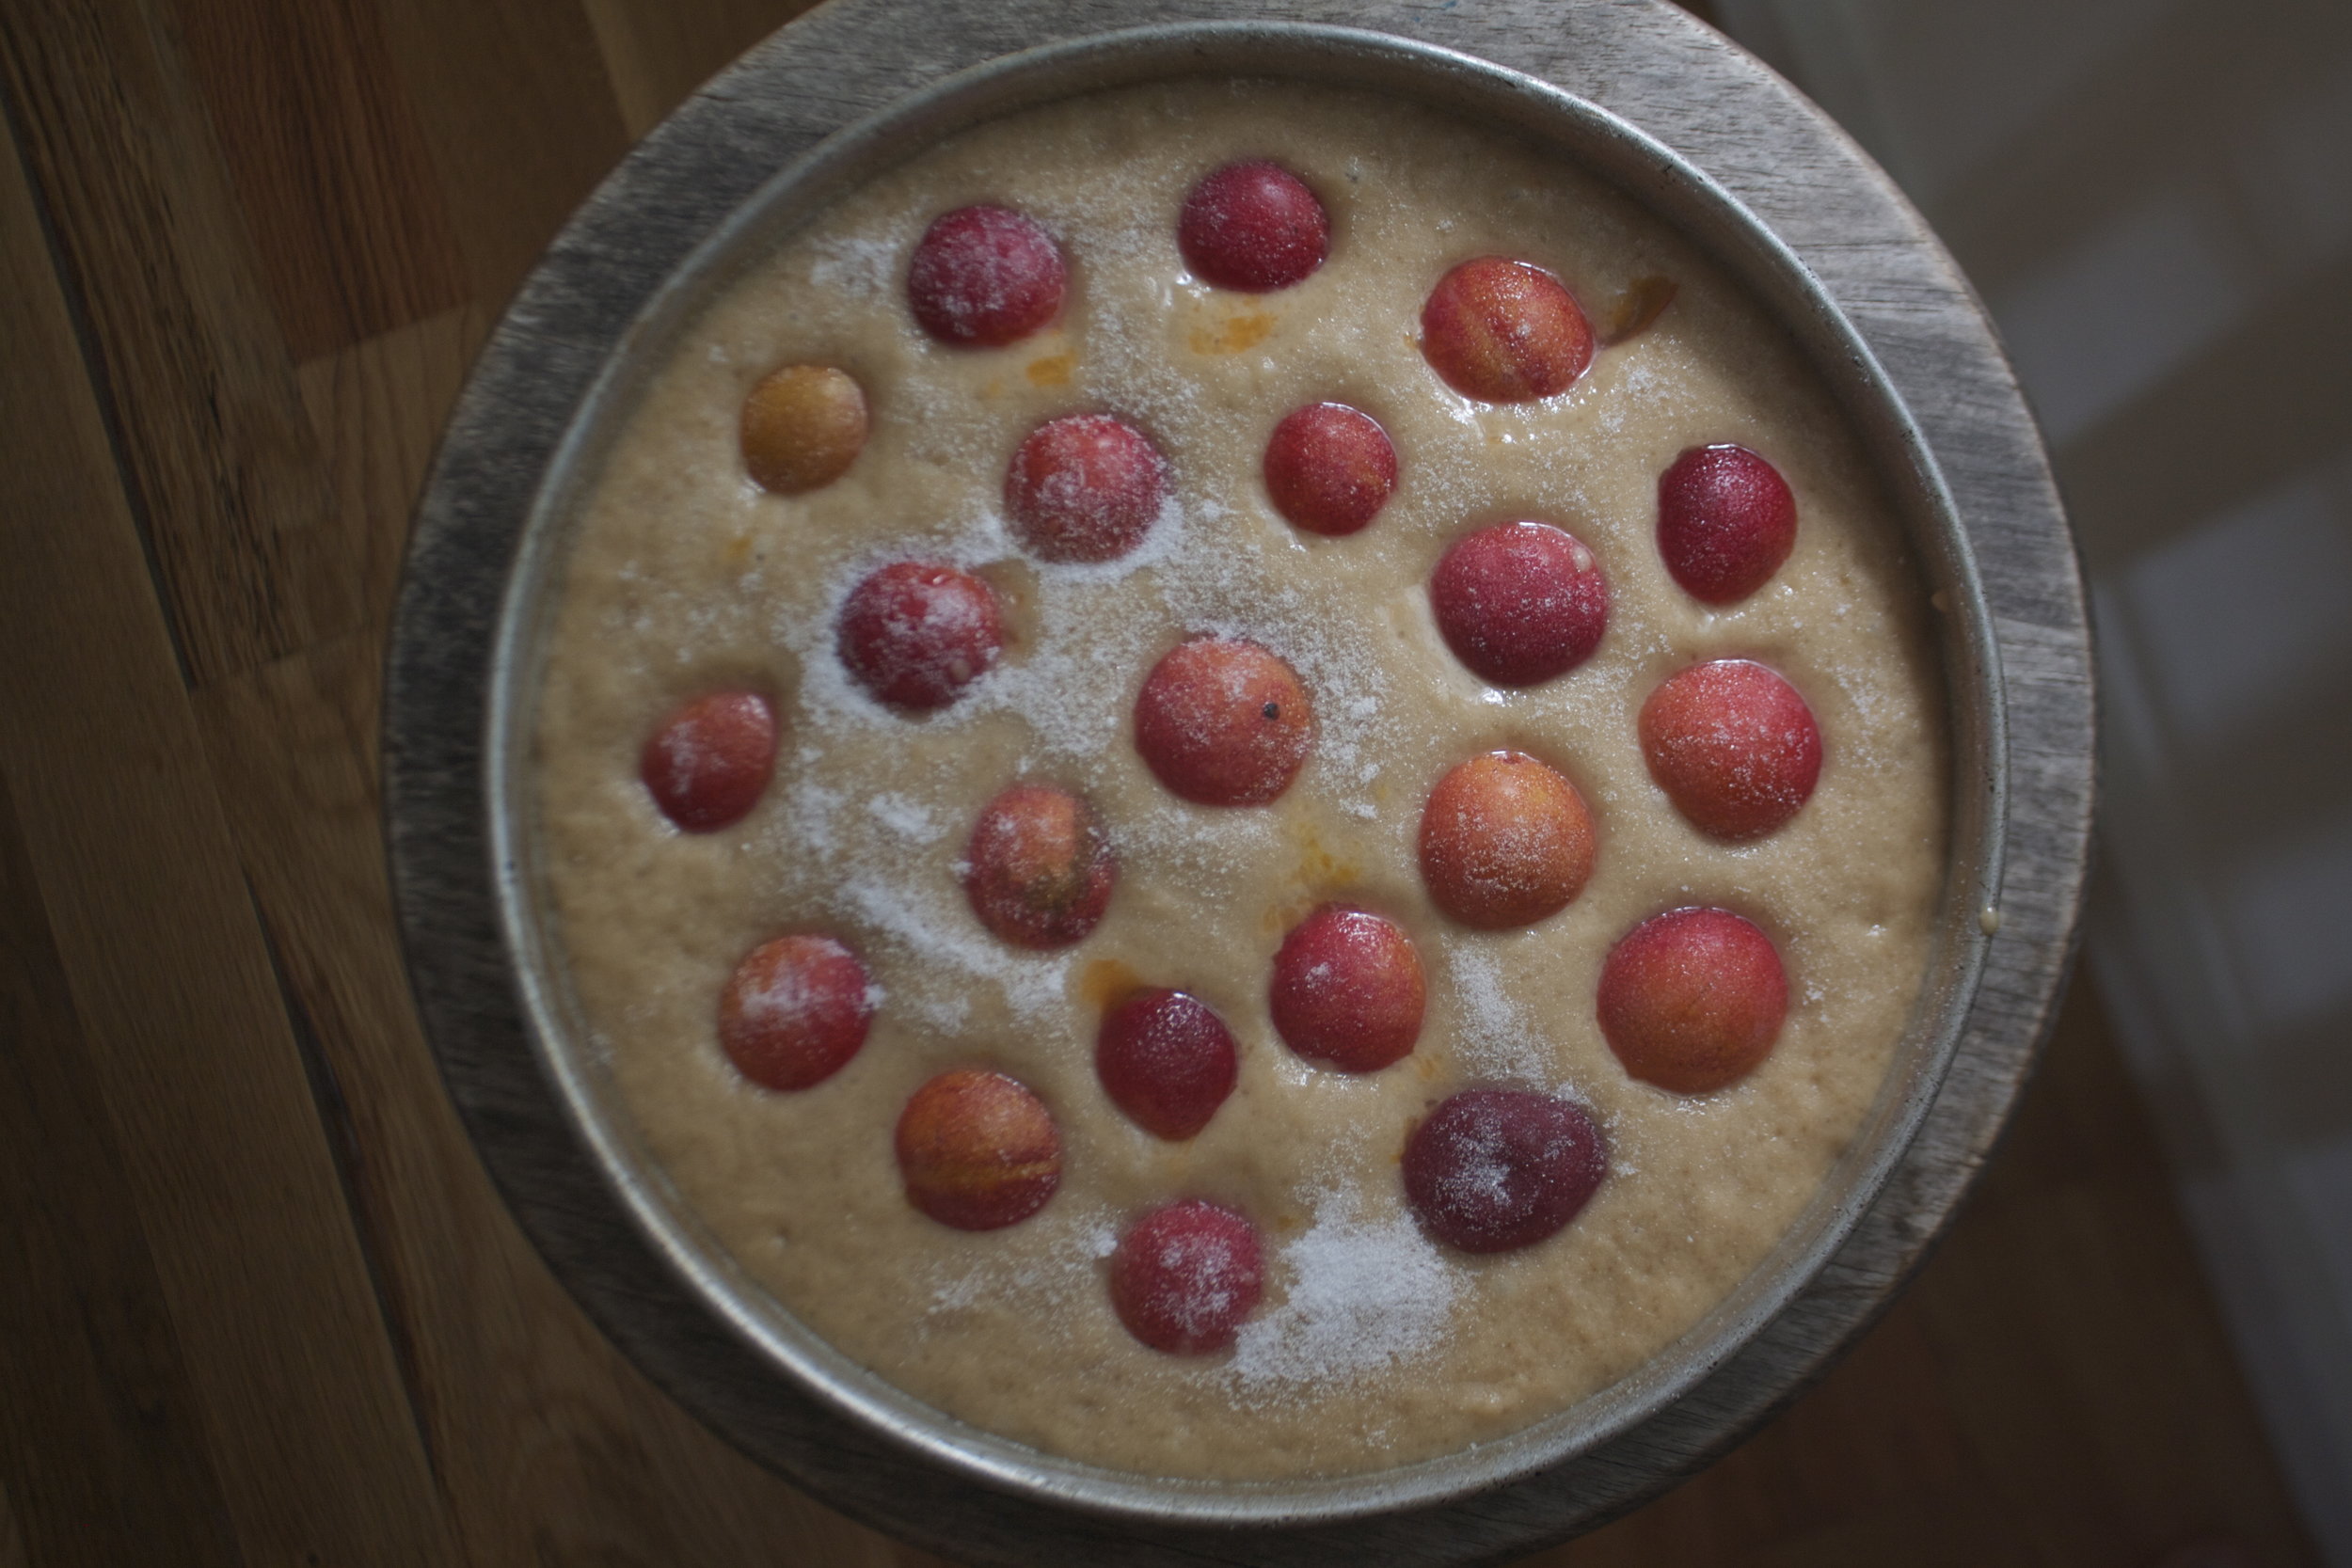
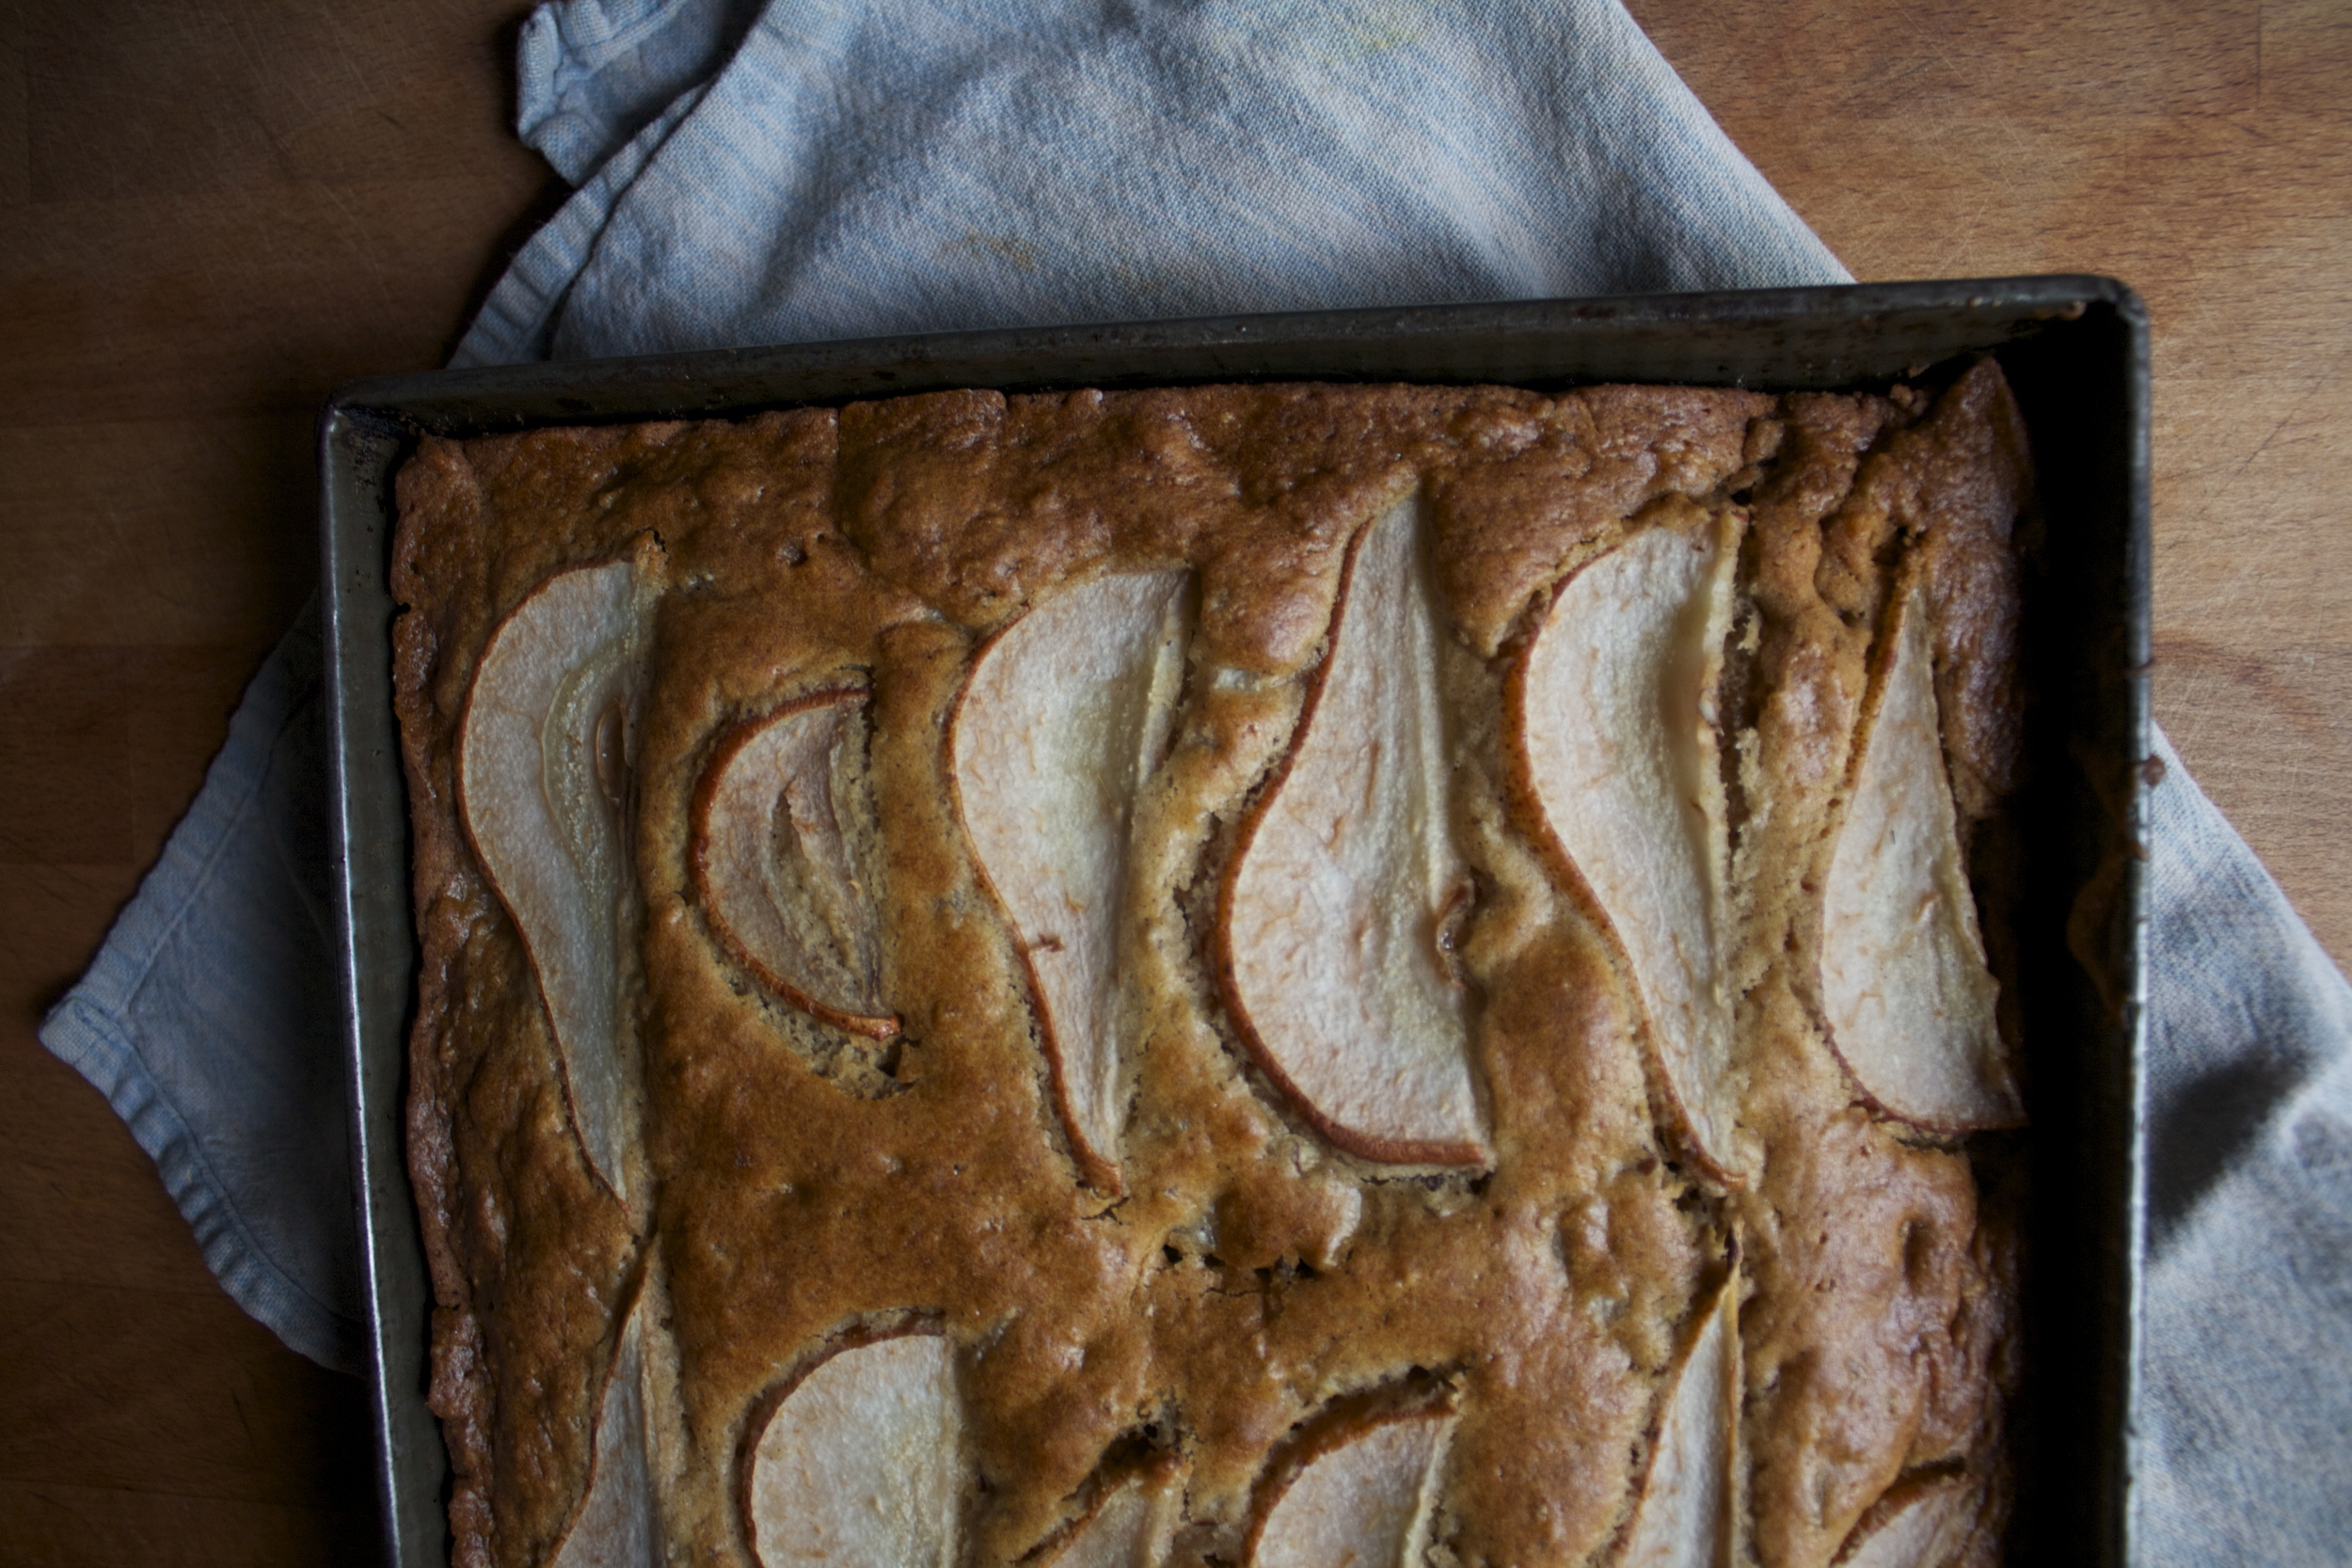
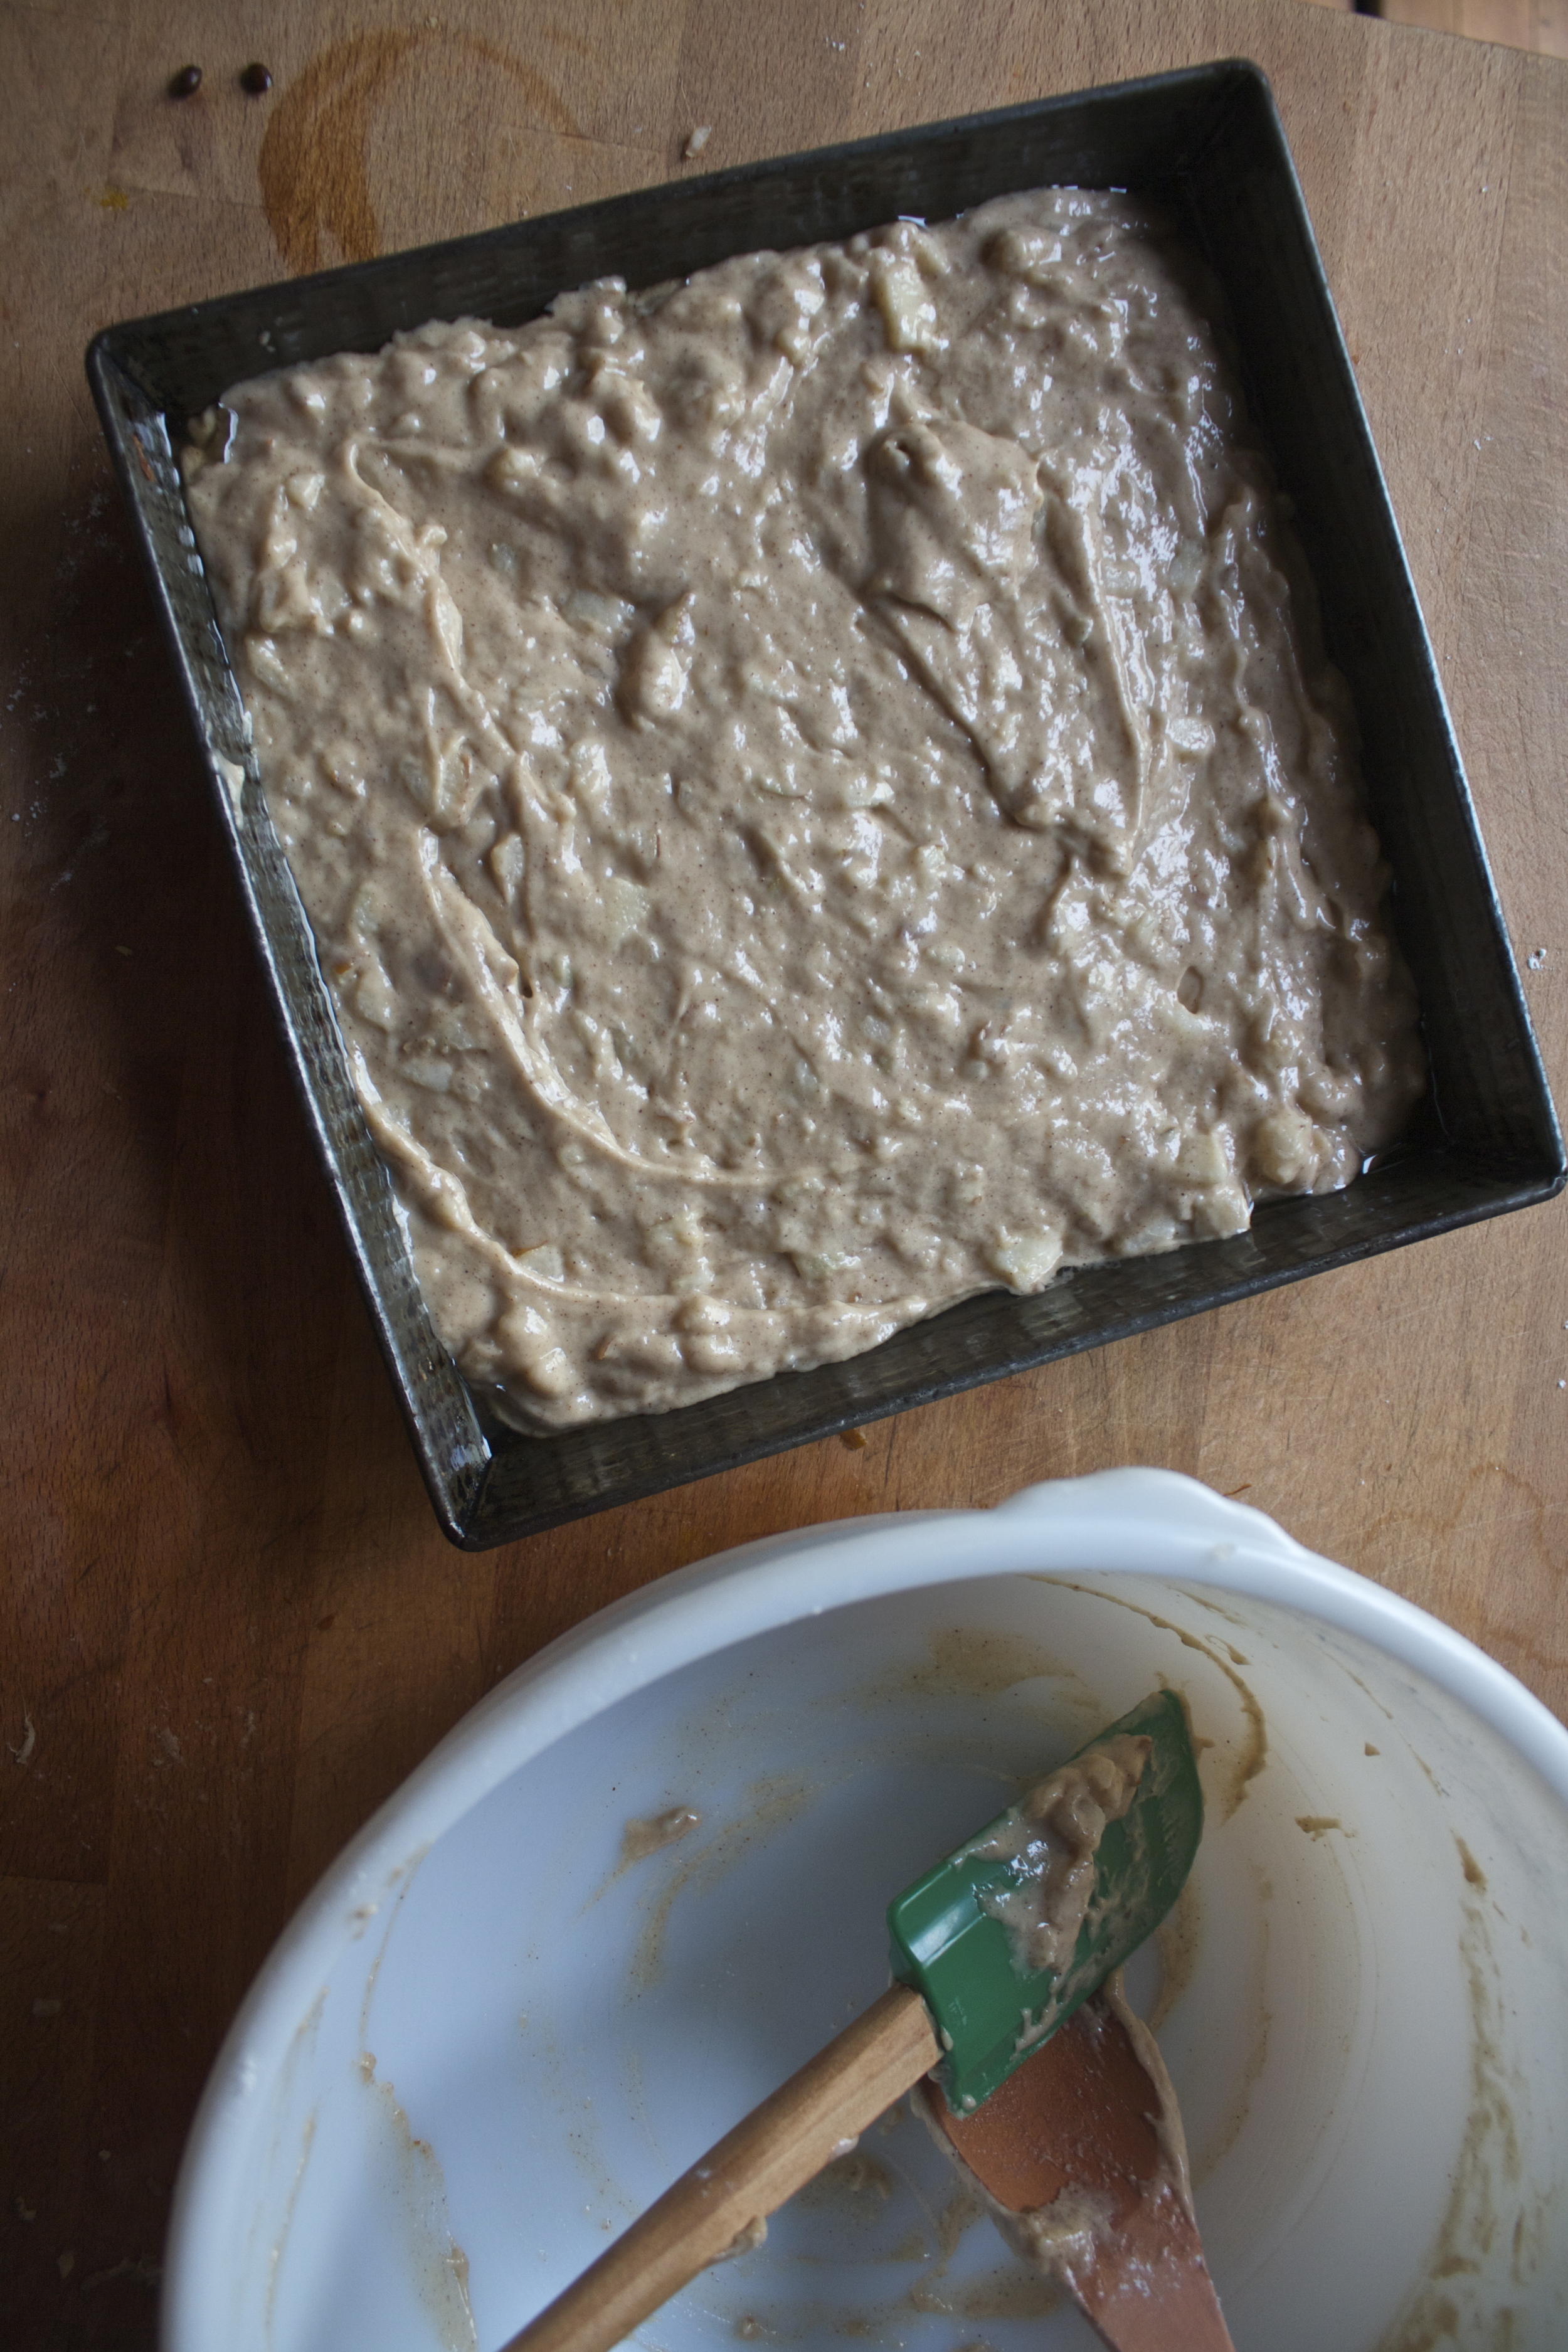
Batter gets poured into a very well greased cake pan and the plums get placed, cut side down,right on top. A sprinkle of sugar to top it off is not a bad idea.

Into the oven it goes to turn to cake!

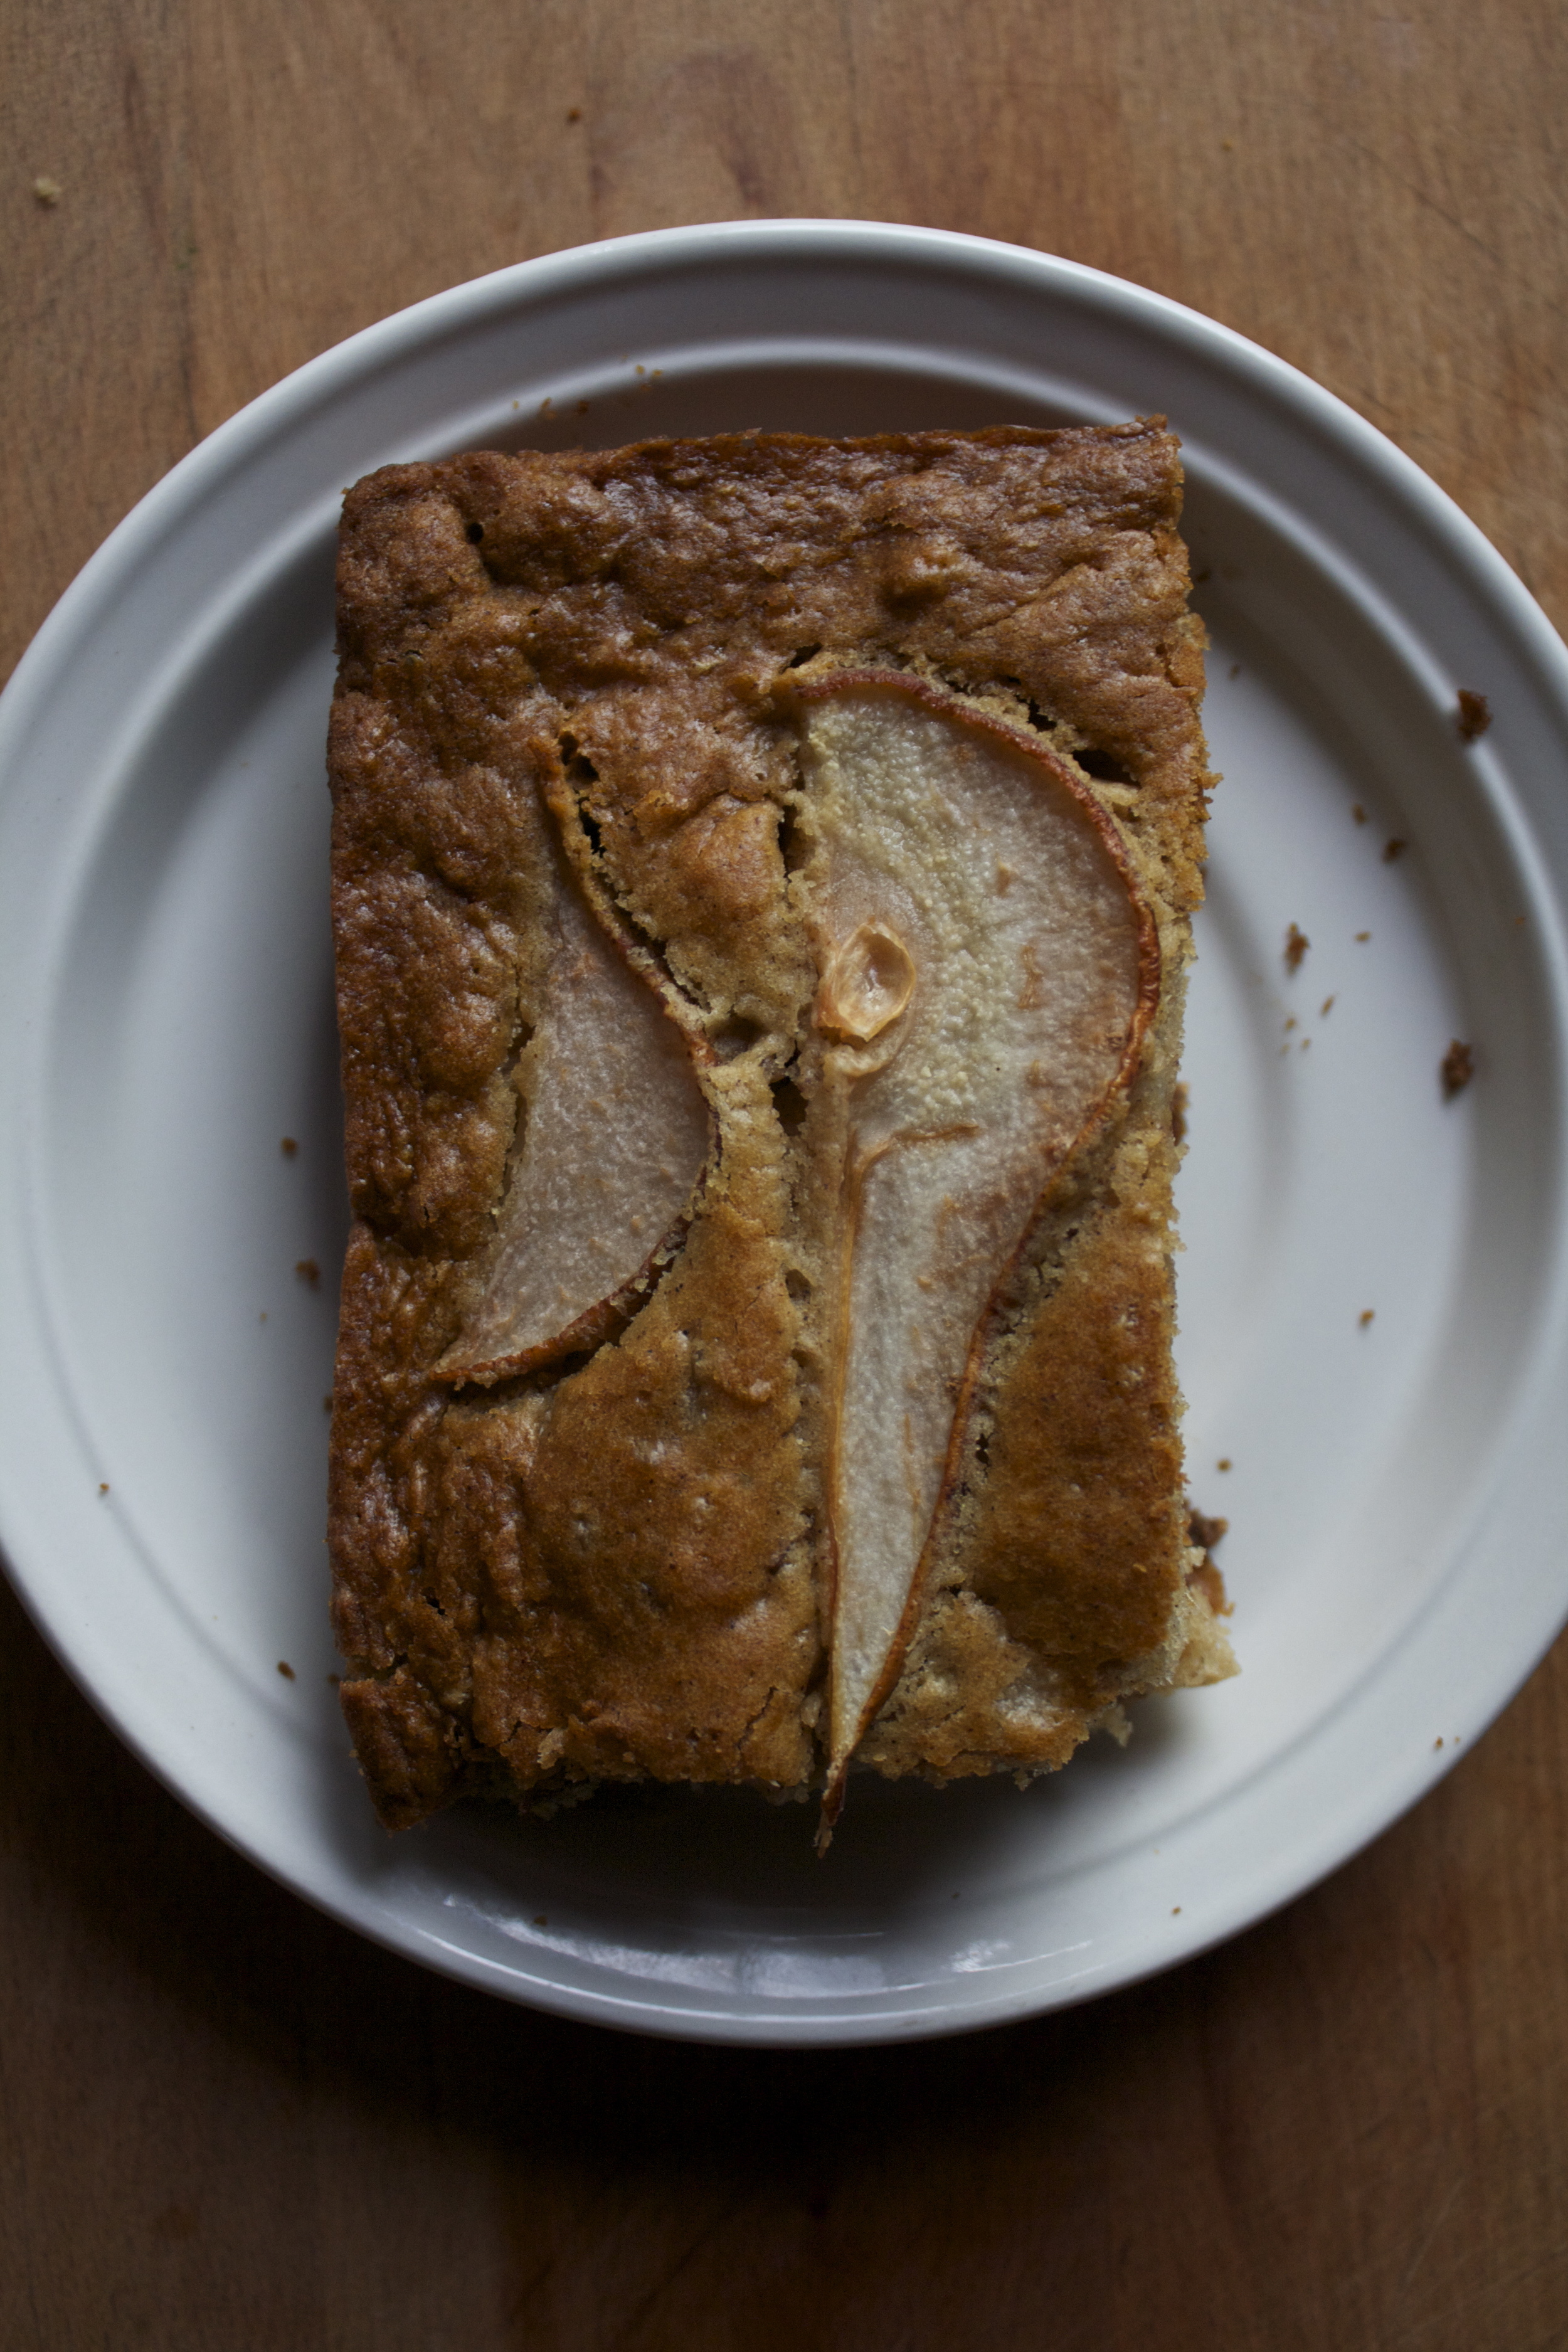
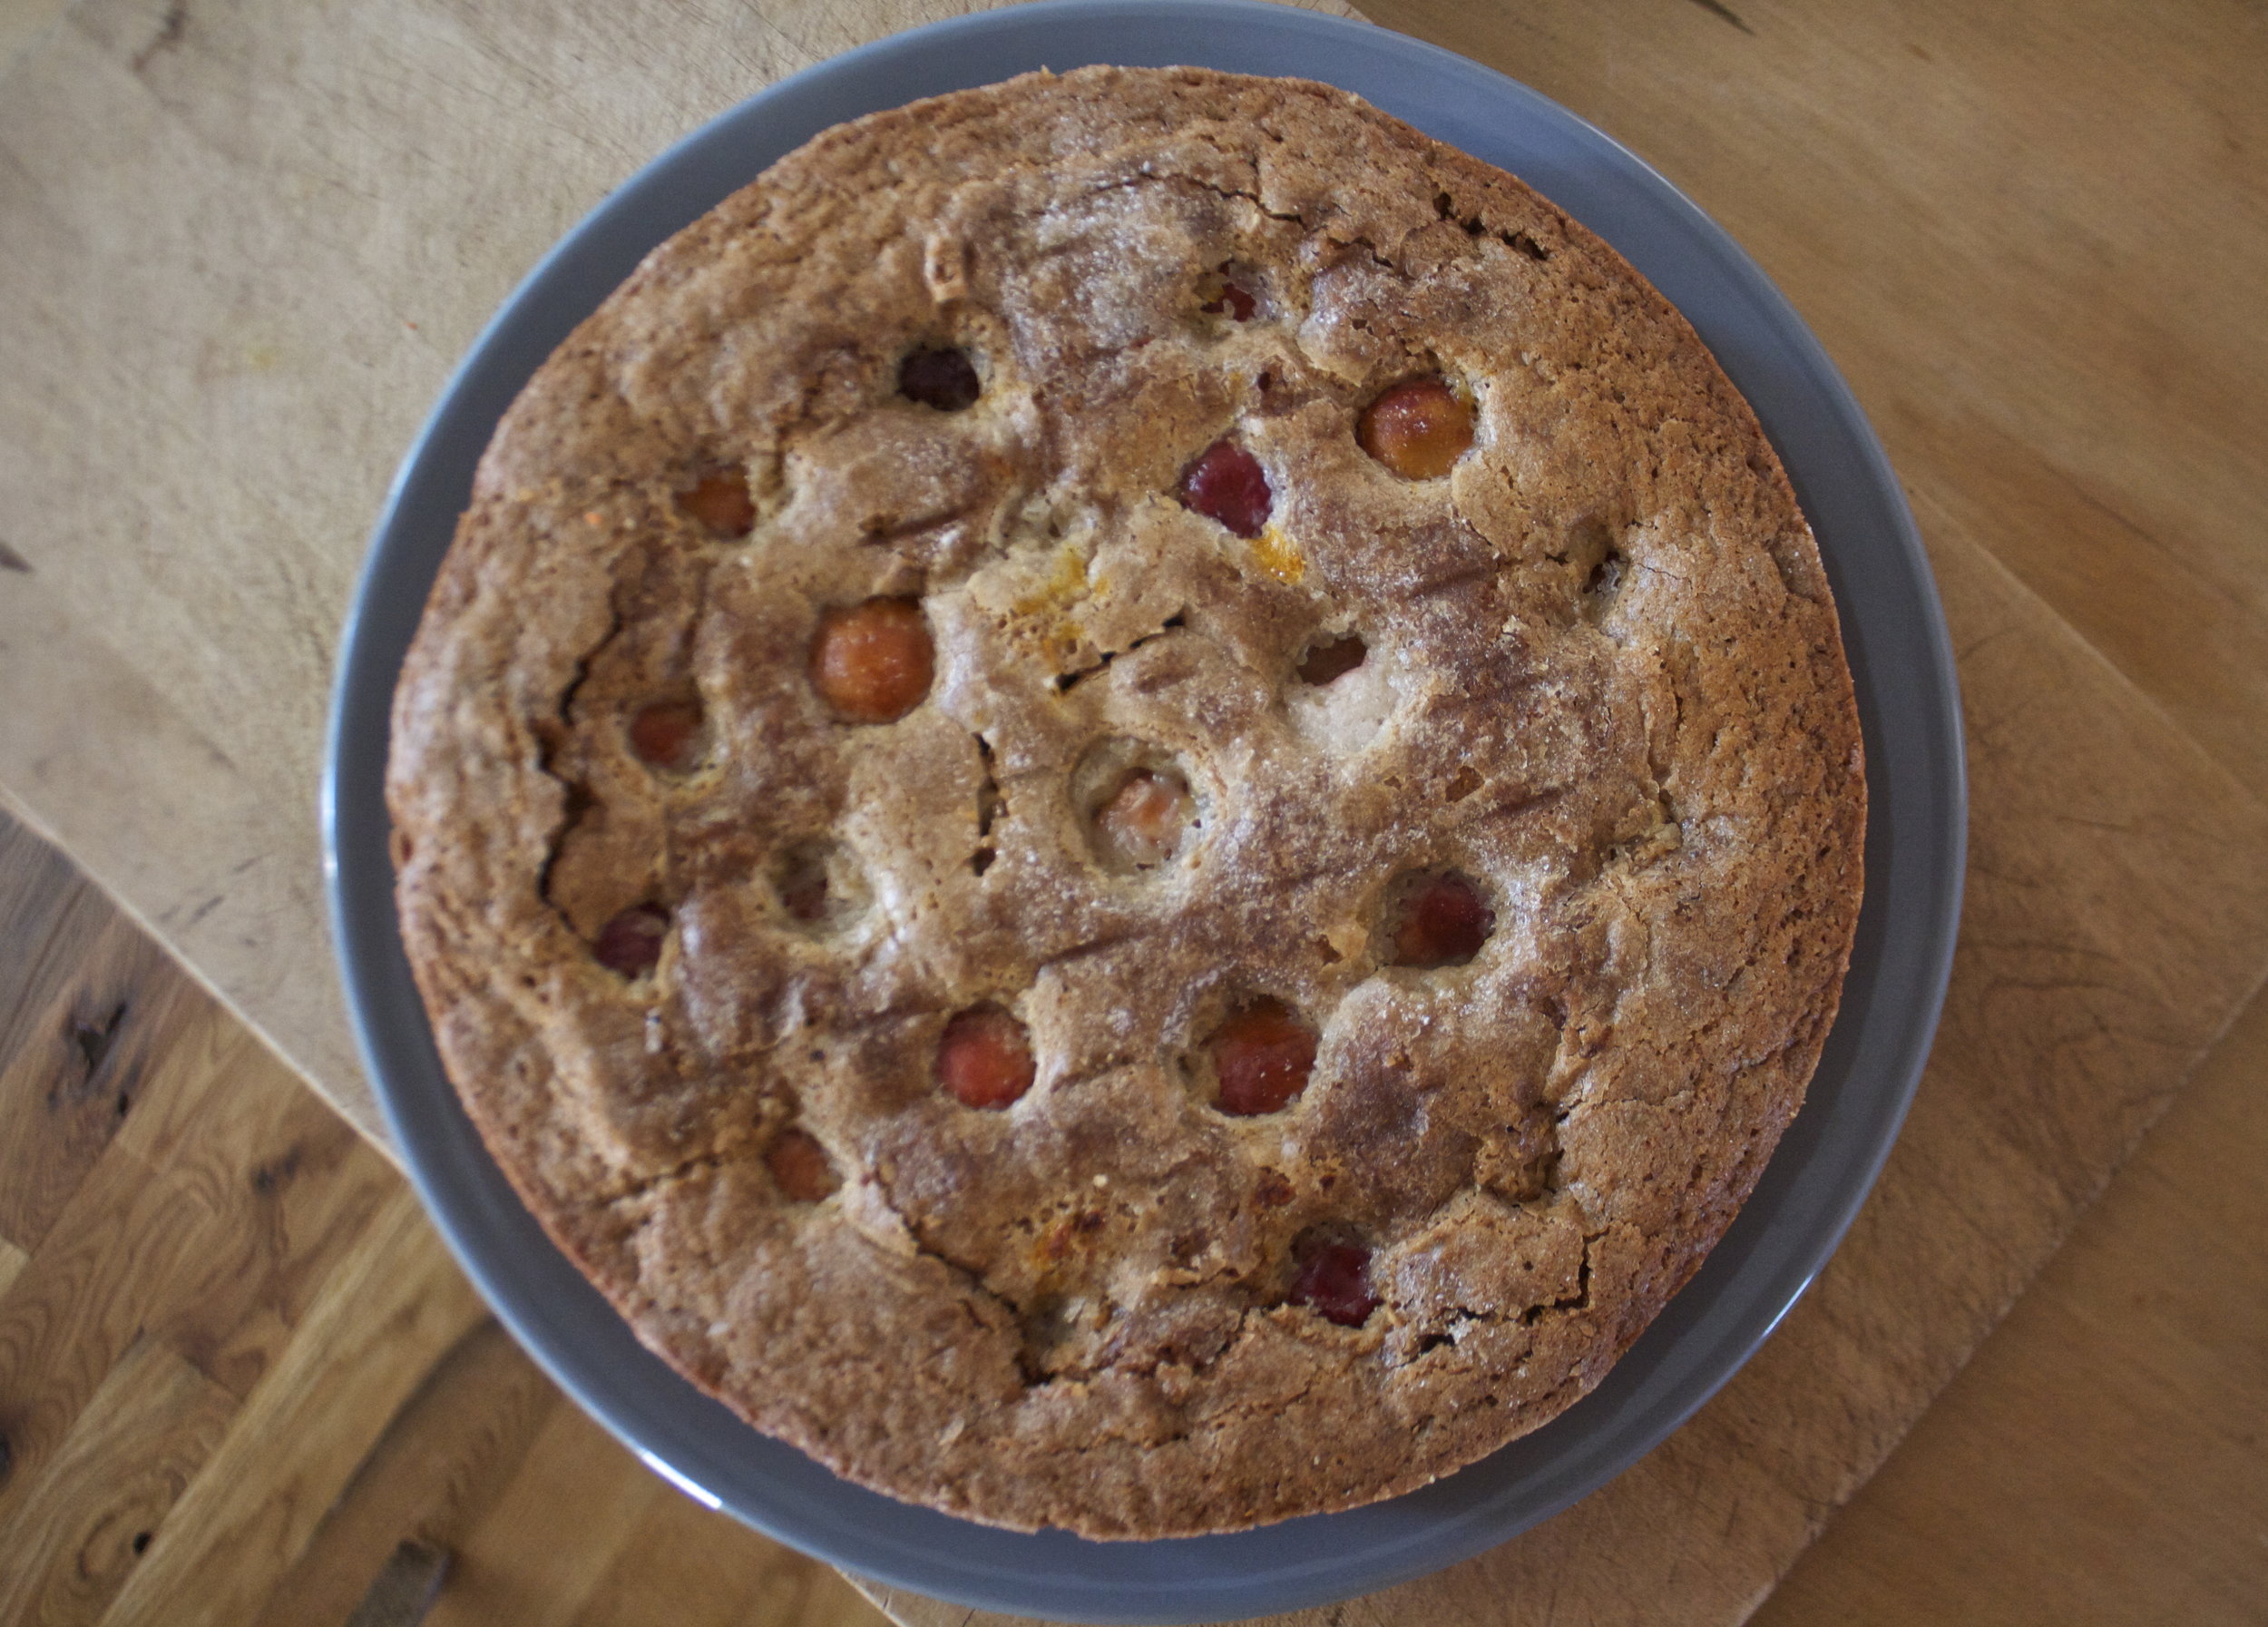
Pulled from the oven looking so nice. Let the cake cool completely in the pan before taking it out. Hot cake is hard to handle!

IMG_6851.jpg

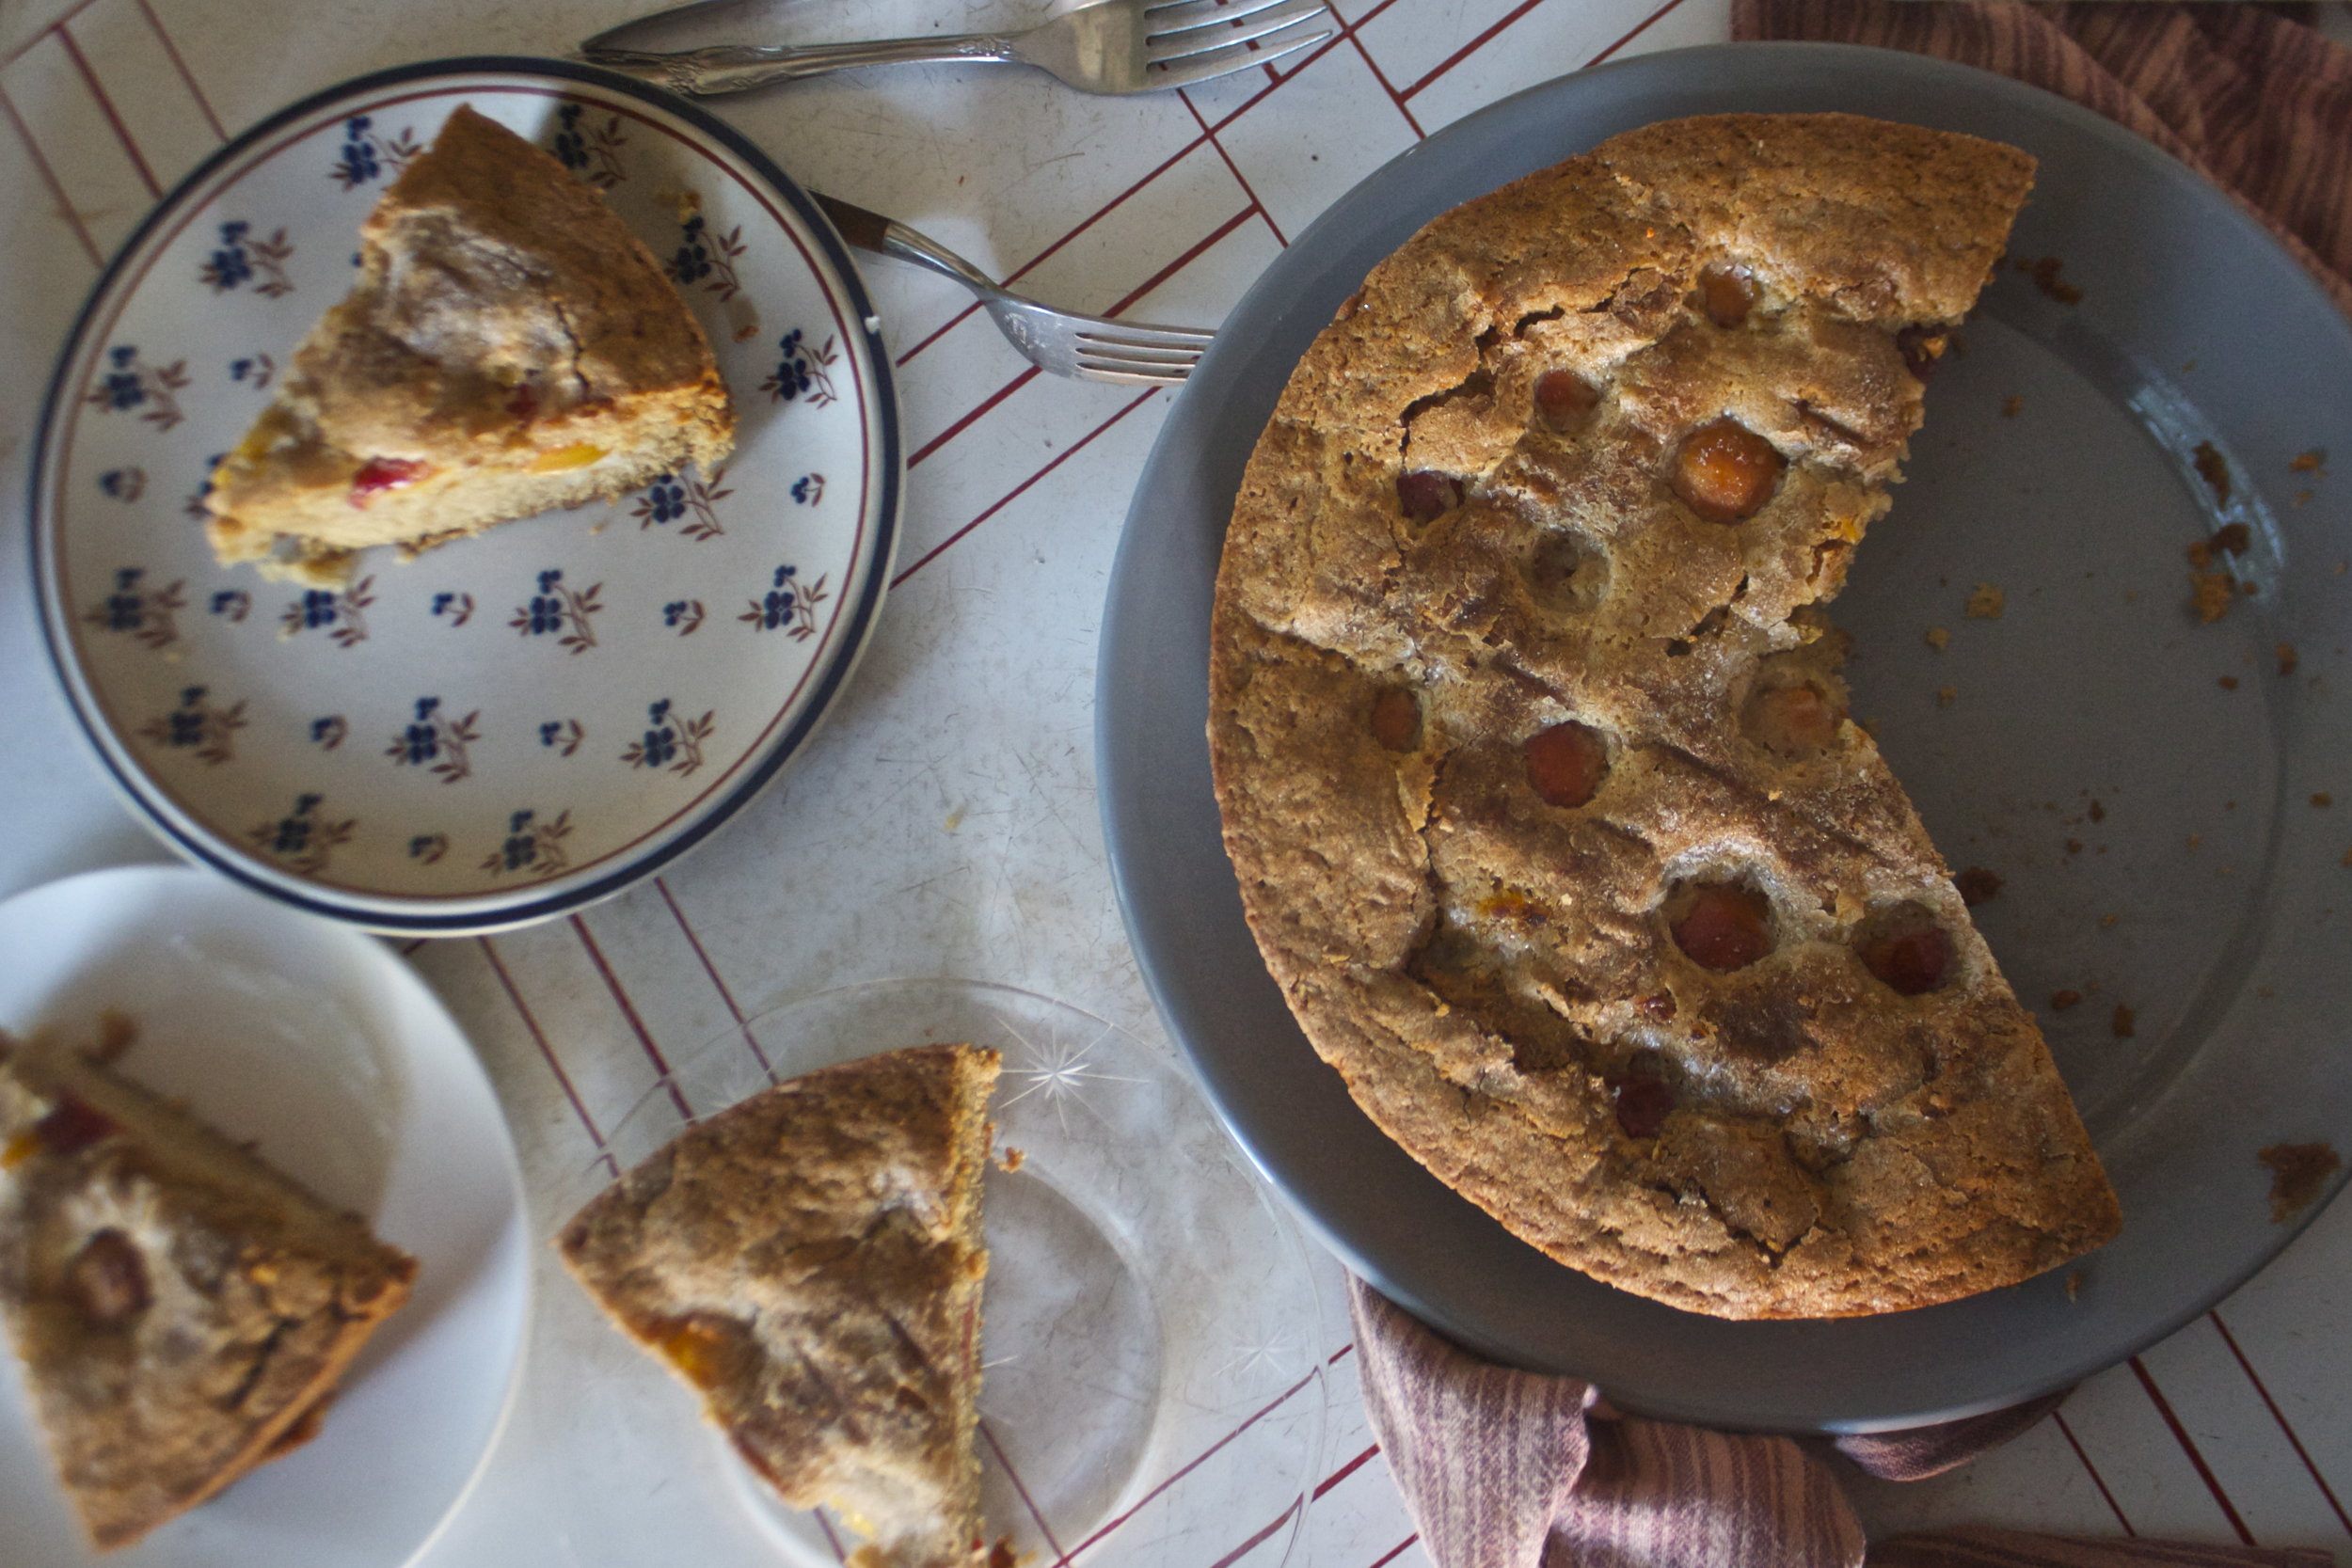
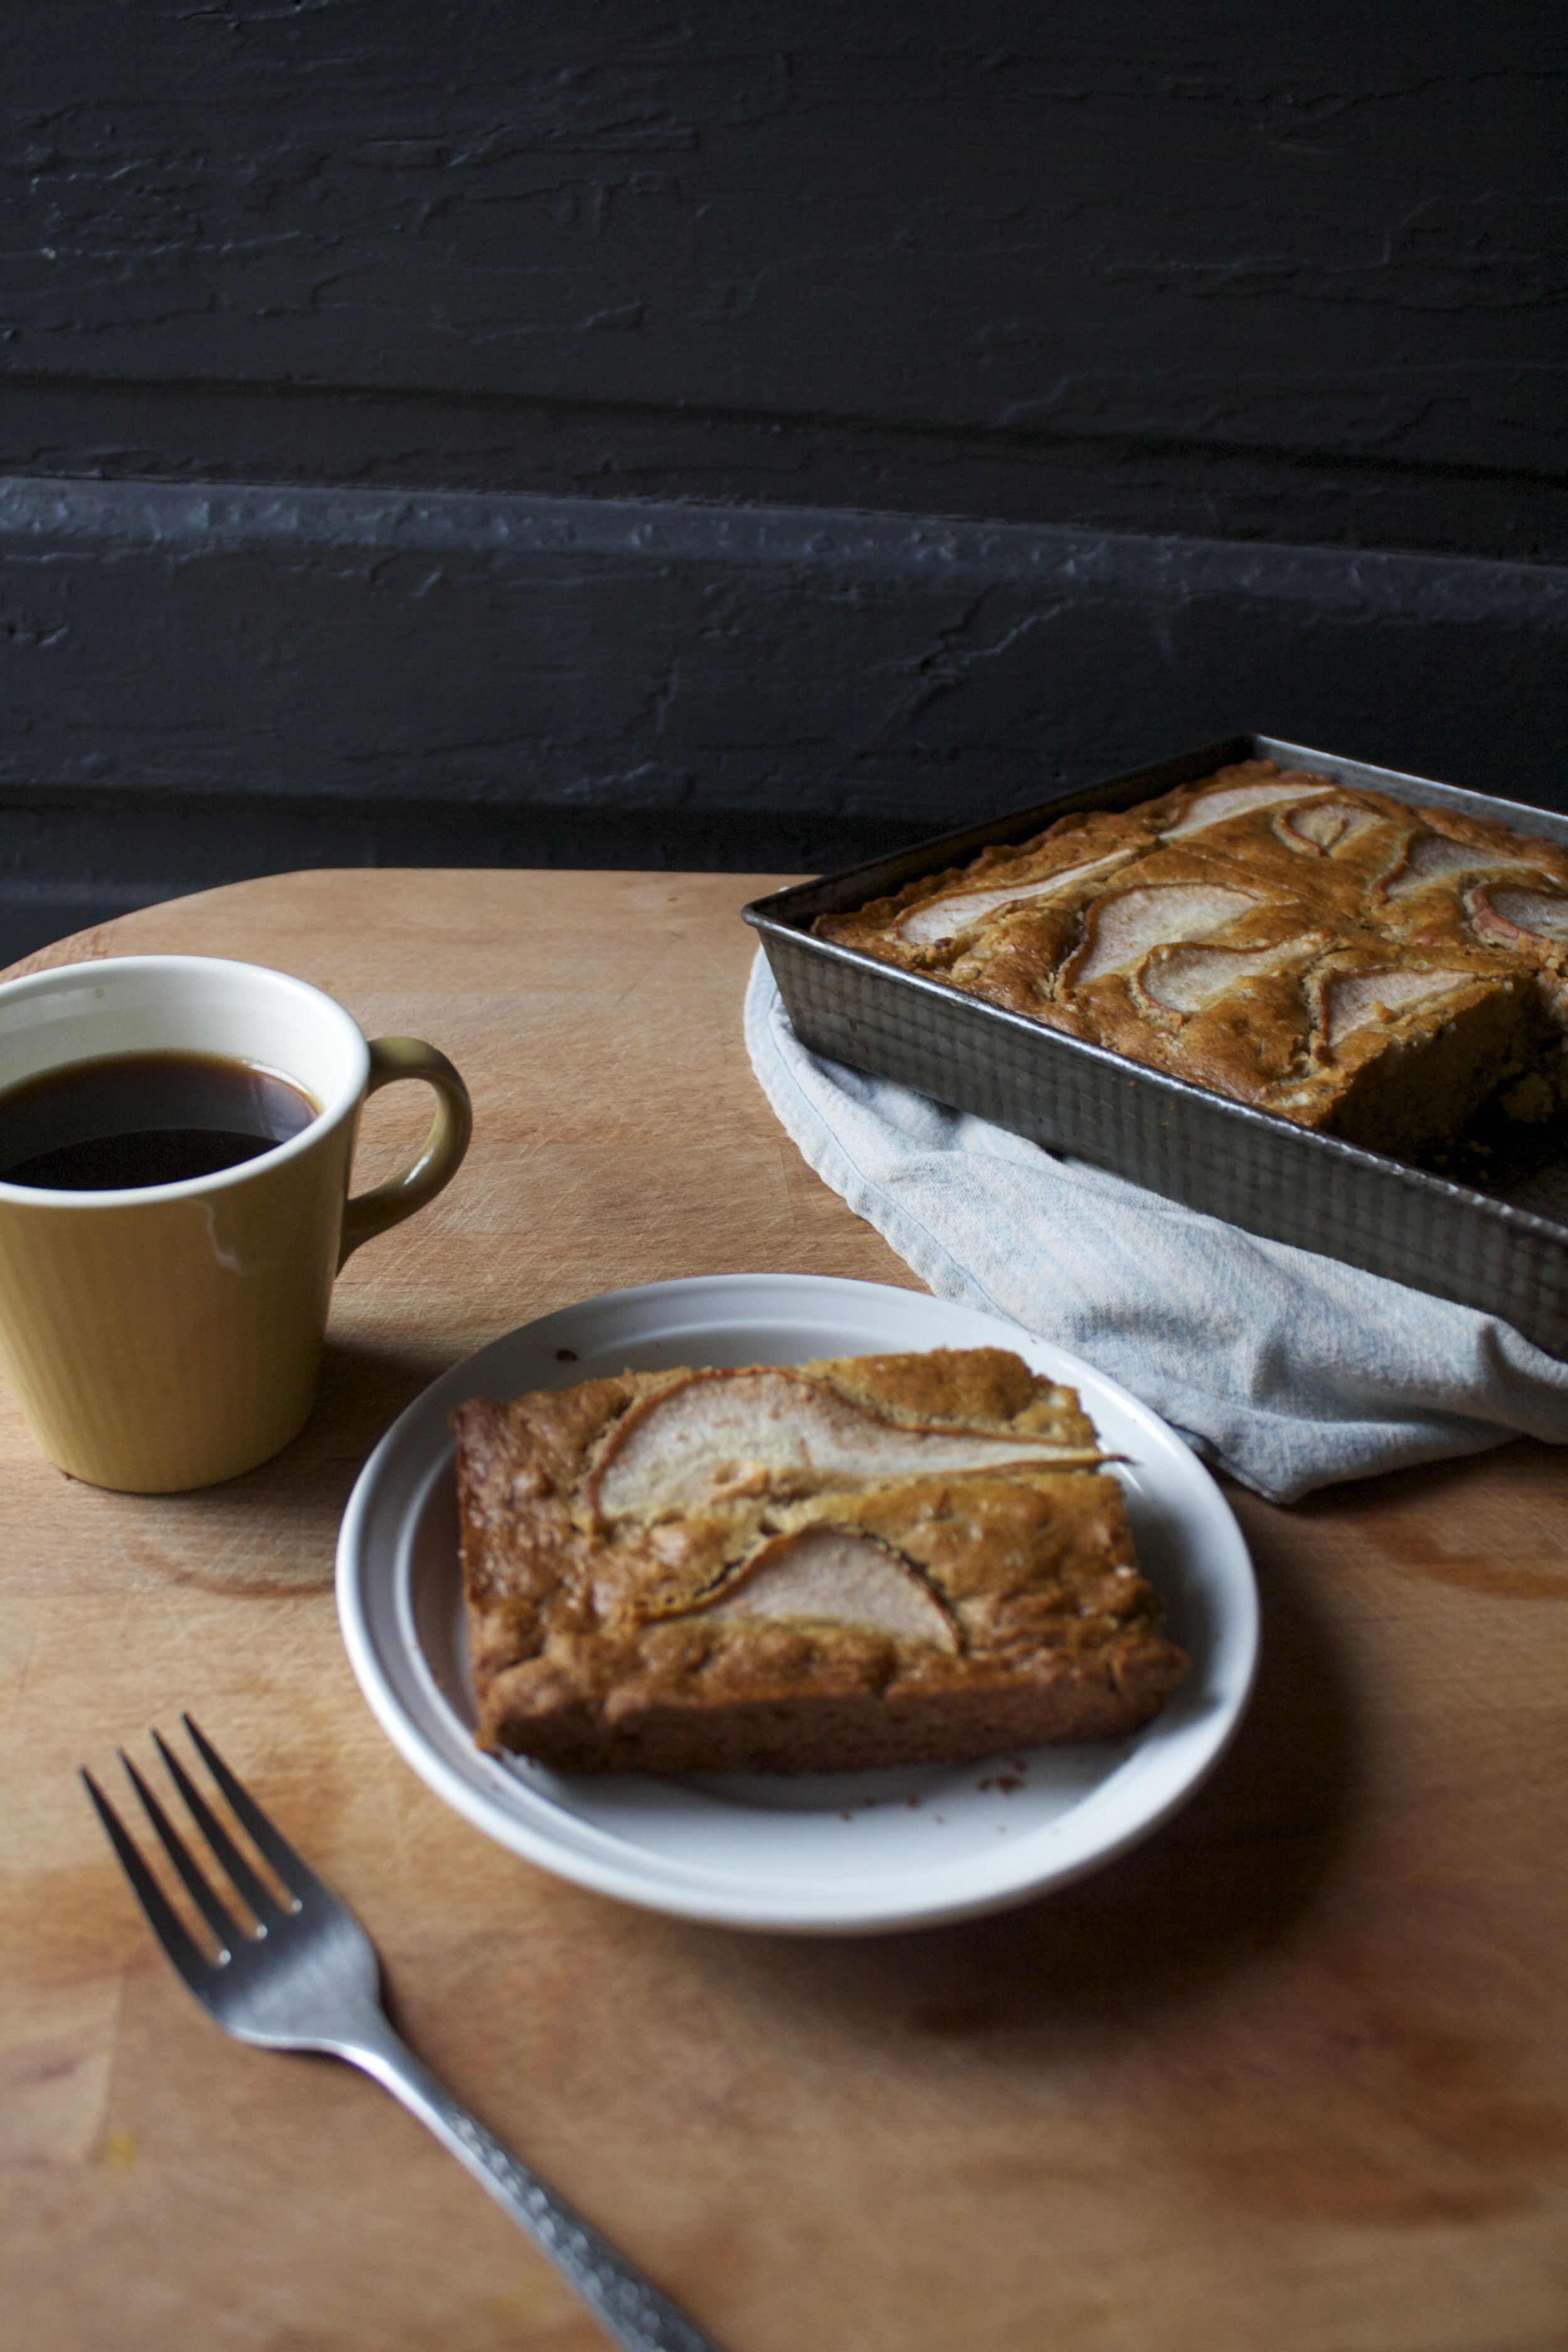
And as soon as you get it out of the pan you can start eating.

Enjoy the last bits of summer. Share if you can!

-C


Plum Cake

Makes a 12 inch cake

Ingredients

  • 2 1/4 cups all purpose flour
  • 1 teaspoon baking sods
  • 1 1/2 teaspoon baking powder
  • 1 teaspoon salt
  • 1 cup brown sugar
  • 3/4 cup coconut oil (warmed so it's liquid)
  • 1 teaspoon vanilla extract
  • 1 cup soy milk
  • 1 tablespoon apple cider vinegar
  • 12-14 small plums (the plums I used where golf ball sized so you might need less for larger plums)
  • 1 tablespoon white sugar

Preheat oven to 350

Start by slicing the plums in half and removing the pits. Set them aside. Hint. for slicing, the best way to do this is to run the knife along the pit all the way around the plum and then twist the plum in half. Pop the pit out with you finger or spoon.

In a large bowl, whisk together the salt baking soda and powder, and salt . In a smaller bowl mix together the coconut oil, brown sugar, and vanilla until smooth. Pour the wet into the dry and add in half the milk, mix together, then the rest of the milk and apple cider vinegar. Mix until all incorporated and smooth.

Pour batter into a well greased 12 inch round cake pan.  (If you don't have that a 9x9 square pan will work) Smooth out the top then grab your sliced plums and stick them, cut side down, on top. Give each plum a little push into the batter so it half submerged. Sprinkle the top with white sugar and pop into the oven

Bake for 45-50 minutes or until a fork or toothpick stuck int he middle comes out clean.

Remove and let cool completely in cake pan, it's easier to remove the cake when it is not hot.
And once it's cool, remove cake gently and ta-da. Cake time


In cake, Dairy Free, desserts, fruit, summer, Vegan, vermont, Winooski Tags plums, plum cake, vegan, vegan baked goods, king arthur flour, local, neighbors, sharing, summer, plant based, vermonting, VT, winooski, cake, summer cake, stone fruit, dairy free
Comment

Blackberry Pie Crumble Squares

August 12, 2017 Colleen Stem
IMG_6368.jpg
IMG_6384.jpg

The house next door to us is for sale and in the backyard of the house is a whole lot of blackberry bushes. The mr and I have been hopping the fence over there like ninjas and filling large bowls of berries and sneaking back home to eat our weight in those blackberries. (Ok, not entirely true. We are not good enough ninjas to jump the fence so we have been walking through the fence gate. Plus we checked with the current owner, she told us to pick all we wanted to. We are not asshole ninjas stealing fruit)

So many berries. I check every few days and they just keep on coming and I am not one to let perfectly good berries (or any food) go to waste, so I just keep picking. I froze some , ate so so many, and then I was going to make a straight up pie but decided to do pie bars instead because one, I couldn't find my pie plate (I think Shannon has it) and two, these are just a bit less formal, like pie can sometime be. Plus easier to share because they are cut into little squares and hold there shape really well. And lets be honest, I didn't want to have to roll out pie dough if I didn't have to.

Such a good way to use up and share an excess of berries. Now off you go to make some pie crumble bars while I go play with the kittens (I'll tell you all about the kittens tomorrow....)

The stuff. Flour, sugar, baking powder, and salt. A little soy milk and coconut oil, a lemon, and arrowroot powder. And of course lots of blackberries.

IMG_6280.jpg
IMG_6281.jpg

The flour, salt, baking soda, and sugar get mixed in a big bowl then the coconut oil get mixed in into a crumble.  Now in goes the soy milk to get it all a little wet.

A little more then half the mixture gets patted down into a greases and lined pan

Berries, sugar, arrowroot powder, lemon juice and lemon zest go into a bowl. Give it a mix.

Dump and distribute all over recently patted down dough..

And crumble the rest of the crumble all over the top.

Now into the oven it go.

All cooked and cooling while you put away the clean dishes (or anything that will distract you for at least a half hour while they cool.)

And when they have cooled enough to cut, it's time for you to eat.

And yes, these are totally perfect for dessert and breakfast.

-C


Blackberry Pie Crumble Squares

makes 16 squares

For the crust

  • 2 1/2 cups flour
  • 1 teaspoon baking powder
  • 1/2 teaspoon salt
  • 2/3 cup coconut oil melted then cooled to soft
  • 2/3 cup cane sugar
  • 4 tablespoons soy milk

For the berry filling

  • 3 cups fresh blackberries
  • 3 tablespoons arrowroot powder
  • 1/3 cup cane sugar
  • zest and juice of a lemon

Preheat oven to 375

Mix the flour, sugar, salt, and baking powder together in a large bowl. Add in coconut oil and incorporate with a fork or pastry cutter until the dough looks crumbly, add in soy milk and mix in with for again just til until incorporated. (think pie dough-like)  Don't worry if some of the dough seems dry, it's fine.

Grease and line a 9x9 pan. Dump a little more then half of the dough mixture in and pat down to cover bottom of pan. Try to make sure it's all an even thickness.

In a separate bowl, toss together the berries, sugar, arrowroot powder, lemon zest and juice of that lemon. Dump the mixture into pan and evenly distribute over dough. Take the remaining dough and crumble all over the top then just stick it into the hot oven.

Bake for about 50 minutes or until the crumble on top is a nice golden brown.

Remove and let cool completely before cutting.

Cut then eat.

Store squares in fridge, some even say they taste better cold.

In Vegan, Sweets, summer, fruit, desserts, Dairy Free, cookies, pie Tags blackberry pie, crumb bars, vegan, plant based, king arthur flour, local, coconut oil, summer
Comment

Skillet Bread with Chard, Mushrooms, and Onions

July 14, 2016 Colleen Stem
IMG_6422.jpg
IMG_6424.jpg

I am running extremely low on food in my house, like there isn't a can of beans or a box of pasta left. Yeah, I have a few zucchini left, but I think that mr might be getting a bit sick of it. (He has had zucchini noodles for lunch and dinner for the past few day). And I was going to go to the grocery store before dinner, but then I didn't. Why? well because I didn't really feel like it.

Turns out that I didn't need to go to the store for dinner.I had a few mushrooms, an onion, and a few stalks of chard left in the fridge. (but pretty much nothing else) I just bought a 25 lb bag of flour so I am all stocked up on that and last minute I found a avocado that I thought was a beet in the fridge. All I needed to make a dinner, and a quick and easy, and really tasty one to boot. Plus being so mother F*ing hot, it was perfect because there was no need to turn on the oven.

Now the question is,now that dinner was made and being that the fridge is so empty, should I clean and defrost it? Answer is yes, yes I should, but am I going to? Probably not. I just don't have it in me to stand in font of the fridge, hacking ice away with a large spoon and boiling water for an hour. It's to hot. I'll do it later.

The stuff. Flour, baking powder, olive oil, salt ans water for the skillet bread. A few humngo stalks of red chard, a couple mushrooms (I would have used a few more if I had them). an onion, and a few cloves of garlic.  Missing is the pepper and the avocado and lemon that I found while rummaging the fridge.

The bread is super easy. Just whisk together the flour salt, and baking soda then add in the oil. Mix until it's crumbly then mix in the water until it turns into a soft dough. Gather into a ball and stick in bowl then into fridge for a few minutes to let the dough rest.

IMG_6410.jpg
IMG_6413.jpg

After the dough has rested, take it and cut into 4 equal pieces. Roll each piece into ball and then roll out as flat as you can. Heat up a skillet to high heat and once hot, place rolled out flat onto (dry) skillet. Cook first side for about 3-4 minutes or until browned and cook, then turn heat down a bit, flip and cook other side until browned. Remove bread, turn heat back up, and repeat with remaining flats.

For the rest. Remove the leafy part of the chard and set aside .Thinly hop up the mushrooms, onion, and the chard stalk. Mince up the garlic. Toss it all (not the garlic yet)into a lightly oiled skillet , season with salt and pepper, and cook on medium heat until starting to brown. Now toss in a few splashes of water and the minced garlic, mix around, and cover wit a lid. Cook for another 8-10 minutes until the veggies are nice and soft.

IMG_6417.jpg
IMG_6420.jpg

Cooked and ready, but wait, chop up the chard leaves and toss them into skillet. Another splash of water and a few more minutes under a lid will wilt them up real quick.

Skillet beads are made, veggies are all nice and cooked up. The avocado and lemon where found, sliced.

Not bad for a last minute-lean out the fridge of all food-dinner. Not bad at all.

Don't melt

-C


Skillet Bread with Chard, Mushrooms, and Onions

Make 4 flatbread

For the skillet bread

  • 1 cup all purpose flour
  • 1 teaspoon baking powder
  • 1 teaspoon salt
  • 2 tablespoons olive oil
  • 4-5 tablespoons cold water

For the rest

  • 2-4 white mushrooms
  • 2-3 large stalks of chard (any color)
  • 1 sweet onion
  • 2-3 cloves garlic
  • salt and pepper
  • olive oil
  • water
  • An avocado and a lemon (optional)

To make the skillet bread. Mix together the flour, salt, and baking soda in a large bowl. Pour in olive oil and mix until crumbly then add in 4 tablespoons of water (5 if it seems to dry) until a dough forms. Gather dough into a ball, stick in bowl and cover, and place in the fridge to rest for about 10 minutes. Once dough has chilled, remove and cut into 4 equal sized pieces. Roll each piece into a ball then, on a clean surface, roll out as flat as you can. Grab a skillet and place on high heat. Once skillet has heated up, place a rolled out dough on hot, un-oiled surface and let cook for about 3-4 minutes or until the bottom cooked with golden brown spots. Turn heat to medium and flip bread. Cook the other side for another 4-5 minutes or until browned. Remove flat and turn heat back up. Cook the rest of the bread like the first one.

For the rest. Remove leafy parts of the chard from the stalk and set aside. Take stalk and chop into pieces about 1/ 2 inch think. Slice onion and mushrooms up as thinly as you can. Mince garlic. Garb a skillet, stick on medium heat and drizzle with a little olive oil. Toss in chard stalk, onions, and mushrooms, sprinkle with salt and pepper and mix around until the stuff starts to brown a bit. Add in a few good splashed of water and the garlic and then place a lid on the skillet. Cook for about 10 minutes, giving the mixture a good stir every few minutes. Once the veggies are all soft and yummy, chop up the remaining chard leafs and place them into the skillet. Add another splash of water and place the lid back on. Cook until the leaves have wilted.

To assemble. Flat bread on plate. Scoop some of the sauteed veggie mixture on top. A few slices of avocado on top with a squeeze of lemon juice and a bit of cracked pepper...You are good to go.

In Vegetables, Vegan, summer, snack, Savory, salad, entree, dinner, Dairy Free, brunch, breakfast, bread Tags Skillet bread, Skillet Bread with Rainbow Chard Mushrooms and Onions, Vegan, Veggies, king arthur flour, Swiss Chard, Avocado, DInner, Quick, Easy, no oven, summertime, local, organic, farm share, icf, intervale community farm, farm food, seasonal
Comment

Dill Pickle Saltine crackers

December 12, 2015 Colleen Stem
IMG_5663.jpg
IMG_5633.jpg
IMG_5659.jpg

The mr is a saltines fanatic. I personally don't get it, but he really, truly loves a good fresh package of those salty crispy crackers, and loves to make a little cracker crumb mess. (I think it does it to drive me crazy)

 The other night during a particularly crumby saltine cracker snack, he declared that the saltine people (who are these people?) must come out with flavored saltines. I then continued to burst his bubble and told him I am pretty sure the saltine people have, in fact, come out with flavors, but he was skeptical and did not believe my words. Whatever dude.

But then I got to thinking, "why the hell haven't I made flavored saltine crackers yet?" So make flavored crackers I did. I know that the mr is really into dill pickled chips (beause I can smell the when he eats them) and I have been buying these mammoth jars of pickles from the Costco superstore (I love pickles but more then that I need the gigantic jars). so I had me a shit ton of pickle juice. It was meant to be.

The first time I made the crackers, I did a really small batch and wasn't expecting anything amazing, just going for a decent whatever cracker. But no, the few that I managed to make, the mr went nuts for. He told me they were the best fucking cracker that he has ever had and I now have to make them for him all the time, and that it is now a birthday tradition (it was his birthday). He said they were the prefect dilly-ness, the pefrect texture and just the right amount of salt. Perfection.

Well that made me happy so instead of waiting for his next birthday, I just made a big batch. Again, more proof that I am the best girlfriend ever!

The stuff. Flour, dill pickle juice, olive oil and some dried dill and salt.

IMG_5579.jpg
IMG_5582.jpg

Flour into a bowl gets drizzled with olive oil and mix around with a fork.

 Then in goes the pickles juice , same deal, mix together with a fork until the mixture forms a dough. (almost resembling a pie dough)

Place dough down on counter. Let it sit there for a few minutes to give it time to rest.

After the rest, roll the dough out as thinly as you can (try for about an 1/8 inch).

I found that when I slightly damped the counter that the dough was easier to roll. It might be because I have wood counter top so this may or may not work for you, but is worth a try.

And with a knife or dough cutter (or fancy cracker cutting tool), trim off sides (if you want) and cut into 2 inch squares.

Note. IF you want to, poke a couple little wholes into the tops of the crackers. Doing so will prevent the crackers from poofing up (I was told the poof is good)

And place the crackers on a baking sheet, brush tops with the pickle juice, then sprinkle with chopped dill and a tiny bit of salt.

Stick into the preheated oven.

Bakeuntil they start to turn a light golden brown and arepoofing up a little (go ahead and grab one now for quality control)

These crackers be cracking. And wouldn't you know it, they are already all gone. Next time I make them I am going to have to hide them.

Have a great weekend!

-C


 Dill Pickle Saltine Crackers

Makes about fifty 2x2 crackers

  • 1 cup all purpose flour
  • 6-8 tablespoons pickle juice
  • 3 tablespoon olive oil
  • finishing salt to taste
  • tablespoon chopped dried dill

Preheat oven to 350

Place flour into a shallow bowl and drizzle the olive oil in. Mix around with a fork. Grab pickle juice and drizzle in 6 tablespoons of the juice and mix with the fork until a dough forms. Add in another tablespoon or two if the dough needs more moisture to come together.

Form dough into a ball and let rest on the counter for a few minutes (good time to wash the dirty dishes)

After the rest, take the dough and roll it out to about 1/8 inch or as thinly as you can. Weirdly enough, I found that I was able to roll my dough out better when I damped my counter. The dough didn't slide around and it still lifted up easily with a spatula.. but do what works for you.

Once you have rolled the dough, trim sides to clean lines and cut into 2x2 inch squares (you can cut into any shape and or size you like) Any trimming reform into a ball, roll out, and make a few more. (If you want a more authentic looking cracker, you can poke little whole into them. Doing this also make the crackers not poof up when bakes)

Place crackers on a lightly colored (or parchment lined) baking sheet. Brush each cracker top with a little pickle juice and sprinkle the tops with salt and dill. Place in the oven to bake for about 12 minutes or until the crackers have poofed up and are turning slightly brown.

Remove from oven, let cool completely and either eat right away or place in a air tight container for later.

These crackers had no later.


In Dairy Free, holiday, recipes, Vegan Tags dill pickle saltine crackers, crackers, vegan, saltines, homemade crackers, dill, pickles, savory crackers, snack food, easy, clean eating, plant based, king arthur flour
Comment

Ginger Pear Cake

November 12, 2015 Colleen Stem
IMG_3048.jpg
IMG_3067.jpg

This cake was born from my anxiety. Whenever I am feeling crazy, anxious, kinda sick, or even just really happy, I want to be in the kitchen making something. It's probably some deep seeded control issue that I have (I can't control my brain, but I can control bread dough), but whatever. Being in the kitchen takes my head out of life , even just for a little while, and let's me concentrate on something else that really has nothing to do with whatever I am thinking about (unless I am thinking about food, in which I bake whatever food I am thinking about) Does this all make sense or am I just nuts?

So yeah, the other day I was having one of those days. I was extra crazy (for so many reasons) and really needed to just step away from my thoughts. I rushed home and just started grabbing stuff.. cake stuff.  I figured that If I was going to bake something that I might as well bake a little snack cake for the mr, especially sense he has to deal with this crazy. I had a large quantity of pears that were all ripening  at once sitting in the fruit basket, so I grabbed some of those. And I grabbed the ginger… well because why not.

And I made this cake.. and I felt better. And the mr got cake (also brought some to my sisters.. her and the kids ate it all within minutes). It was a win win situation. 

So now you know. If you are my friend and I am feeling some feelings, at some point, you will proably get a cake.

The stuff. A few pears,some fresh ginger, brown sugar and cinnamon.  Also have some white whole wheat flour, baking soda, baking powder and salt. And some oil, apple cider vinegar and a little bit of water.

Start with the pears. Cut in half, remove seed and stems, then chop/mince the crap out of them. It's cool to have a few big chunks., it adds some good texture. Take the pears and as much as the juice you can scrap from the counter and stick into a bowl.

Grate up a few good tablespoons of fresh ginger..

Tip. I keep my ginger in the freezer. its easier to grate and it doesn't go bad!

IMG_2961.jpg
IMG_2967.jpg

The ginger goes into the bowl with the pears, along with the oil, cinnamon, sugar, water and vinegar. Mix it all up . Then all that wet mixture goes into the bowl with the flour, baking soda and powder and the salt.

And that get's all mixed.. and now you have cake batter! 

Depending on you pears and how juicy they are, you might find that your batter seems to dry, just add in another 1/4  cup of water. The batter should be the consistency of like greek yogurt, not ruing, but not stiff either.

Preheat you cook box (oven)

IMG_2978.jpg
IMG_2984.jpg

Dump the batter into a well greased 9x9 inch pan. Slice up another pear into thin strips (I only used half, then ate the other half)

Lay the slices on top to make it look all pretty. Do what I did, or some other design (it's your cake to make pretty any way you want). Once you do that, stick the cake into the oven.

When the cake is a nice deep golden brown, take it out of the oven.

Maybe let it cool for a few minutes, letting the smell wrap around your head so that you smell like baking all day. No cut yourself a slab, grab some coffee, and go for it. 

Enjoy

-C


Pear Ginger Cake

Makes a 9x9 inch single layer cake

  • 2 cups white whole wheat flour
  • 2 cups minced , super ripe and jucey pears (about 2 whole pears)
  • 2 tablespoon freshly frated ginger
  • 1/2 cup canola oil
  • 1/4- 1/2 cup water
  • 2/3  cup brown sugar
  • 2 teaspoons cinnamon
  • 1 teaspoon salt
  • 1 teaspoon baking powder
  • 1 teaspoon baking soda
  • 1 tablespoon apple cider vinegar

Preheat oven to 350

Take pears, remove seeds and stem, and chop the crap out of them until they are tiny little pieces. Scoop pears, and any juice they leave behind into a bowl. Add in the sugar, oil, cinnamon,  ginger, vinegar,  and  1/4  cup of water and mix until incorporated. In a seprertare big bowl, mix together the salt, baking soda and powder with the flour. Add in the wet mixture and mix until fully incorporated.  If the batter seems to dry (should be the constancy of whipped potatoes or greek yogurt), add in another 1/4 cup of water. 

Scoop batter into a greased 9x9 inch baking pan. If you want to make it pretty, grab another pear and cut into thin slices and place right on top of the batter in any fashion you like. 

Place cake into oven and bake until a nice dark golden brown,about 40-45 minutes ,or until a tester stuck in the middle comes out clean. 

Remove, let cool in pan, and cut yourself a big slab, grab some coffee e to tea, grab a book, and eat it. .

In Vegan, Sweets, snack, recipes, photography, holiday, Dairy Free Tags ginger pear cake, pear cake, thanksgiving, holiday, quick cake, vegan, local, organic, king arthur flour, dessert, clean wating, whole wheat
Comment
Older Posts →
 

https://thelovelycrazy.squarespace.com/config#/|/about/

Me. Food Maker.Food eater. Woo HOO!

STEM+NODE  SMALL BATCH AND ONE OF A KIND POTTERY

stem+node ceramics


____________________

Subscribe

GET NEW POSTS IN YO EMAIL

You are AWESOME!!!


@thelovelycrazy 2014-2021