 How awesome will you be when you bring the most freaking amazing tortilla chips to the party this weekend? You will be like.."what, it ain't no thang.. I am just good like that"
Yes, yes you are.
And yes, I am assuming that you will be making these awesome chippers to share at a Super Bowl part this weekend. I say this because even as I sit here writing this (with the TV on) there has been nothing but football talk…deflated balls, hot wings, half time shows and commercials. It's almost as big as Christmas. Got to get the decorations, the special game day food and your football jerseys. It's crazy and all over the place. So that's why I am assuming you are making these for the game. But if you not going to be participating in any football parties.. by all means, make these chips for yourself anyways. Celebrate you day! Have a non football watching party. Or just make these whenever. Jalapeño Lime chips for everyday!
Note: You can make these chips without the jalaeno and or the lime if you need or want to. You can also stop after the first step and have some dank corn totillas for tacos ands stuff..But definitely make the chips… worth it for sure!

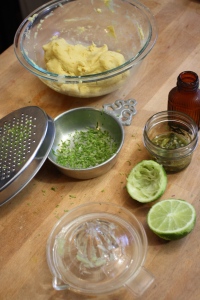
All the stuff.. Masa harina, hot water, salt, a lime and a jalapeño. Zest lime and place half the zest into a glass bowl with oil and either sit on warm oven or microwave for 30 seconds to infuse. Puree the jalapeño with a cup of hot water and add the puree and half the zest of a lime, plus salt, to the masa harina. Mix it all up with another 1/2 cup of water or enough to make the dough resemble play dough… You can add more water or masa if you dough is to wet or dry.
 Knead dough a few times just to make sure it's completely uniformed and divide into 12-14 equal pieces. Place balls on a plate and cover with a wet paper towl to keep from drying out.
I do not own a tortilla press so I used what I had… wax paper, a wooded cutting board and brunt force. I took each ball and place it between the two pieces of the waxed paper, placed the cutting board on top, and with all my might and body weight, pressed down to smoosh. It works like a charm.
 My cast iron skillet is big enough to cook 2 -3 at a time, but doing one at a time is cool too. Preheat the skillet to medium heat. Cook each tortilla for about 2-3 minutes ( or until starting to brown) on each side.
  Half way there to chips!!!
With my fingers ( you can using a basting brush for sure), I rubbed a little of the lime oil all over both sides of each tortilla. Stacked a few high, then sliced those tortillas into triangle shapes. If you want to go crazy, you could cut them into strips or even use a cookie cutter and do some fun shapes… but triangle are easy, classic, and practical. A good shape for dipping!
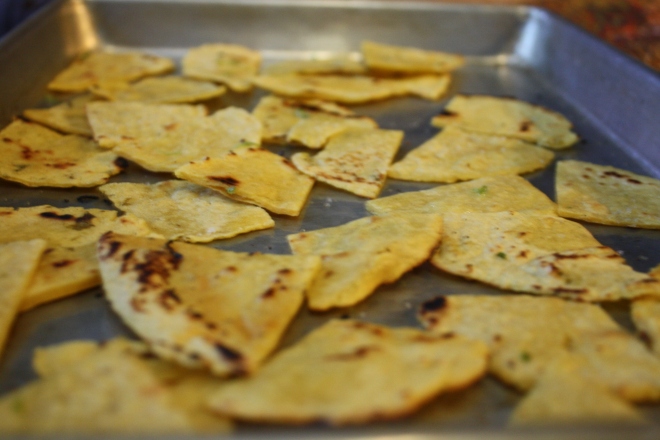 Placed all nice and cozy on a baking sheet. trying not to overlap. Into a 400 degree oven for about 20 minutes to complete the chip making process.. After about 15 minutes, check for doneness. When nice a crispy, remove from oven, squeeze lime juice all over and sprinkle with salt. I then stuck them back in the oven for a few more minutes just to dry the lime..
 After cooling down, take those chips and stick them in a bowl.
Eat a few, but wait and save them for the party. Or better yet, make a few batches. Bring a batch, eat a batch. (Its ok, you are allowed)
Eat with some salsa, maybe some of this guacamole, or just as they are…Anyway is the right way as long as you are eating!
Have fun making these and have fun getting read for the party this weekend (Super Bowl or not!)
-C
Jalapeño Lime Tortilla Chips
Makes 12-14 tortillas.. then made into a medium bowl of tortilla chips.
Ingredients
- 2 cups masa harina
- 1 1/2 to 1 3/4 cups hot water
- 1 teaspoon salt
- 1 lime (juice and zest)
- 1 large or 2 small jalapeños
- 2 tablespoons olive oil
- salt
To start, zest lime and add 1/2 of the zest to bowl with the oil. Place oil on warm spot on stove to let the oil infuse the limeness.
Take jalapeno and puree with 1 cup of hot water. In a large bowl, add puree and remaining lime zest to the masa harina and mix, adding an additional 1/2 to 1 cup of hot water until the dough resembles play dough, not to soft, but not to dry and completely incorporated
Divide dough into 12-14 balls and place on a plate under a wet paper towel to keep dough from drying out.
One at a time, take a dough ball and place between two pieces of wax or parchment paper. Place either a plate or cutting board on top and press down as hard as you can (you could even stand on it). Remove flatten tortilla from paper and place in medium hot skillet. Cook each tortilla for 2-3 minutes on each side.
When all tortillas have been made, lightly rub lime oil on all over both sides. Stack a few on top of each other and cut into triangles. Place pieces on a baking sheets (I used 2) and bake at 400 for 15- 20 minutes or until lightly browned and crunchy. When chips are done, remove from oven, squeeze or sprinkle lime juice on chips and sprinkle with salt. Stick back into oven for another 2 or so minutes to re-crisp from the lime juice.
Remove and let cool completely, then dump into a bowl
Enjoy!
 A birthday bouquet of veggies. My lover knows me oh so well.
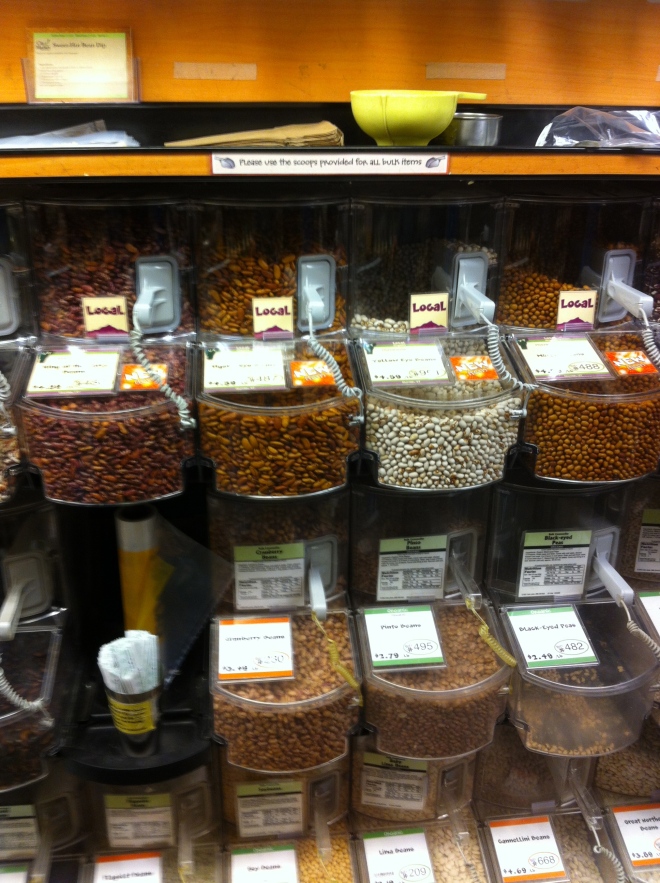 Every year I buy myself some special food for my birthday week. This is the bulk section at the local coop. They got in a bunch of new local dried beans!!!! Local birthday week beans. ( yes, beans make me happy)
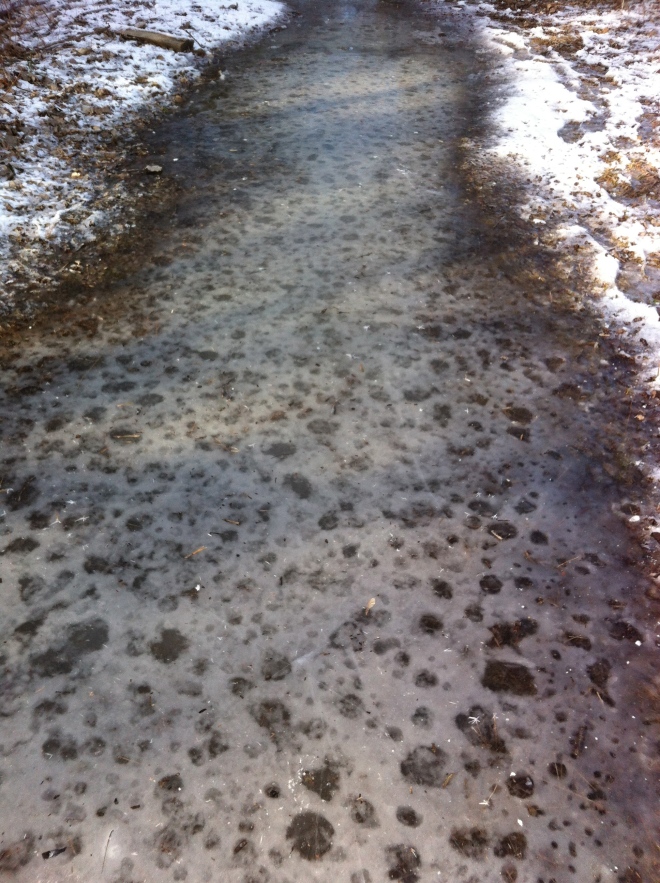 This hike was pretty treacherous, the whole trail was covered in this ice…. but look how cool it is.
  Huggable mountains

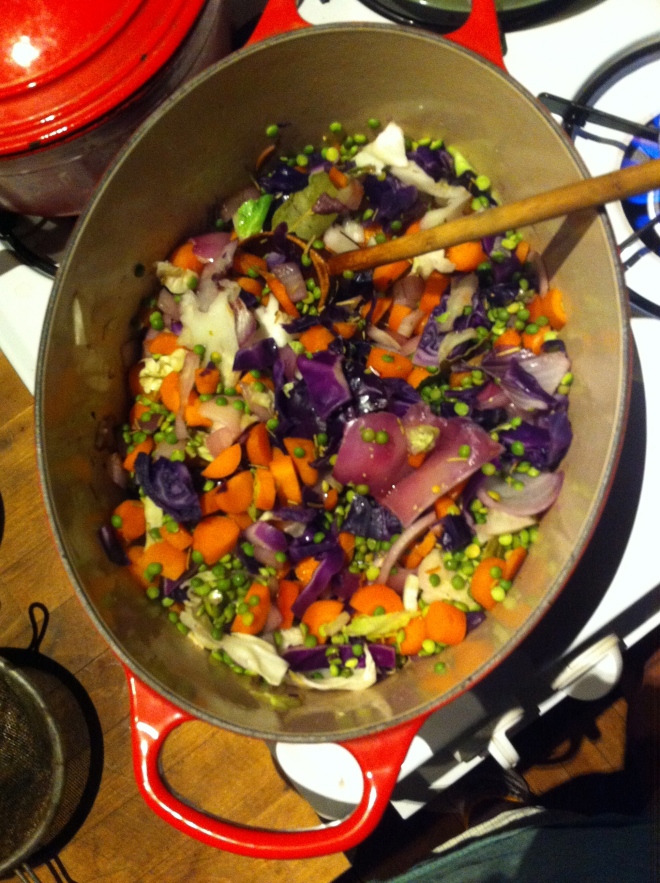 Split peas with tons of purple cabbage and purple onions plus chunks or bright orange carrots.. So freaking pretty and so freaking tasty!
 And last but not least..a throw back that made me smile…Moving day last summer. Our truck full of my house plants. I love my plants.
 To start, take you main color of fleece and cut into a mountainy triangle shape. You can go tall and skinny or short and fat….. any shape you want. If you feel like you need to make a paper template and use that to cut, go for it, but I don't think you really need to.
 Cut the piece for the peak in a jagged up and down pattern. Place right side up onto the base of the mountain and trim away excess fabric.
 Using the zig zag stitch on your machine, sew the jagged edges of the mountain peak right side up onto the right side of the mountain. Go slowly, but don't worry about making it perfect, just make sure to sew over all the jagged edges.
  Now turn the two pieces right sides facing in on each other. Change the stitch on you machine to a straight stitch and sew around the perimeter of the mountain, leaving a small hole in the bottom.
 Fold it right side out and stuff it. I started with little bits of the stuffing in each of the corners, then filled in the middle, it makes it easier to fill.

 Everything all mixed together, dumped onto a floured surface and kneaded for 10 minutes by hand…..If you have a stand mixer, you can use it if you want, but you are missing out on the fun of doing it by hand….
 When dough has doubled, punch down and plop out onto floured surface. Dust the bottom of a griddle or in my case, two cast iron pans, with corn meal. Divide dough into 8-10 equal balls and smash into 2 inch thick disks.
  Place on griddle or pans and sprinkle more corn meal on top of each E.M. Cover and let rise for another 15 minute.
  Now the E.M.s have rested, turn the griddle (or pans) on to low heat. Once your griddle (or pans) gets hot, continue to cook that side for another 7-10 minutes, or until golden brown. Flip and cook other side for 10-12 minutes or until golden brown. Once browned, check for doneness with a thermometer. The inside should reach 200 degrees.( if you don't have a thermometer, fork split one open and check…. you are going to eat it anyway) If the outside cooked faster then the inside, no worries, just pop them into the oven at 350 for 8-10 minutes. I had to pop mine into the oven for to cook completely.
 Remove form griddle, let cool a bit, and ……Fresh, fluffy fat, fantastic….Everything and more that a real english muffin should be. Split open with a fork and……. the nooks and crannies! So spot on. Serve with anything your heart desires…I served these with whipped honey butter…. and eat the only kind of E.M. you will ever again eat. Grocery store english muffins be damned!
 Here is the list of what you will need to make the exact shelf with the same measurements that we used…but feel free to use and adjust the measurements to your want or need.
 Take one of the 17 1/2" pieces and with a straight edge, draw two lines form opposite corners to find dead center. Measure 8" from center on each line, that is where the legs are going to be placed. Working with one leg at a time, add a smear of wood glue to each leg as you are about to screw it down. Place leg on mark and sink a screw about an inch up from the inside of the leg, screwing at a slight angle (see photo)..
 Now grab the top piece (17 1/2 ") piece and the two sides pieces (25 1/2"). Add a bit of wood glue to the side ends and line up top piece with the sides. Sink 2 screws into each side. If you have another person helping, have them hold the pieces for you while you screw the top into the sides.. if not, use the bottom to rest a side against (like in picture).
  Now flip over and screw the bottom piece into the sides……
 Place shelf on the lines (The wood should fit in tight, you might even have to bang it a bit to get it into place….but you want it to fit nice and snug.) Now screw the shelf…two screws on each side.