• stem+node ceramics
  • HOME
  • Food Recipes
  • About
  • Contact
Menu

The Lovely Crazy

Street Address
City, State, Zip
Phone Number

Your Custom Text Here

The Lovely Crazy

  • stem+node ceramics
  • HOME
  • Food Recipes
  • About
  • Contact

Sweet Pea Snack Cake with Strawberry Glaze

May 9, 2020 Colleen Stem
IMG_7904.jpg
IMG_7962.jpg

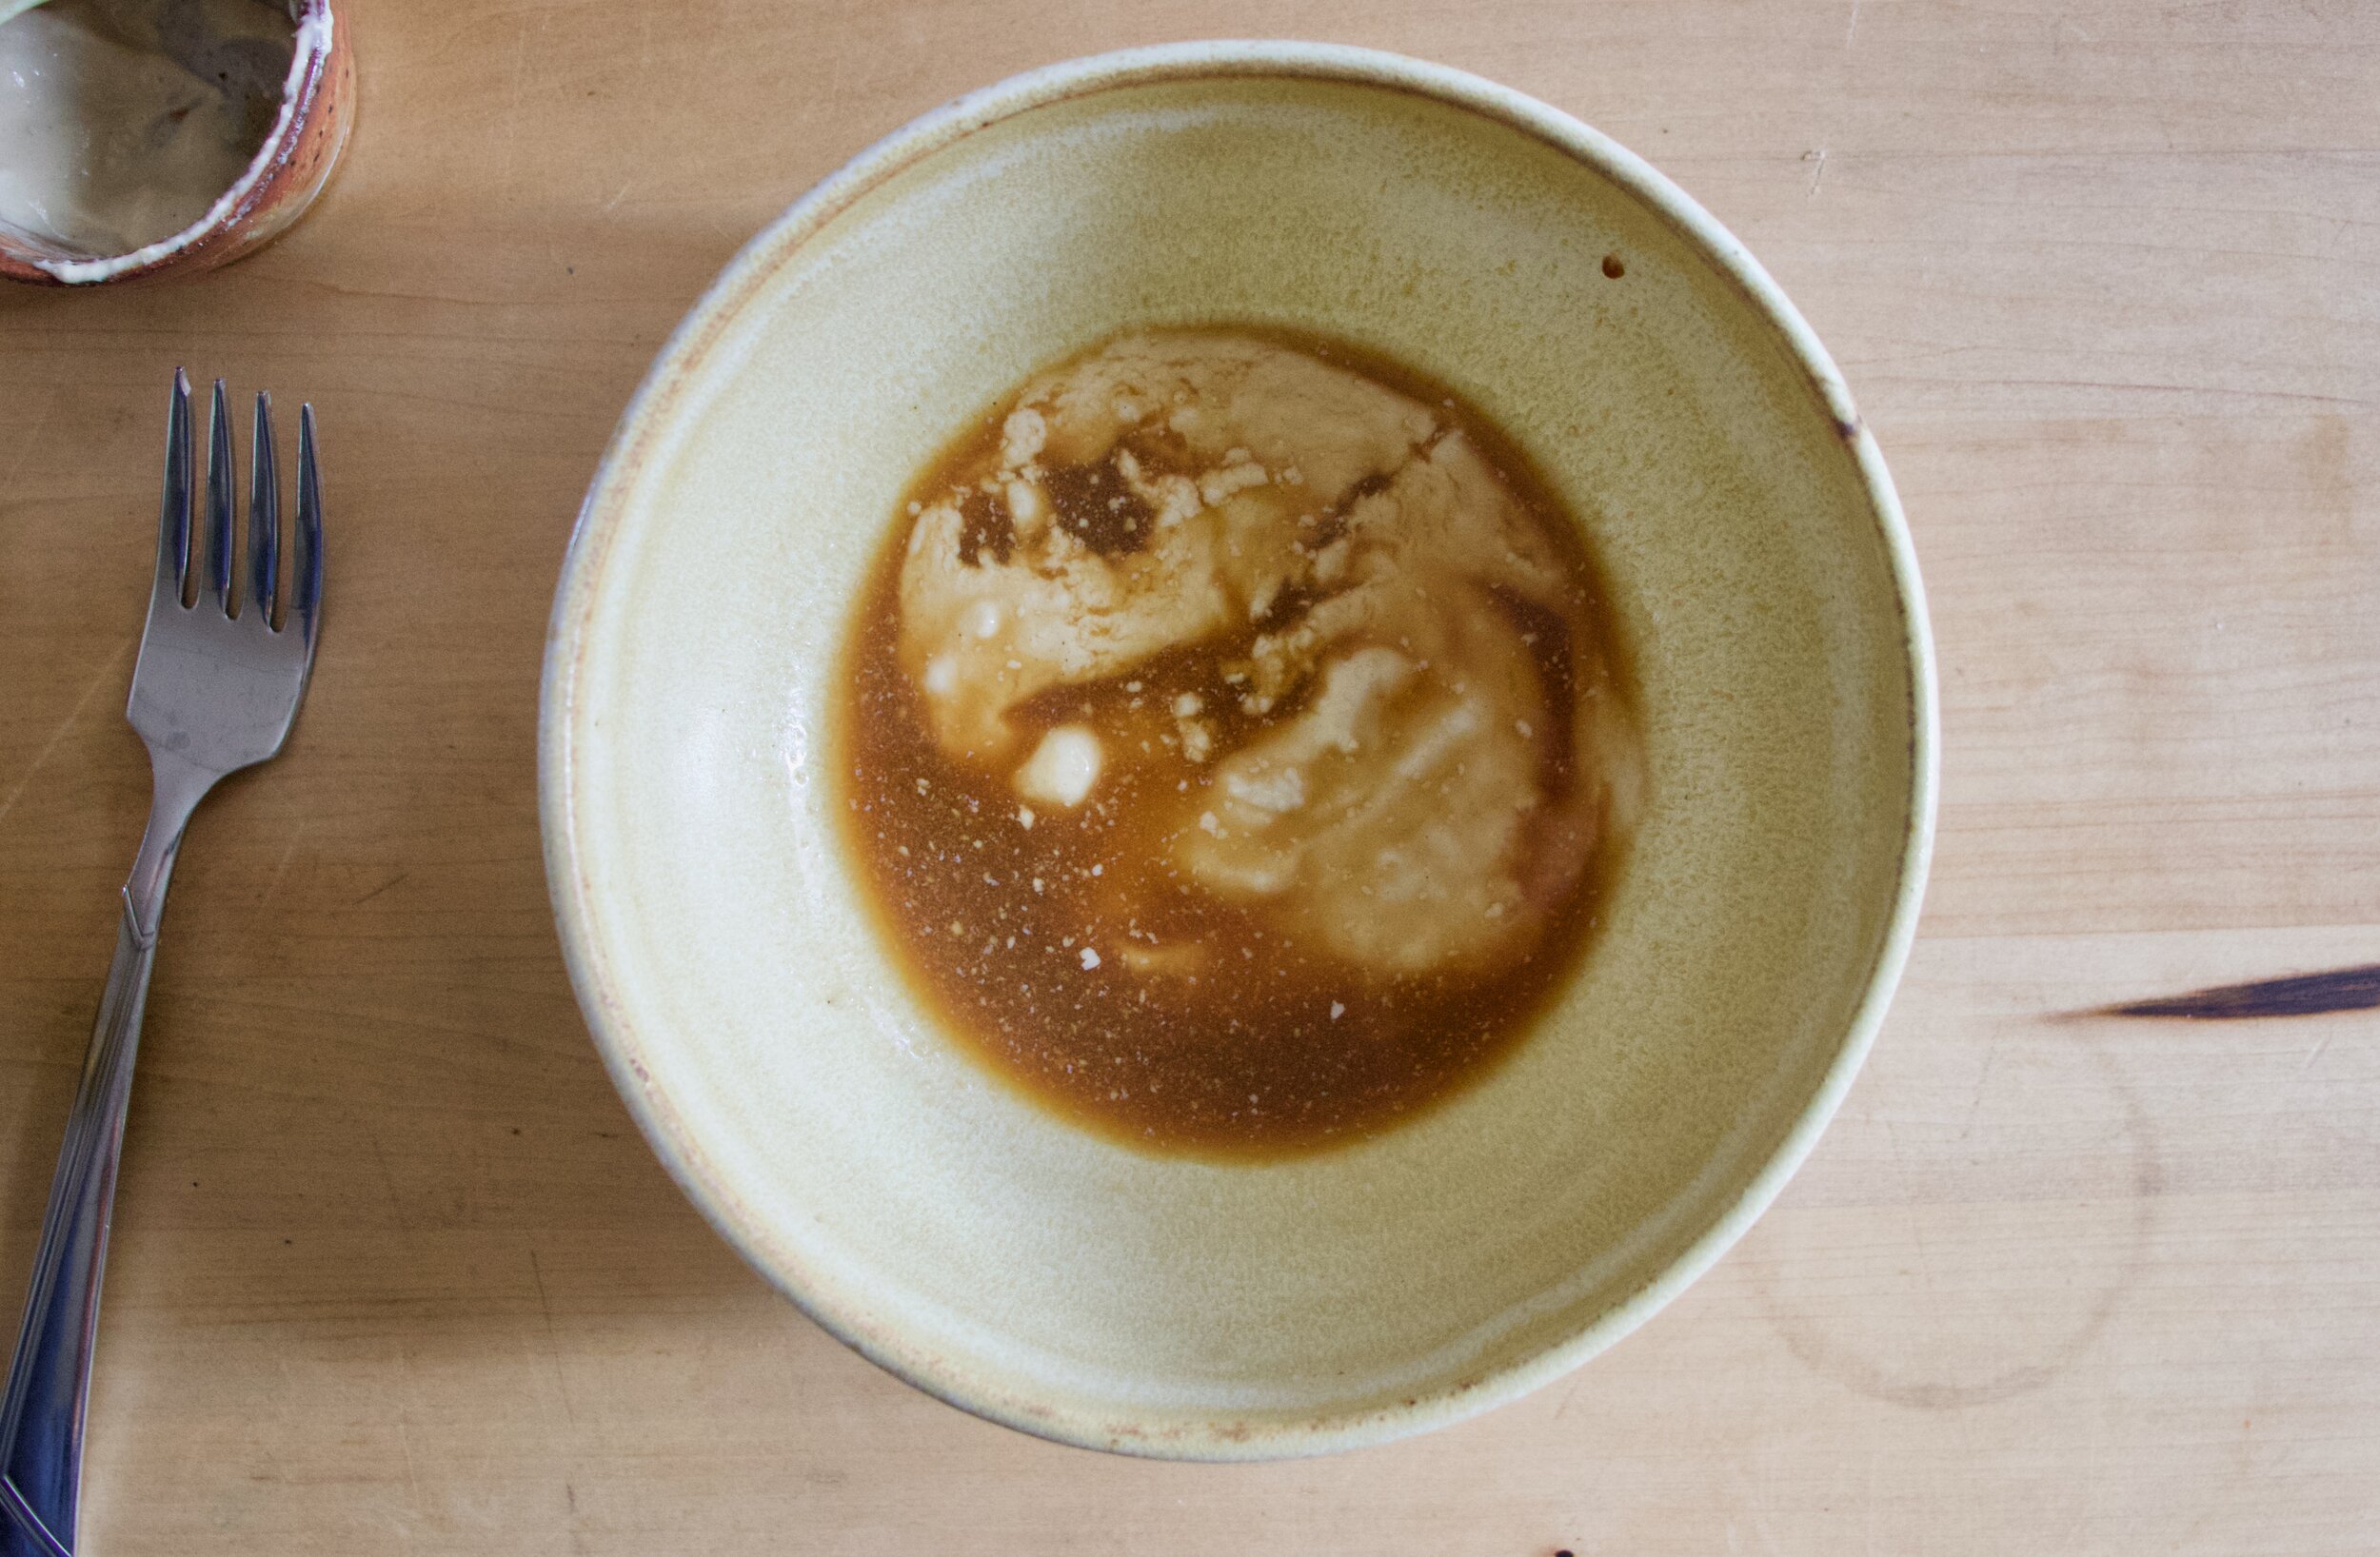
It started a few nights ago when I was eating my after dinner dessert snack. A big bowl of fresh strawberries. But there was something missing. I wanted a little something else to add to my dessert so I opened the freezer to see if there was any frozen bananas. What caught my eye was the bag of peas. And it just seemed right so I poured some into a bowl, dumped hot water on them to thaw, and mixed them into the bowl with the strawberries. Now I got to tell you, it was one of the most satisfying delicious desserts I have had in a long time. Think about it. Peas are sweet and creamy and strawberries are sweet and tart. The combination might seem a little strange but haven’t we learned by now that I am always right about flavors? HAHA. But really. It’s one of my new favorite snacks.

Now how to share my newfound love of peas and strawberries? Well cake of course. I figured people are less hesitant to try new flavor combinations when in cake form because everyone wants cake. And I was right. Plus it is a real looker if I do say so myself. Bright green cake with bright red strawberry glaze. A spring time snack with the spring time feels. Everything about this cake is right on point with all the things. And it is super fast and easy to make to boot because it’s all thrown together in a blender.

You really can’t go wrong here friends. And if you happened to be needing a little something something to snack on with your mama this weekend, well I think you just found the perfect snack.

Now to the cake!

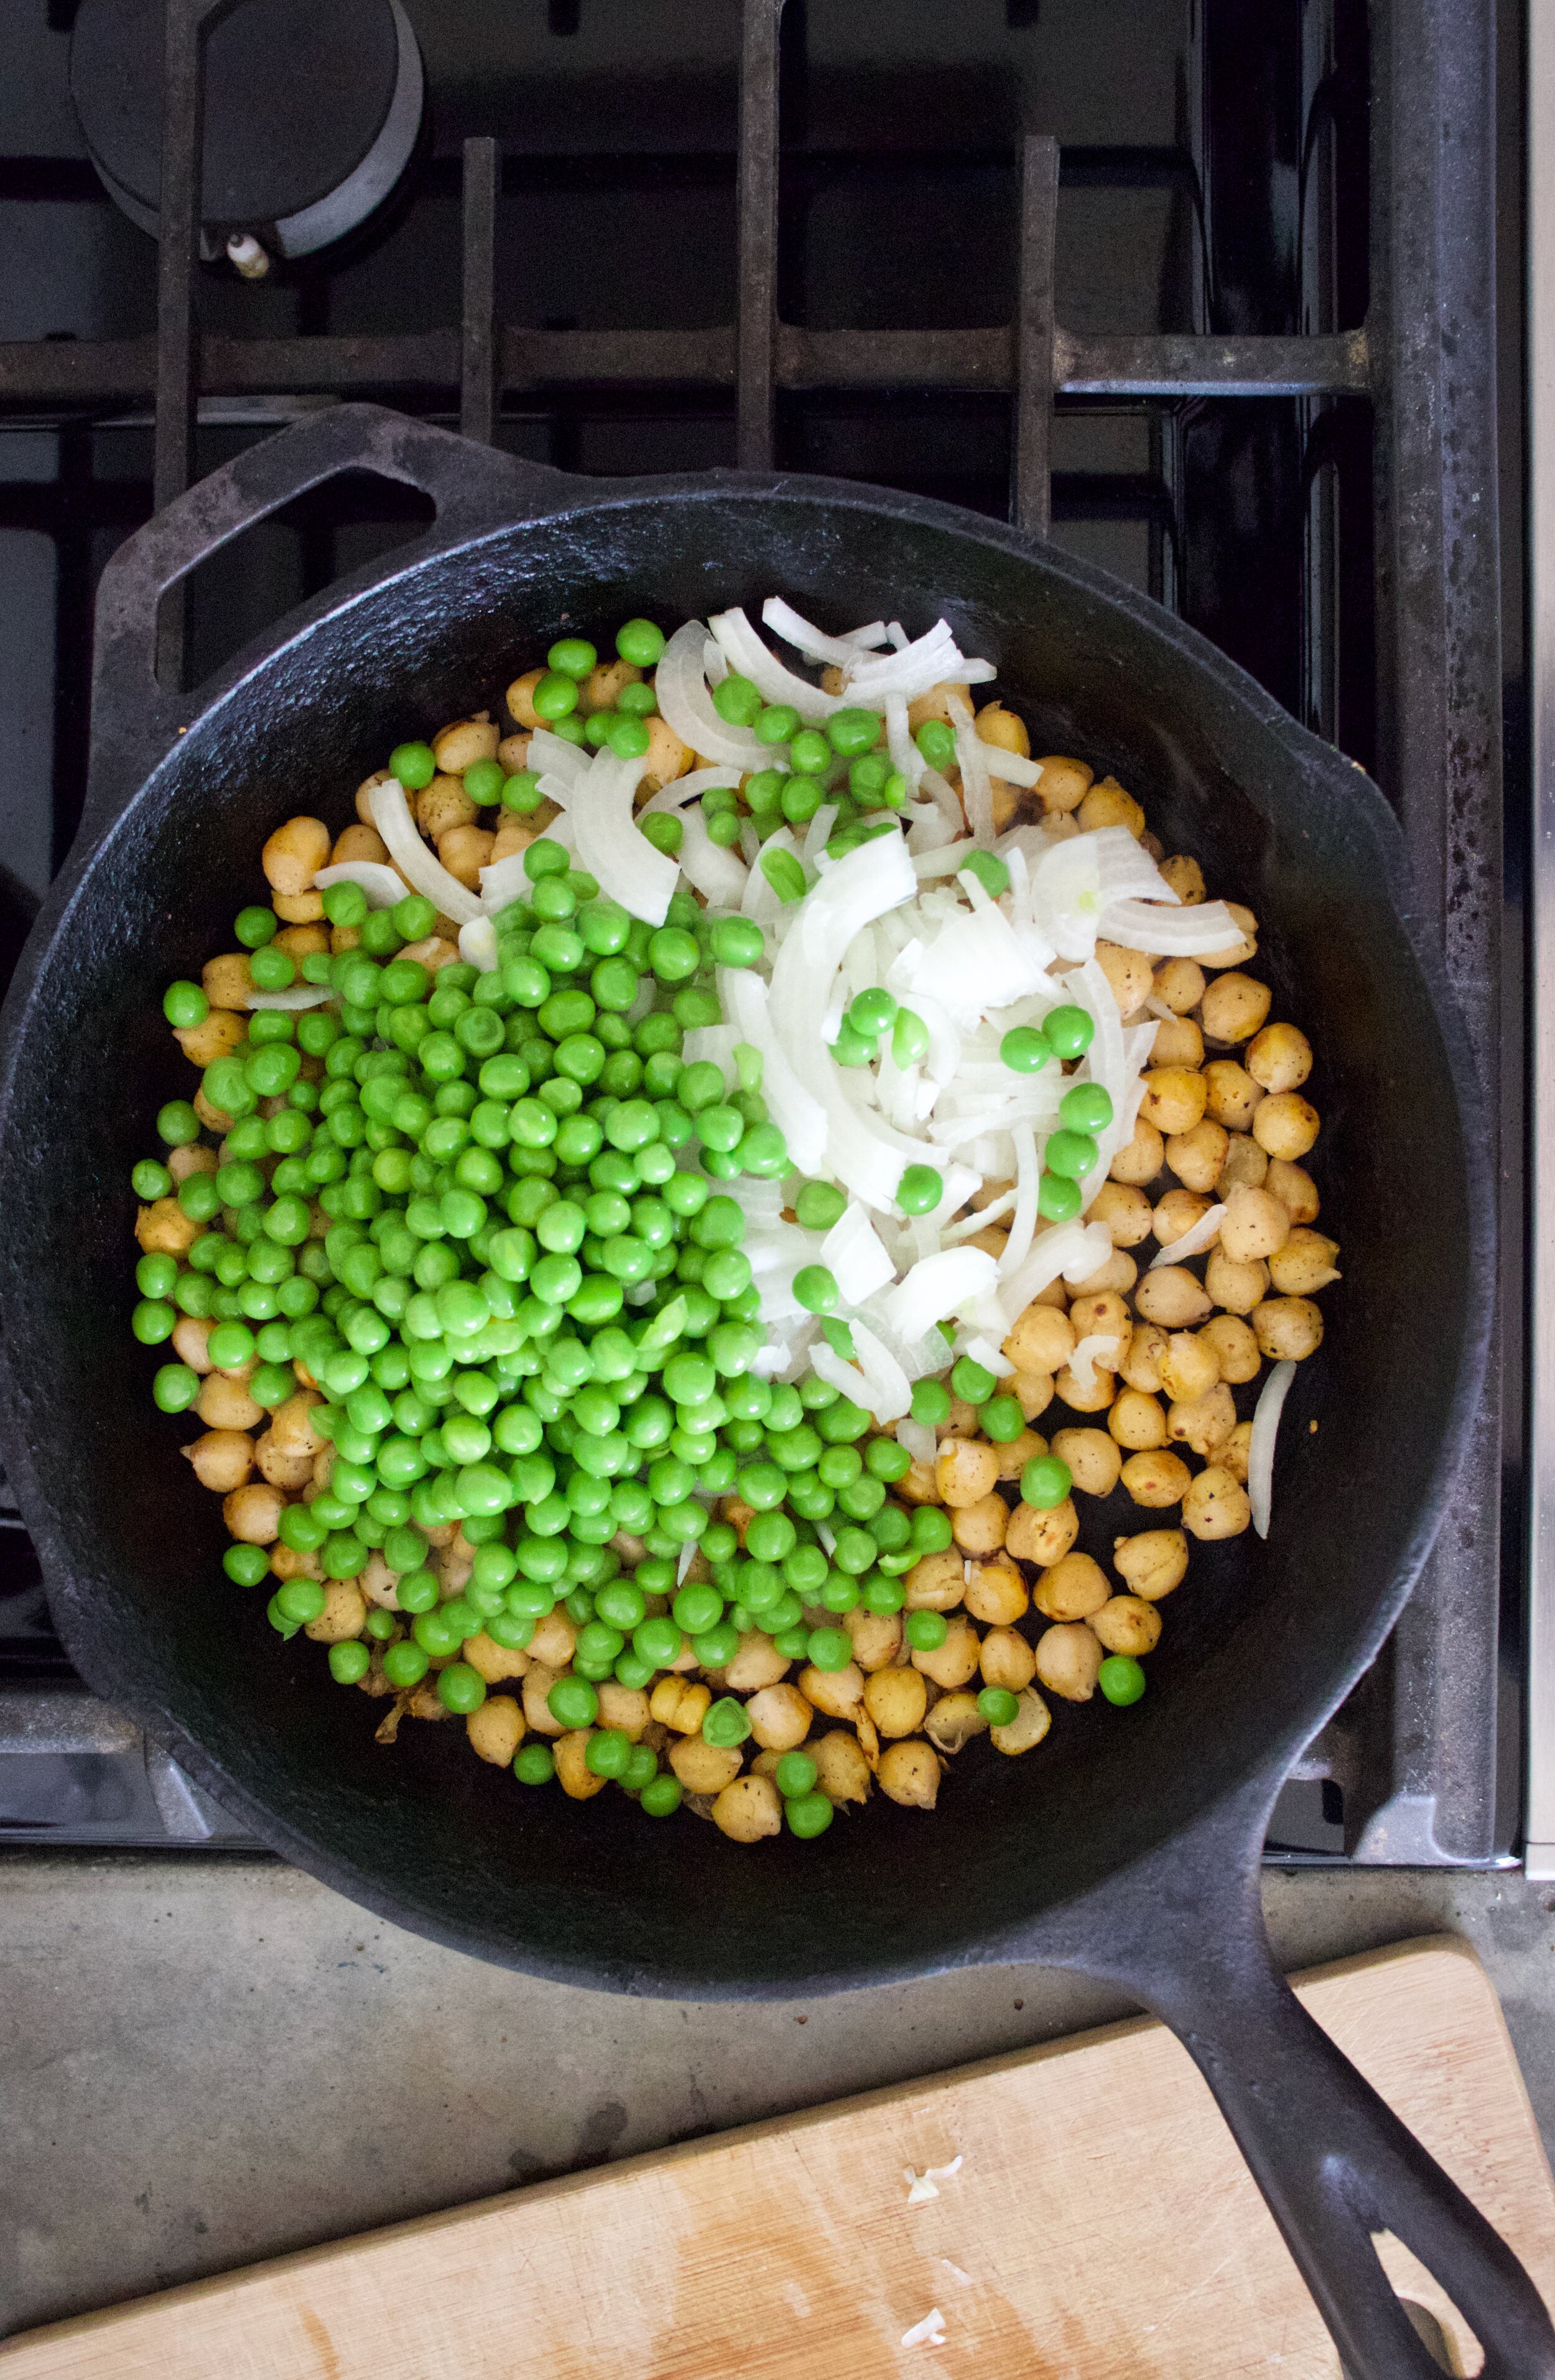
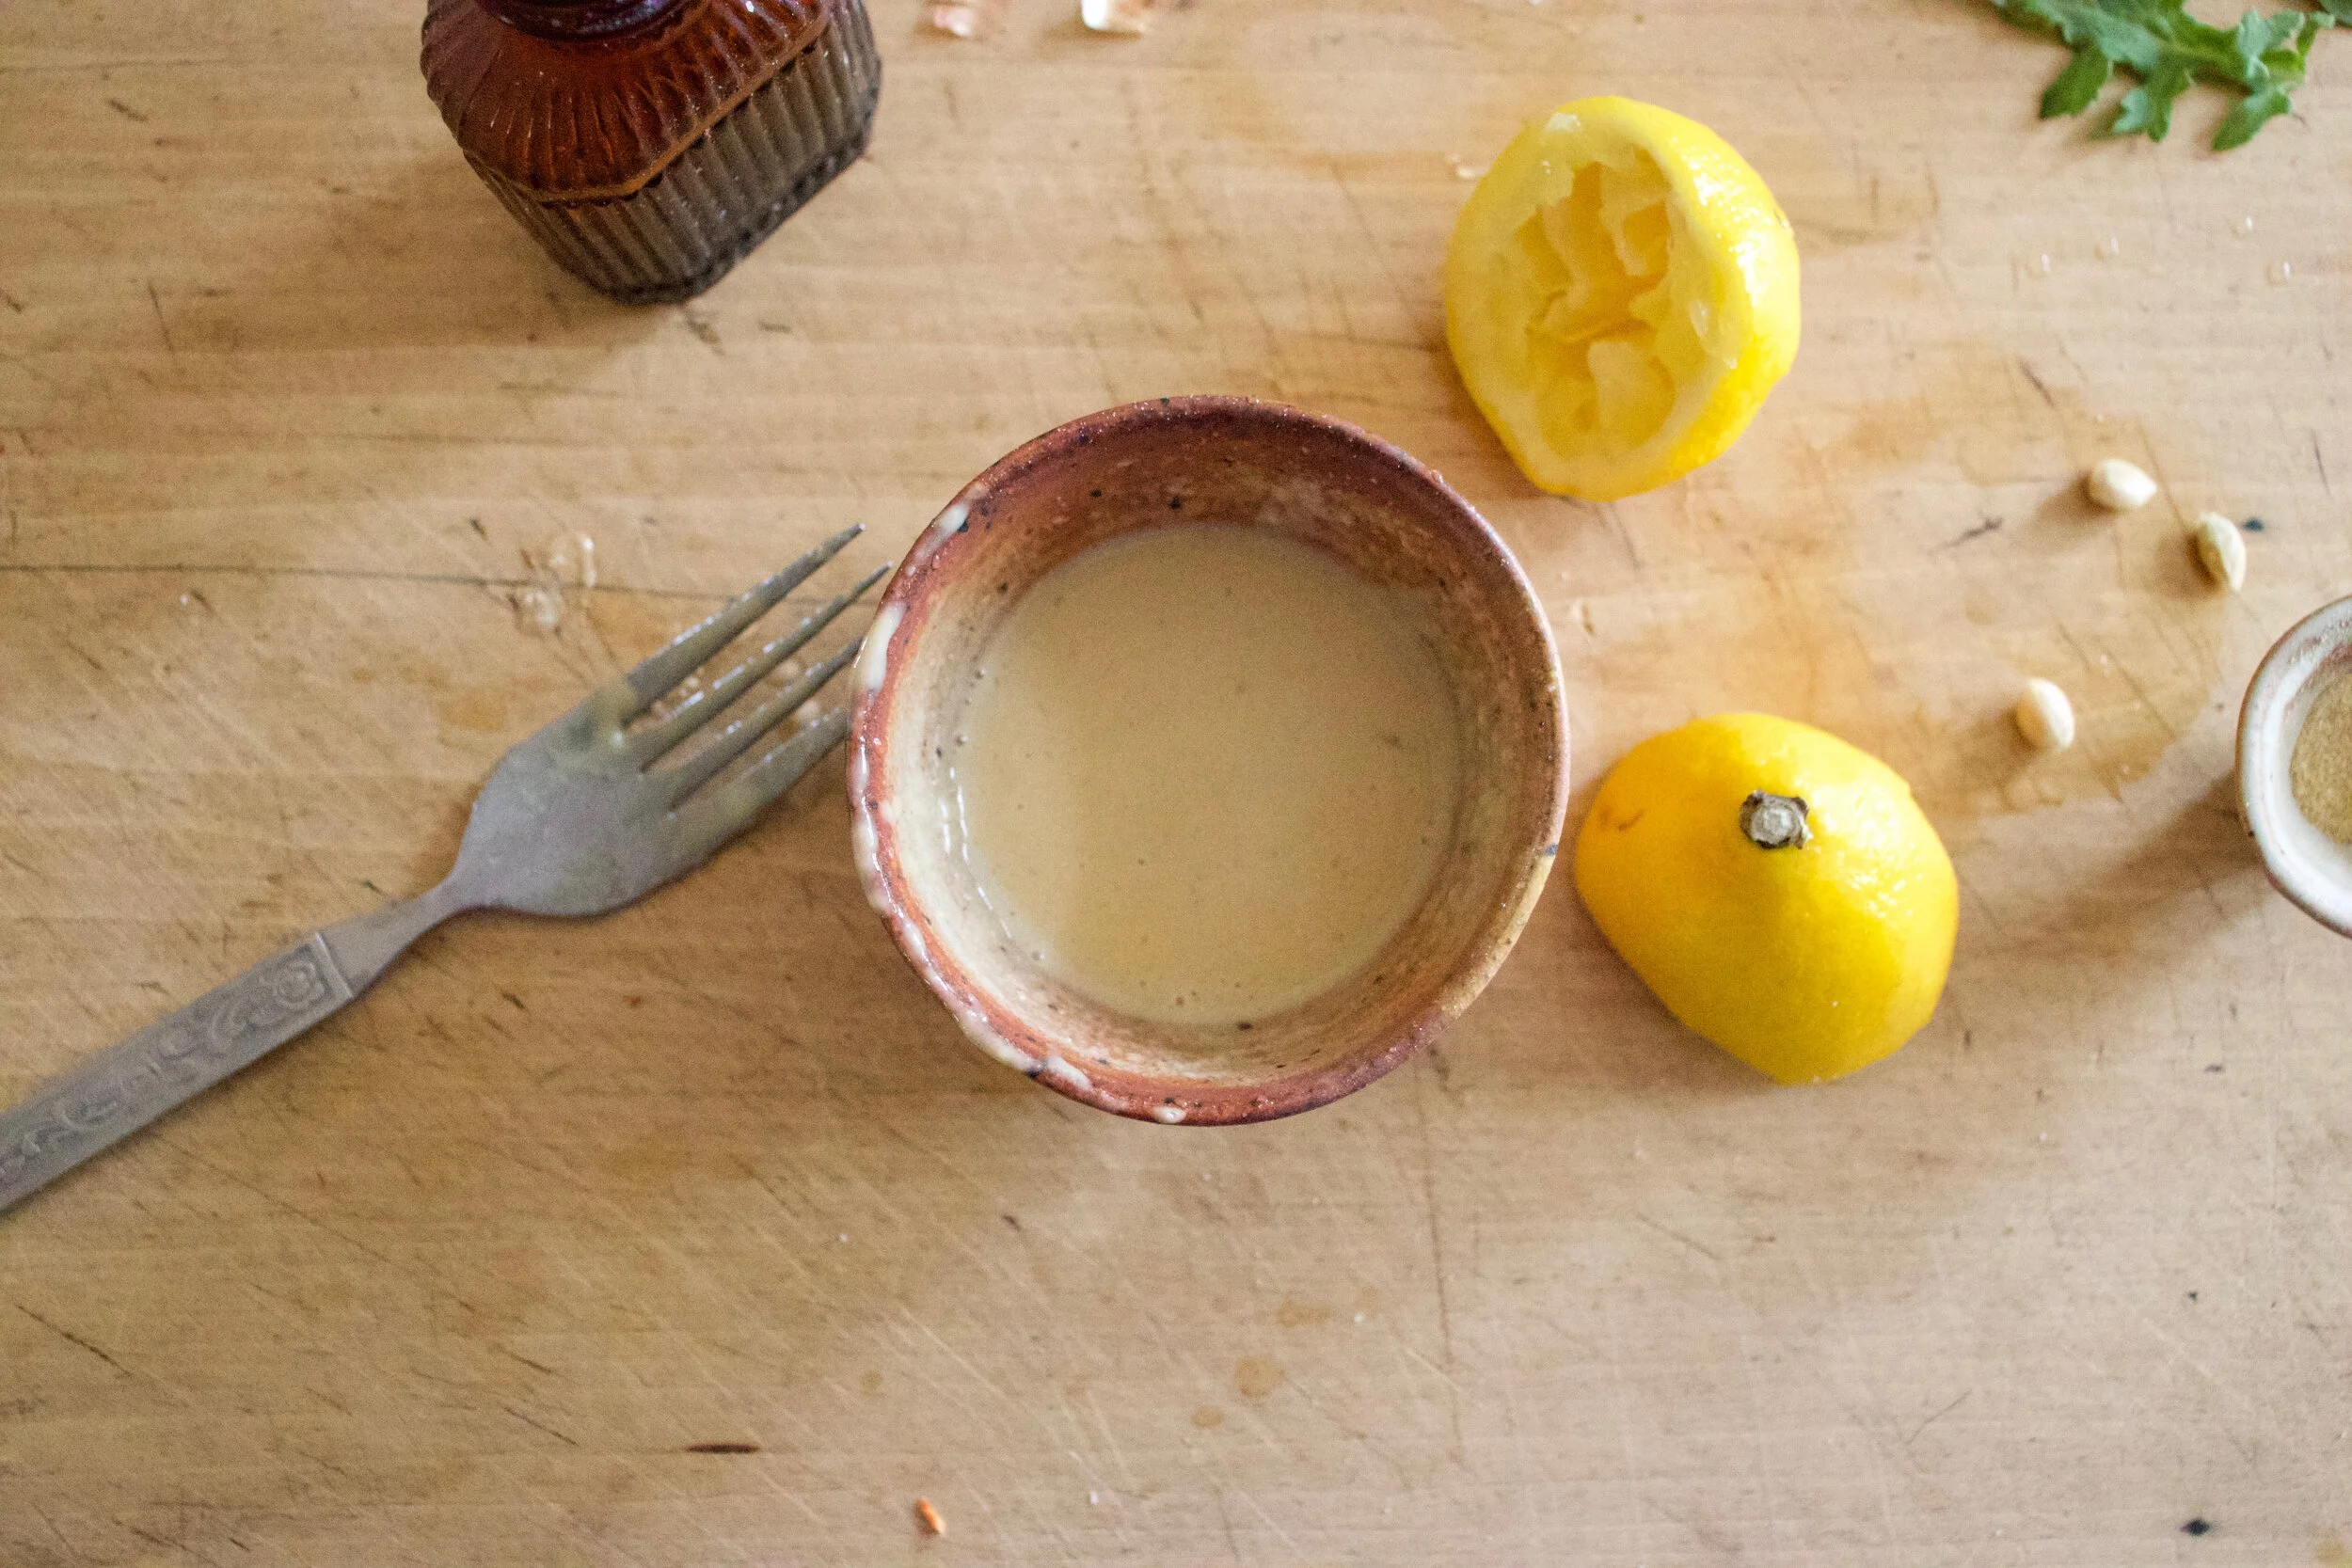
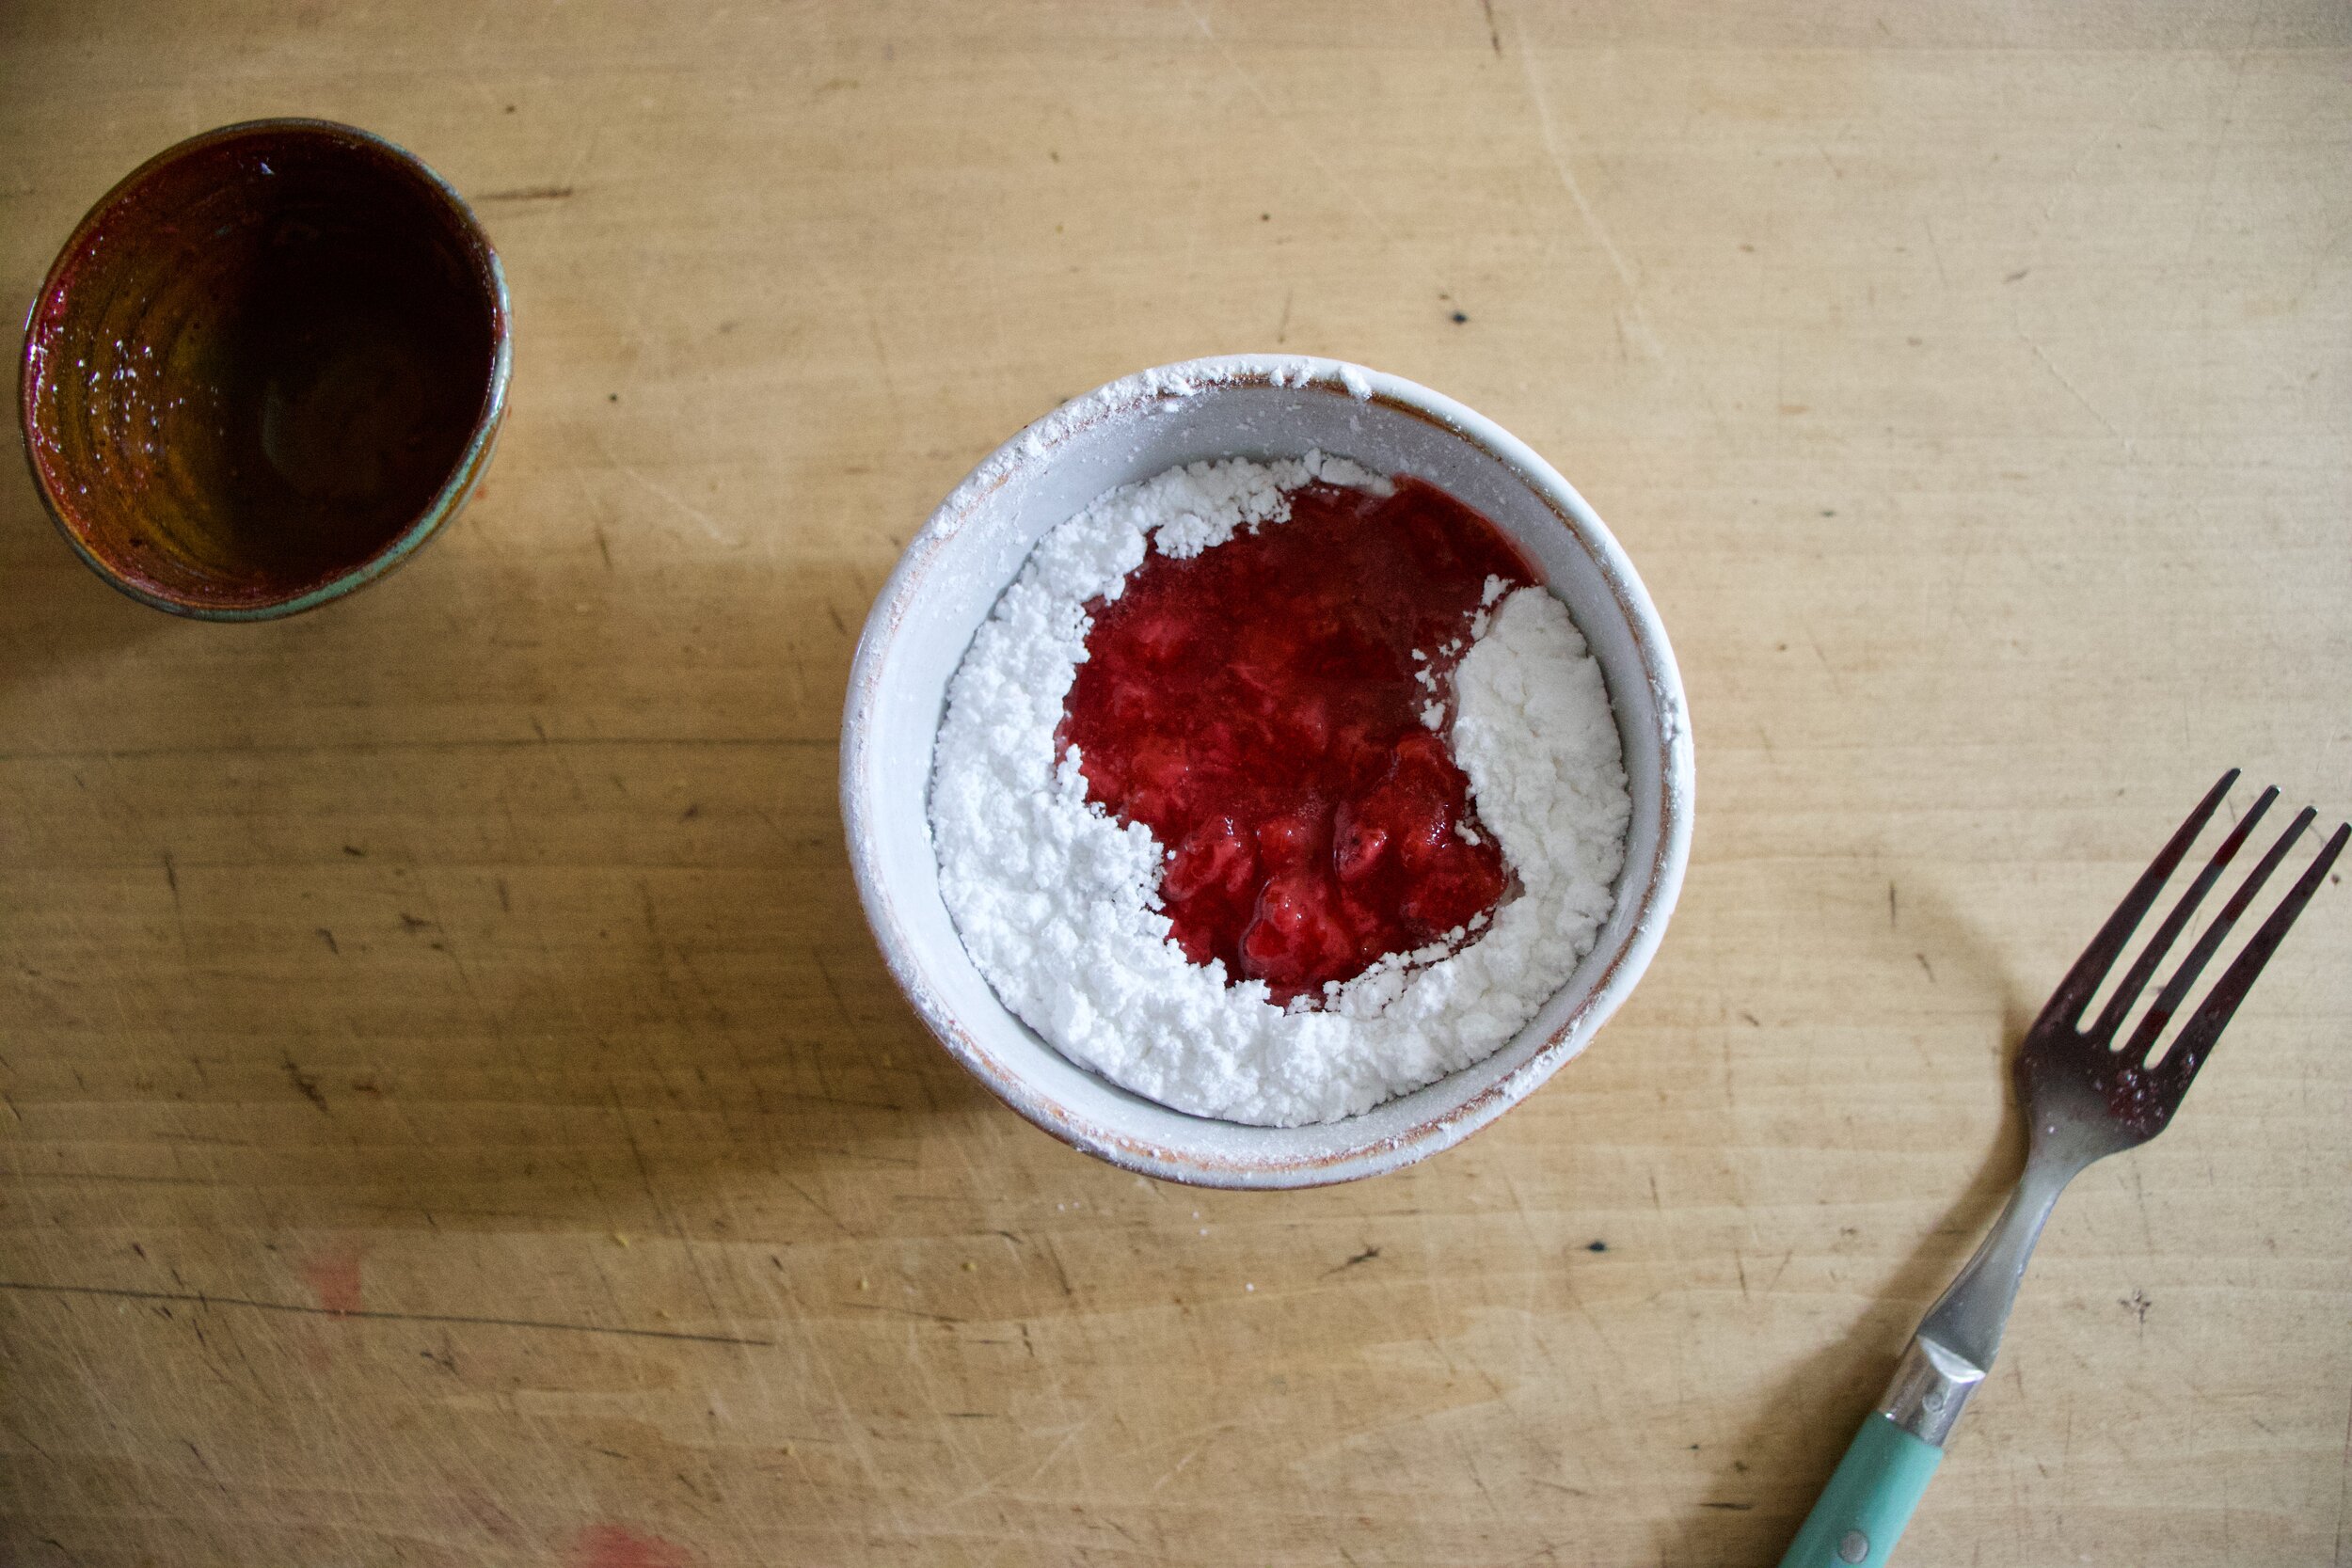
The stuff. Peas,strawberrie jam of perceives (I had just made it so it is still warm) Flour, sugar and powdered sugar, baking soda and powder, salt, oil, and vinegar.

IMG_7720.jpg
IMG_7726.jpg
IMG_7734.jpg
IMG_7739 2.jpg
IMG_7756.jpg
IMG_7770.jpg

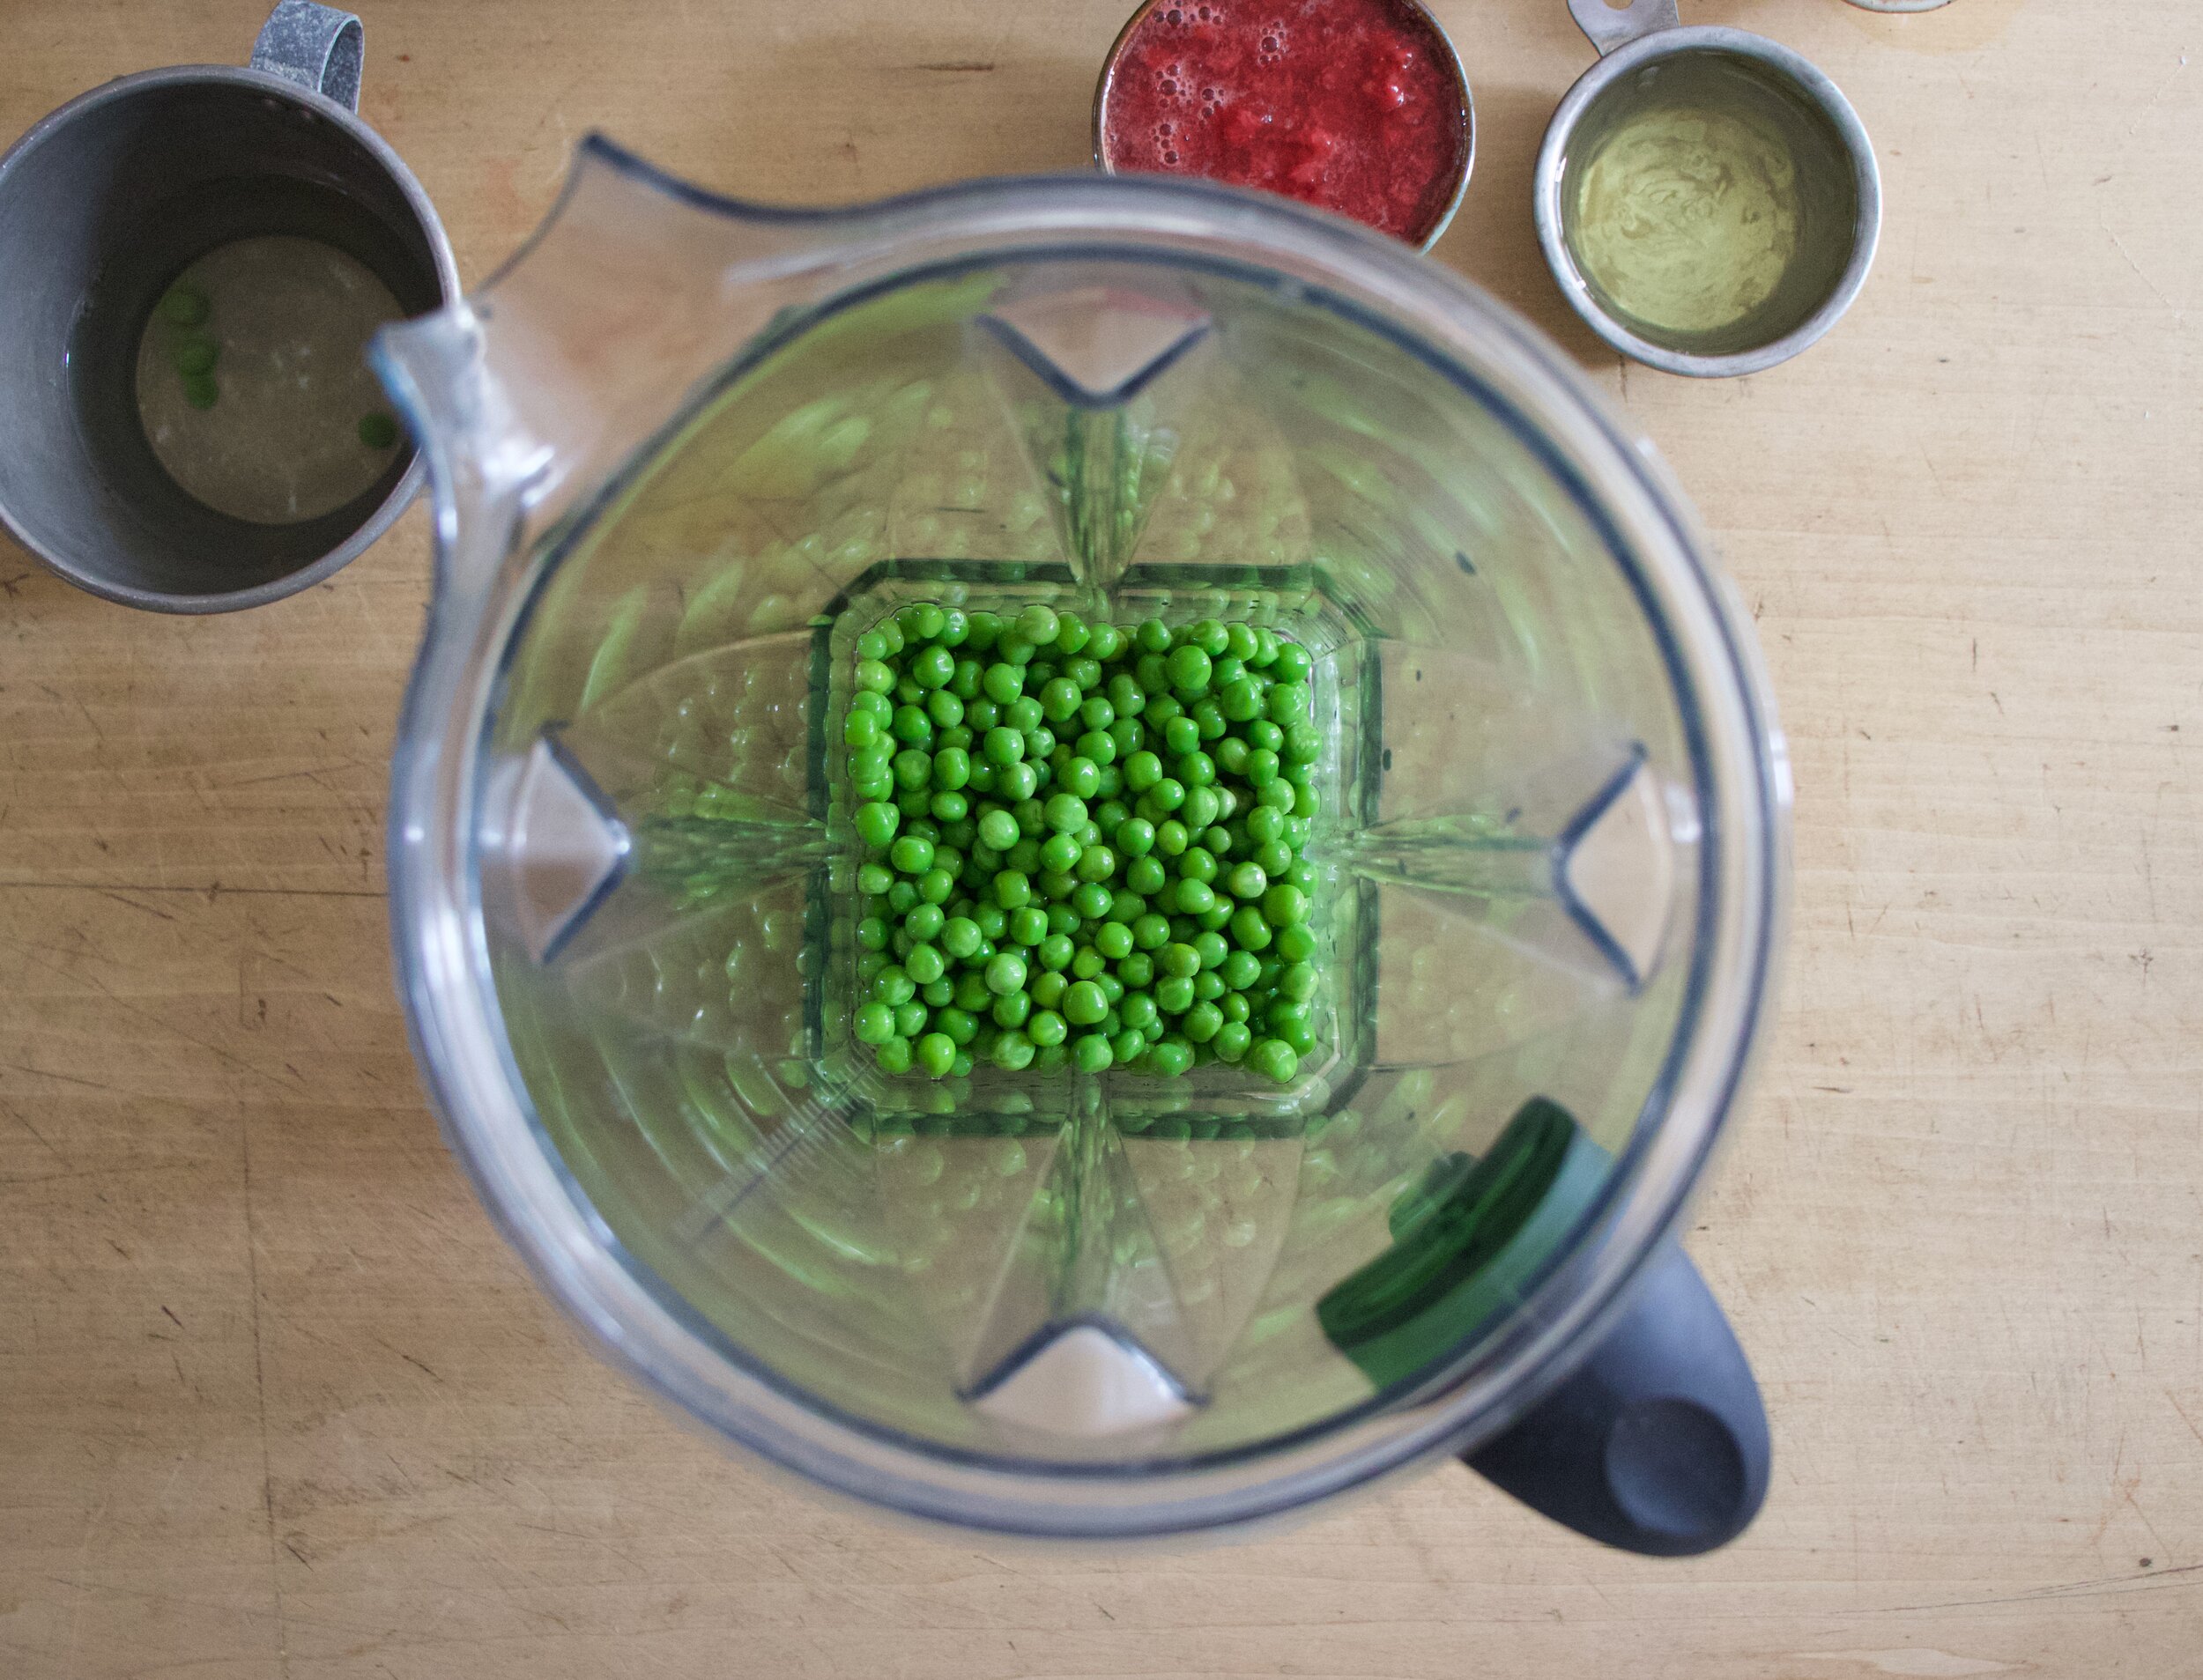
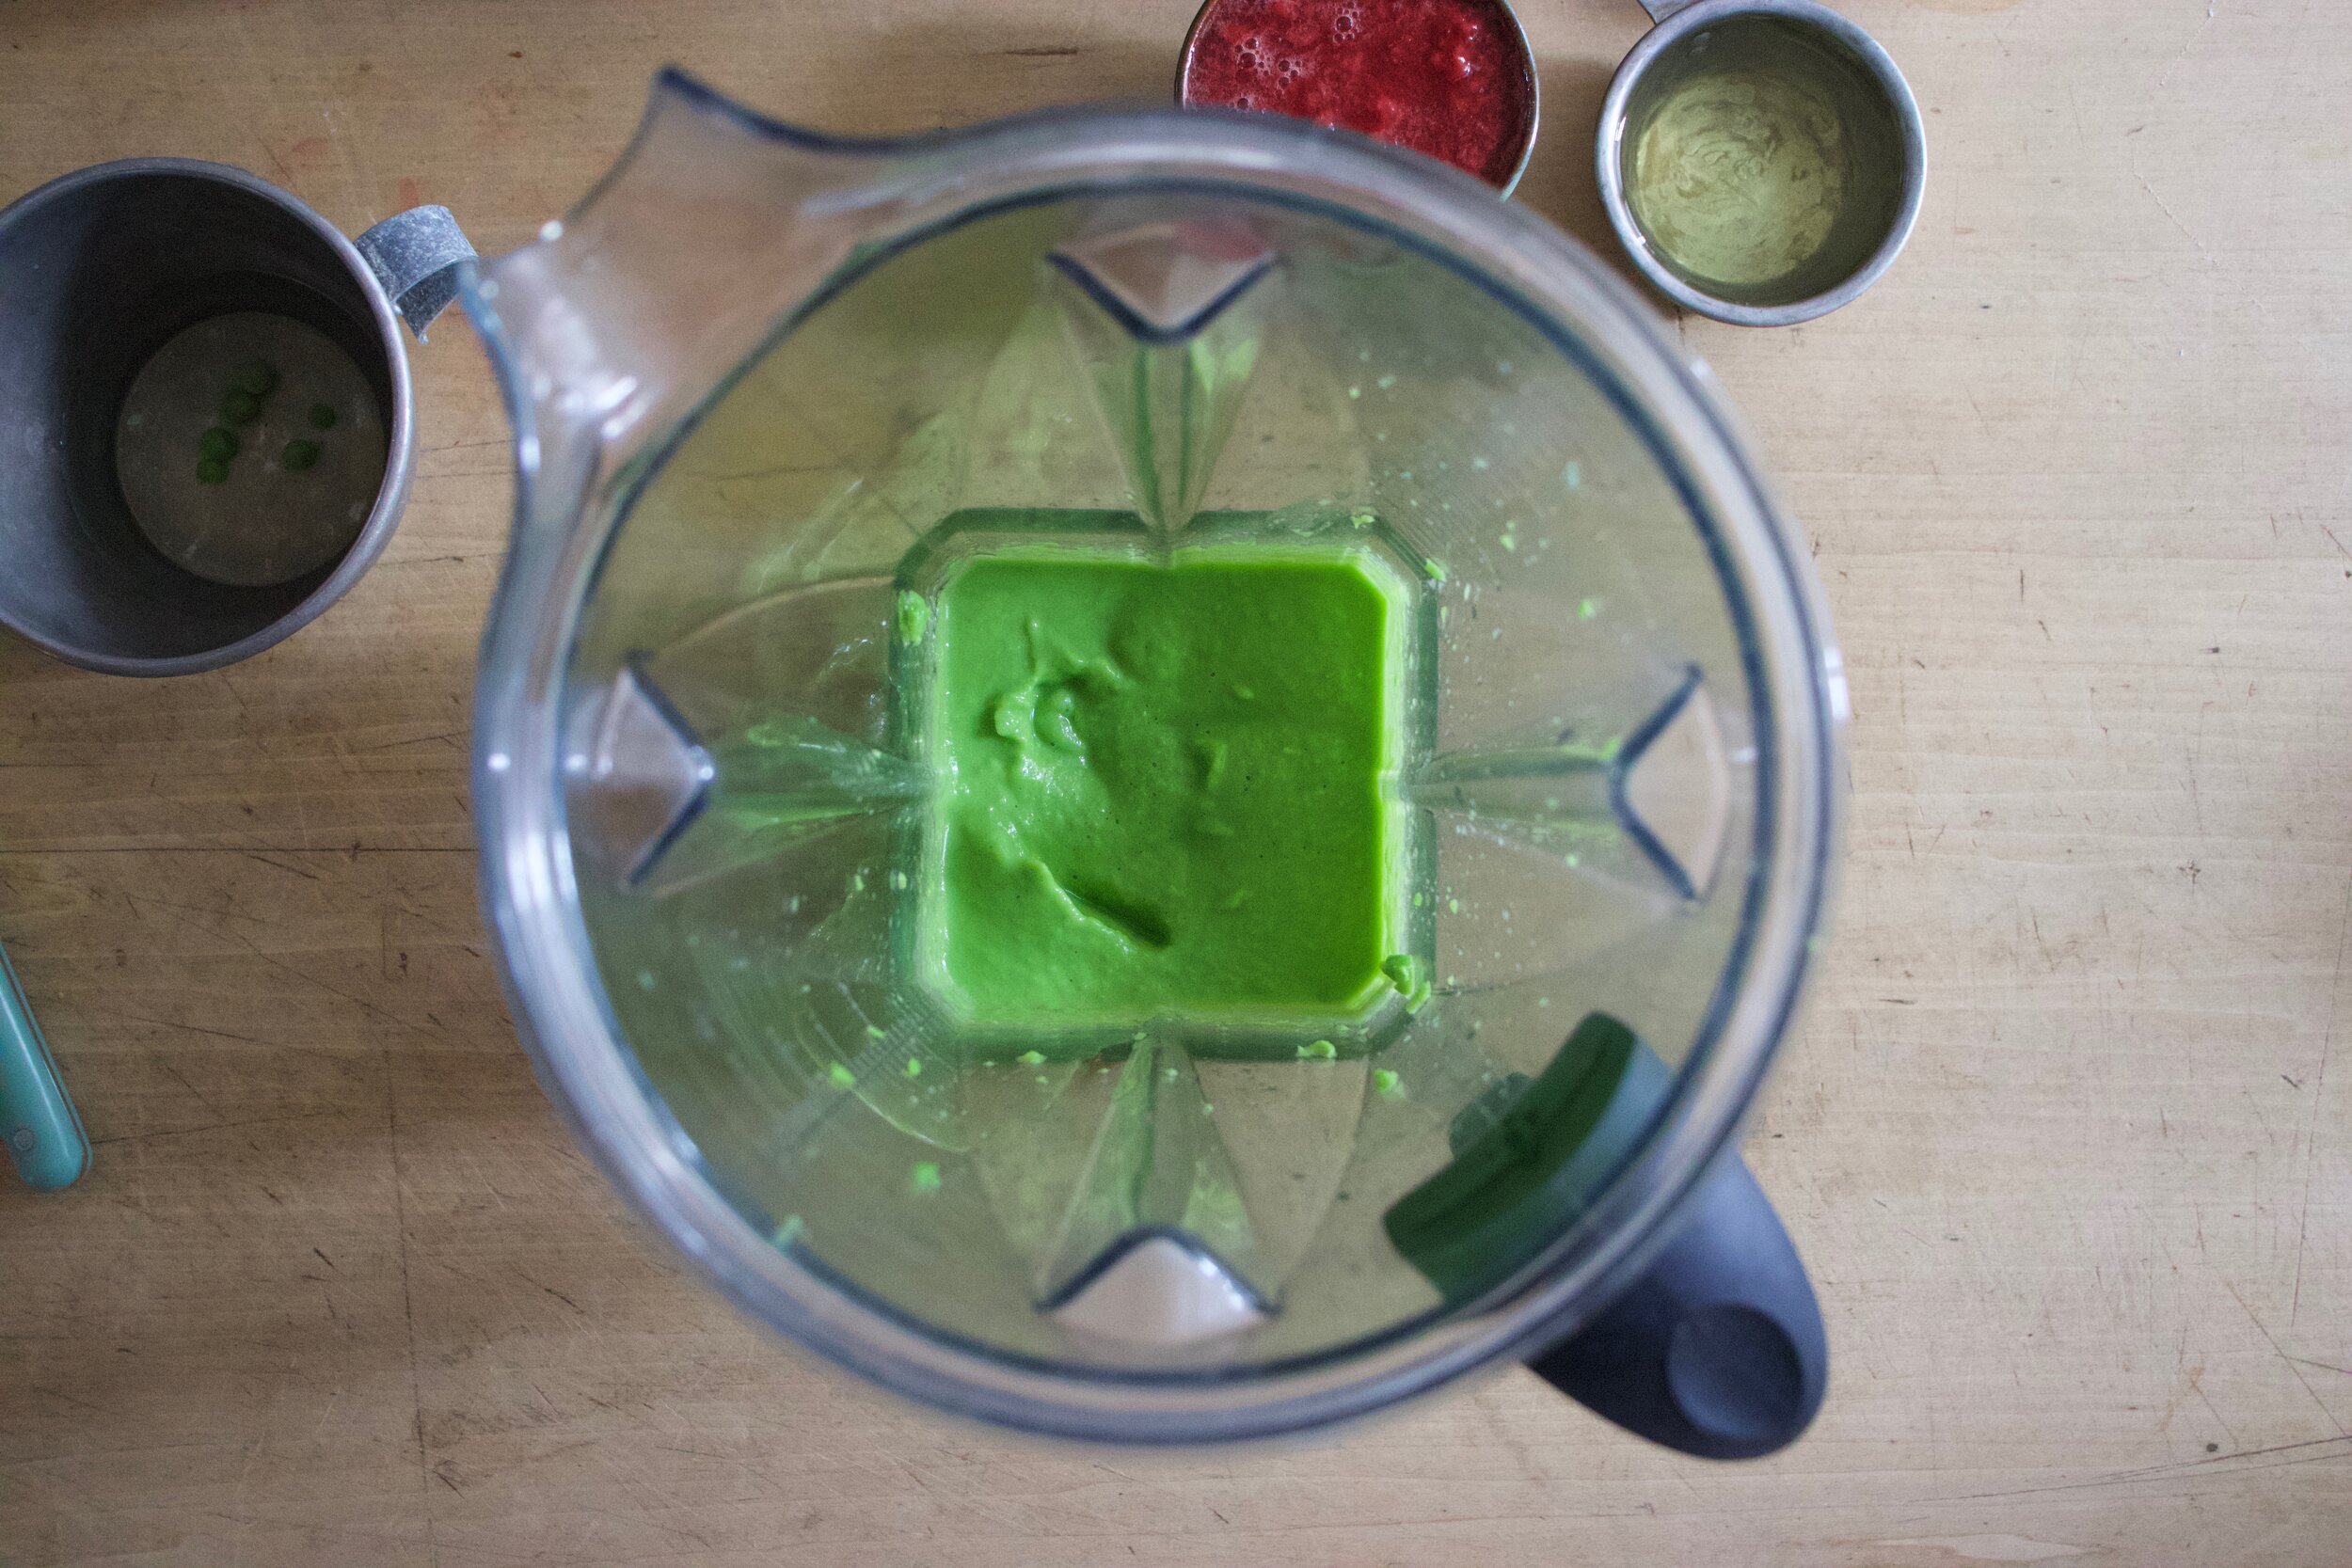
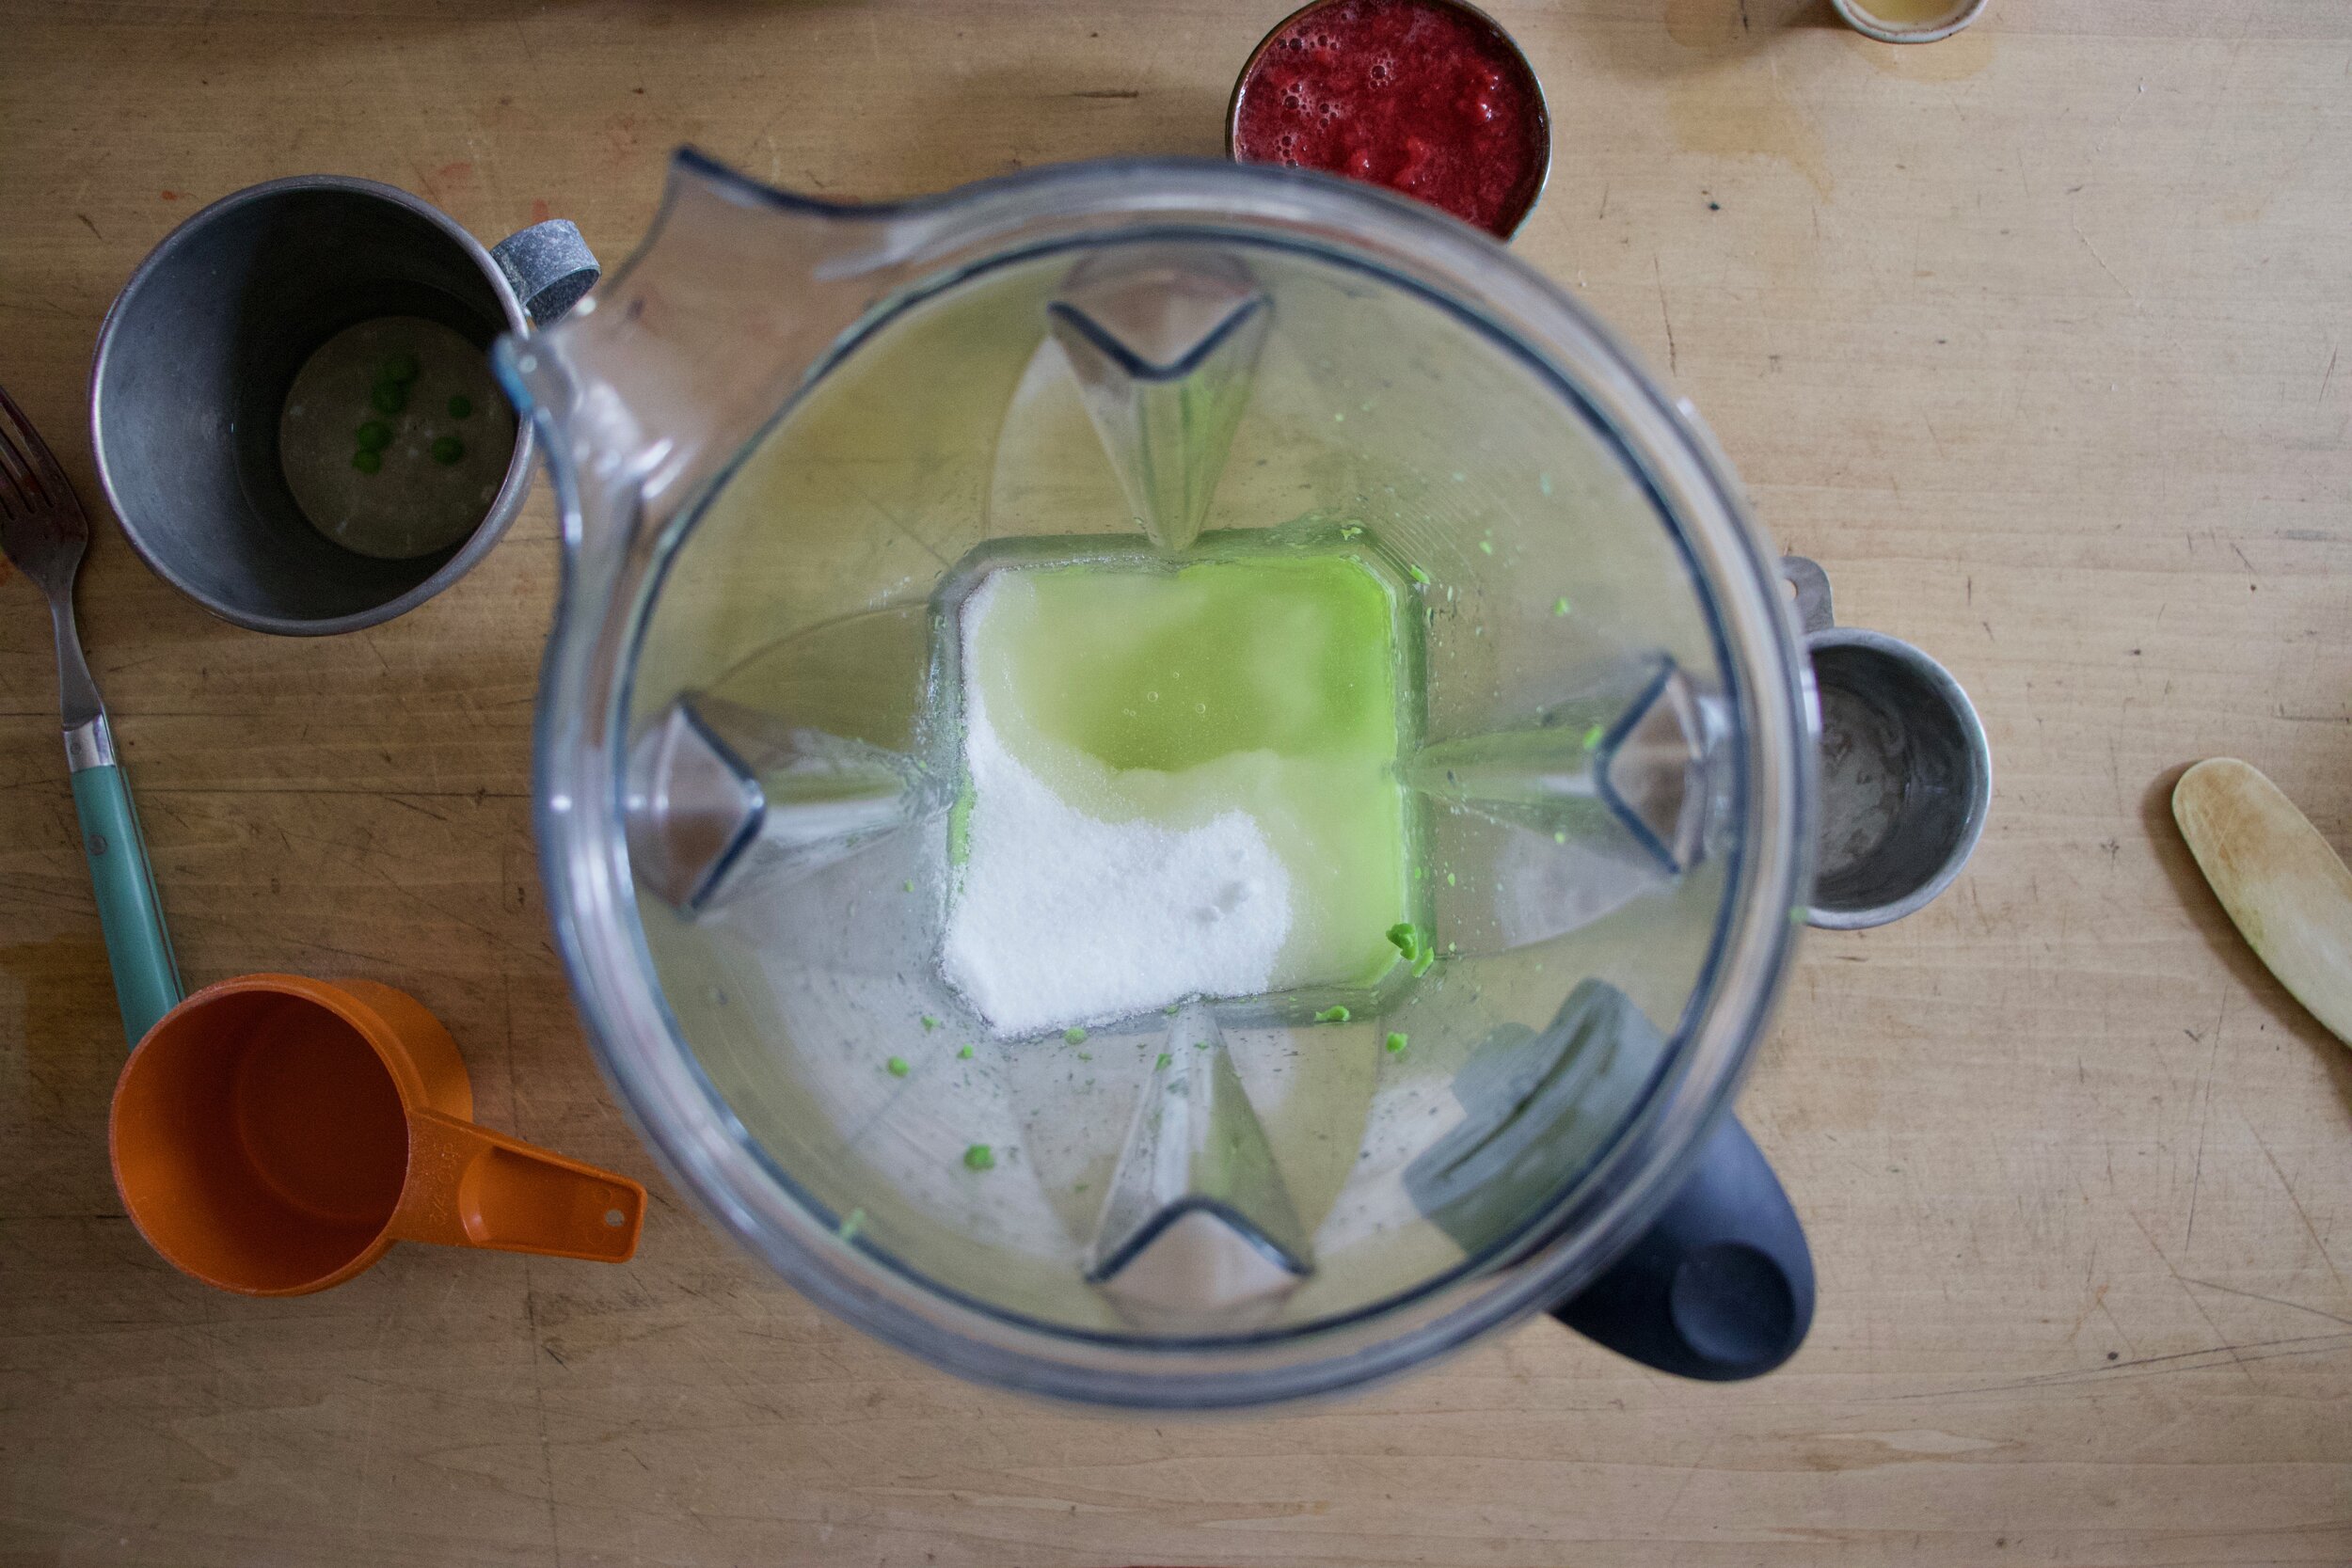
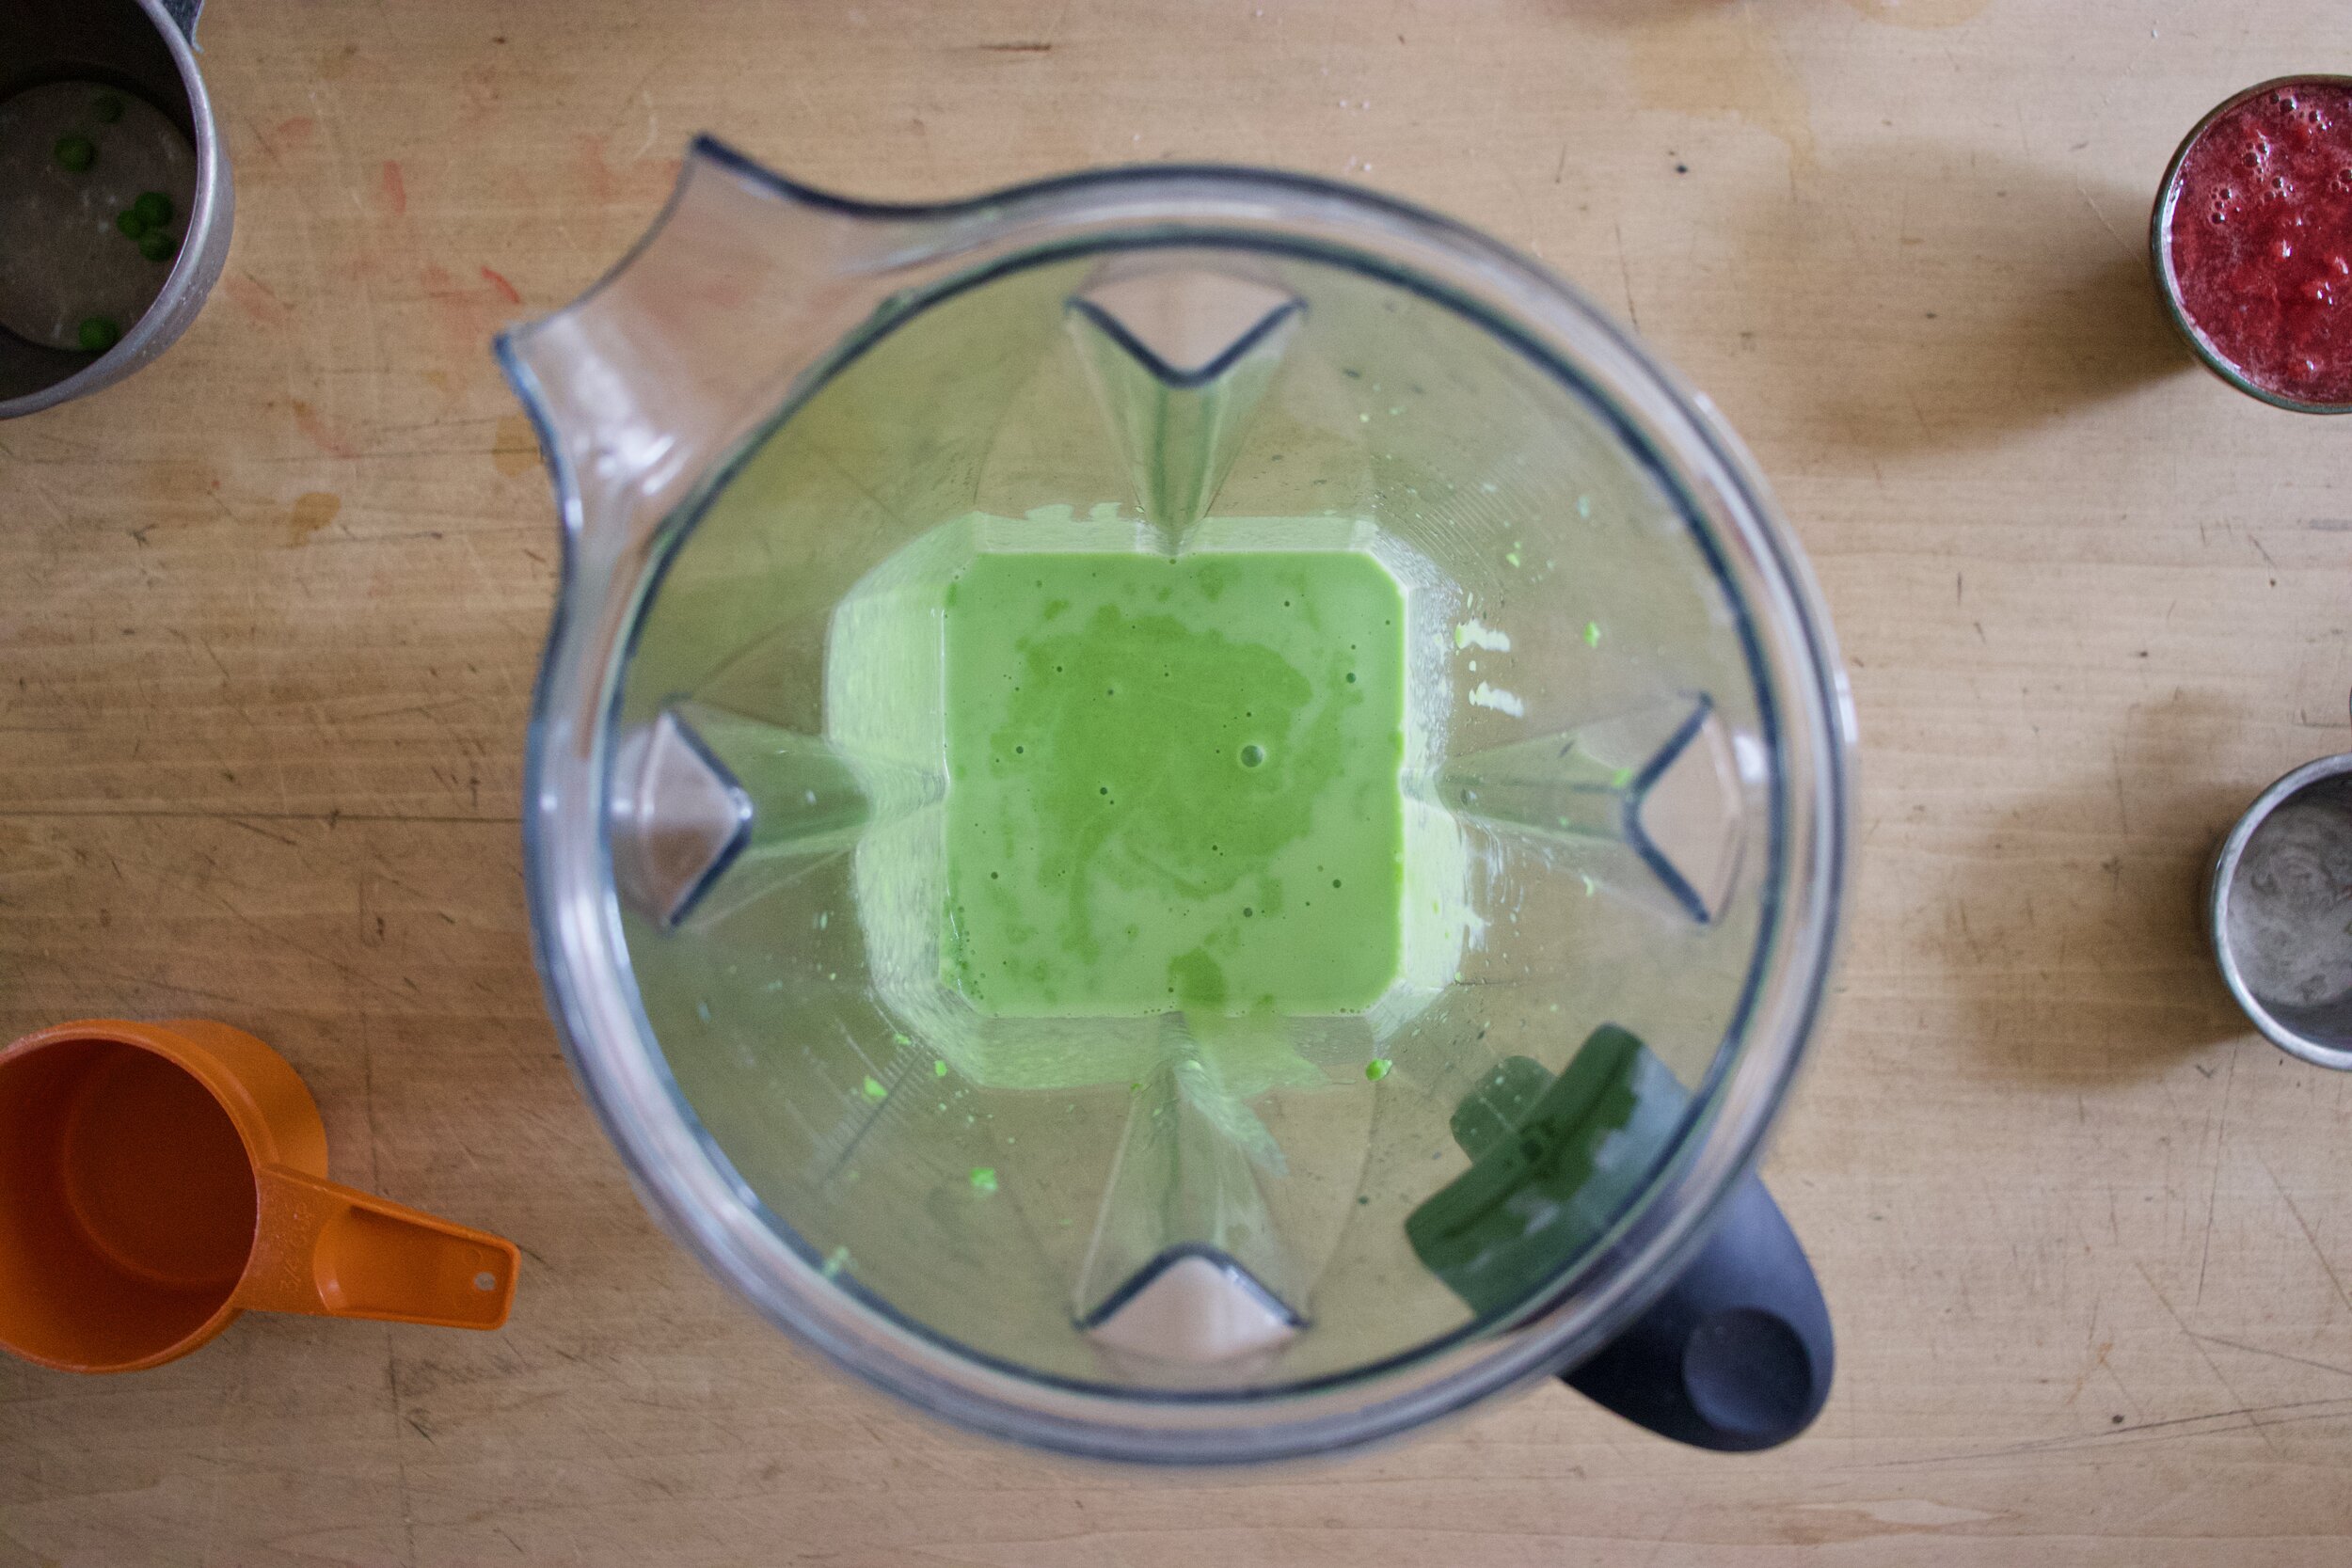
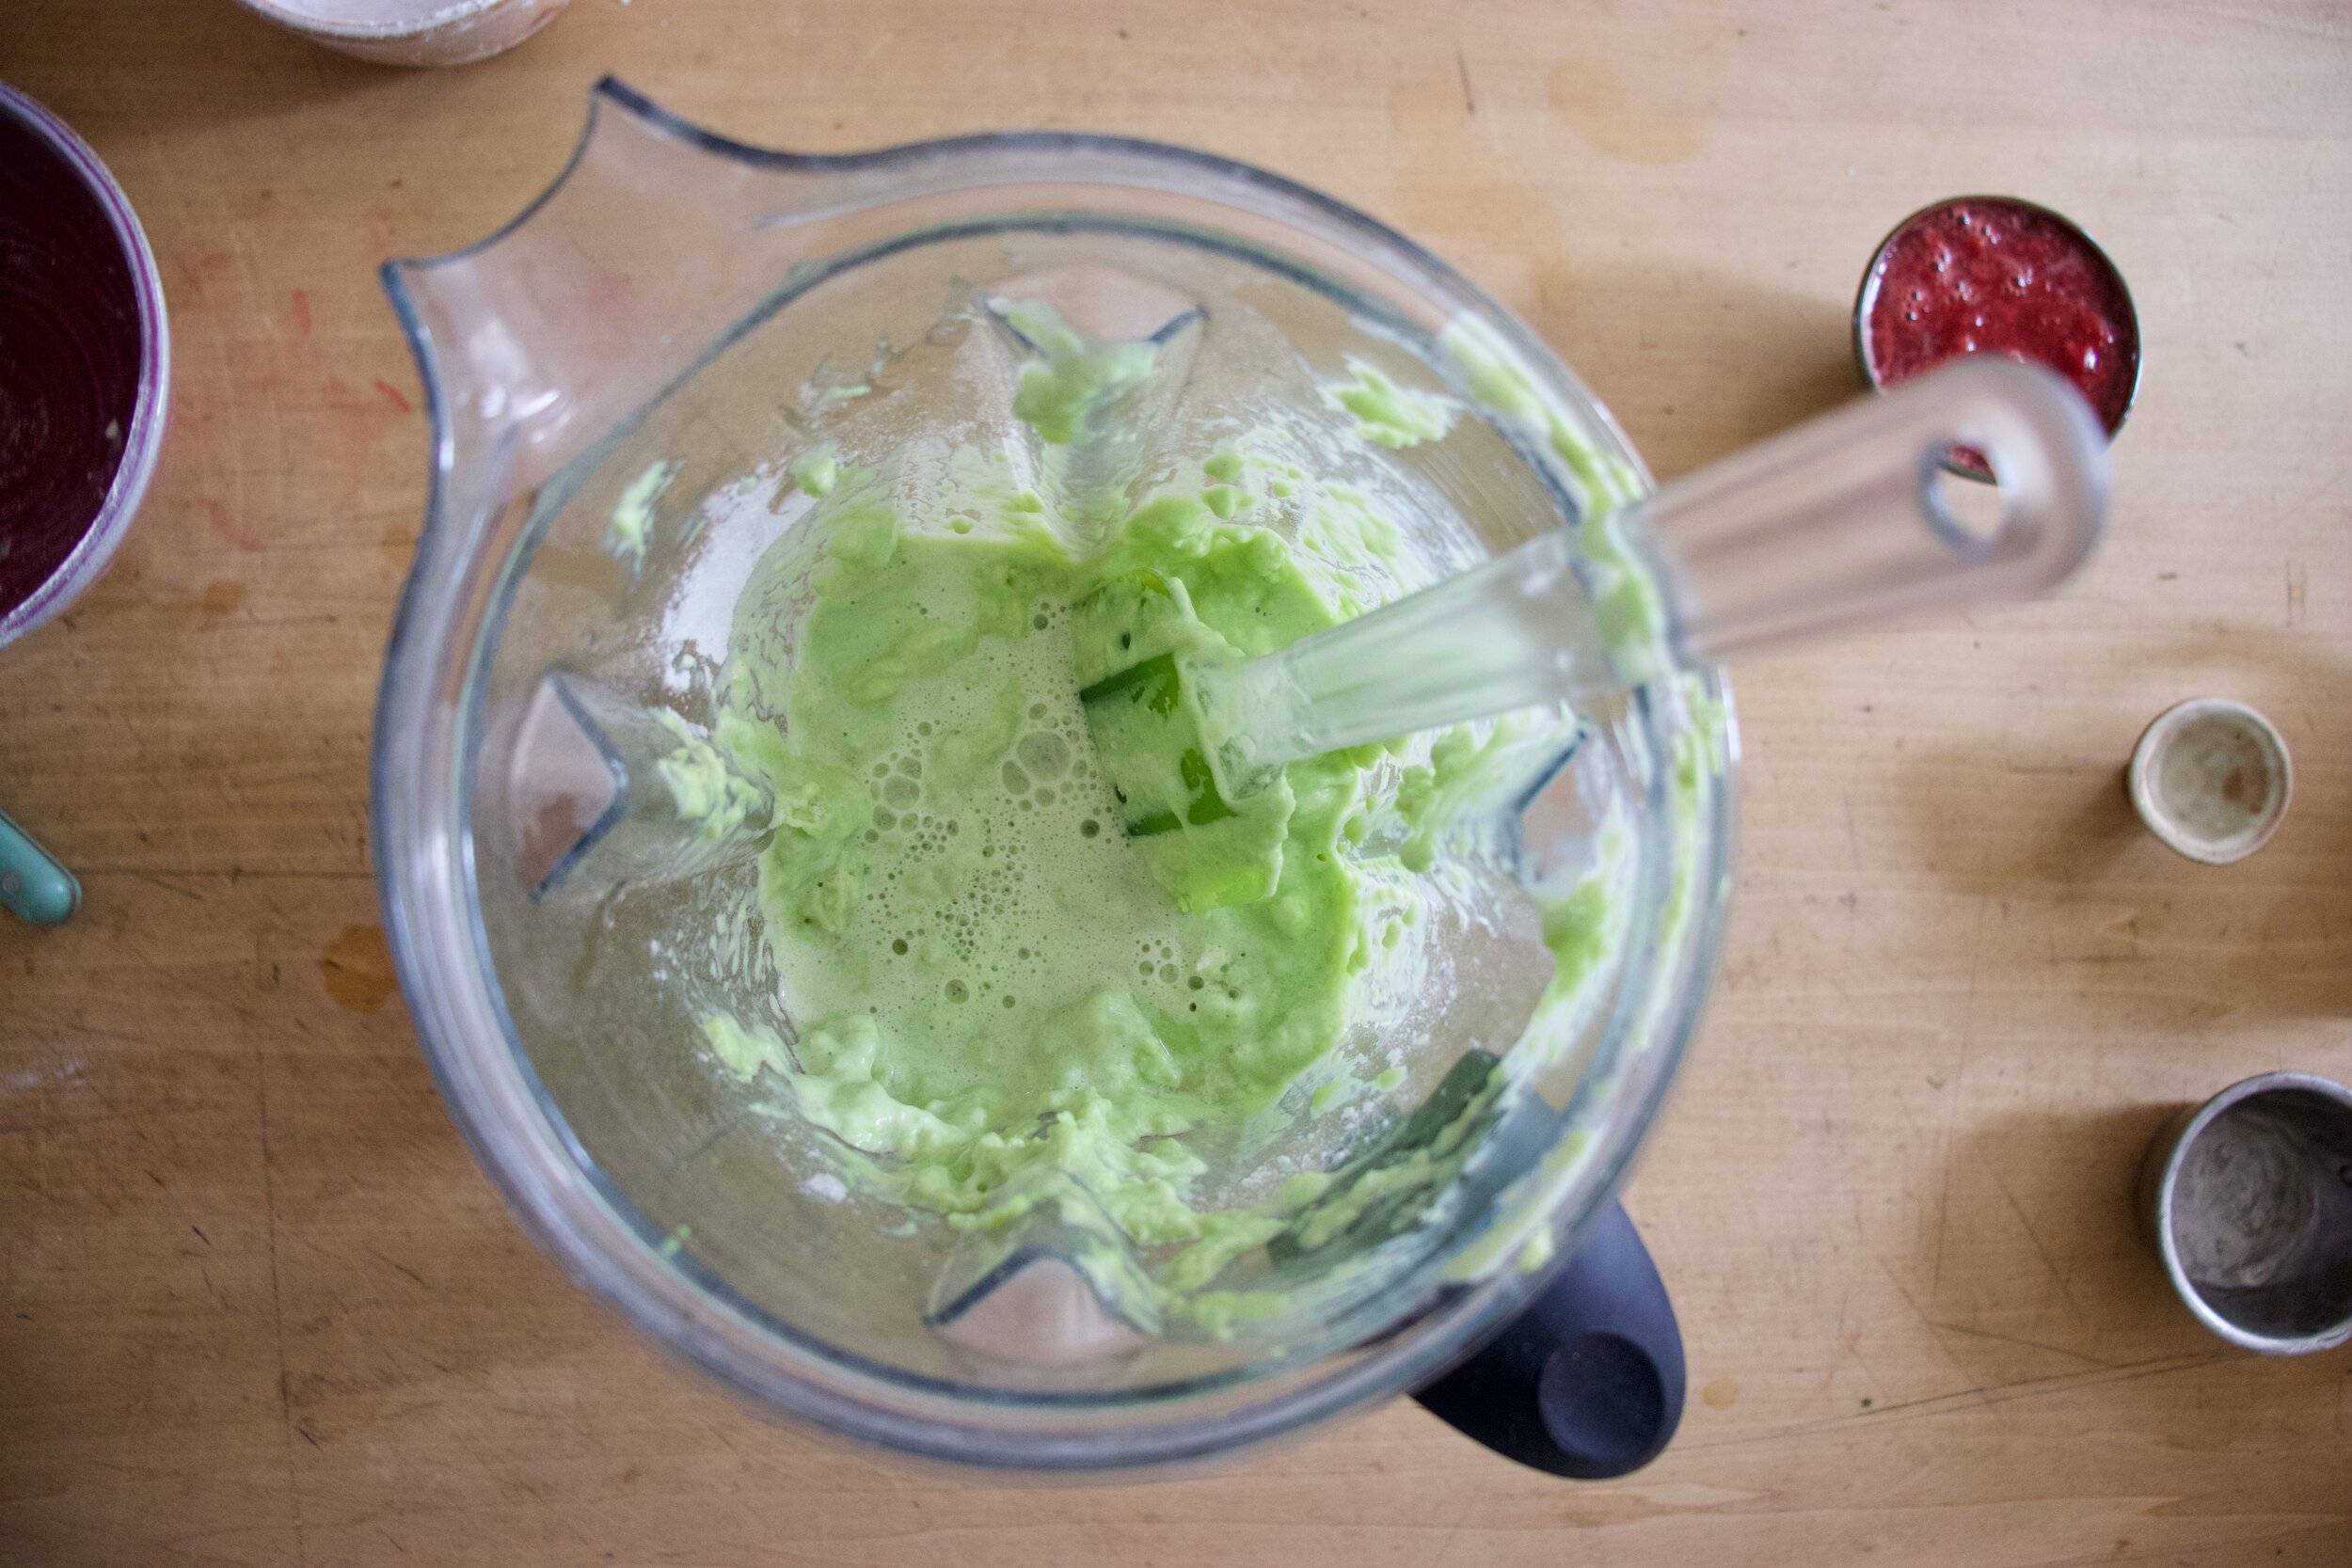
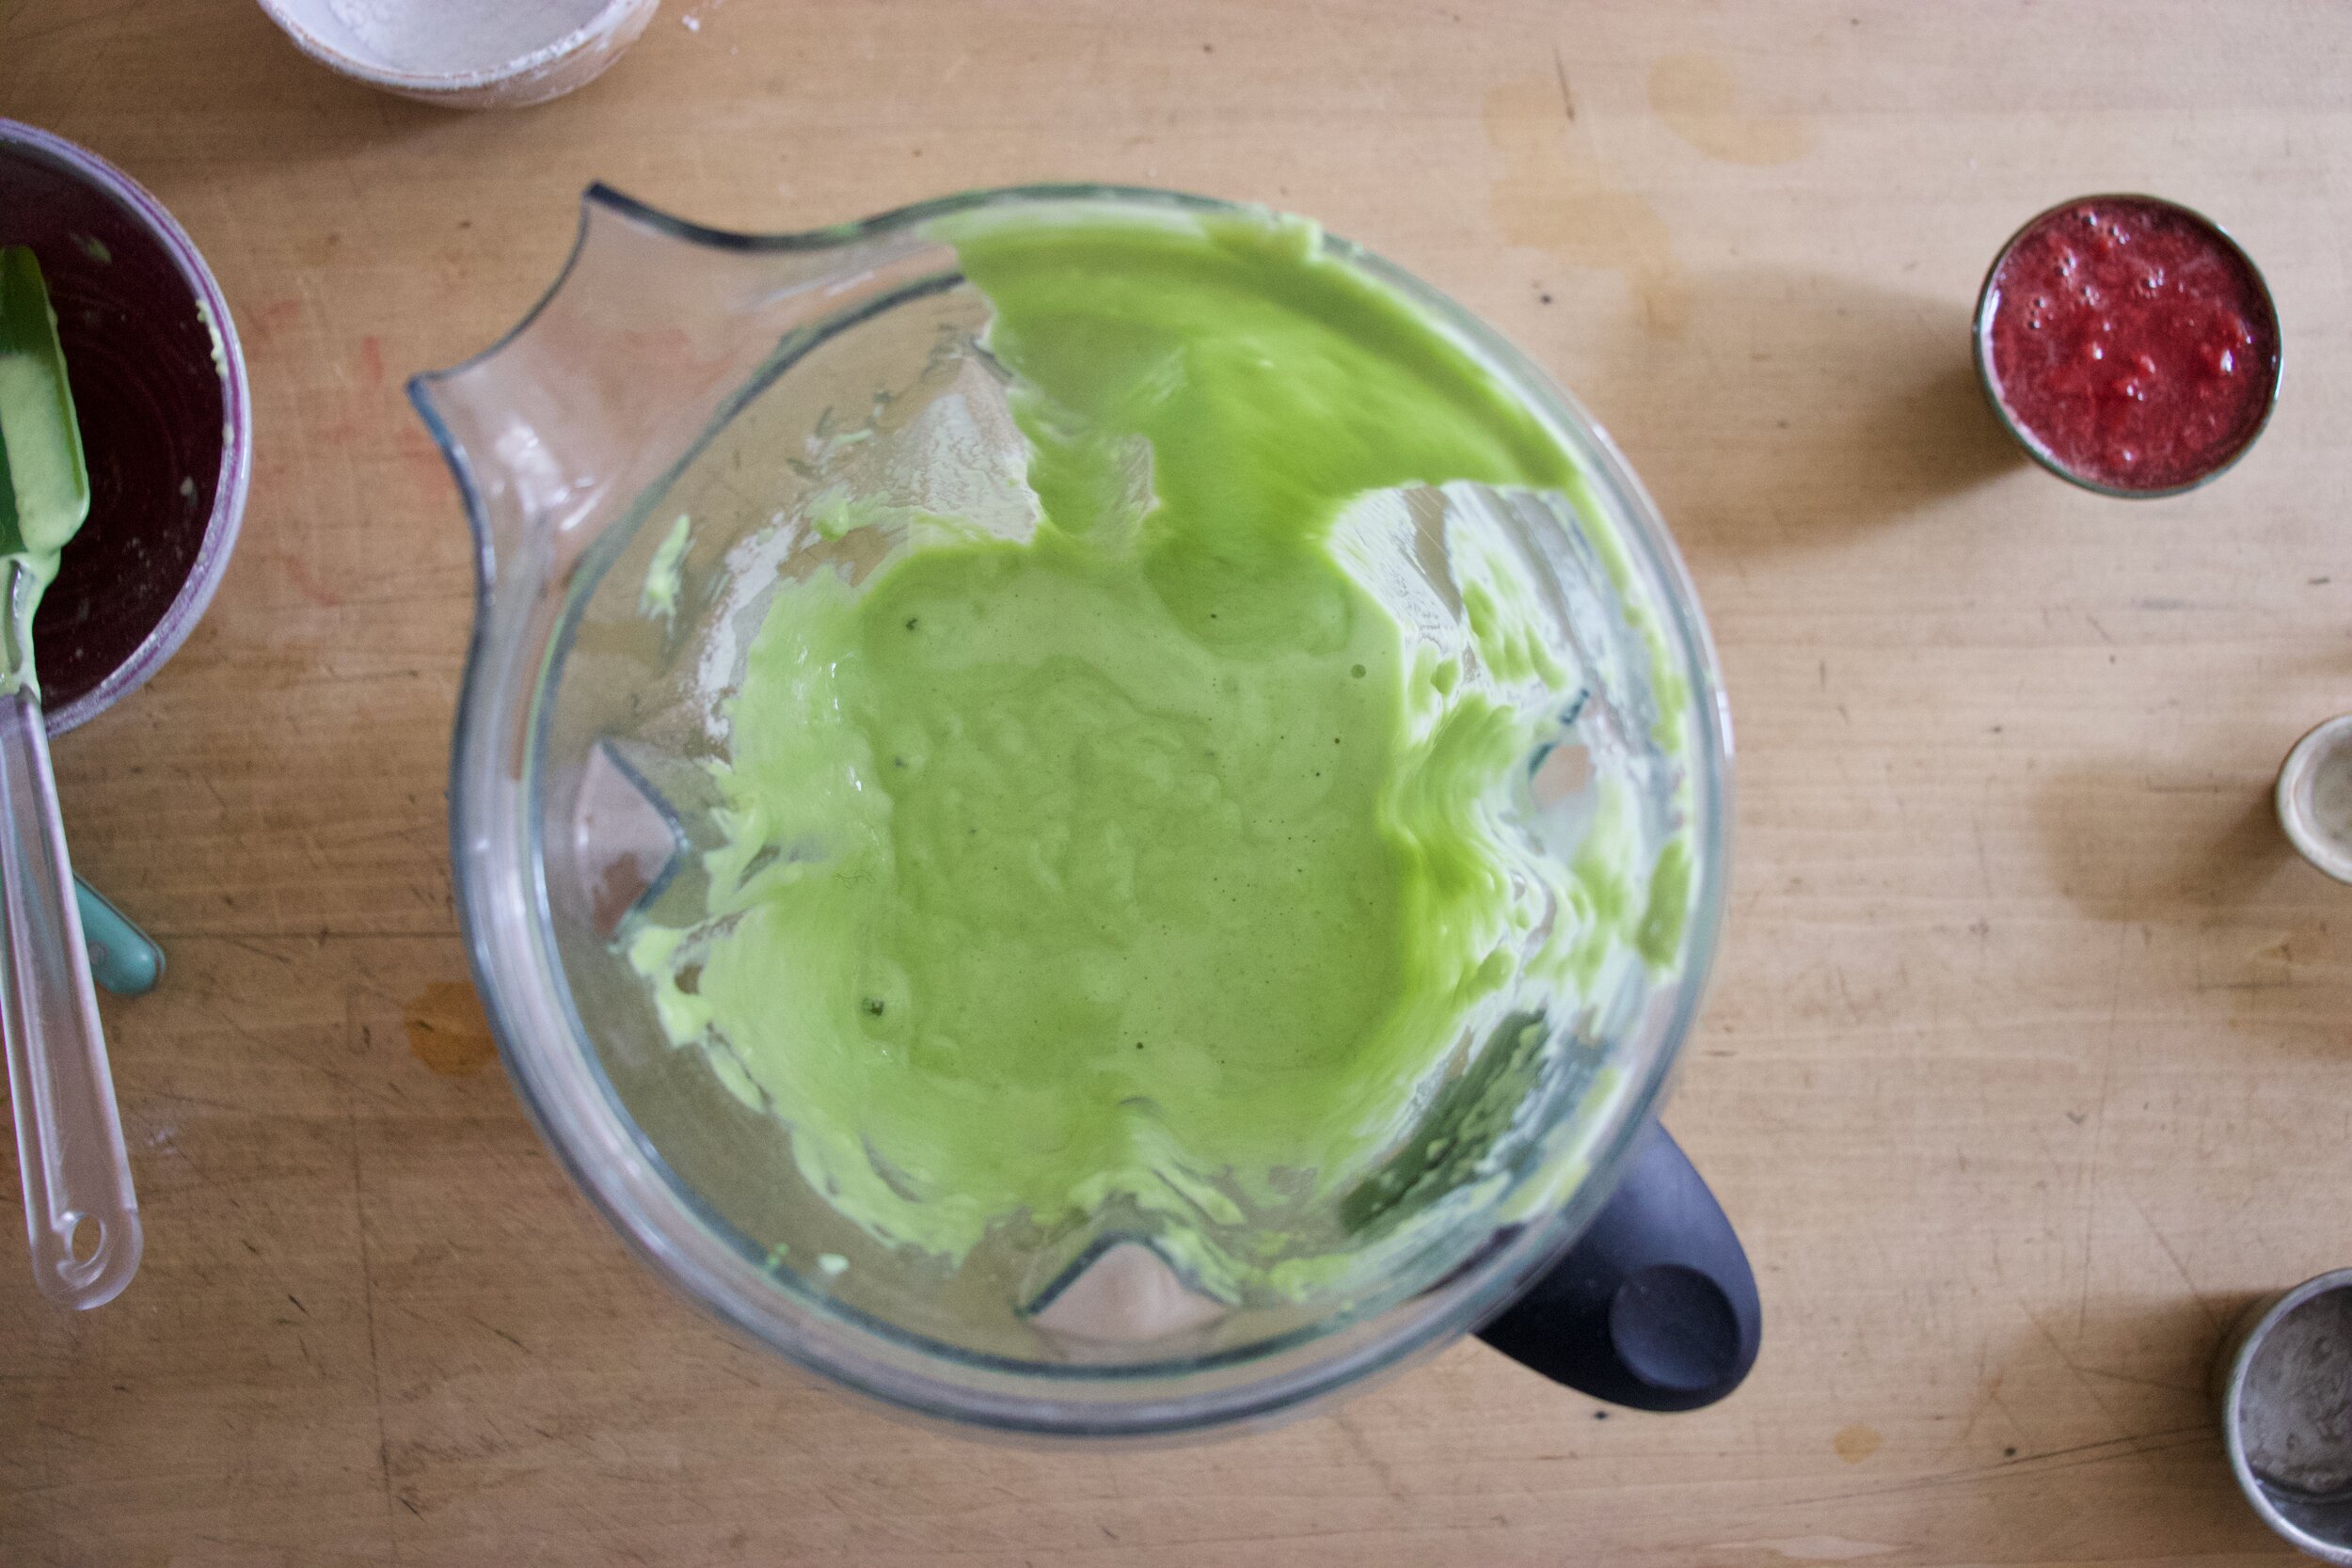
Super easy here. Place peas into blender and blend until smooth. Add oil and sugar and blend until incorporated. Then add in all the dry. Before you blend, take a spoon or spatula and hand mix it a little. Add in a cup of water and vinegar then pulse until incorporated. Don’t over blend it or else it will be tough.

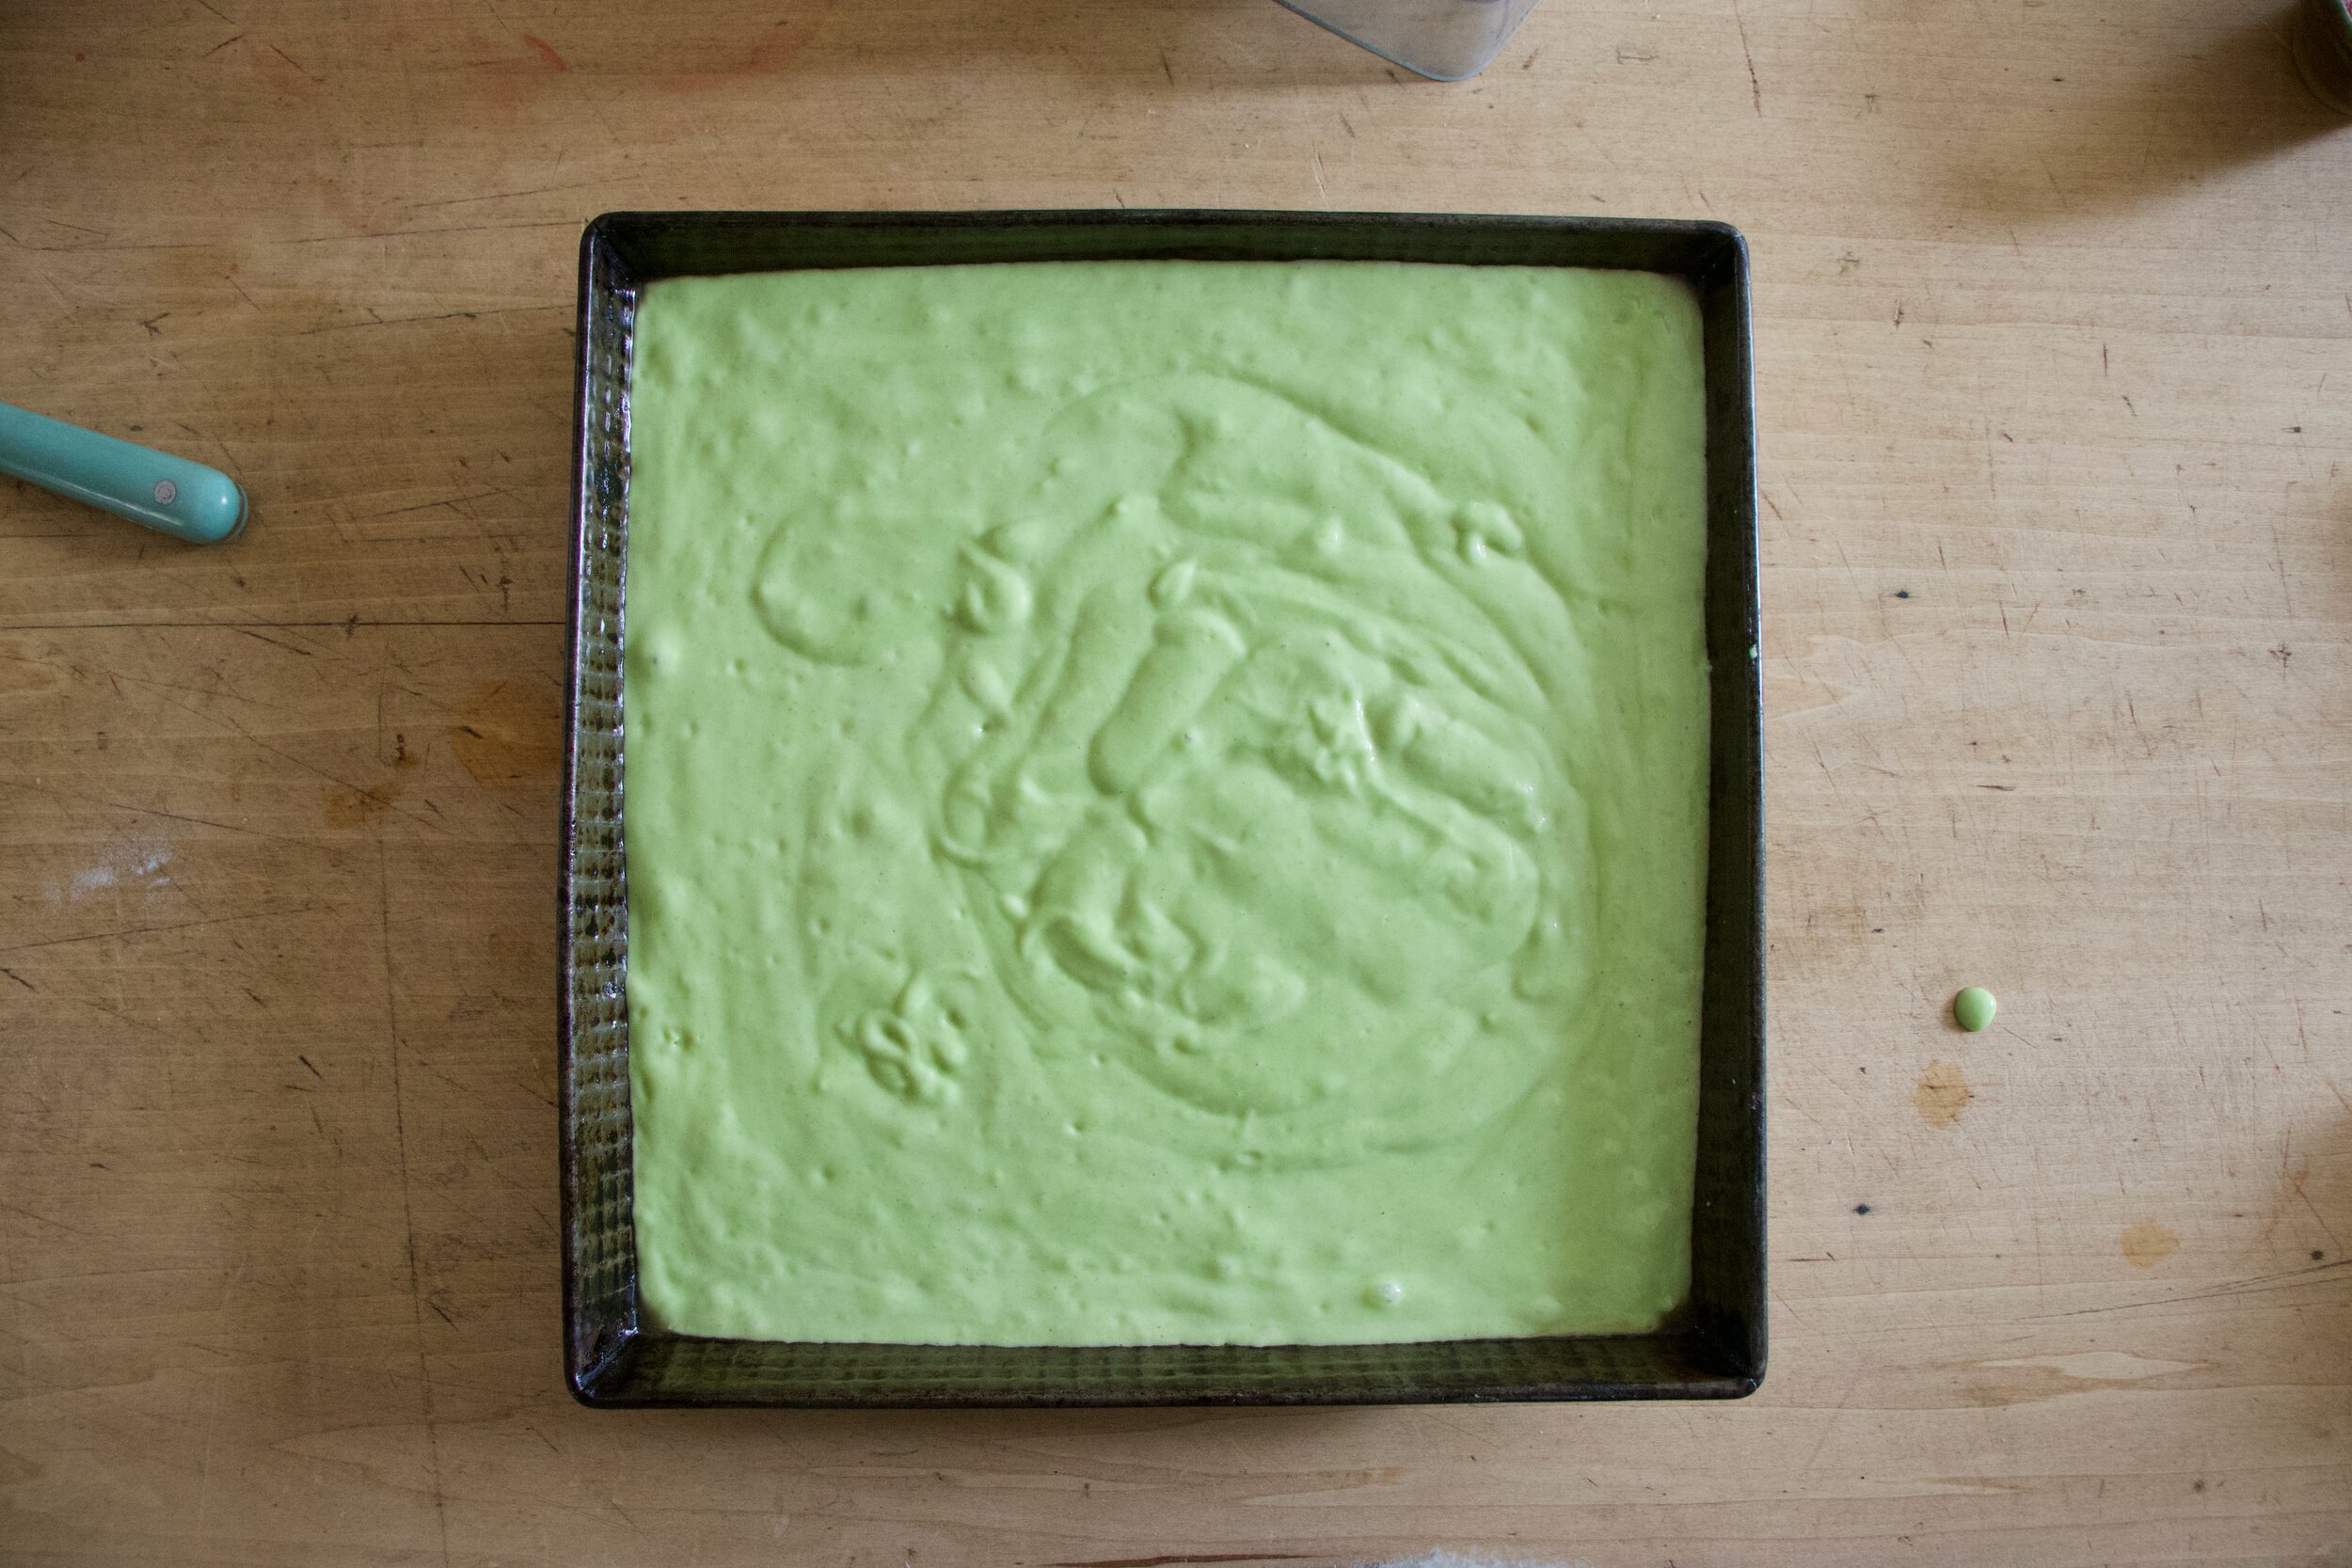
Pour batter into a well greased pan and pop into a hot oven. Bake.

Afer about 25 minuts, check for doneness. When the fork or tester comes out clean, it is done!

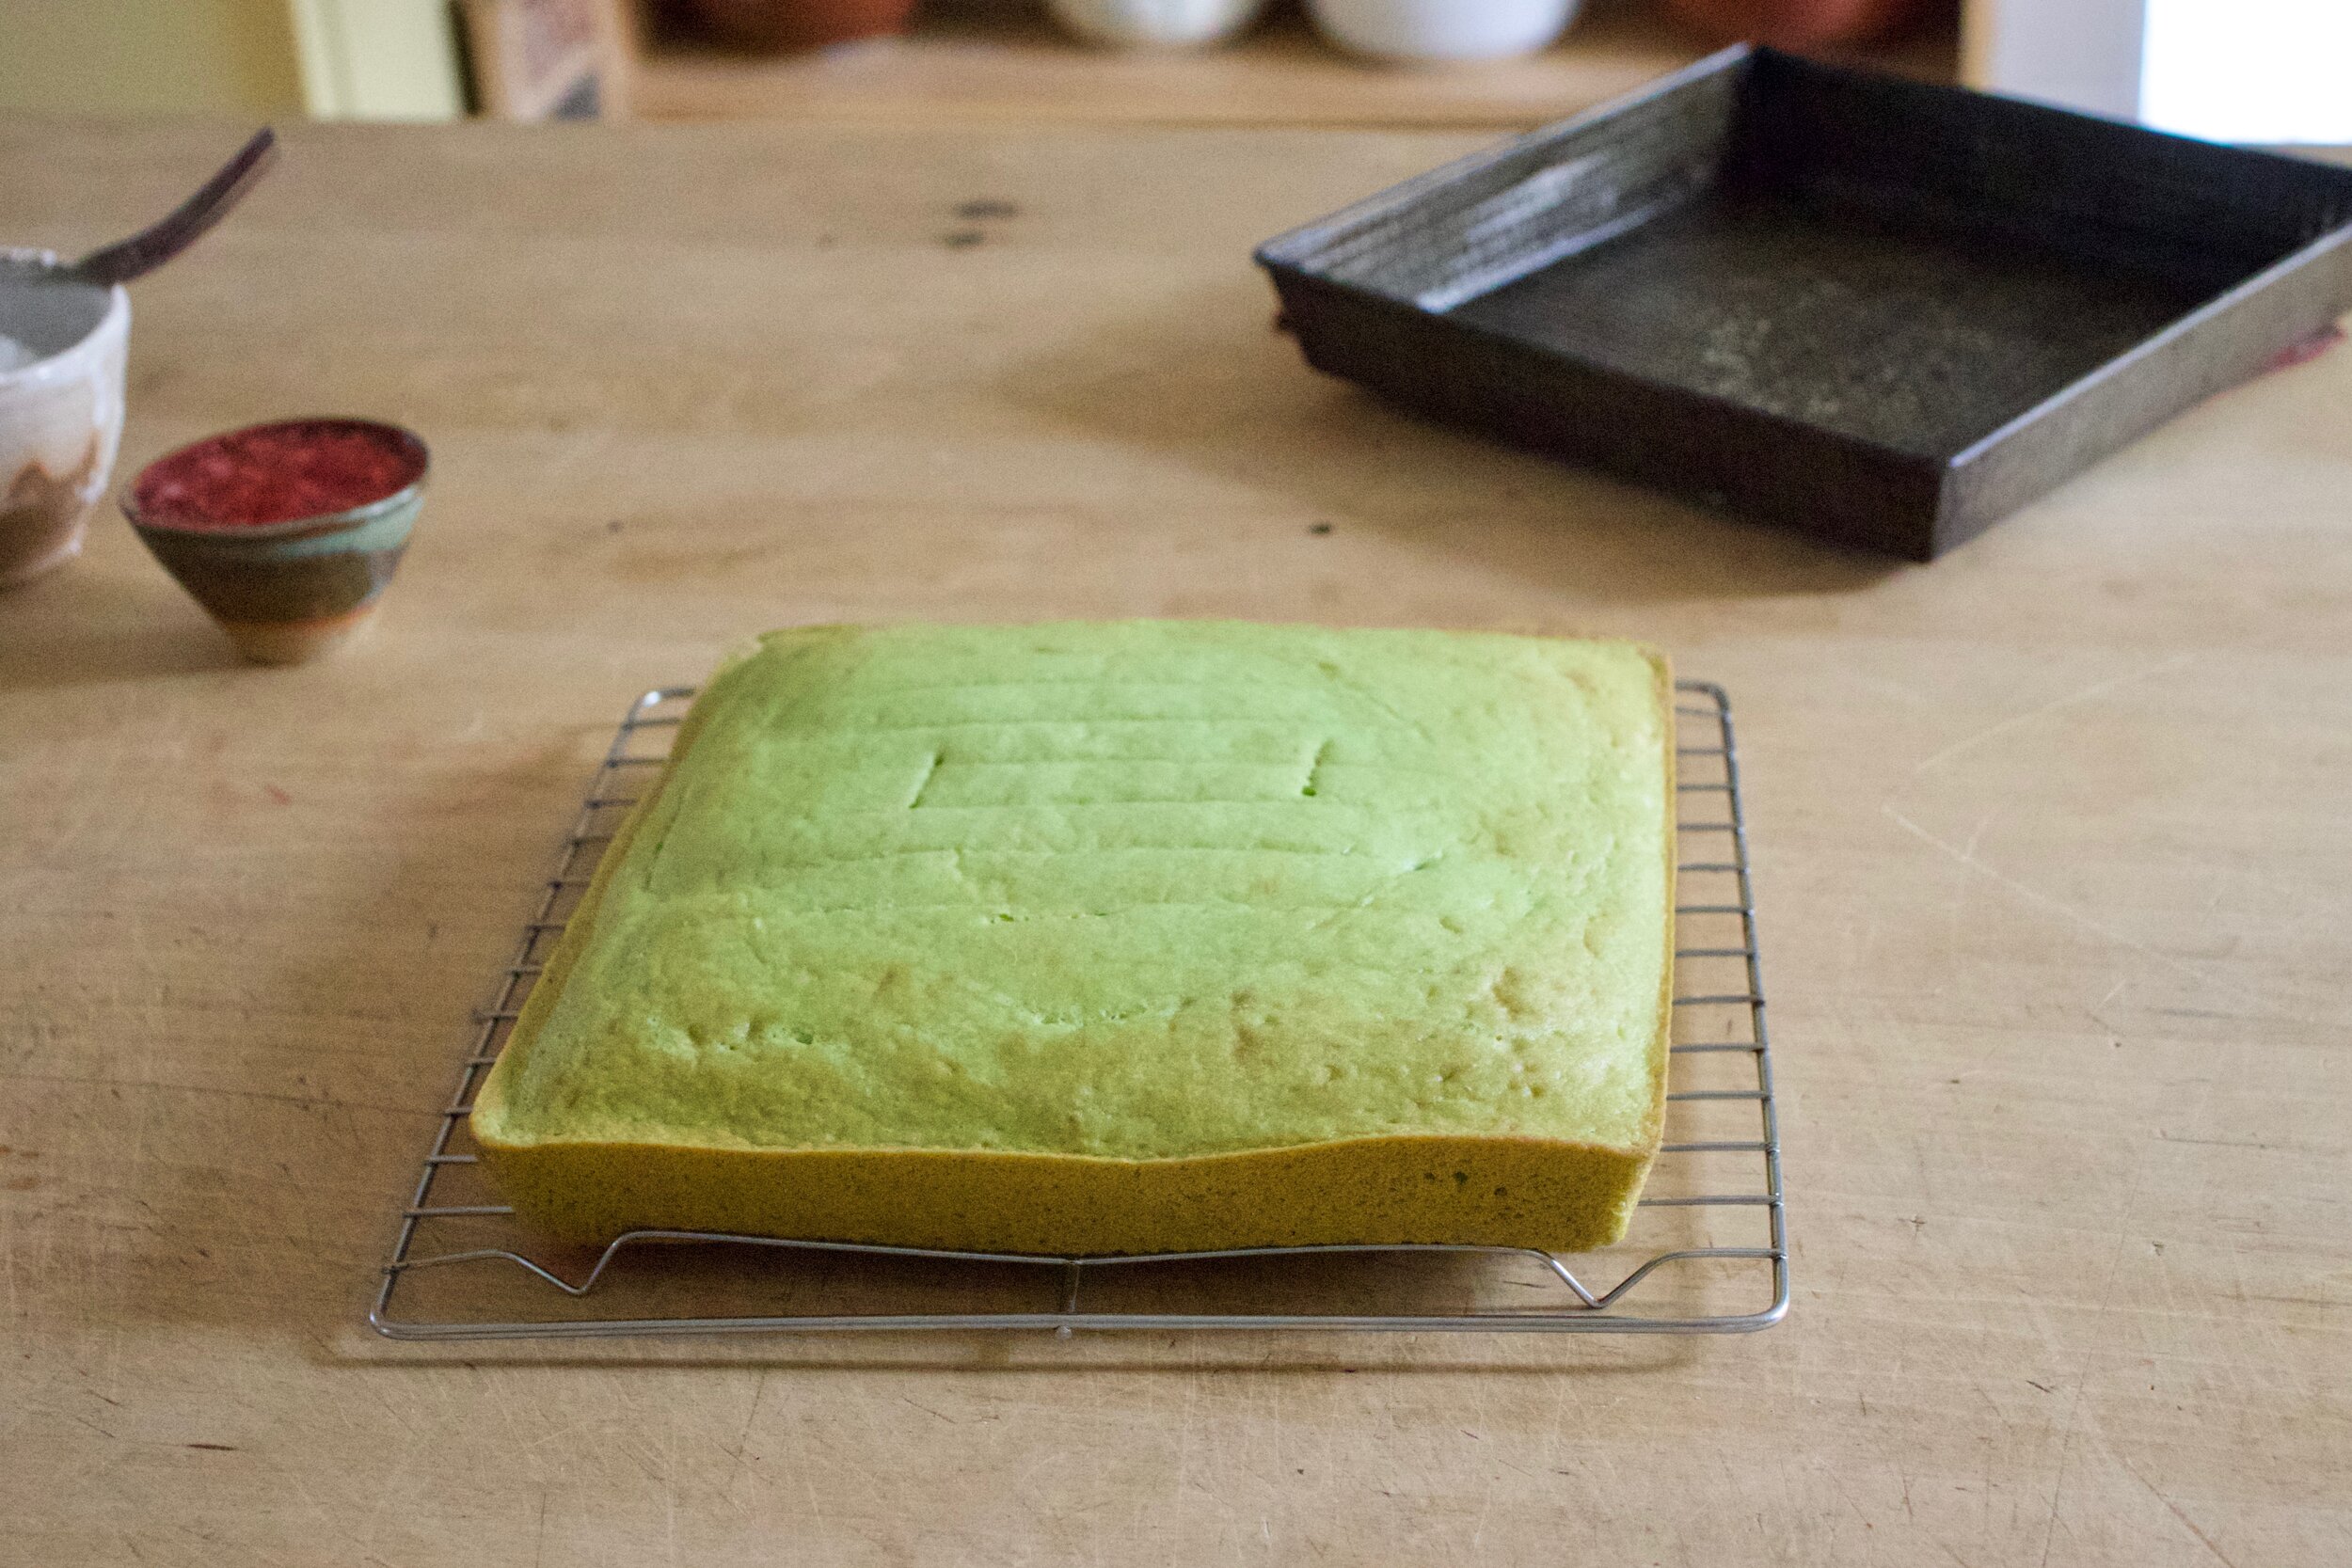
Pop cake out and let cool on a wire rack.

IMG_7805.jpg
IMG_7813.jpg

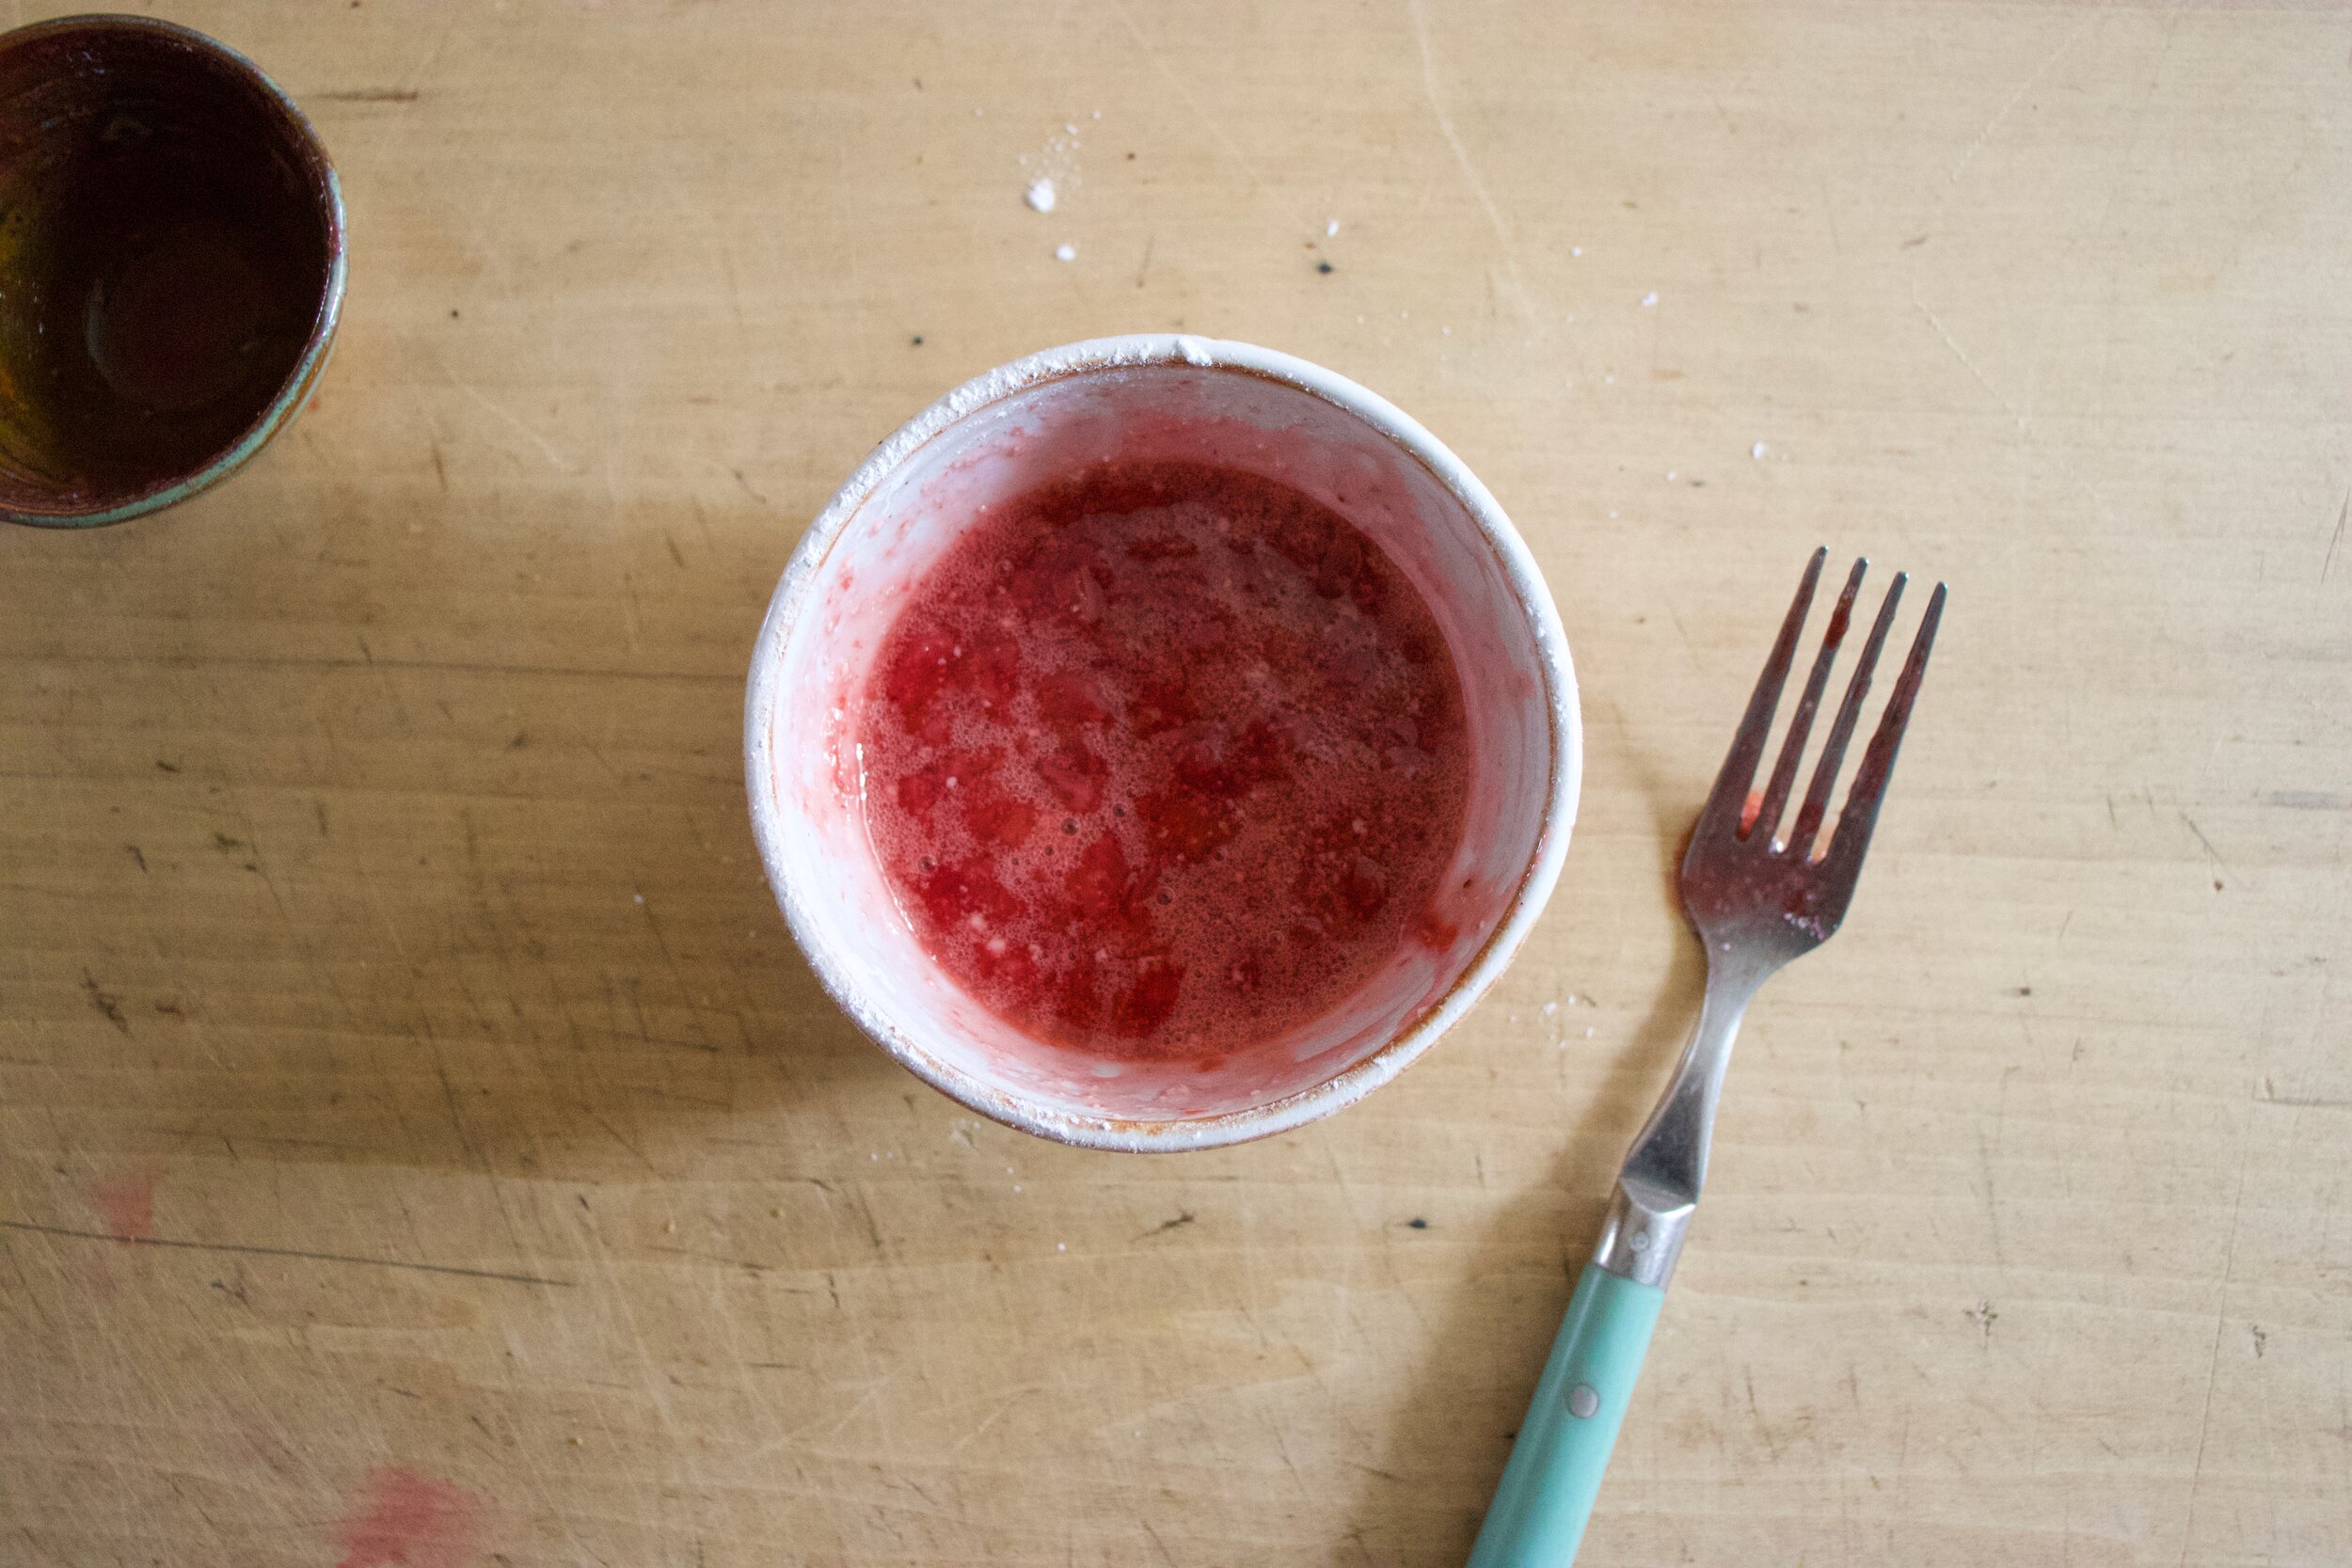
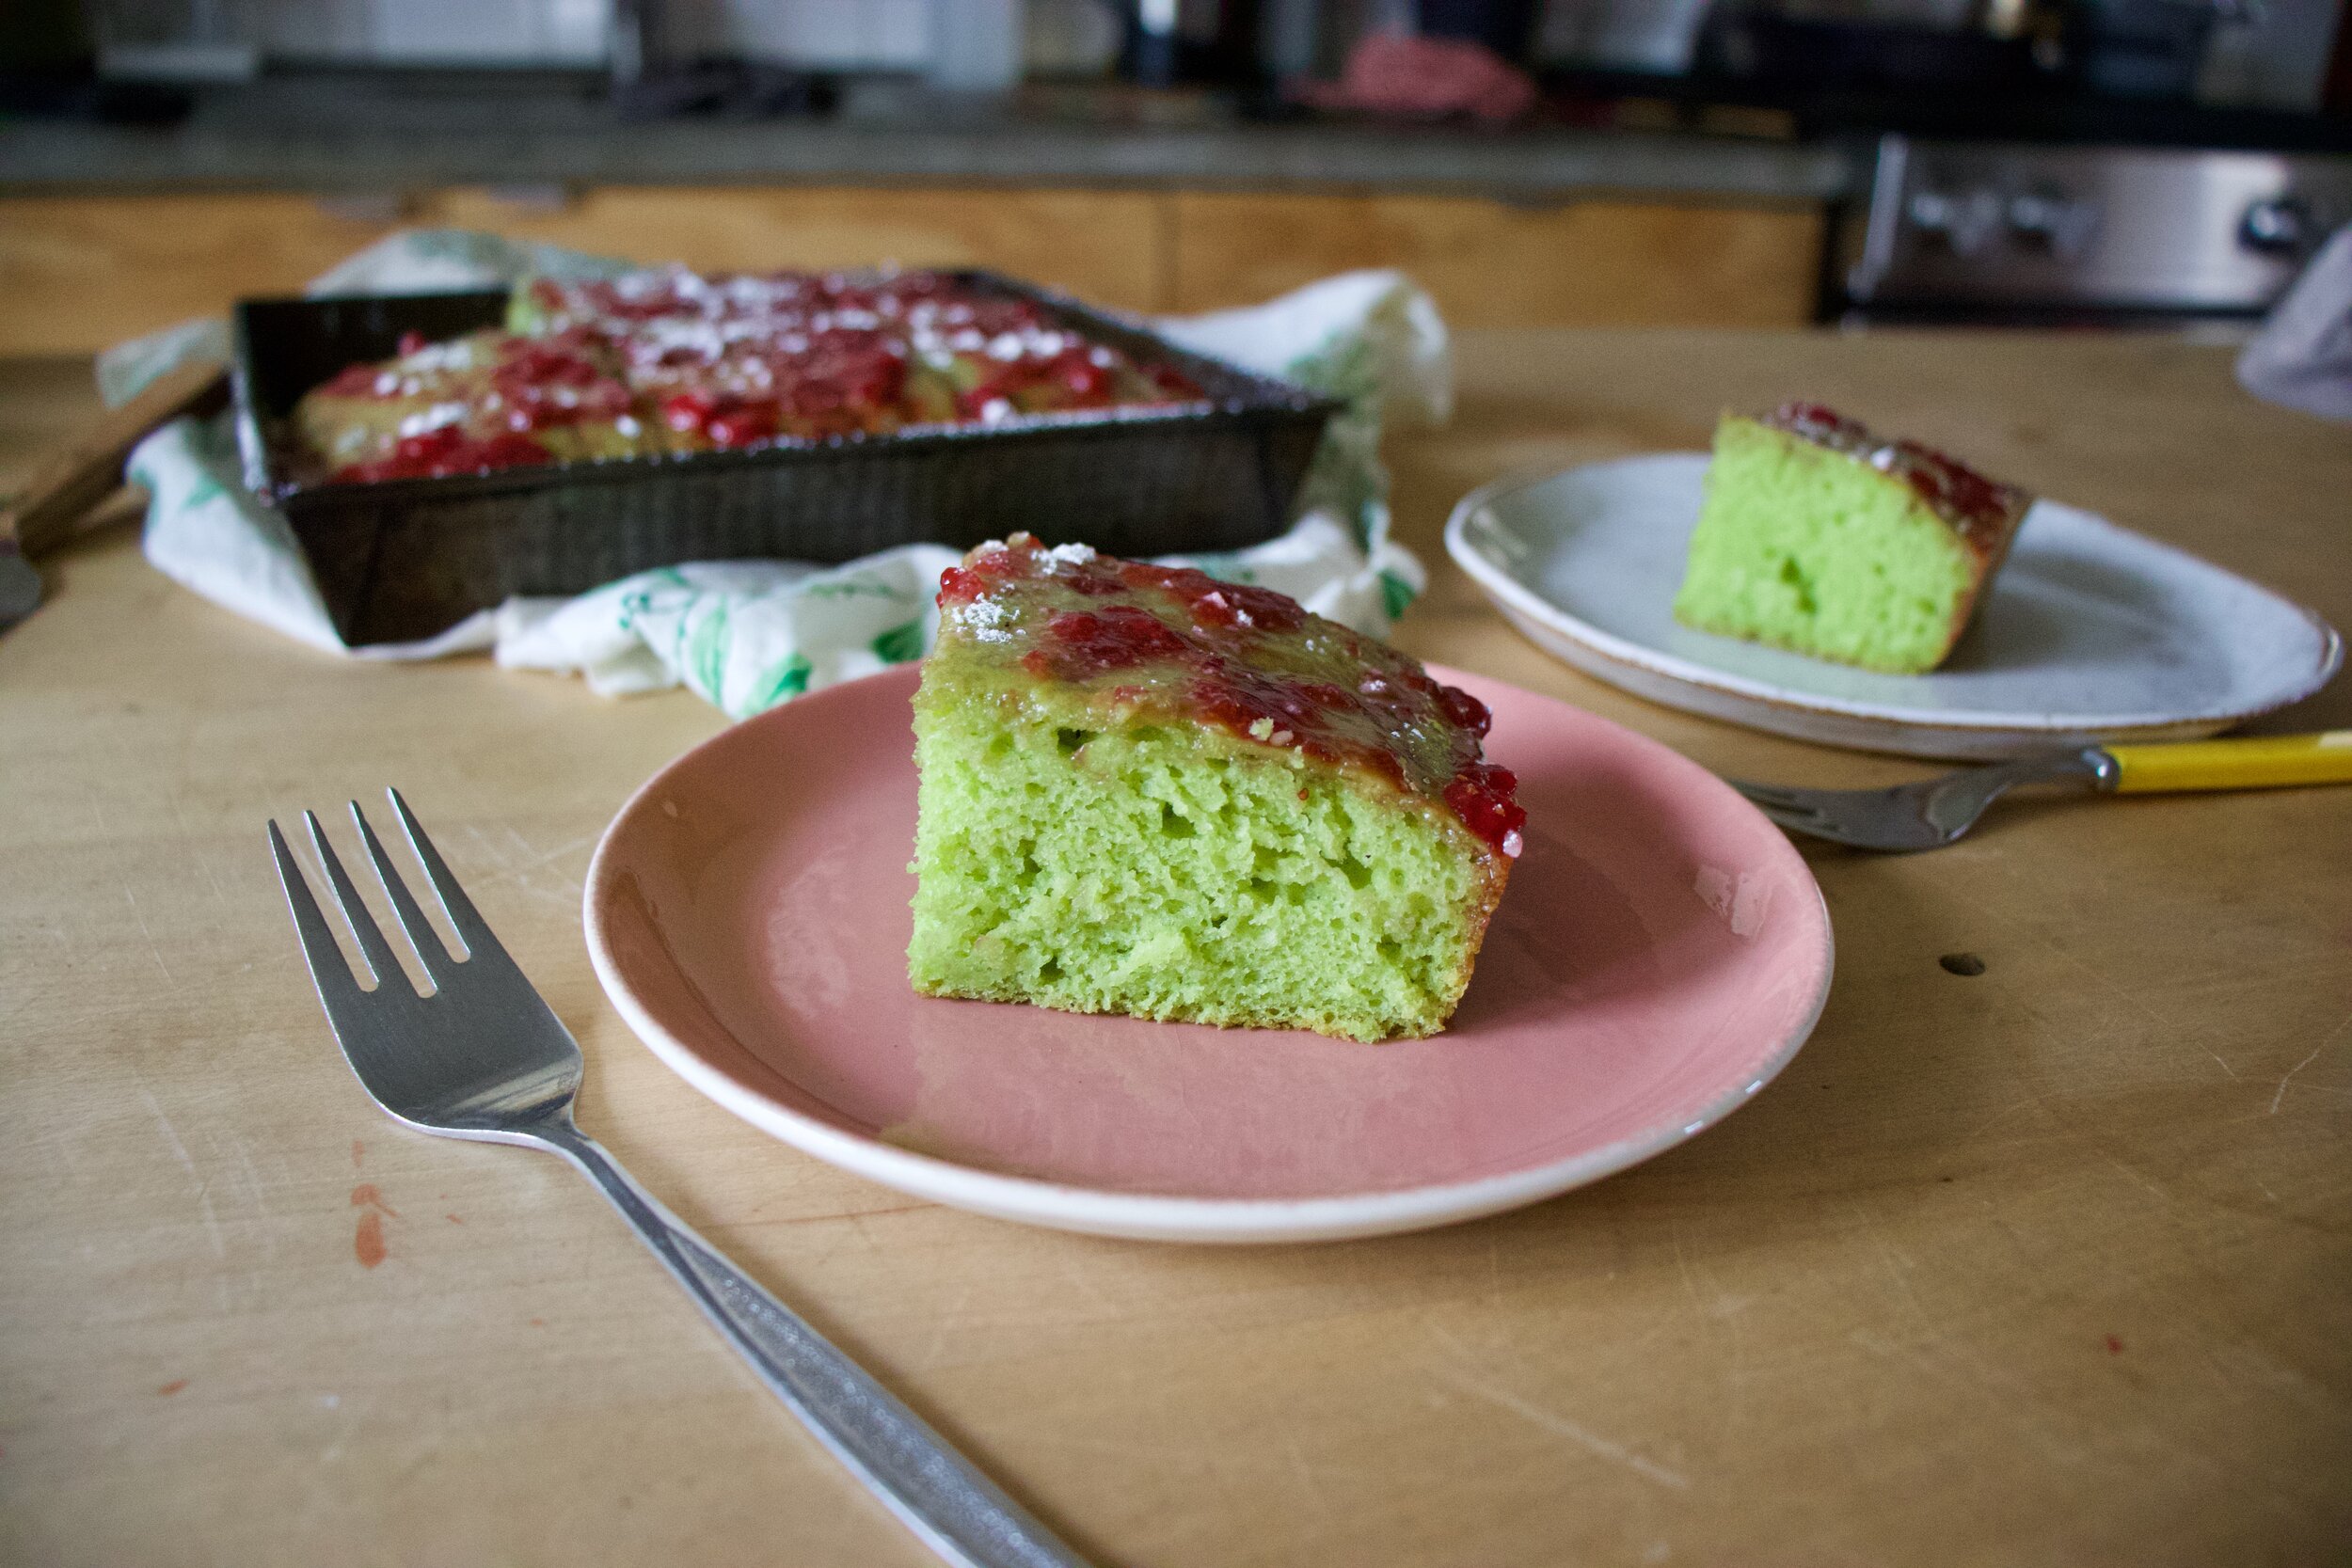
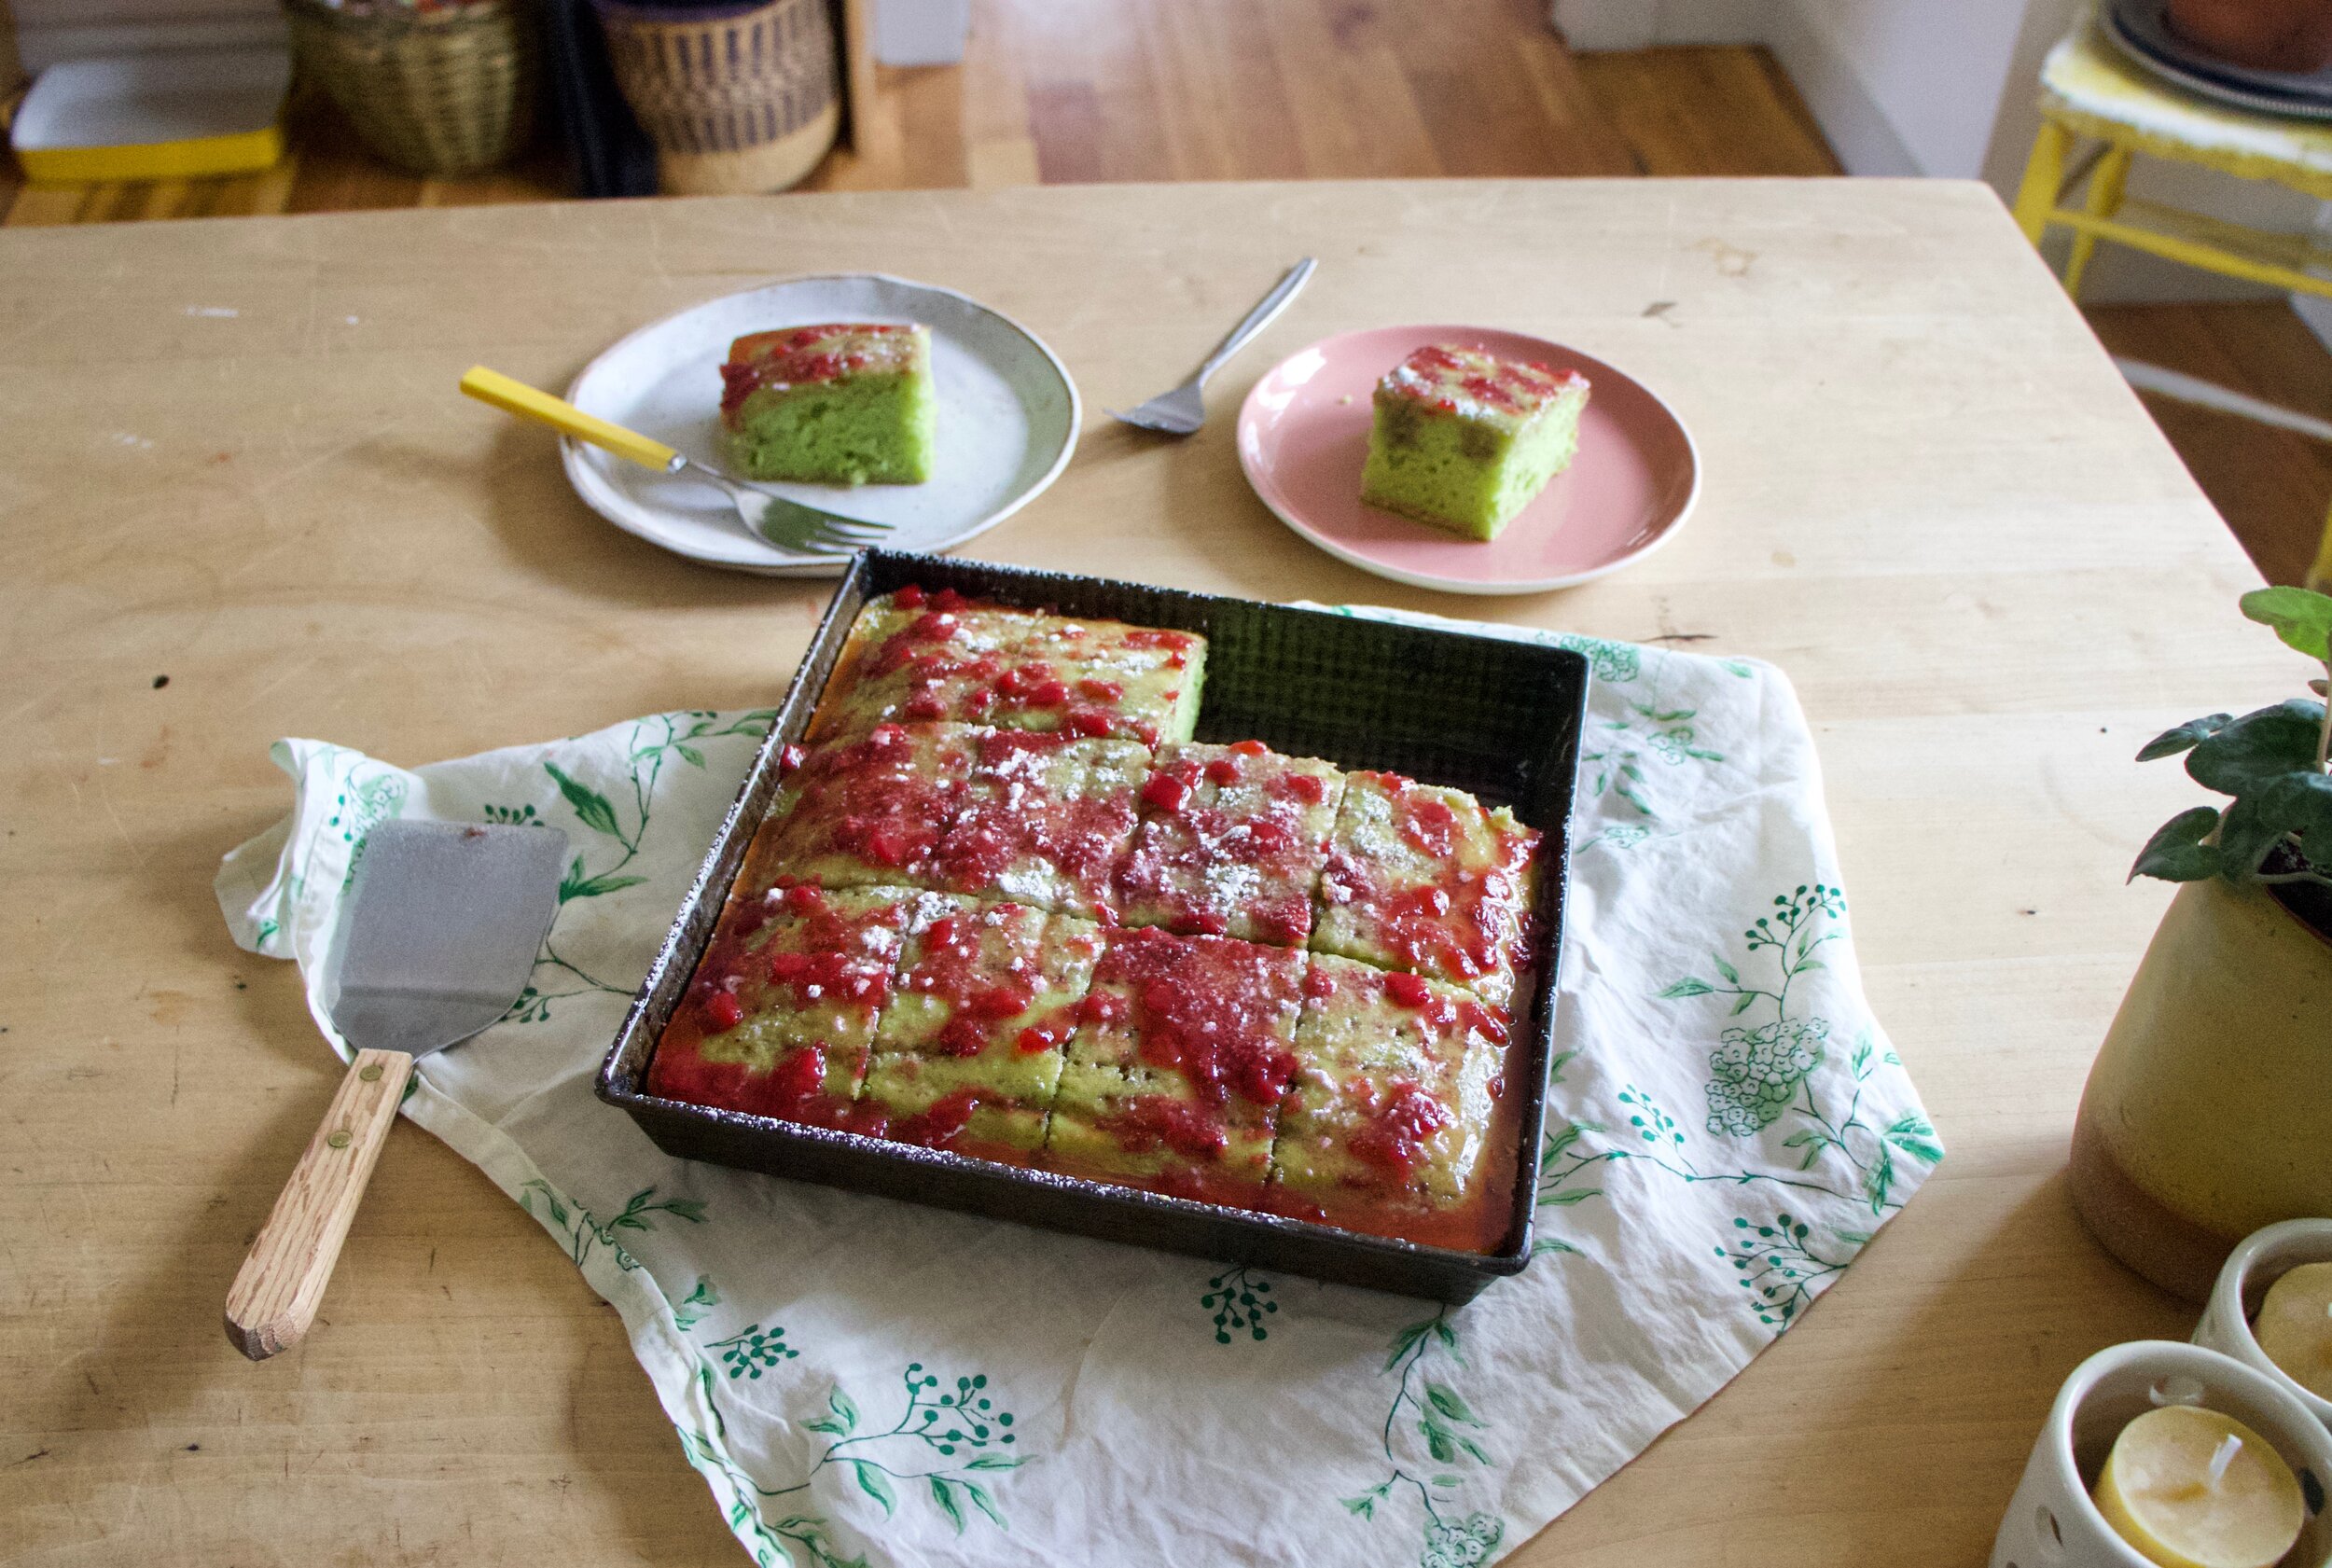
And glaze. Warm up the jam in the microwave on on stove until loose then mix jam with powdered sugar.

When the cake has cooled, grab a fork and stab holes all over so when you pour glaze on it will kind of seep into said holes.

Pop cake back into pan (or don’t if you dont want too) and pour glaze all over top.

A dusting of powdered sugar for looks and done and done. Cut into squares, pop a piece on a plate, and snack away.

-C


Sweet Pea Snack Cake with Strawberry Glaze

makes a 9x9 cake

  • 2 cups all purpose flour

  • 3/4 cup white sugar

  • 1 1/3 cups sweet peas (fresh or frozen and thawed)

  • 1 cup water

  • 1/3 cup oil

  • 1/2 teaspoon salt

  • 1 teaspoon baking powder

  • 1 teaspoon baking soda

  • 1 tablespoon vinegar

  • 1 cup powdered sugar

  • 3 tablespoon strawberries jam or preserves

Preheat oven to 350

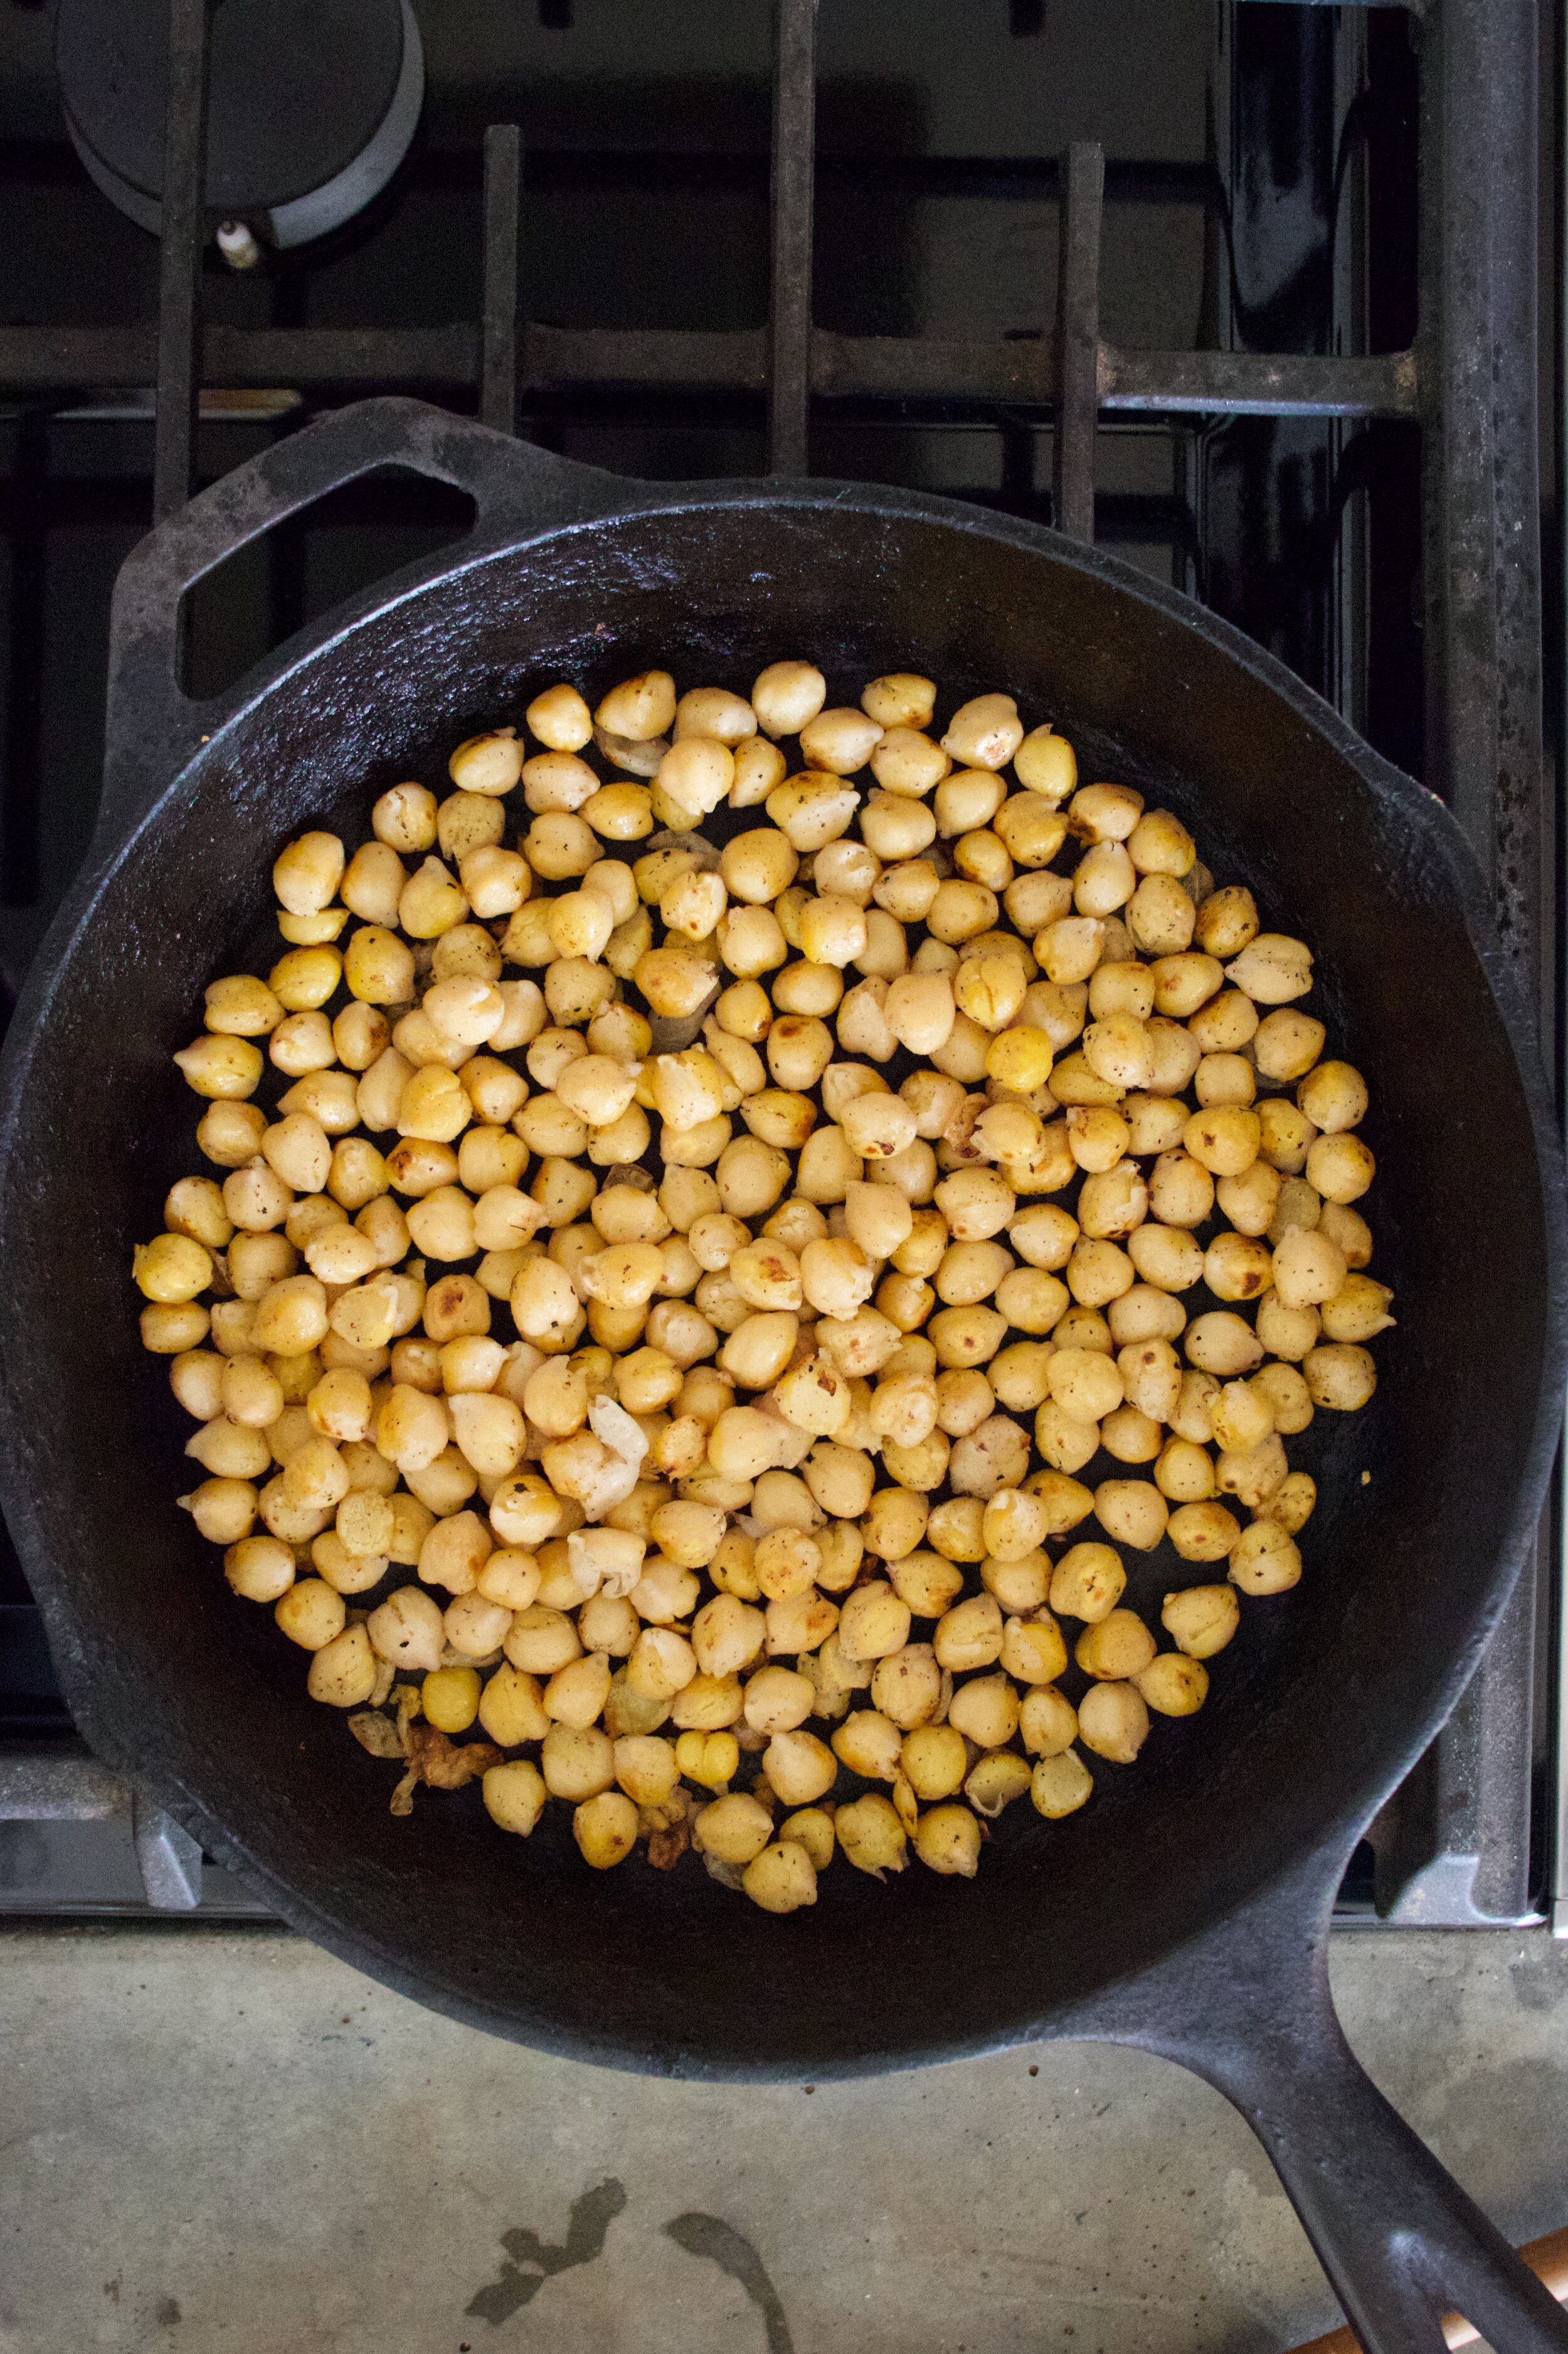
Place peas into blender ans blend until smooth. Add in oil and sugar and blend until incorporated. Next add in baking soda and powder and then flour on top. Grab a spoon or spatula and mix a little to give the batter a head start then add int he water and vinegar. Pulse in blender for a few seconds, scrap sides, then pulse again until it just become a cohesive batter. Don’t oven blend it or that cake will be tough.

Pour batter into a well greased 9x9 baking tin and place into hot oven. Bake for about 25 minutes or until golden brown and a tester comes out clean. When it is done, pop out of oven and pop cake out of tin to cool on a wire rack.

Once cake is cooled, place back into baking pan. Mix together the powdered sugar and jam then either microwave it or heat on stove for 30ish seconds until warmed and pourable. Grab a fork and stab holes all over top of cake then pour glaze all over.

Sprinkle some more powdered sugar on top for looks, but other then that, it’s now time to eat.

Cake that is not eaten is best keep at room temperature for 2-3 days. Can be frozen too.

In cake, Dairy Free, desserts, fruit, quick and easy, Sweets, Vegan, Vegetables Tags Sweet Pea Snack Cake With Strawberry Glaze, cake, vegan, dairy free, plant based, peas, dessert, snack cake, homemade, mothers day, spring, blender cake, easy, fast, green cake
Comment

Peanut butter and Veggie Sandwich

May 2, 2020 Colleen Stem
IMG_7640.jpg
IMG_7691.jpg

Why is it when I bring up anything that has to do with savory peanut butter, people get all wild and weird about it? There has been some misinformation that has seeped into peoples brains that told them that peanut butter cannot be savory, that it must be paired with something sweet and sugary.

Well I am here to tell you that that is bull shit and while peanut butter does go amazingly with all things sweet and or fruity, it is almost more fantastic with savory notes and veggies. Seriously, I eat peanut butter all the freaking time, and most of that time it is has garlic, vinegar, and some hot sauce mixed into it. To dip carrots and cabbage into of course.

This sandwich is basically that. Peanut butter mixed with a few spices and loaded with veggies. Sure ok, some of you might be a little skeptical, that is how you were raised. Peanut butter and jelly. Peanut butter and fluff. Peanut butter and banana. I get it, because that was me when I was a kid too. But then I grew up and my taste for great things grew up too, which lead me to this sandwich.

So trust me. It will probably be one of the best peanut butter sandwich situations that you will ever stick in your mouth. Plus what do you got to lose? It is a one sandwich, basically no time invested, easy as can be, adventure. One that will change your view of peanut butter and maybe even your life in all the good ways. For reals.

Now to the peanut butter and veggie sandwich!

IMG_7615.jpg

The stuff. Peanut butter, soy, apple cider vinegar, garlic powder, black pepper, ginger, and red pepper flakes. Also bread and lots of sliced up or shredded veggies. I used red onion, shredded cabbage and carrot, cucumber, sliced fresh green beans, and spinach.

First you pile your veggies together and dump a little vinegar on to them. Also add a little pepper and toss a bit. I did it right on the cutting board. No need to dirty another bowl if you don’t have to.

IMG_7620.jpg
IMG_7625.jpg

Now for the peanut butter spread. Mix the soy, rest of vinegar, the garlic, ginger, and red pepper flakes all together with the peanut butter. Add a tiny splash of water to loosen it up if needed. Mix until completely incorporated. And then dip your finger and taste it. Add more soy or spices if you want.

IMG_7645 2.jpg

And then you spread the peanut butter all over the bread.

IMG_7649.jpg

Top with the veggies that have been sitting a good couple minutes in the vinegar.

Close up the sandwich, cut in half…

IMG_7682.jpg

Eat.

I know, I know. Life is pretty swell, especially with a peanut butter and veggie sandwich.

You’re welcome.

-C


Peanut butter and Veggie Sandwich

makes 1 sandwich

  • 2 heaping tablespoons peanut butter

  • 1/2 teaspoon each ground ginger and red chili flakes

  • 1/2 teaspoon garlic powder

  • 2 tablespoon apple cider or red wine vinegar

  • 1 tablespoon soy

  • splash of water

  • Veggies. You can use any or all of the following . Red onion, shredded cabbage, shedded carrot, sliced cucumber, green beans, spinach.

  • 2 slices of some good ass bread

Start by placing all the veggies you are adding to the sandwich into a little pile and drizzle about a tablespoon of vinegar. Add ground black pepper and toss around a little. You can do this in a bowl, but just on a cutting board works too.

Next mix the peanut butter, tablespoon of vinegar, ginger, garlic, red chili flakes, and soy together until completely incorporated. Add a splash of water if needed to loosen a bit if it gets to thick to stir. Then taste. If you think it needs more heat, add more chili flakes, or more saltness, add a splash more soy.

And now spread the peanut butter all over the two slices of bread. Each side get equal amounts. Grab the veggies and pile them on, close sides together, and cut in half.

Eat. And yes, feel free to make another.

In sandwiches, Vegan, Vegetables Tags peanut butter and veggies sandwich, sandwich, vegan, food, plant based, picnic, gluten free, dairy free, healthy, easy, quick, kid friendly, savory peanut butter, peanut butter, vegetables, fresh
Comment

Carrot Ginger Brown Rice Pilaf

April 25, 2020 Colleen Stem
IMG_7607.jpg
IMG_7559 2.jpg

Do you have a shit ton of rice? I know of at least a few people that might have gone overboard with their rice stock so I think it might be safe to assume that many more did too. And that’s cool, just as long as you eat it. No one like a food waster.

But are you bored with plan rice? Well I got you. Rice is so easy to jazz up. Add a little this, add a little that, and you’ve got yourself a rice dish among the greats. Even better, toast the rice a little before cooking it and you end up with a even better, flavorful rice. That is fact.

Carrot ginger is a classic flavor combination and can pair with just about any other flavors so you don’t have to think too hard about what else to serve with it. And really, you could just eat a big bowl of the rice. There is no need for anything else. It has it all. Grain, veggies, and seeds or nuts… All you need is a fork (or spoon if you are like that) and an open mouth and you are golden.

Now to the rice pilaf!

IMG_7466.jpg

The stuff. Long grain brown rice, a couple carrots, some fresh ginger, garlic, an onion, soy sauce, olive oil, water, and pepper.

Grab onion and dice it up really small. Shredded or julienne the carrots.

IMG_7475.jpg
IMG_7476.jpg
IMG_7482.jpg

Add a couple of tablespoons of olive oil to a pot. Add in the onions and start on medium heat and let them cook for a few minutes. Then add in the carrots and keep cooking for a few more minutes until they become slightly tender.

Mince the garlic and the ginger.

IMG_7497.jpg
IMG_7499.jpg
IMG_7520.jpg

Add that freshly minced garlic and ginger to the pot and give it a good stir. Add in the rice now as well and cook for another few minutes , stirring it once or twice until you can smell the toasty-ness of the rice. Then add in the water and soy.

IMG_7532.jpg

Bring the pot to a boil then turn heat down to the lowest simmer. Pop a top on the pot and let cook, undisturbed, for about 30ish minutes, or until all the liquid has absorbed into the rice.

Once rice is cooked, grab a fork and fluff then pop the lid back on and let it rest for 5-ish minutes. Trust, this makes the rice so just do it.

And then the rice is done, all fluffy and flavorful. Add some green something for a little pretty and yum. Also added a handful of toasted sunflower seeds because why the heck not.

-C


Carrot Ginger Brown Rice Pilaf

makes 3-4 servings

  • 3/4 cup long grain brown jasmine rice

  • 1 1/2 cups water

  • 1 small onion

  • 2 carrots (about 2 cups shredded)

  • 2 tablespoons minced fresh ginger

  • 2 tablespoons soy sauce

  • 2-3 cloves garlic

  • 2 tablespoon olive oil

  • pepper

  • 1/2 cup toasted sunflower or any other seeds or nuts you have on hand (optional)

Start by dicing up the onion and shredding or julienning the carrot into small pieces. Place into medium pot along with olive oil and set on medium heat. Cook for a few minutes until the slightly tender.

Mince garlic and fresh ginger and add it to the pot with carrots and onions. Add in dried rice too and keep cooking on medium heat until the rice smells toasty. Add in the soy and the water. Bring pot to a boil then reduce to lowest simmer you got. Place a lid on top and cook for 30ish minutes or until the rice has absorbed all the liquid.

Once the rice has the liquid, remove the pot from the heat and fluff it with a fork. Place lid back on pot and let the rice rest for 5ish more minutes.

Then eat. I think adding a handful of some crunchy seeds or nut and maybe something green only adds to the rice so go for it if you have it around.

In grains, side dish, Vegan, Vegetables, dinner Tags Carrot Ginger Brown Rice Pilaf, grains, whole grains, rice, vegan, food, pilaf, healthy, plant based, dairy free, dinner, easy, homemade, fresh, yummy, simple
Comment

ChickPeas and Peas

April 18, 2020 Colleen Stem
IMG_7395.jpg
IMG_7403.jpg
IMG_7446 2.jpg

I am all about the quick meal. Sure I love me some kitchen time, but sometimes I just want good food good and fast. Chickpeas lightly sautéed, tossed with fresh green peas, thin pieces of raw onion, and tahini sauce. Sounds easy and so simple right? Well it is, simply freaking fantastic.

I am also thinking ahead to those summertime cookouts or when people are flowing through the house in need of food. This is a definite dish to bring to a cookout of potluck dinner situation. You know, when we can do those things safely again. Until then, I make it and eat it to my face. Now you should too.

To the chickpea and peas!

The stuff. Chickpeas, peas, an onion, some tahini, soy sauce, red wine vinegar, and a little oil. Also need a splash of chickpea waster or regular water. And pepper, if you want it.

IMG_7318 2.jpg
IMG_7333.jpg

Tahini, soy, vinegar, and a little bit of chickpea water. Stir until smooth and creamy.

Cut up onion, nice and thin like.

IMG_7335.jpg

Now sauté chickpeas. Drain and rinse the beans and lightly coat a pan with oil. Toss chickpeas into pan on medium high heat and cook until they start to brown.

IMG_7351.jpg
IMG_7357.jpg

Once the chickpeas have somef dark color, toss in the peas and the onion. Mix it all tougher and turn heat off.

Dump it all into the bowl with the tahini sauce and mix it all together.

IMG_7446.jpg

Add pepper, grab a fork, eat.

-C


ChickPeas and Peas

Serves 1-4 people

  • 2 1/2 cups (or one can) cooked chickpeas

  • 2 cups fresh or frozen (and thawed) green peas

  • 1 small onion

  • 1/4 cup tahini

  • 2 tablespoon red wine vinegar

  • 1-2 tablespoon soy sauce/tamari/liquid aminos

  • a couple teaspoons olive oil for pan

In a medium sized bowl mix together the tahini, lesser amount of soy, and vinegar. Stir until smooth, adding in a splash or chickpea or regular water to thin out until it is the consistency of heavy cream. Taste. If it needs more soy, add a little more in until it tastes right.

Grab the onion and slice it up, really thinly and into small pieces.

Place a large skiller on medium high heat on stove. Add in a couple teaspoons olive oil to coat. If the chickpeas are still in water, rinse and drain. Dump drained chickpeas into hot skillet and cook for about 5-7 minutes or until they start turn deep brown on some sides. Throw in the peas and the onions, turn heat off, and mix around. Let sit in hot pan for a minutes or two then dump it all into the bowl with the tahini sauce. Mix it all around, add some cracked pepper, then, eat.

In Vegetables, Vegan, pulses, beans Tags ChickPea and Peas, salad, vegan, beans, chickpeas, spring peas, easy, tahini, gluten free, plant based, dinner, protein, simple, fsat, BBQ, grain free
Comment

Beans and Greens on Toast

March 21, 2020 Colleen Stem
IMG_6763.jpg
IMG_6778.jpg
IMG_6752.jpg

It was a toss up this week. Share this recipe or share home remedies for flatulence!!!! Mah haha! (But honestly, should I share some home remedies for bloating and the toots?)

Ok, so we all know what is going on in the world at the moment and jeezm fuck. I’ll leave it at that.

Word on the streets (or in the news) is that everyone and their mom went out the past few weeks and stock piled a shit ton of food, especially beans. And you know what, that’s cool because beans are amazing and sometimes the silver lining behind bad shit is that you discover something magical. Like beans.

But there is also the issue of all the food people stocked up on in a slight frenzy and might not have had exact intentions for it. Maybe some greens? Did you buy greens? Are they, right now, sitting in your fridge, maybe a little sad, getting neglected because you have been binge eating up the rest of the girl scout cookies like what?

Well maybe this is a good time to use those greens before they go completely bad and you end up tossing them. Even though shit is mad crazy right now, we need to get perspective, especially on food. Waste is preventable. You don’t need to be that person. If you bought it, you for sure better be eating it.

But let me be clear. This is not just a recipe to use up greens and beans because you have to. No no no. These beans and greens are so freaking delicious. It is spring after all and greens are so bountiful and amazing right now. All I want to do is stuff handfuls of the tender green things into my mouth. After months of roots on top of roots, I could gladly eat nothing but greens for the next month. (Until all the other spring veggies start growing!)

This dish is quick and easy and tasty as AF. You can use any type of bean that you have, pretty much any greens you have, and any bread you have. As for the tahini sauce that gets drizzled on top, if you don’t have tahini, you can make it with another nut butter or just use some other dressing situation. It really is that simple and adaptable. And delicious and nutritious. All the boxes are checked!✔️

Now to the beans and greens on toast!

The stuff. Beans, greens. bread, tahini, an onion, a lemon, a little garlic powder, salt and pepper, and olive oil.

Chop onion.

Onions into a skillet with a touch of oil. Cook until soft.

IMG_6722.jpg

Once onions are soft, toss in the beans! Keep on heat and cook for a few minutes.

And lastly the greens. Right on in, just mix then around and let them wilt down to your preferable wiltedness.

IMG_6706.jpg
IMG_6708.jpg

Tahini sauce. All you do is mix the thin with lemon, garlic, a little pinch of salt and pepper, and water until it is creamy.

Lastly, toast the bread. I used a skillet but use the toaster or oven. Whatever you want to do.

And that is it. Toast on plate, pile on the beans and greens and get that tahini sauce drizzled also over!

IMG_6775.jpg

Now eat. And revel in the greatness of all the good that is now in your mouth!

Stay safe and healthy and aware!

-C


Beans and Greens on Toast

Serves 1

  • 2 cups cooked or canned beans (I used navy but any bean will work)

  • 2-3 large handfuls of greens (I used a mixture of spinach, kale, and chard, but again, any green will do, even romaine or spring mix)

  • 1 small onion

  • 2 pieces of bread

  • a lemon (you can sub a tablespoon vinegar if you don’t have a lemon)

  • a tablespoon or so water

  • a clove of garlic minced or a pinch of garlic powder

  • olive oil

  • salt and pepper

First dice up the onion and toss into a medium sized skillet with a drizzle of olive oil and a pinch of salt. Place on medium heat and cook until soft which should take about 5-6 minutes. Once cooked, add in the beans and stir around.

Let those hang out for a few minutes and start the toast. I think you can figure out how to make toast so I will let you do that. Also make the tahini sauce. Mix the tahini, the juice of the lemon, garlic, and a pinch of salt and pepper together until completely incorporated. Drizzle in enough water to thin it out to a drizzle-able consistency.

After beans and onions have had the past few minutes to warm and cook, toss in all the greens and a splash of water. Cook for another minutes to 2 or until greens have wilted.

Grab a plate, place toast on plate, pile the beans and greens on toast then drizzle all the tahini sauce on top. Season with salt and pepper if needed.

Smile and then eat.

In beans, bread, dinner, Vegan, Vegetables Tags beans, greens, toast, no waste, vegan, food, healthy, dried beans, canned beans, white beans, pulses, gluten free, protein, plant based, healthy dinner, quick and easy, spring, greens about to go bad, fresh greens, food recipes, dairy free
Comment
← Newer Posts Older Posts →
 

https://thelovelycrazy.squarespace.com/config#/|/about/

Me. Food Maker.Food eater. Woo HOO!

STEM+NODE  SMALL BATCH AND ONE OF A KIND POTTERY

stem+node ceramics


____________________

Subscribe

GET NEW POSTS IN YO EMAIL

You are AWESOME!!!


@thelovelycrazy 2014-2021