• stem+node ceramics
  • HOME
  • Food Recipes
  • About
  • Contact
Menu

The Lovely Crazy

Street Address
City, State, Zip
Phone Number

Your Custom Text Here

The Lovely Crazy

  • stem+node ceramics
  • HOME
  • Food Recipes
  • About
  • Contact

Black Bean Tortilla Chips

May 5, 2018 Colleen Stem
IMG_1812 2.jpg
IMG_1840.jpg

The mr has a soft spot for tortilla chips. He doesn't get chips often, but when he does it is usually the super fried, super salty, in a plastic bag, tortilla chips. And I am ok with that because it is not often and the dude deserves chips when he wants them. But I hate how crappy they are for him, especially all the salt. So much salt that I can smell it in my mouth (yes, I said that right). So, as with everything else we eat in the house, I now make chips from scratch. (Slowly I have eliminated just about everything that is pre packaged and started making it myself. I think it's pretty much just the dried pasta and the mr's yogurt and cheese that I haven't gotten to.Yet.) This way he can eat his chips and I don't have to sit there tasting the smell and thinking about the crap that he is eating.  I know I say this a lot, but lets just take a minute here and acknowledge how I really am the best girlfriend ever. 

Ok, now about these chips. I have made plan tortilla chips a few times before and figured it was time for a twist.  In come black beans. Why, because I was pretty sure beans were going to be awesome, and lo and behold, I was completely right. Adding the beans take little to no more effort then making the chips without, and bonus here, more fiber and protein and good stuff going into a chip. Then they are lightly oil, lightly salted, and eaten without any guilt because I made them and they are the best. Seriously, the mr thinks they are amazing and doesn't miss those pre package ones a bit.  And sure, they might take a little time and minimal effort, but really they are super easy and the time and effort to make them is probably no more then going into a store, waiting in line to pay, and driving home to eat your chips. You can have these chip made in that amount of time. So you might as well just make them.

To the chips. 

The stuff. Masa harnia, black beans, water, salt, and a little oil. There should be a lemon or lime here too, but I forgot to stick it into the picture. Oops. 

IMG_1707.jpg
IMG_1710.jpg
IMG_1713.jpg
IMG_1716.jpg

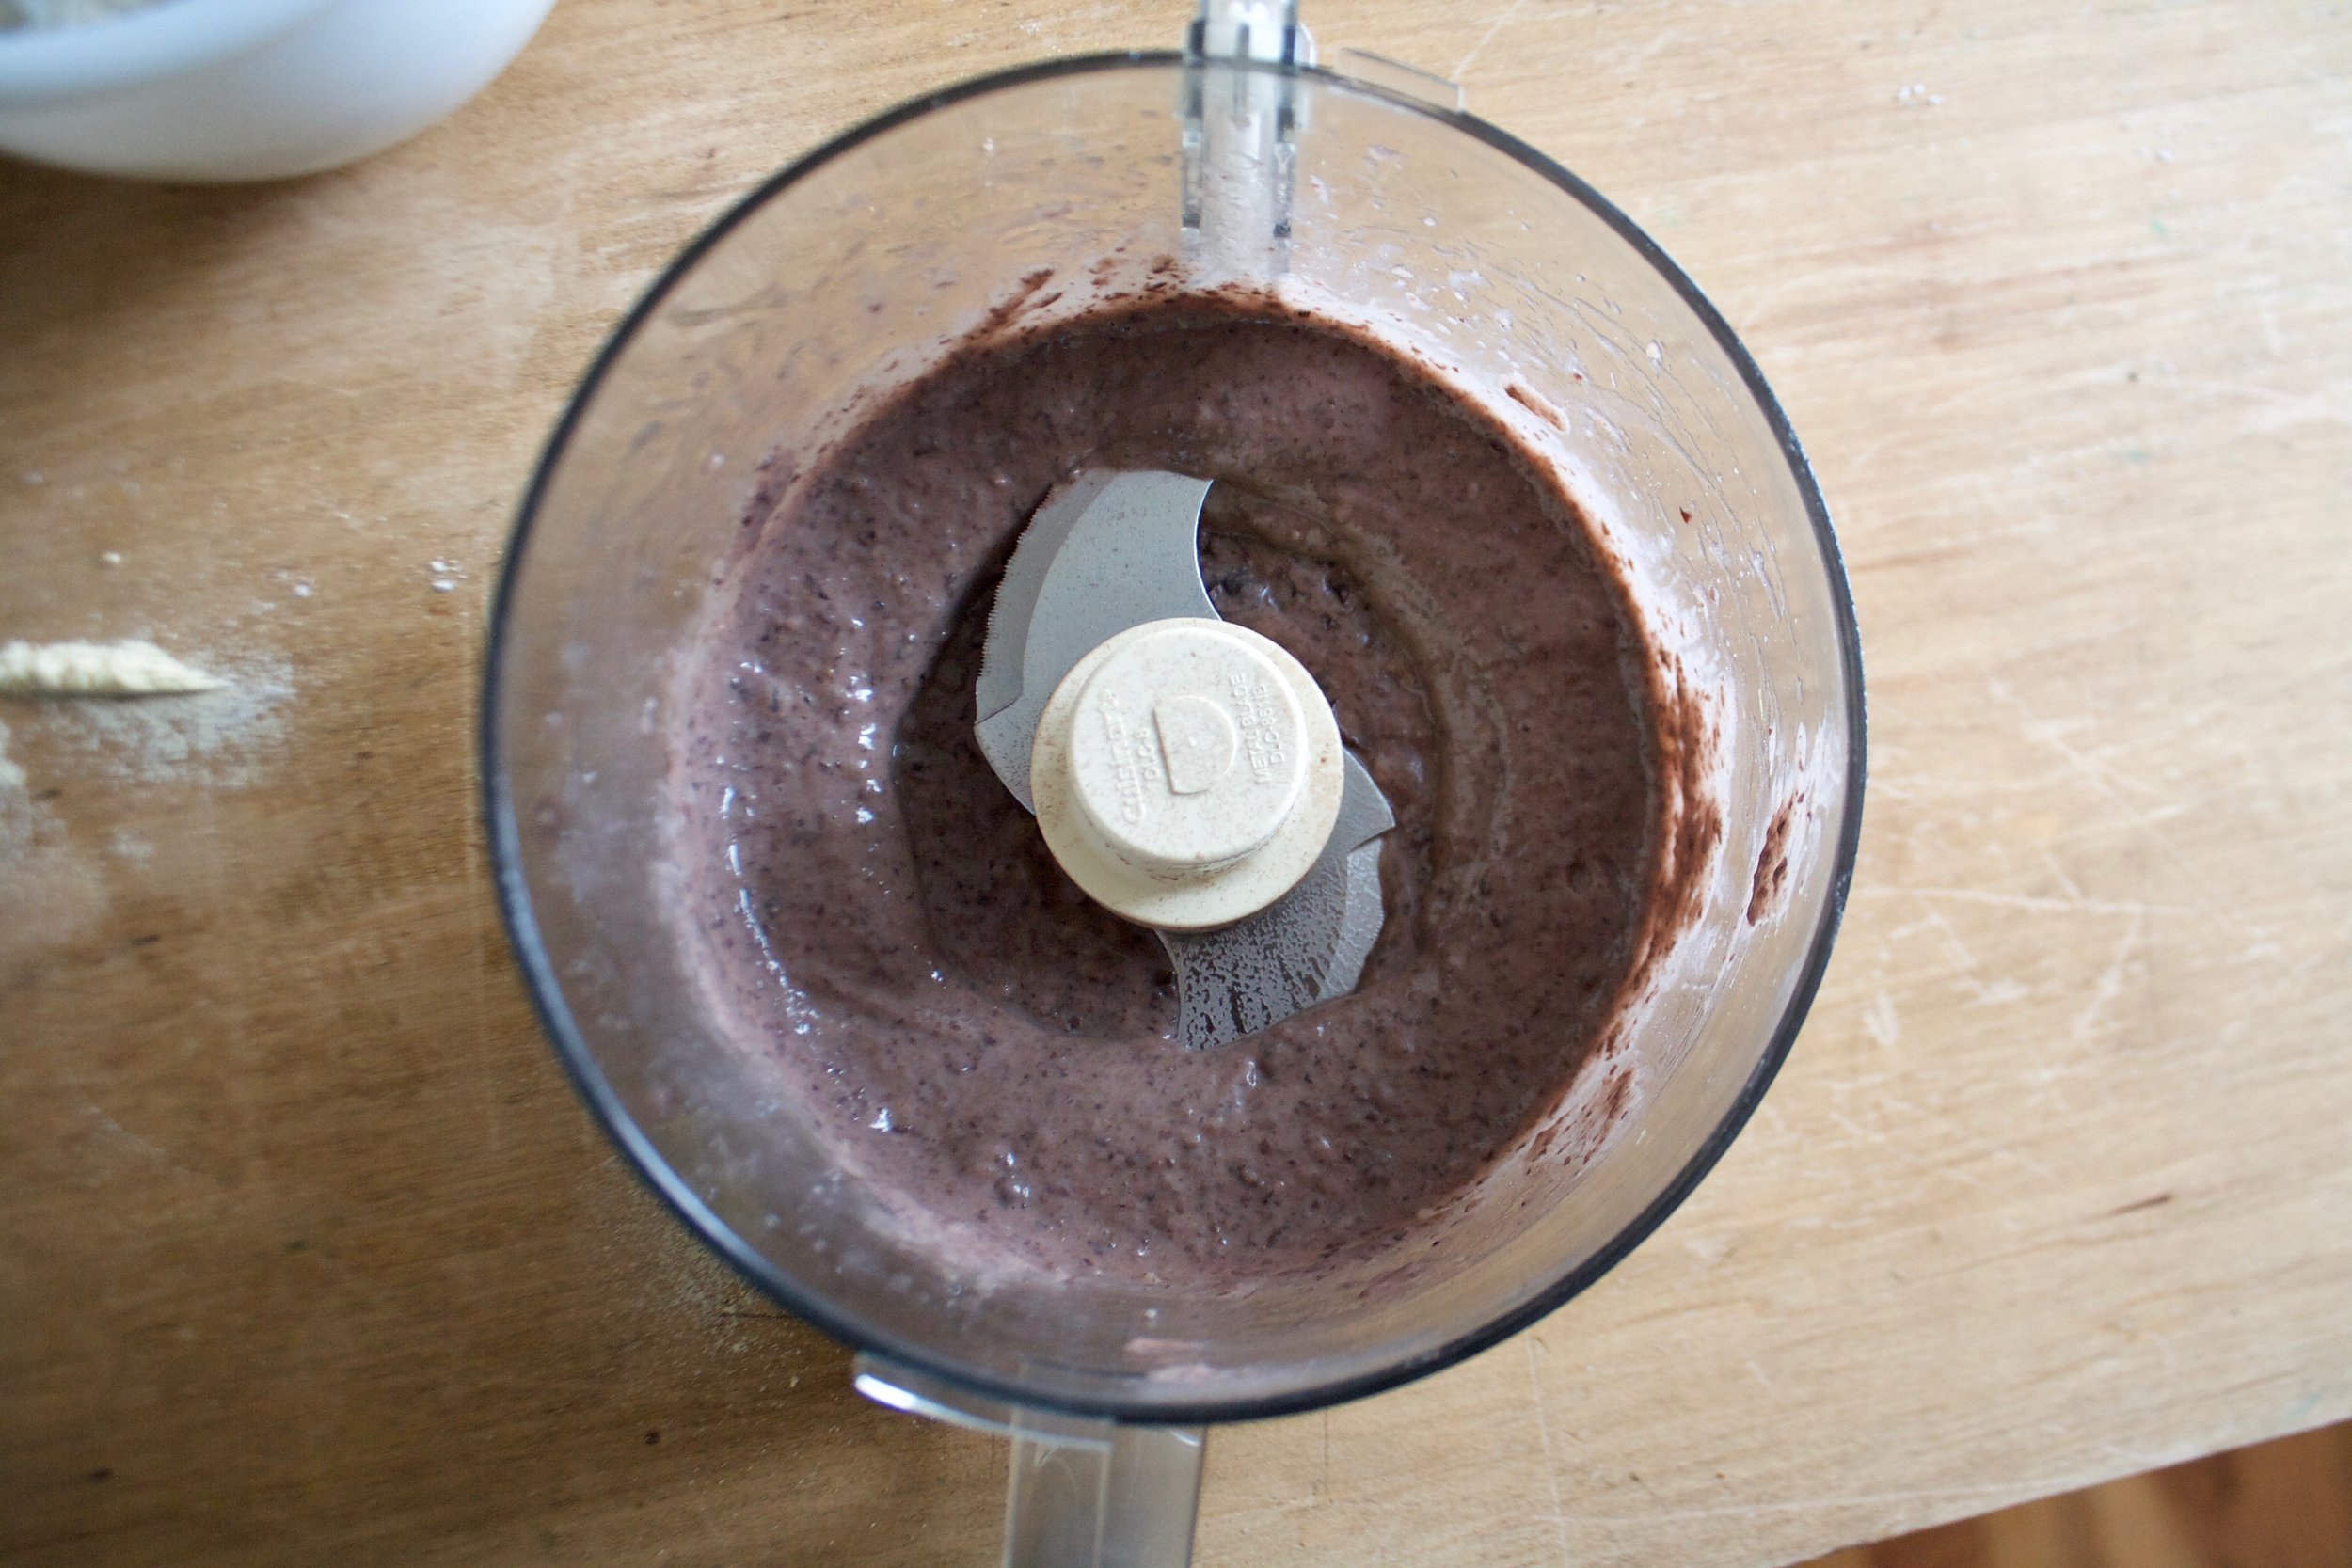
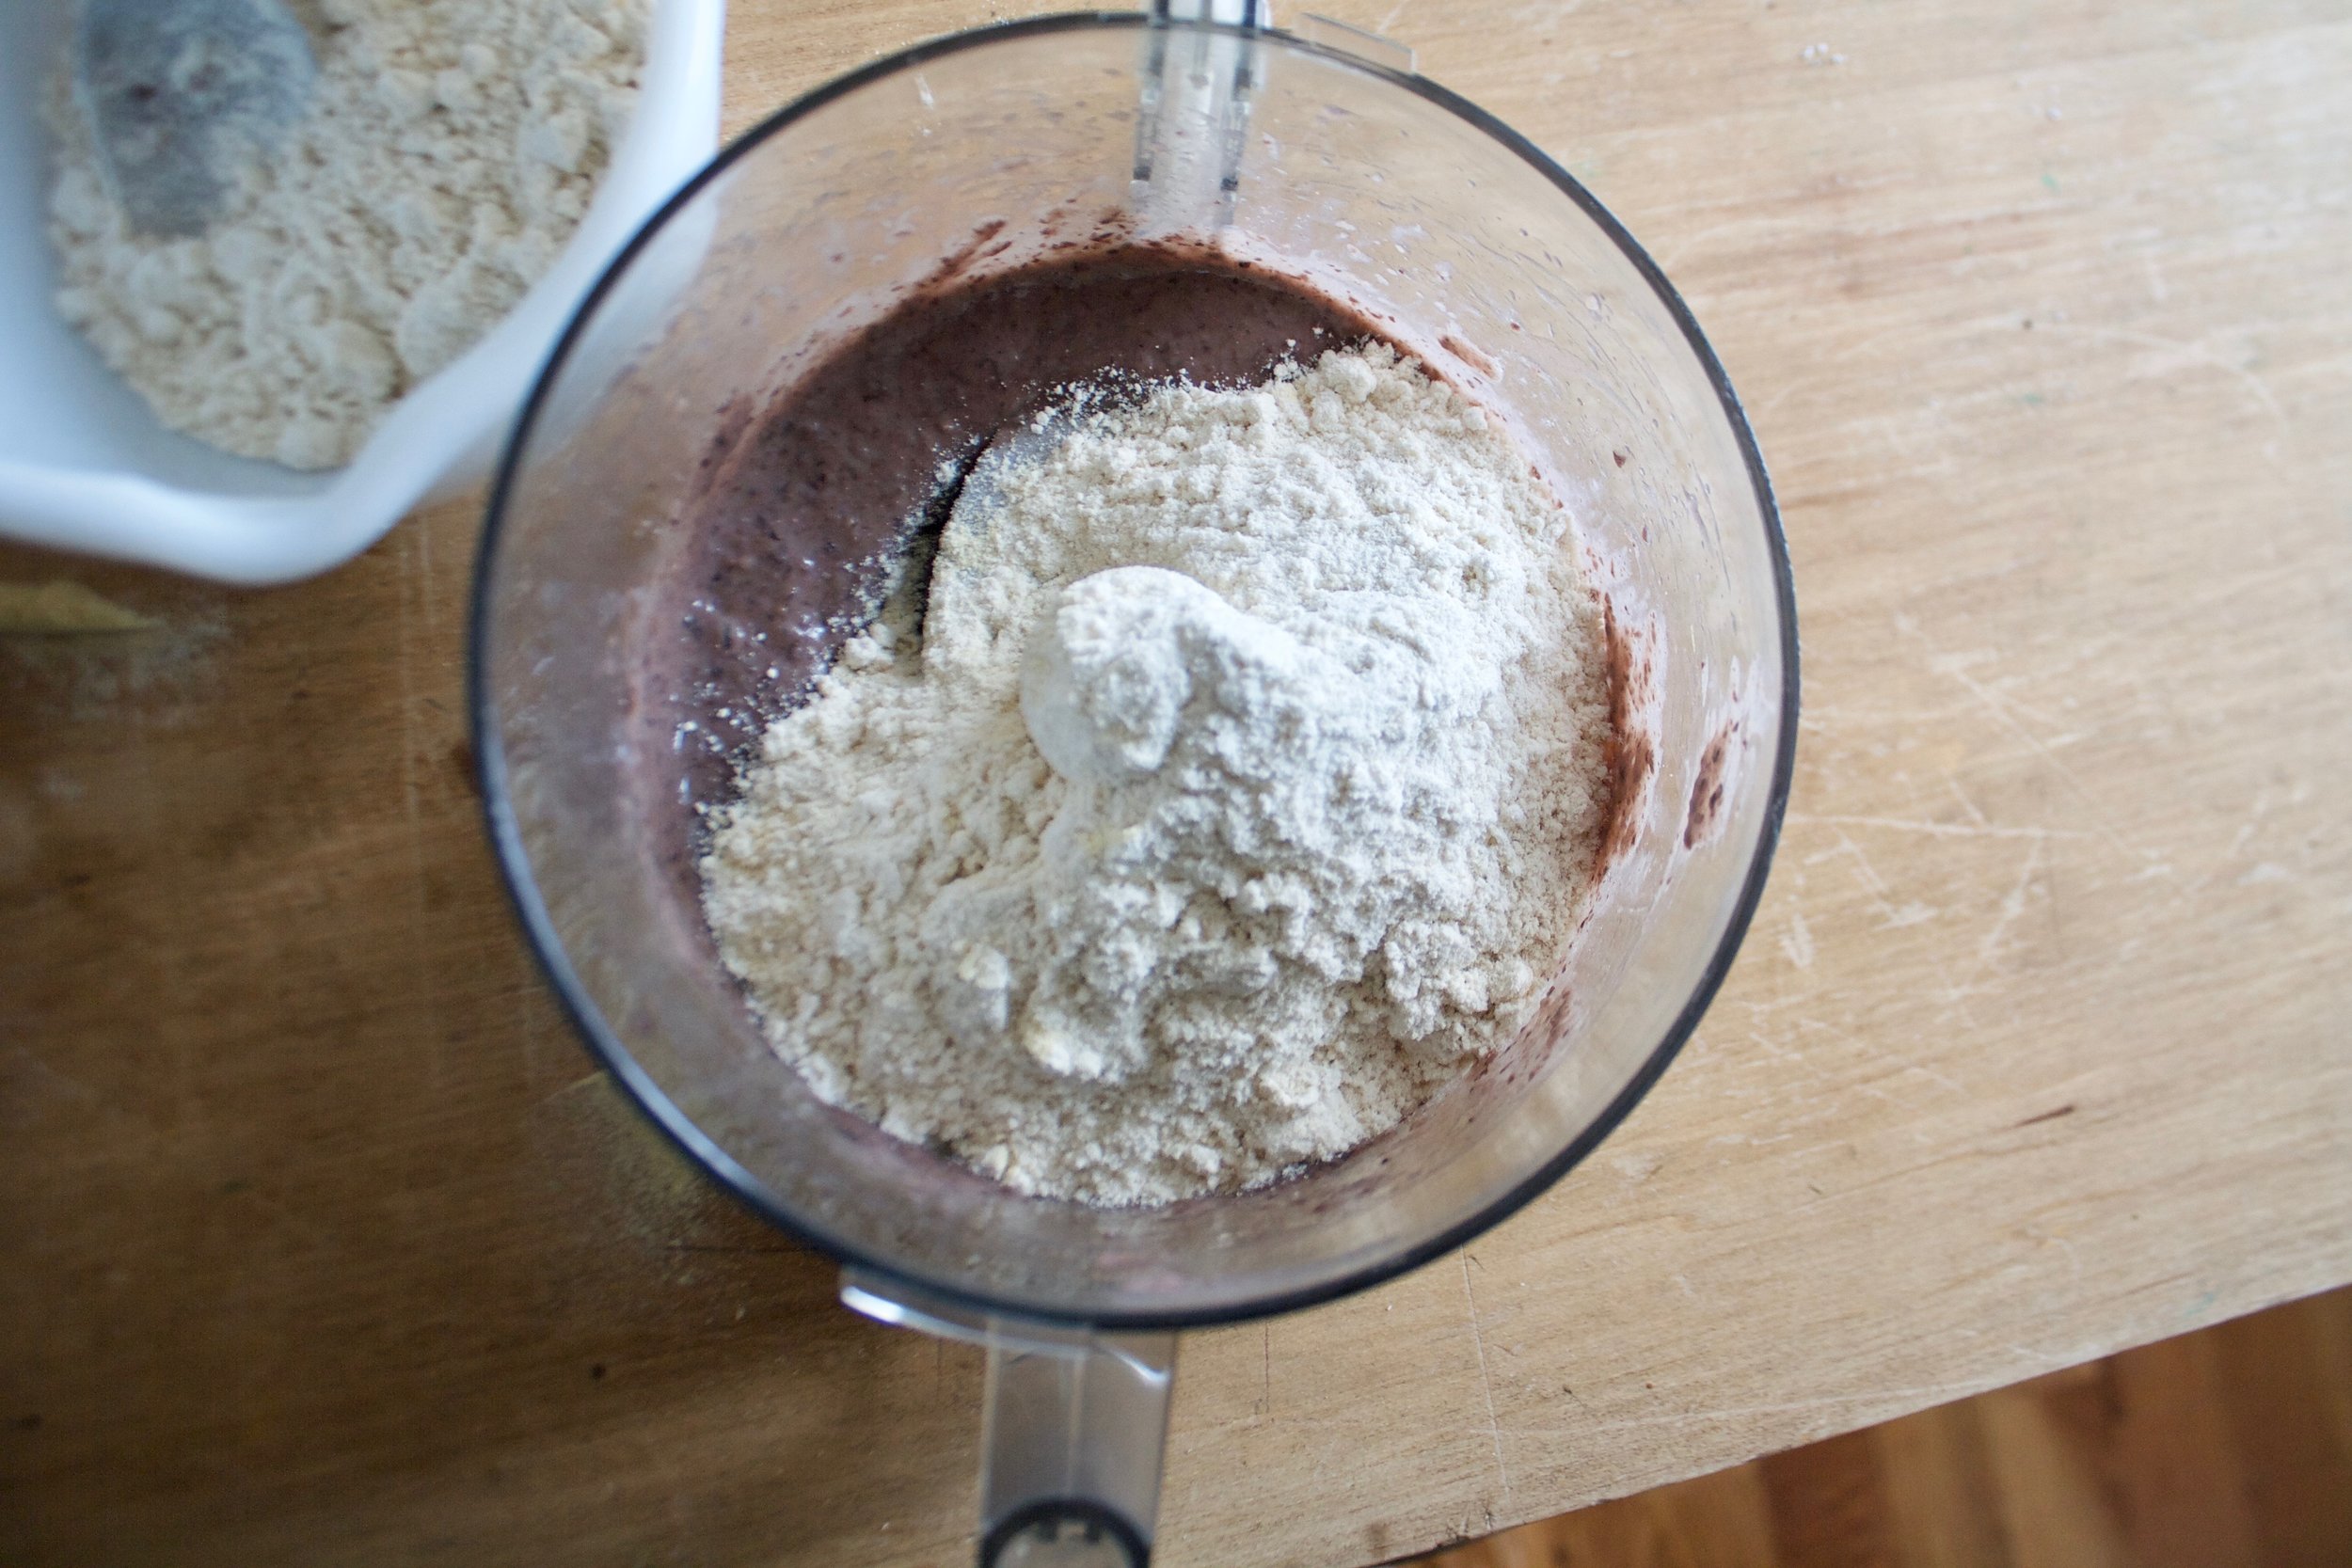
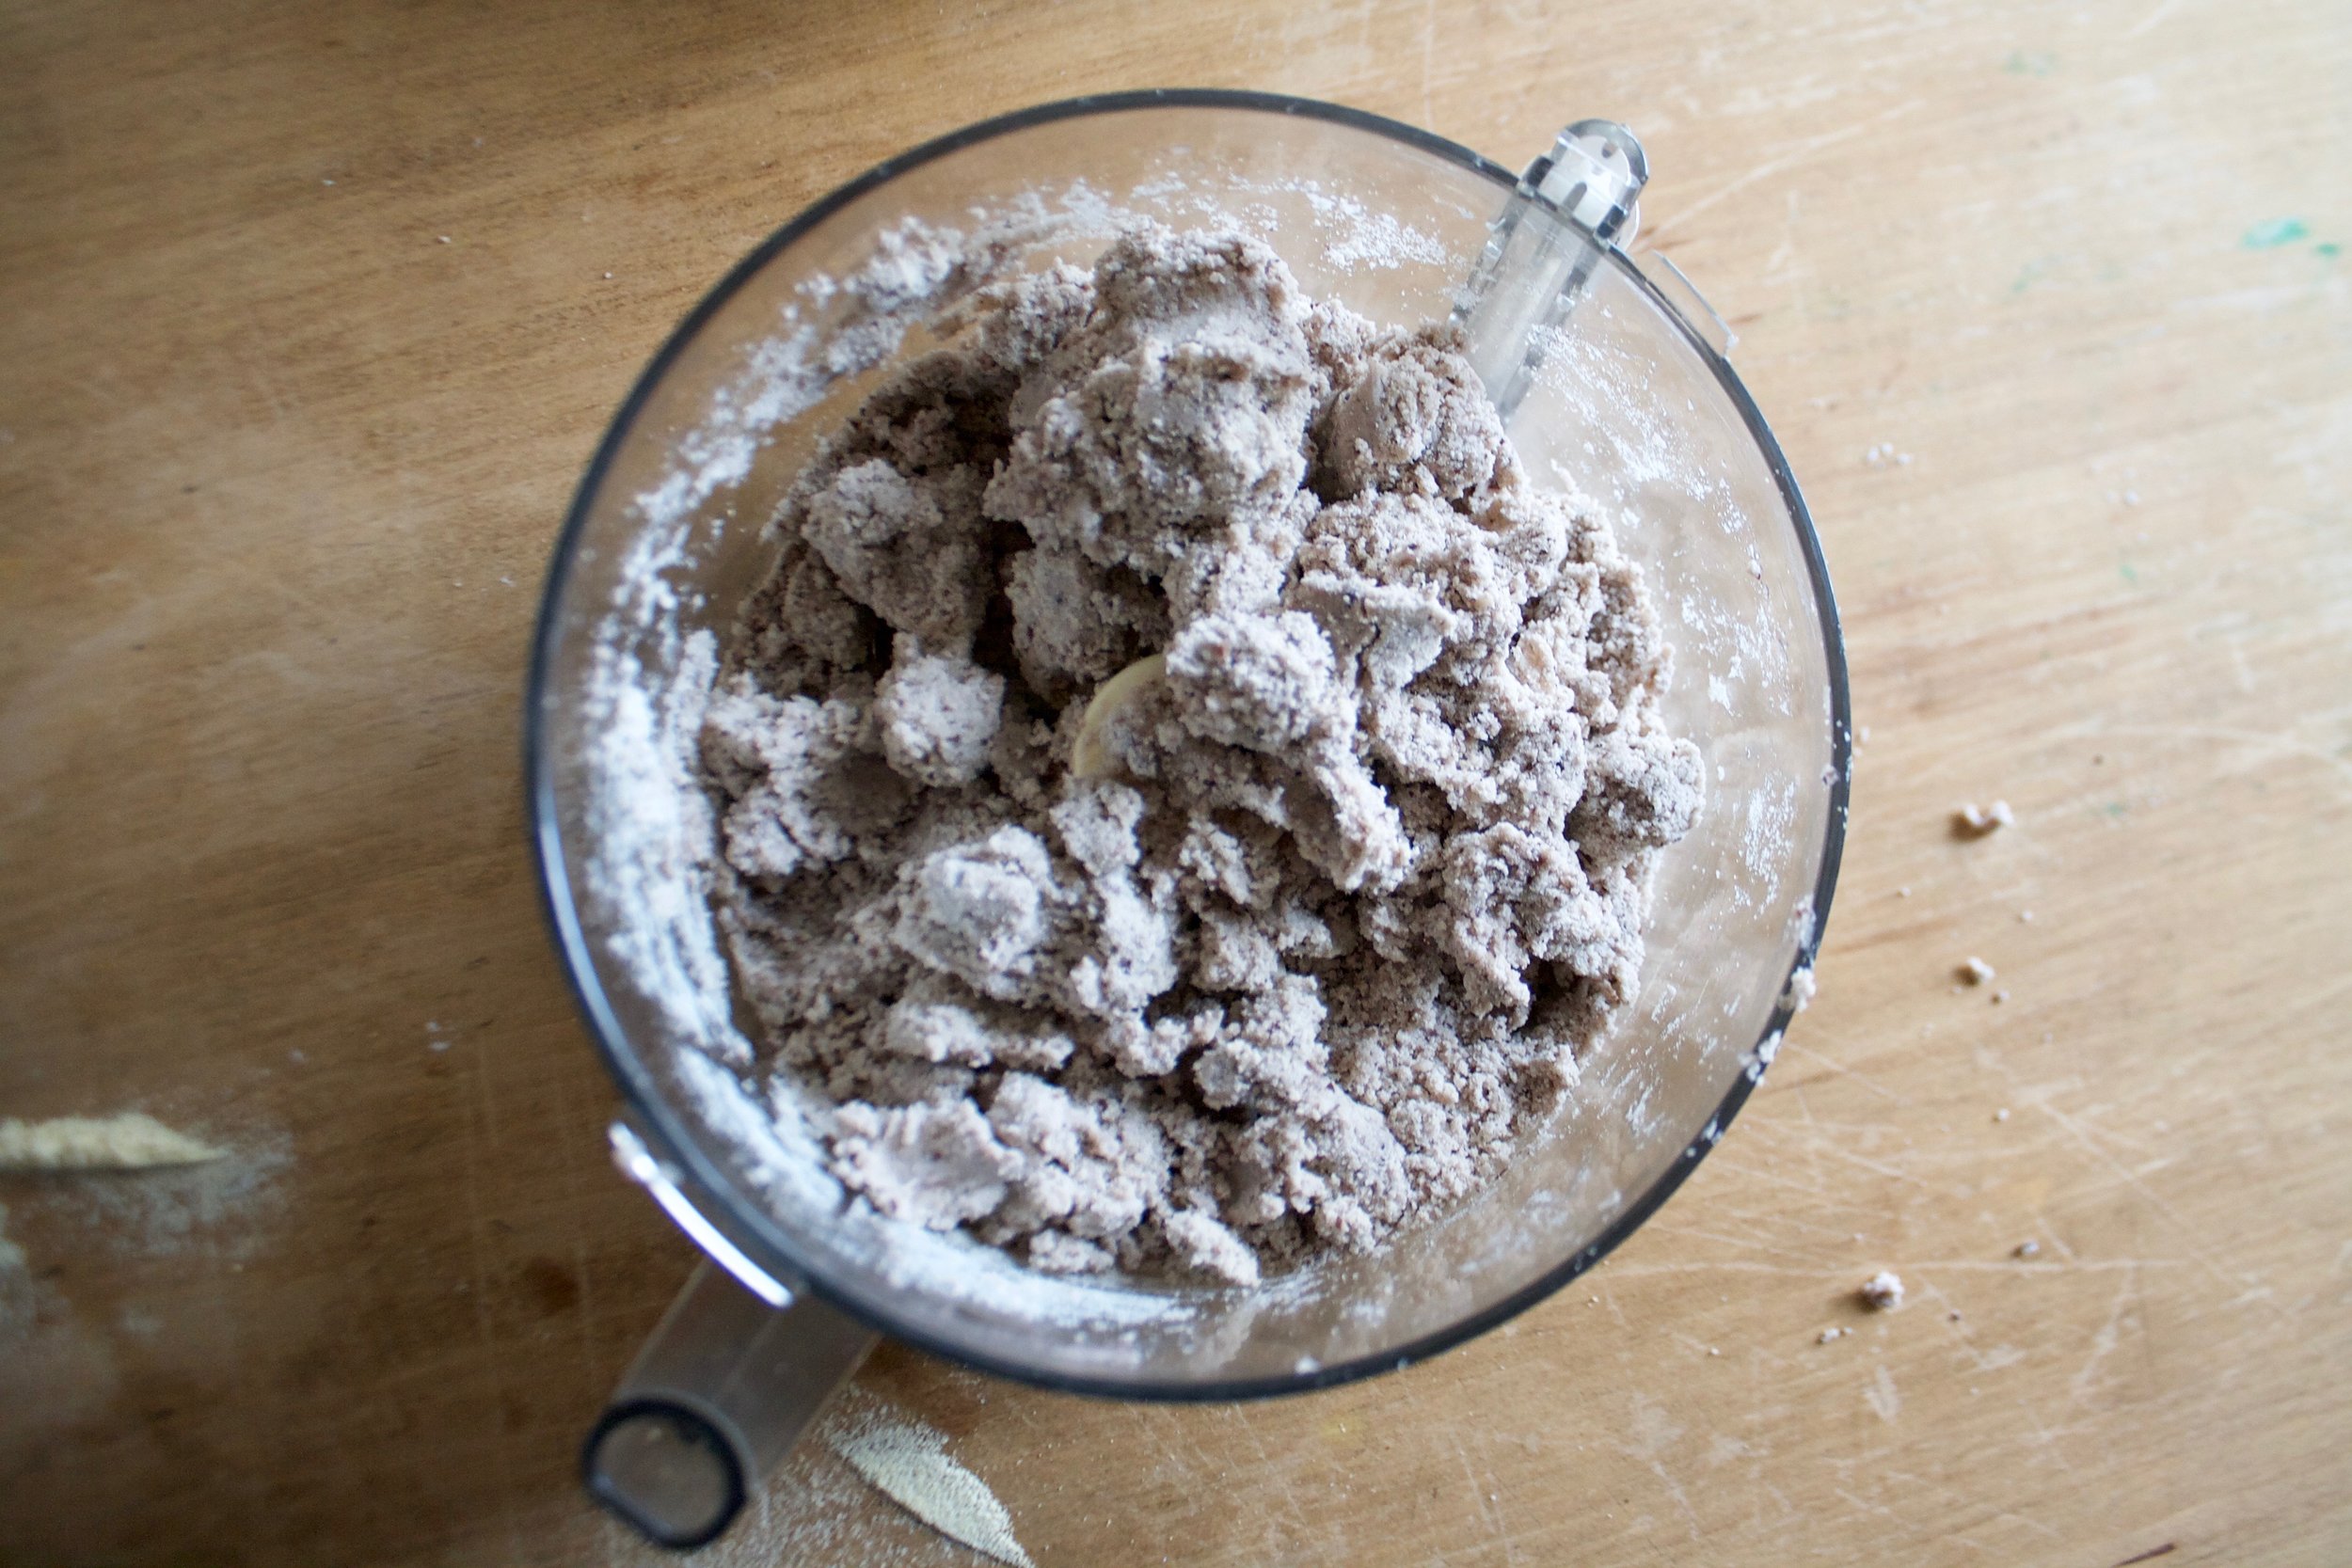
Pretty easy.  Add the beans to a food processor and blend untill completely smooth. Add in the masa and pulse then gradually add in water until a dough forms. Stop and feel the dough. If it feels like play dough and comes together into ball easily, then you are good. If it is to wet, add a little more masa, to dry, more water.

IMG_1719.jpg

Dump the dough onto the counter and form into a ball. Place the doguh into a bowl and cover with a damp closer for 15-30 minutes to let the dough rest.

After the rest, divide the dough into 12 pieces and roll into balls. Place the balls onto a damp cloth and cover while you are making the tortillas so they don't dry out. 

IMG_1735.jpg
IMG_1739.jpg
IMG_1741.jpg

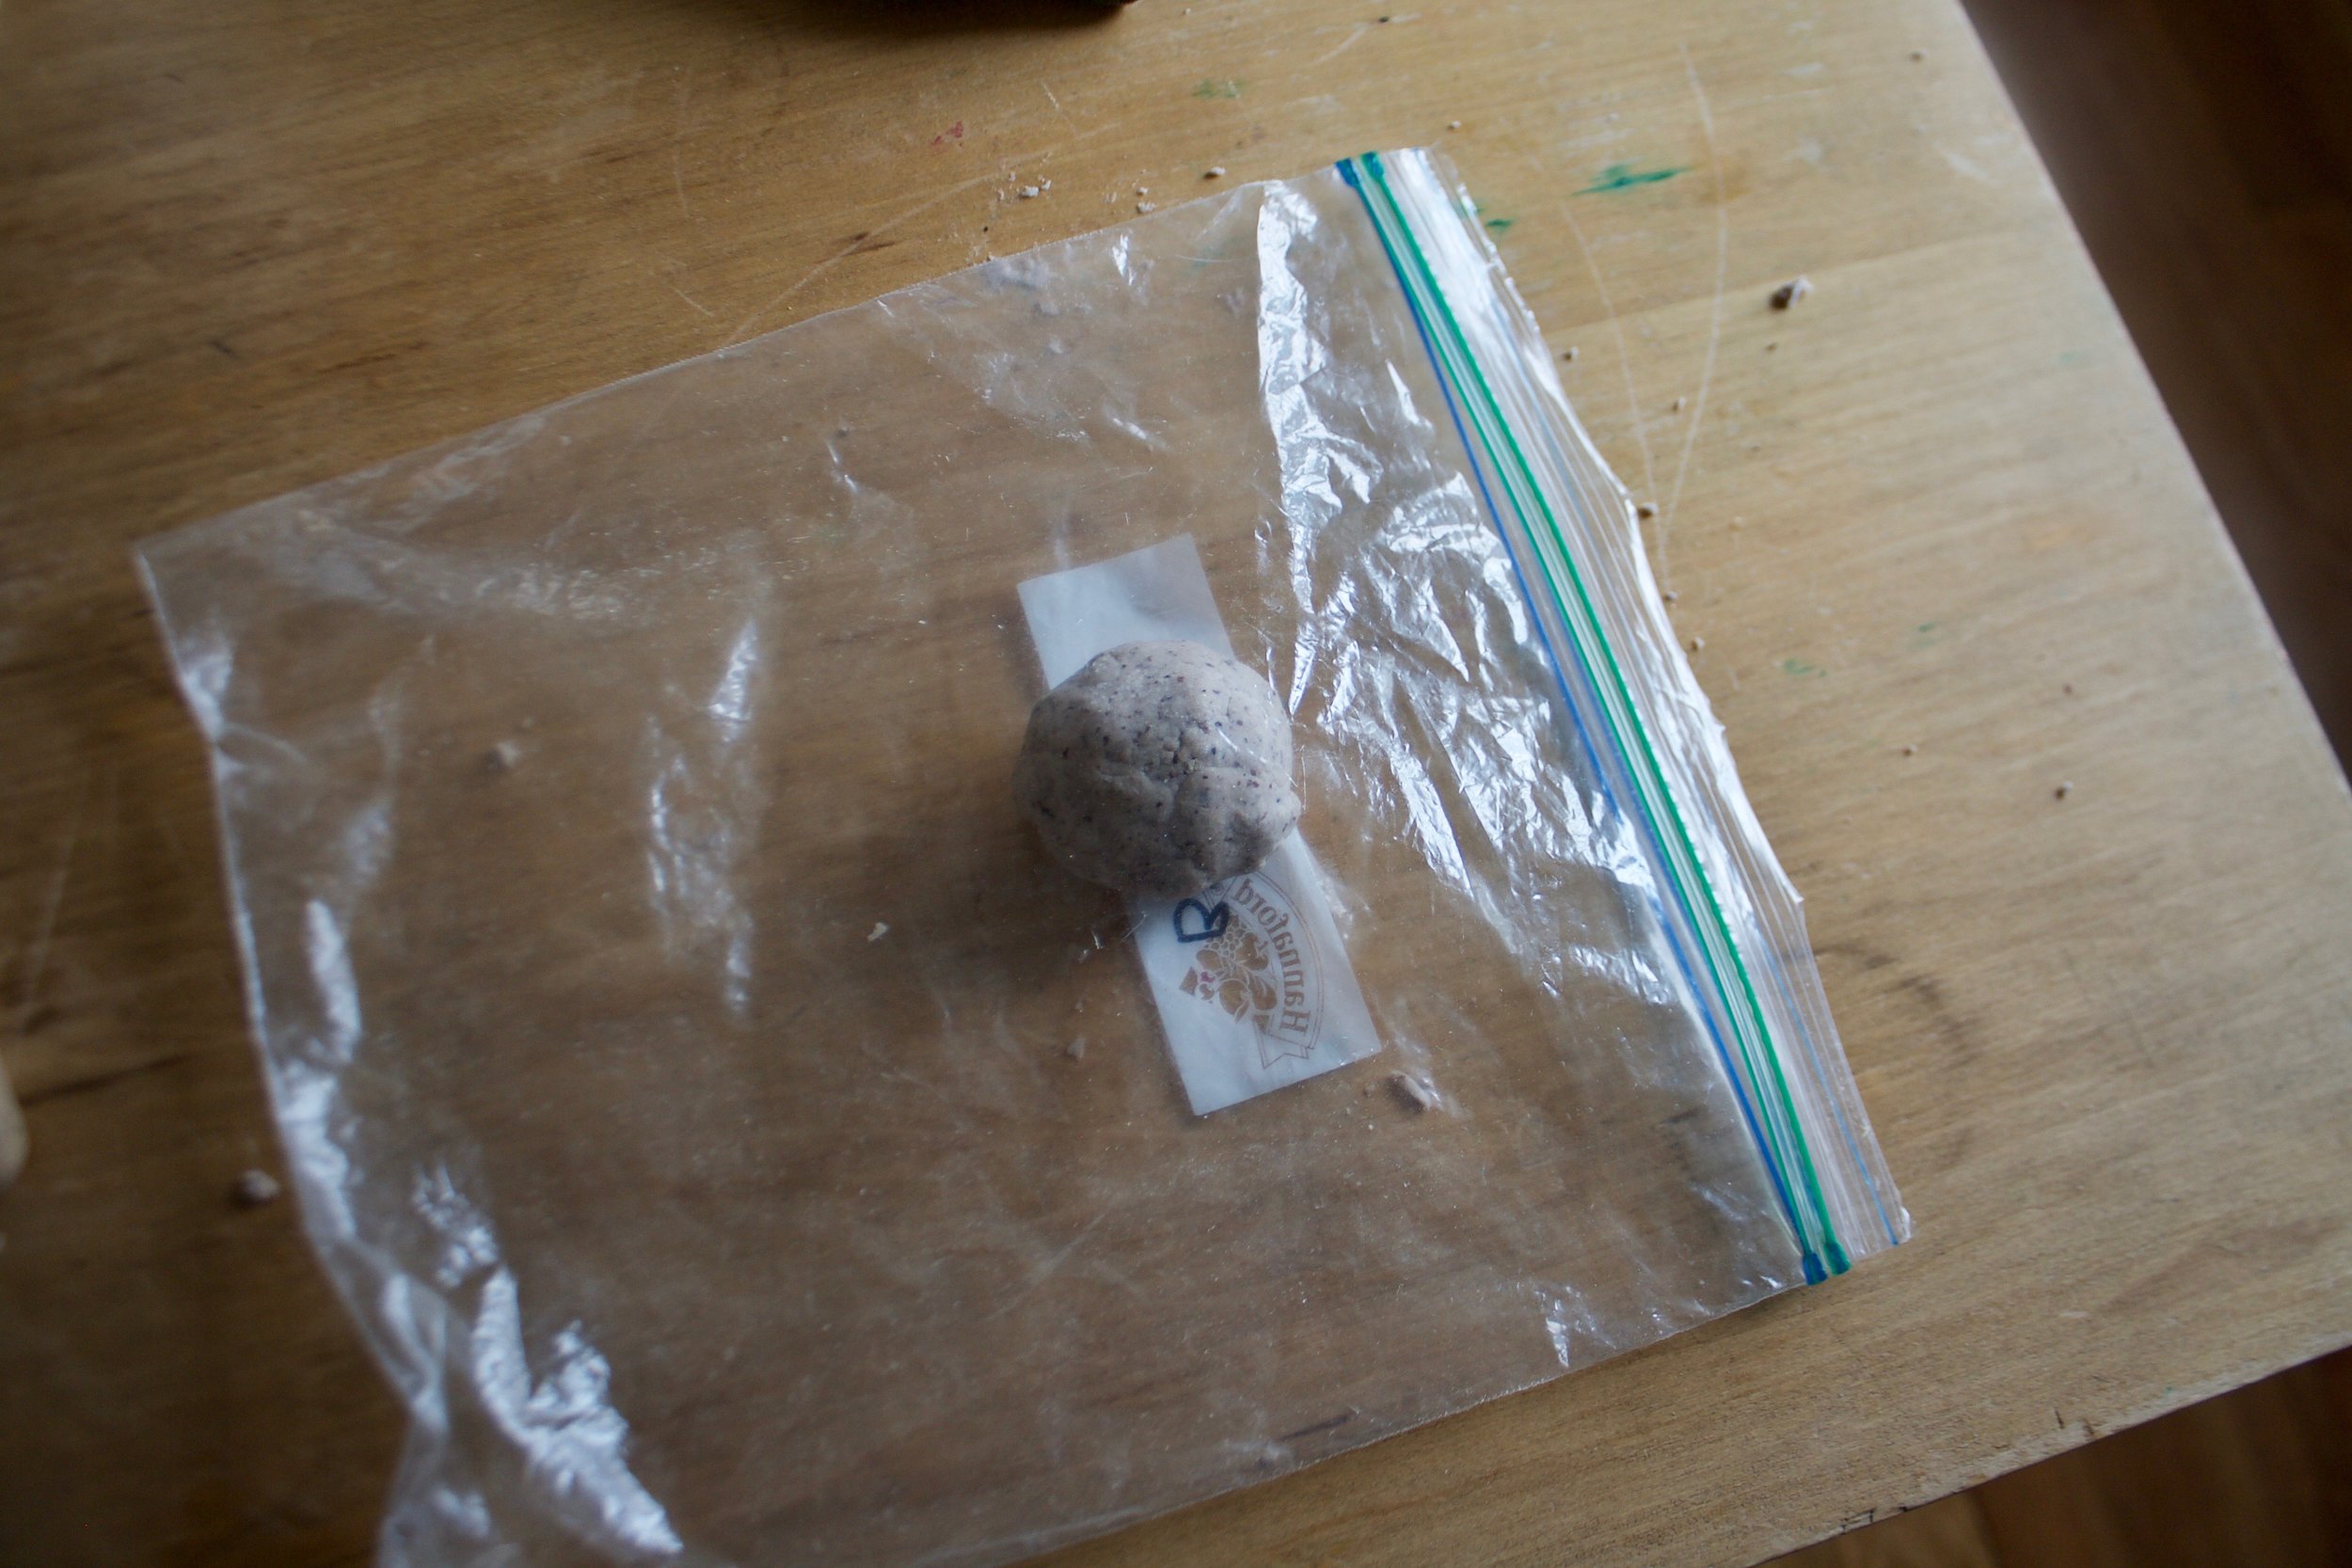
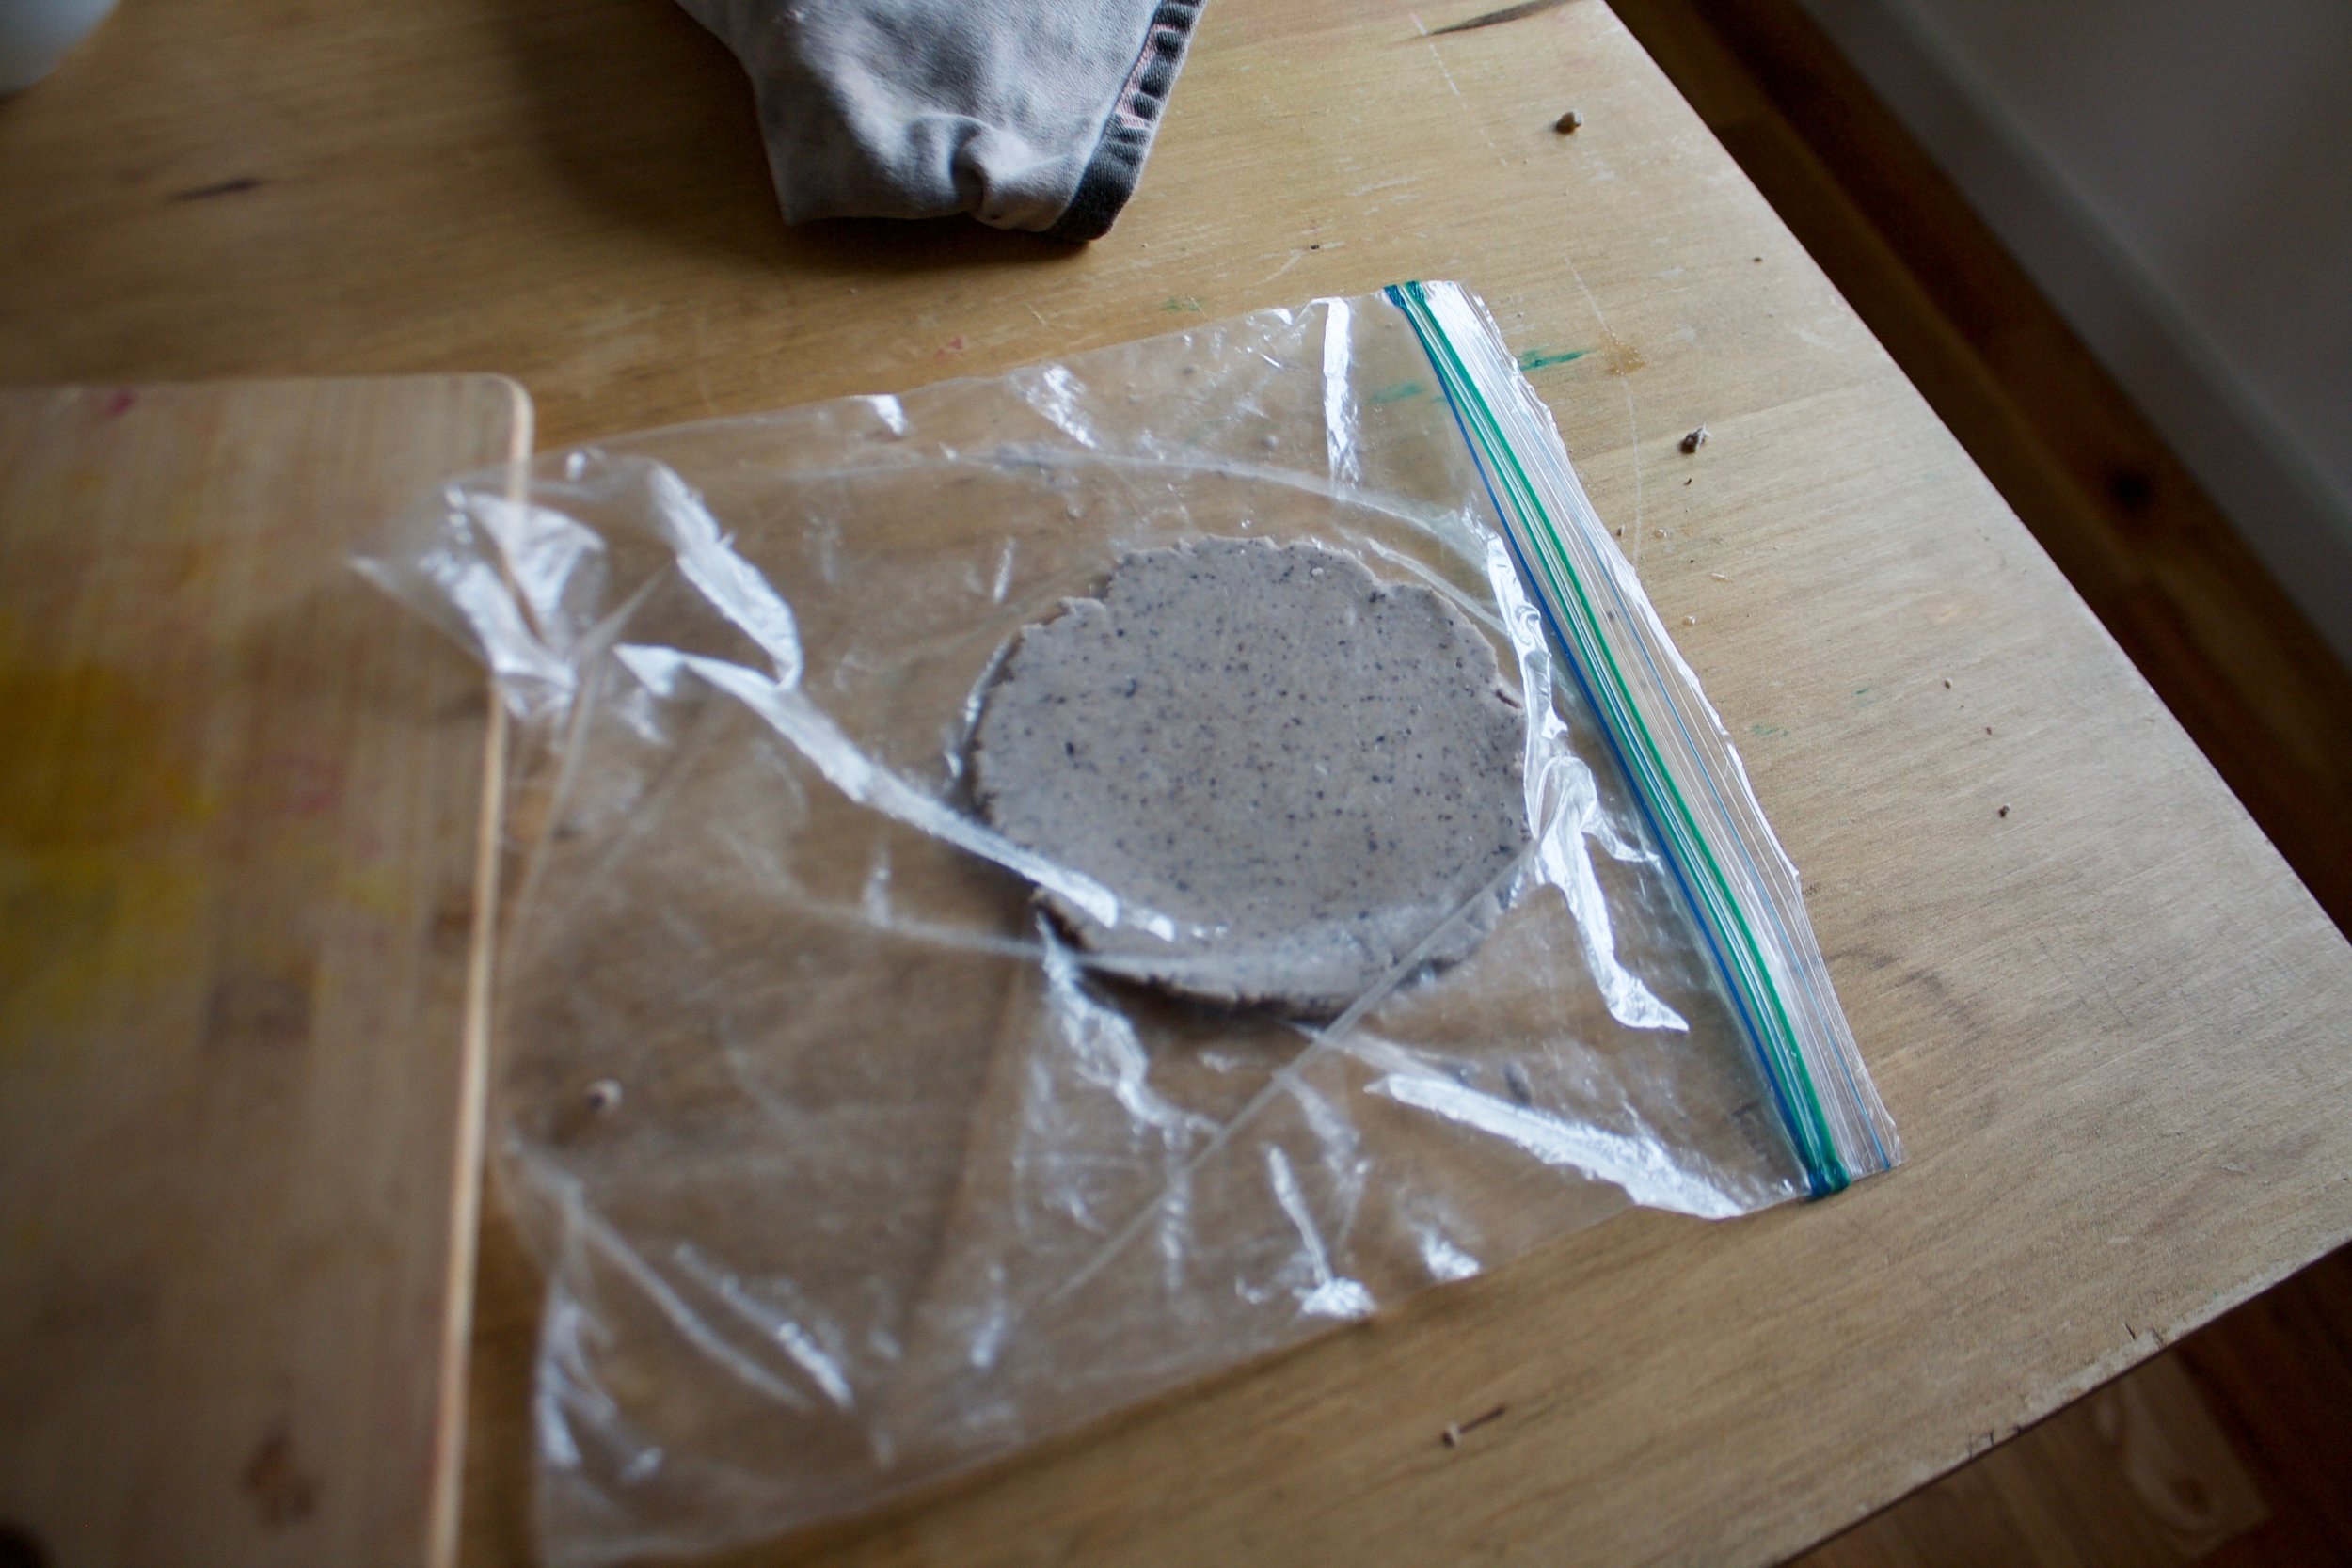
To flatten those balls into tortillas.  After doing this a bunch of times, I have a system that works the best for me.  I use a large ziplock bag (the plastic is a little thicker and easier to deal with, plus I don't use plastic wrap), a cutting board, and a rolling pin. Place a dough ball into the center of the bag then take the cutting board and press directly on top, placing all your weight onto it. It gets flat, but not flat enough so take the rolling pin and flatten some more. Then press the rolled out dough with the cutting board one last time. Carefuly remove from bag and place direrely onto a hot dry skillet. 

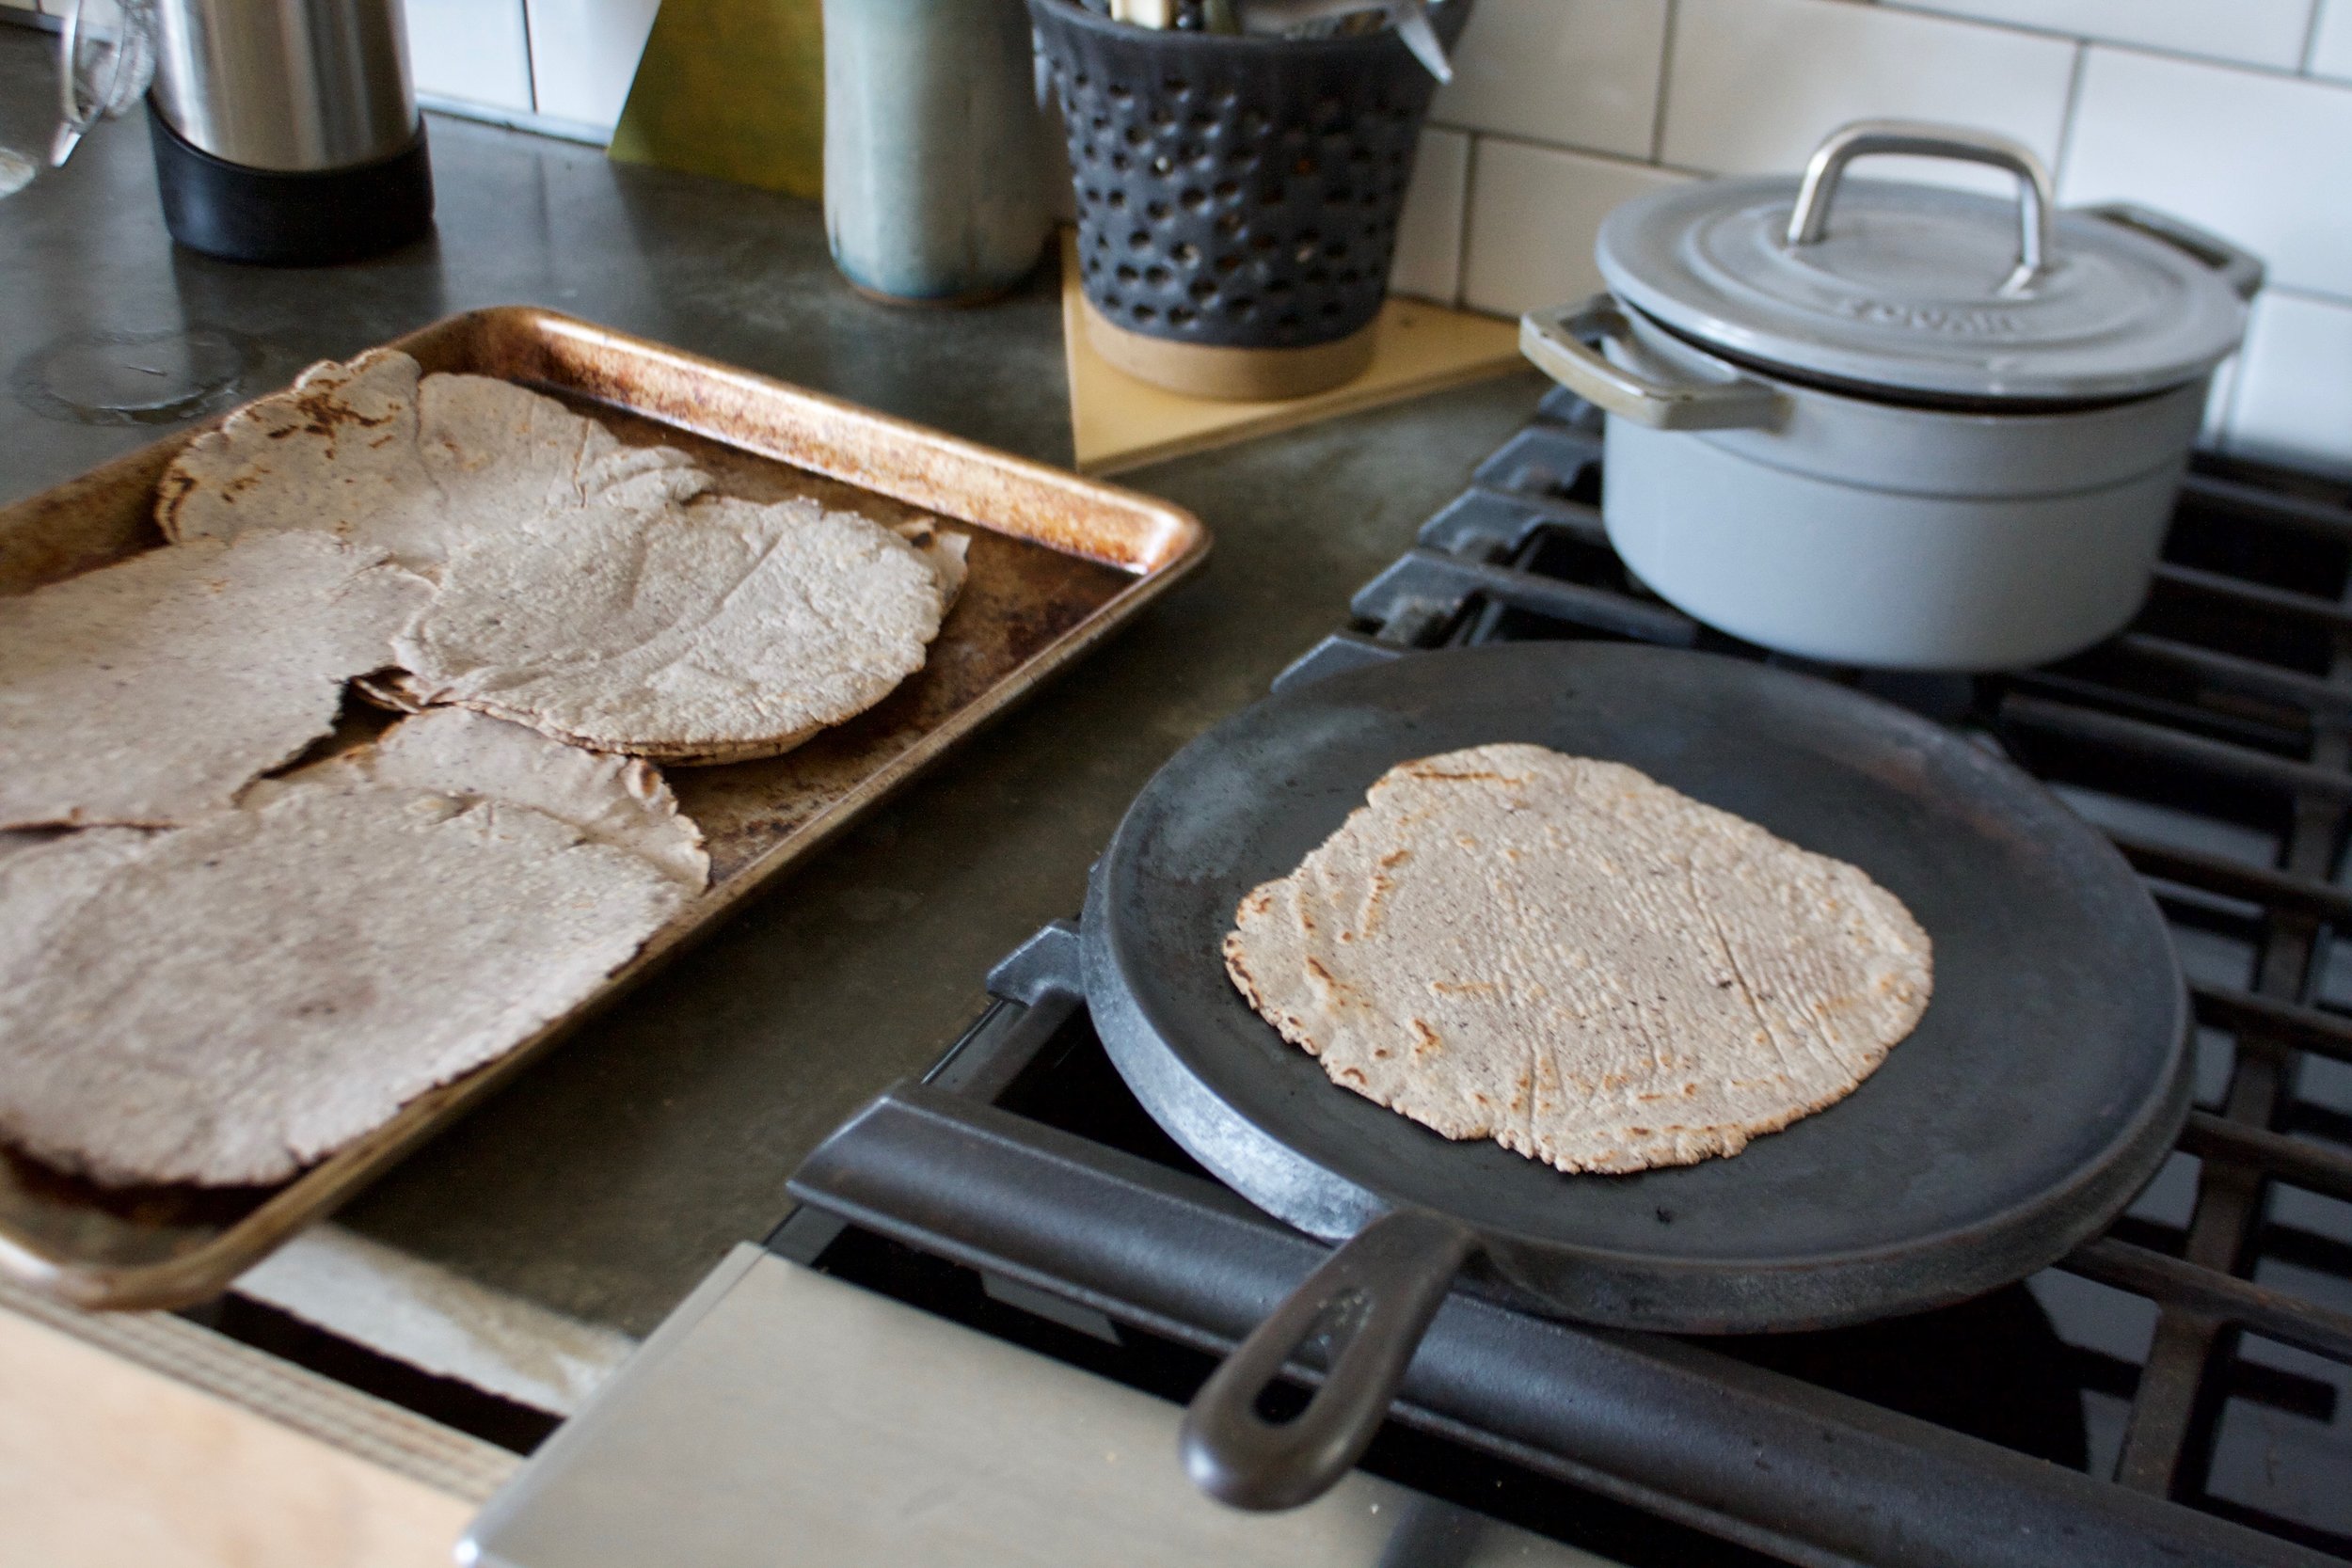
Cook each side 3-4 minutes or until it starts to get a few light brown spots. Once cooked, place on a plate or baking sheet. If I were just making tortillas, I would place then in between a kitchen towel to keep them warm, but because they are destined for chips and don't care. 

IMG_1758.jpg

Black bean corn tortillas. Hey, you could stop here and make a taco or something if you need to. Feel free to use a tortilla or two before using the rest to make the into chips. 

IMG_1769.jpg

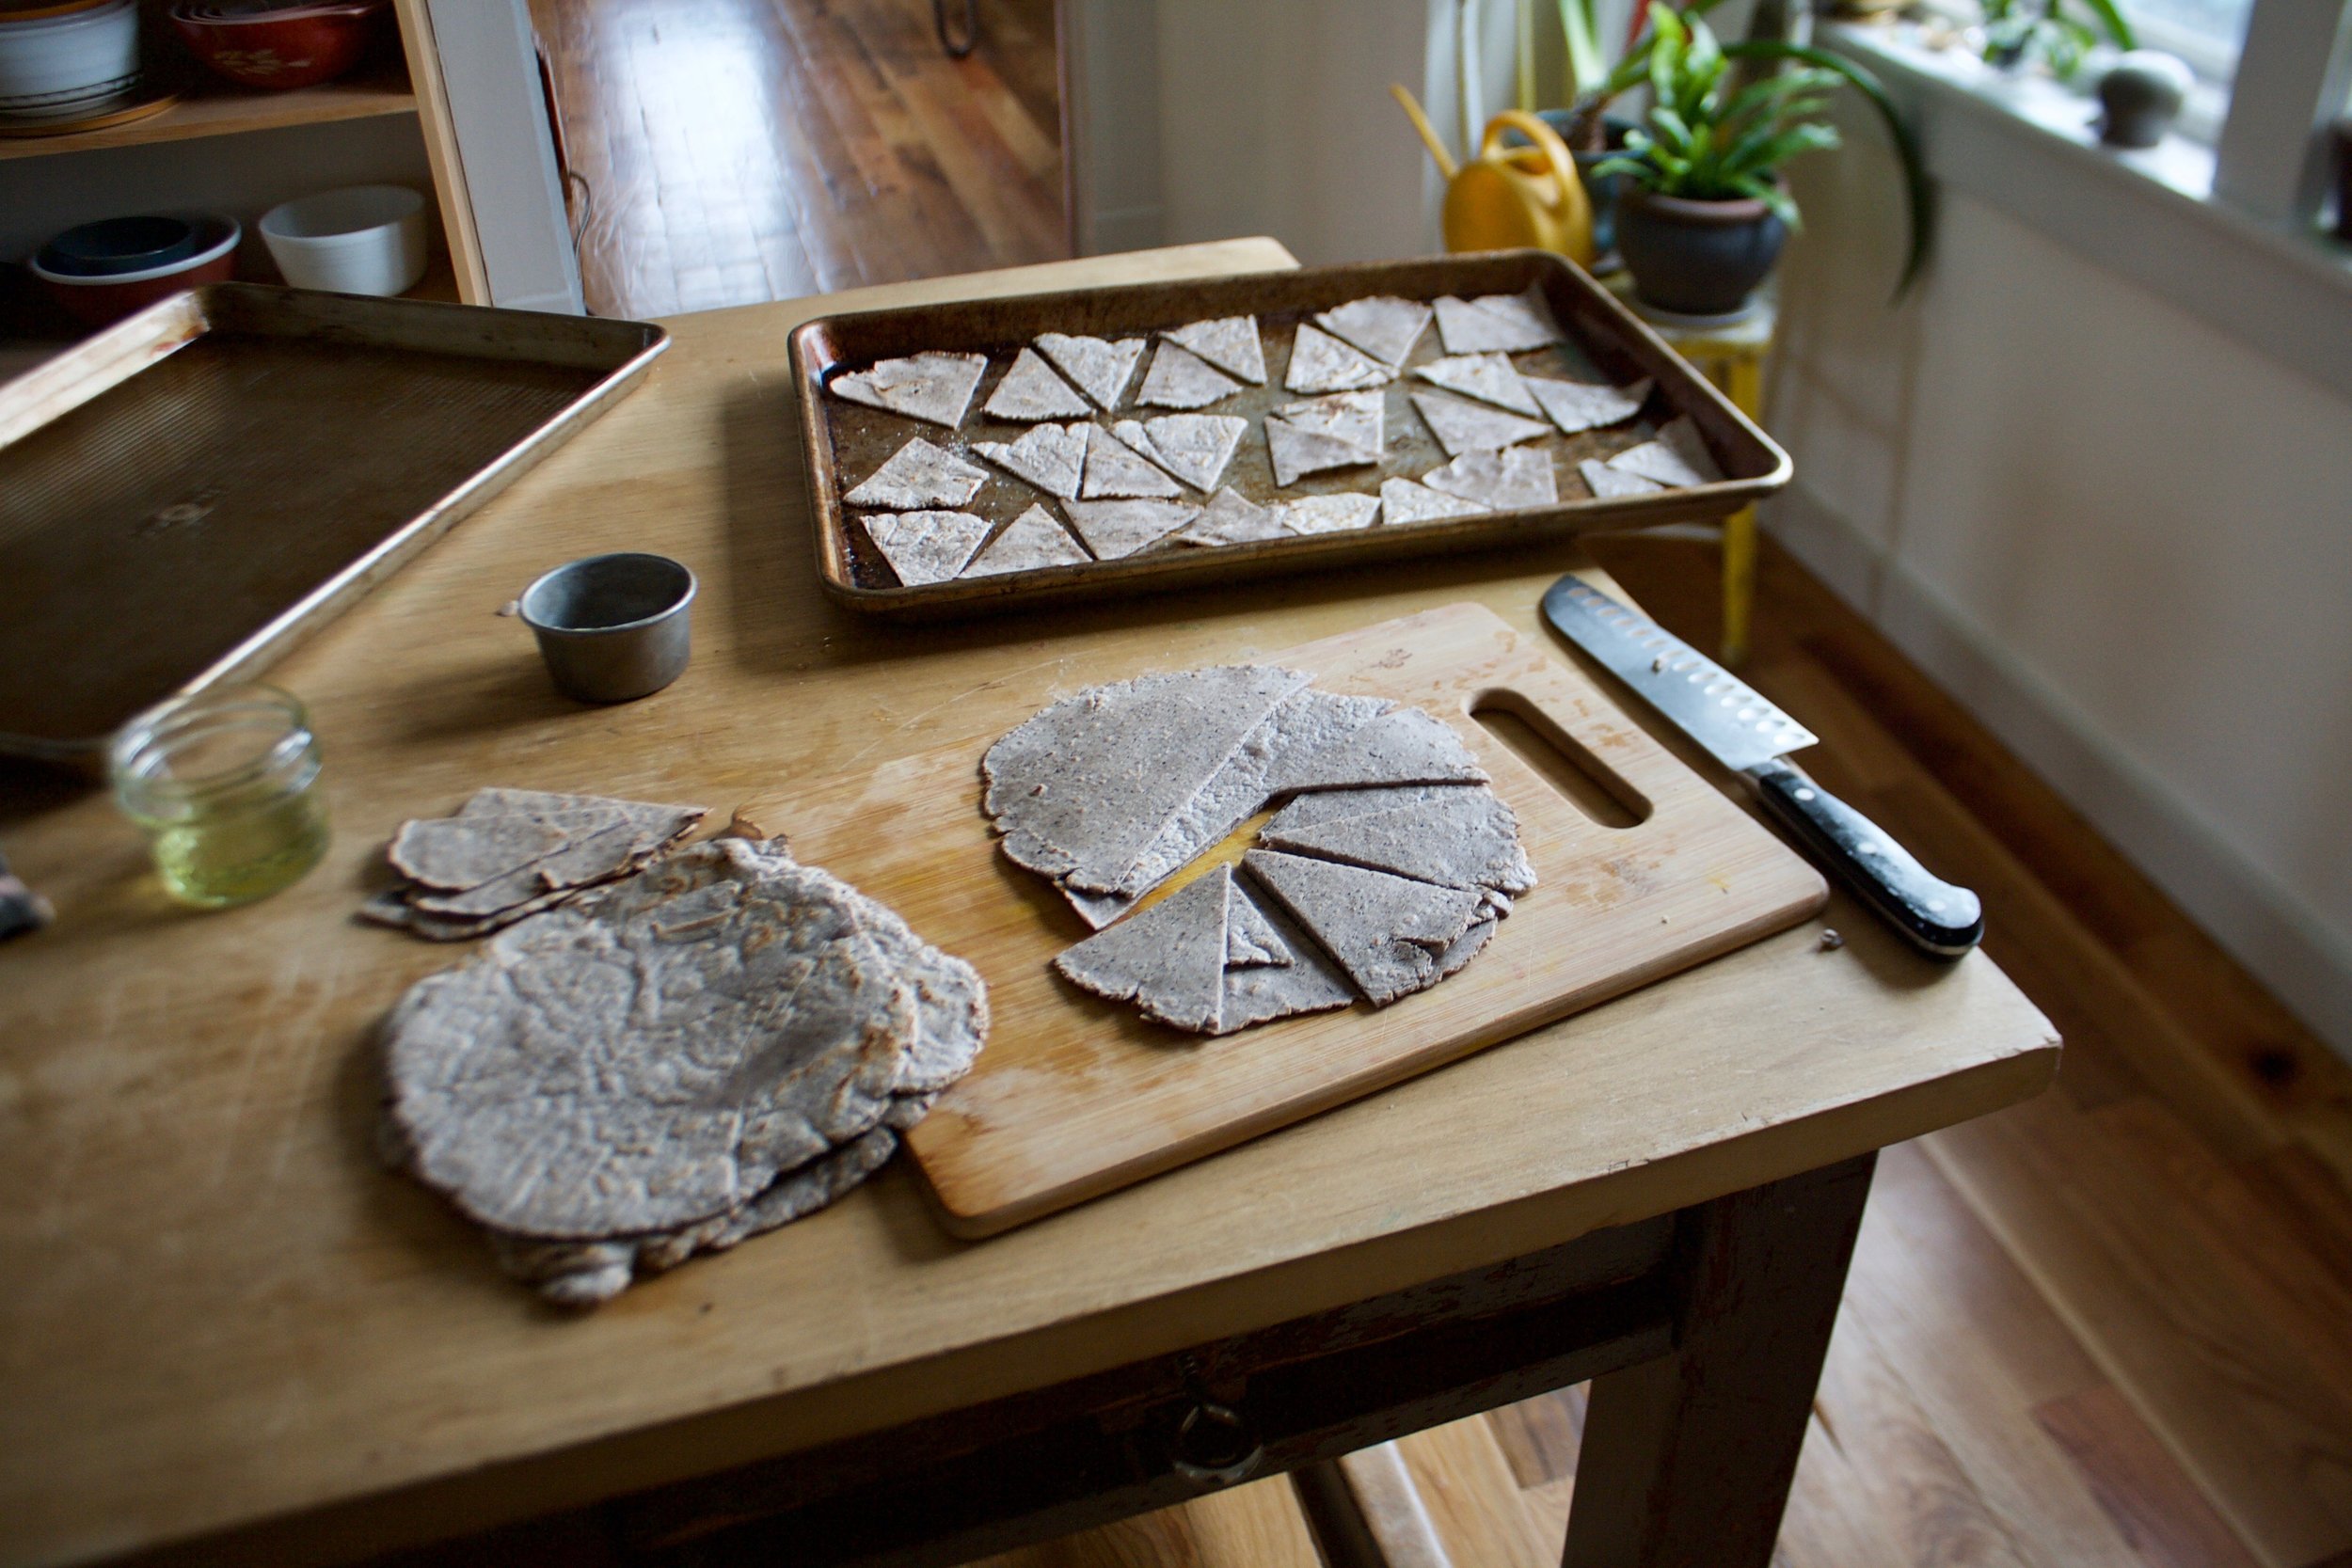
So chips. Grab baking sheets, oil, salt, a knife, and the tortillas. Take a few of the tortillas and oil them. (The easiest way I found to do this is to rub oil on with my hands then rub the oil onto the tortillas. ) Oil 3 at a time, stacked them on top of each other and cut into 8 triangles, 

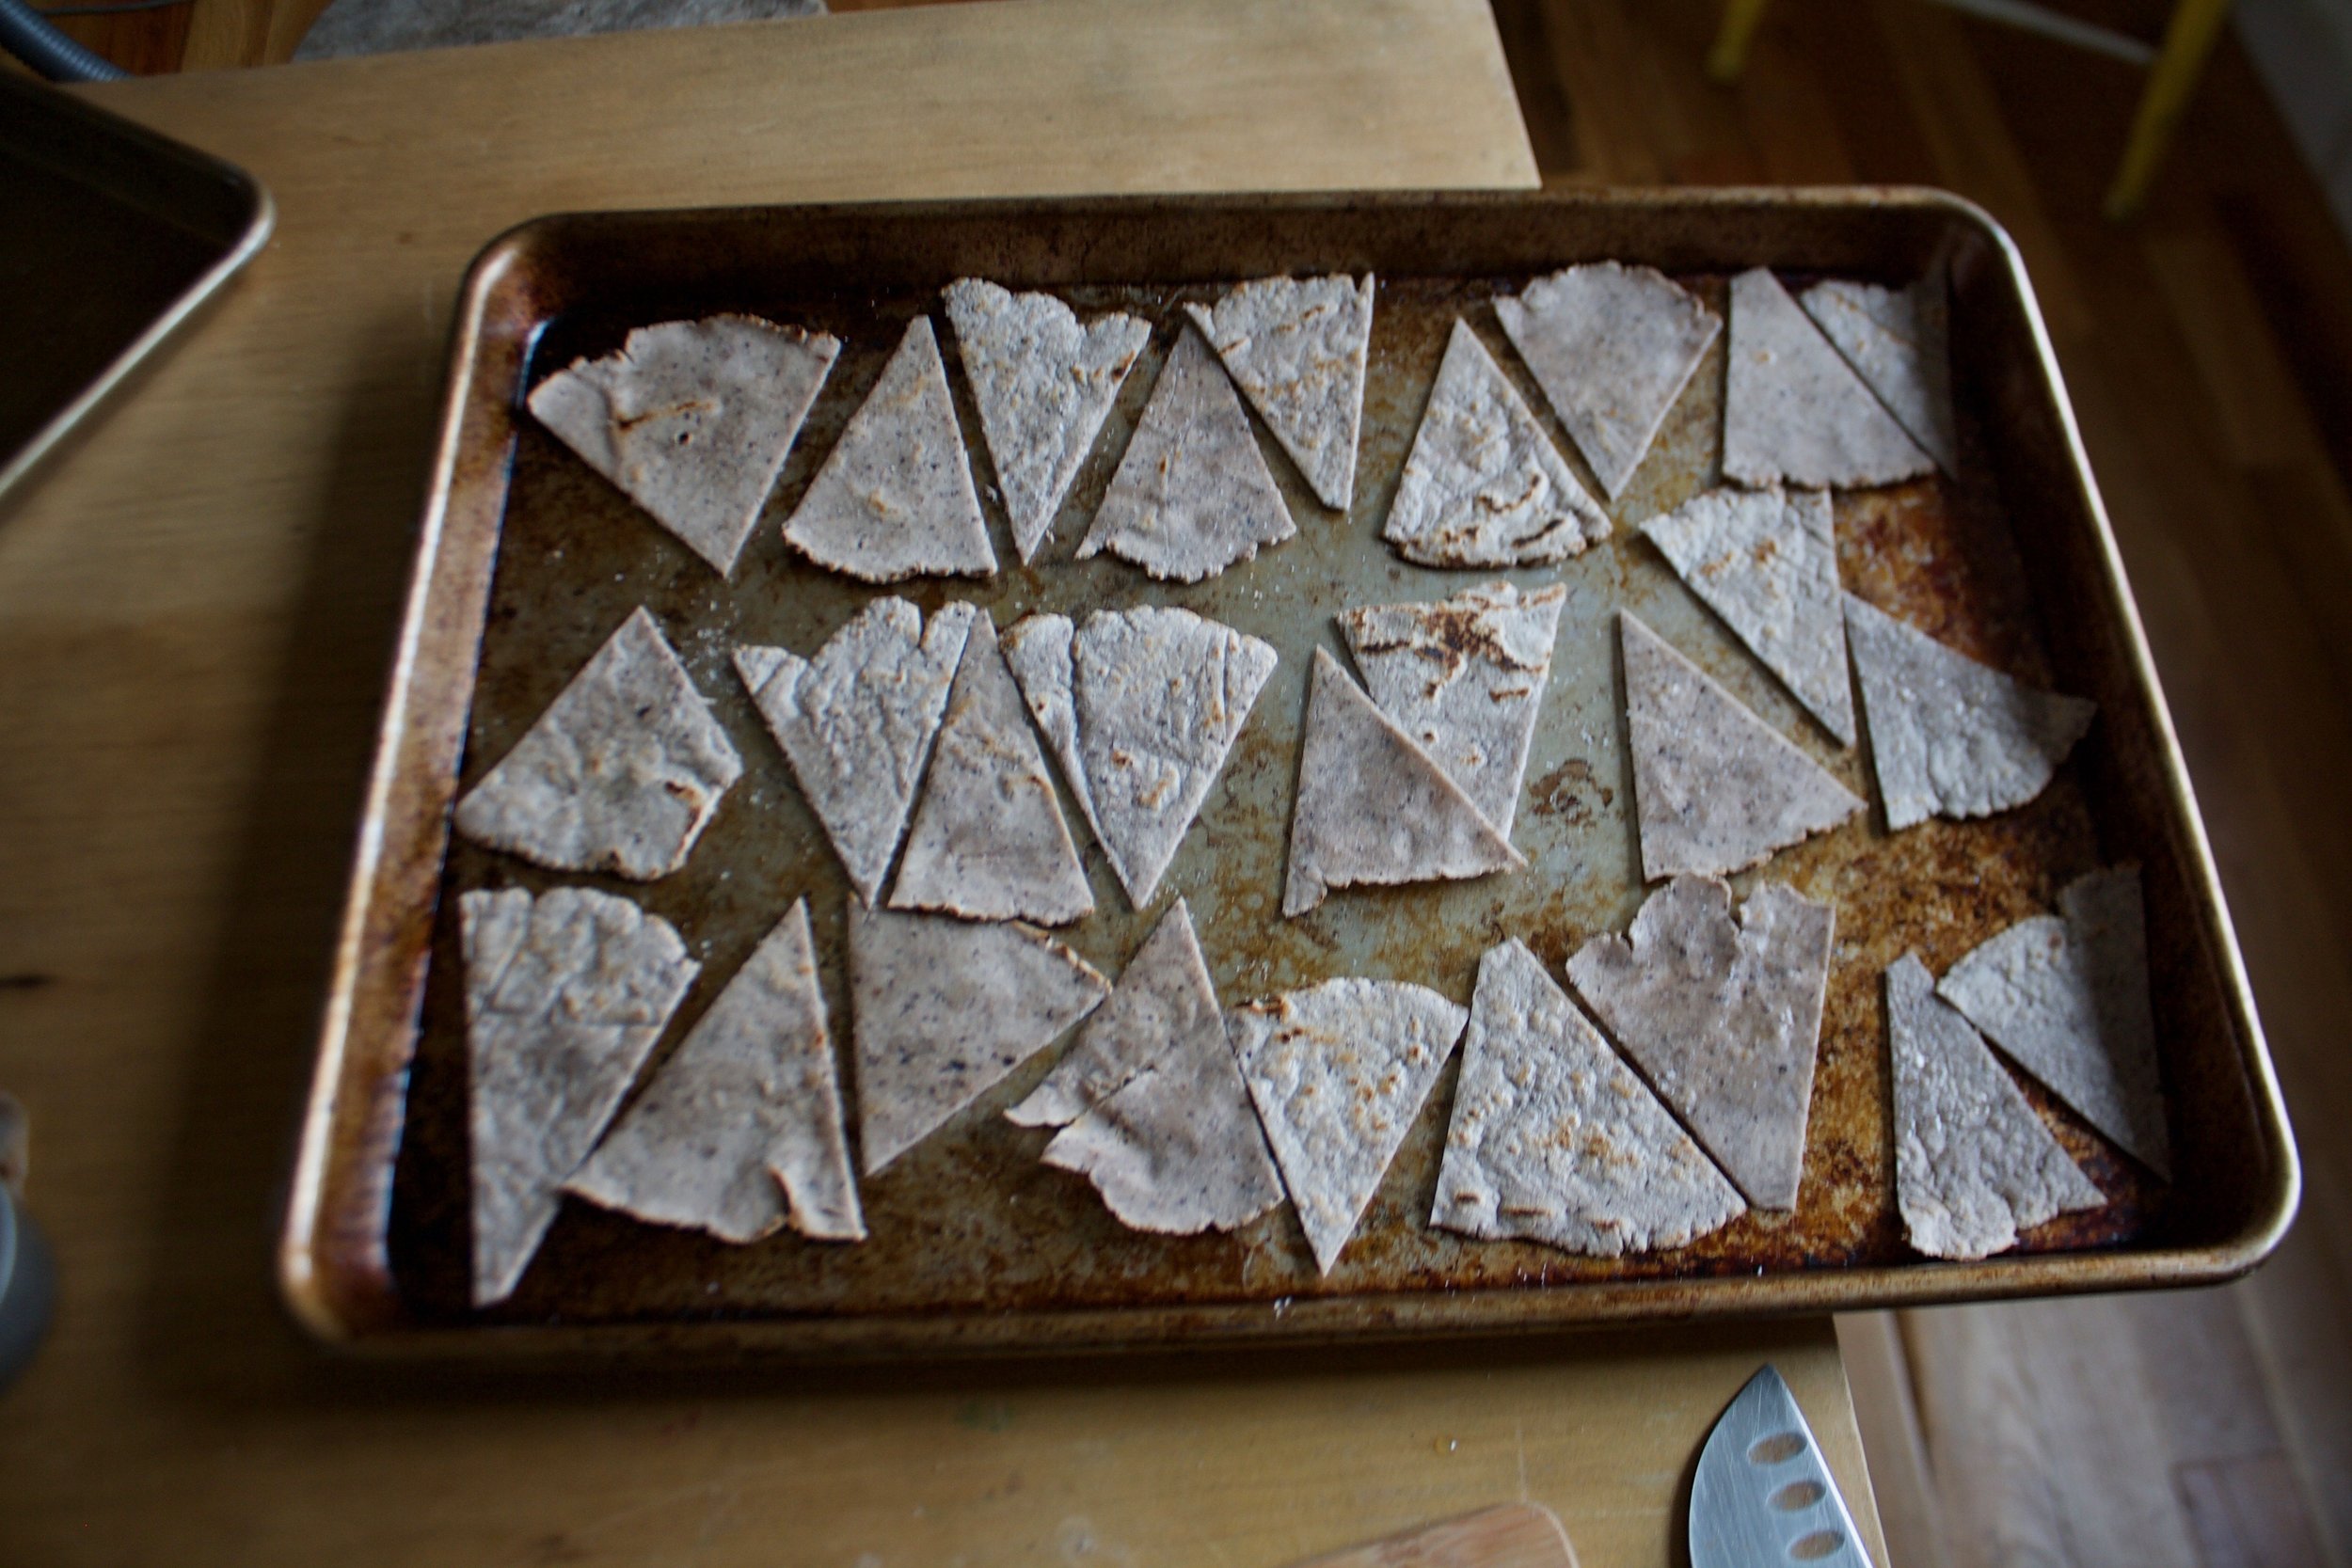
Get as many of the triangles onto a baking sheet as you can, without overlapping.  Once all nice and tight, sprinkle the tops with salt and pop them into preheated oven. 

Pull the chips out of the oven when they are crispy and done (about 10 minutes) then squeeze a little lemon juice all over the chips. Toss around and pop the pan back into the oven for another minute or two just so the juice doesn't  leave the chips soggy.

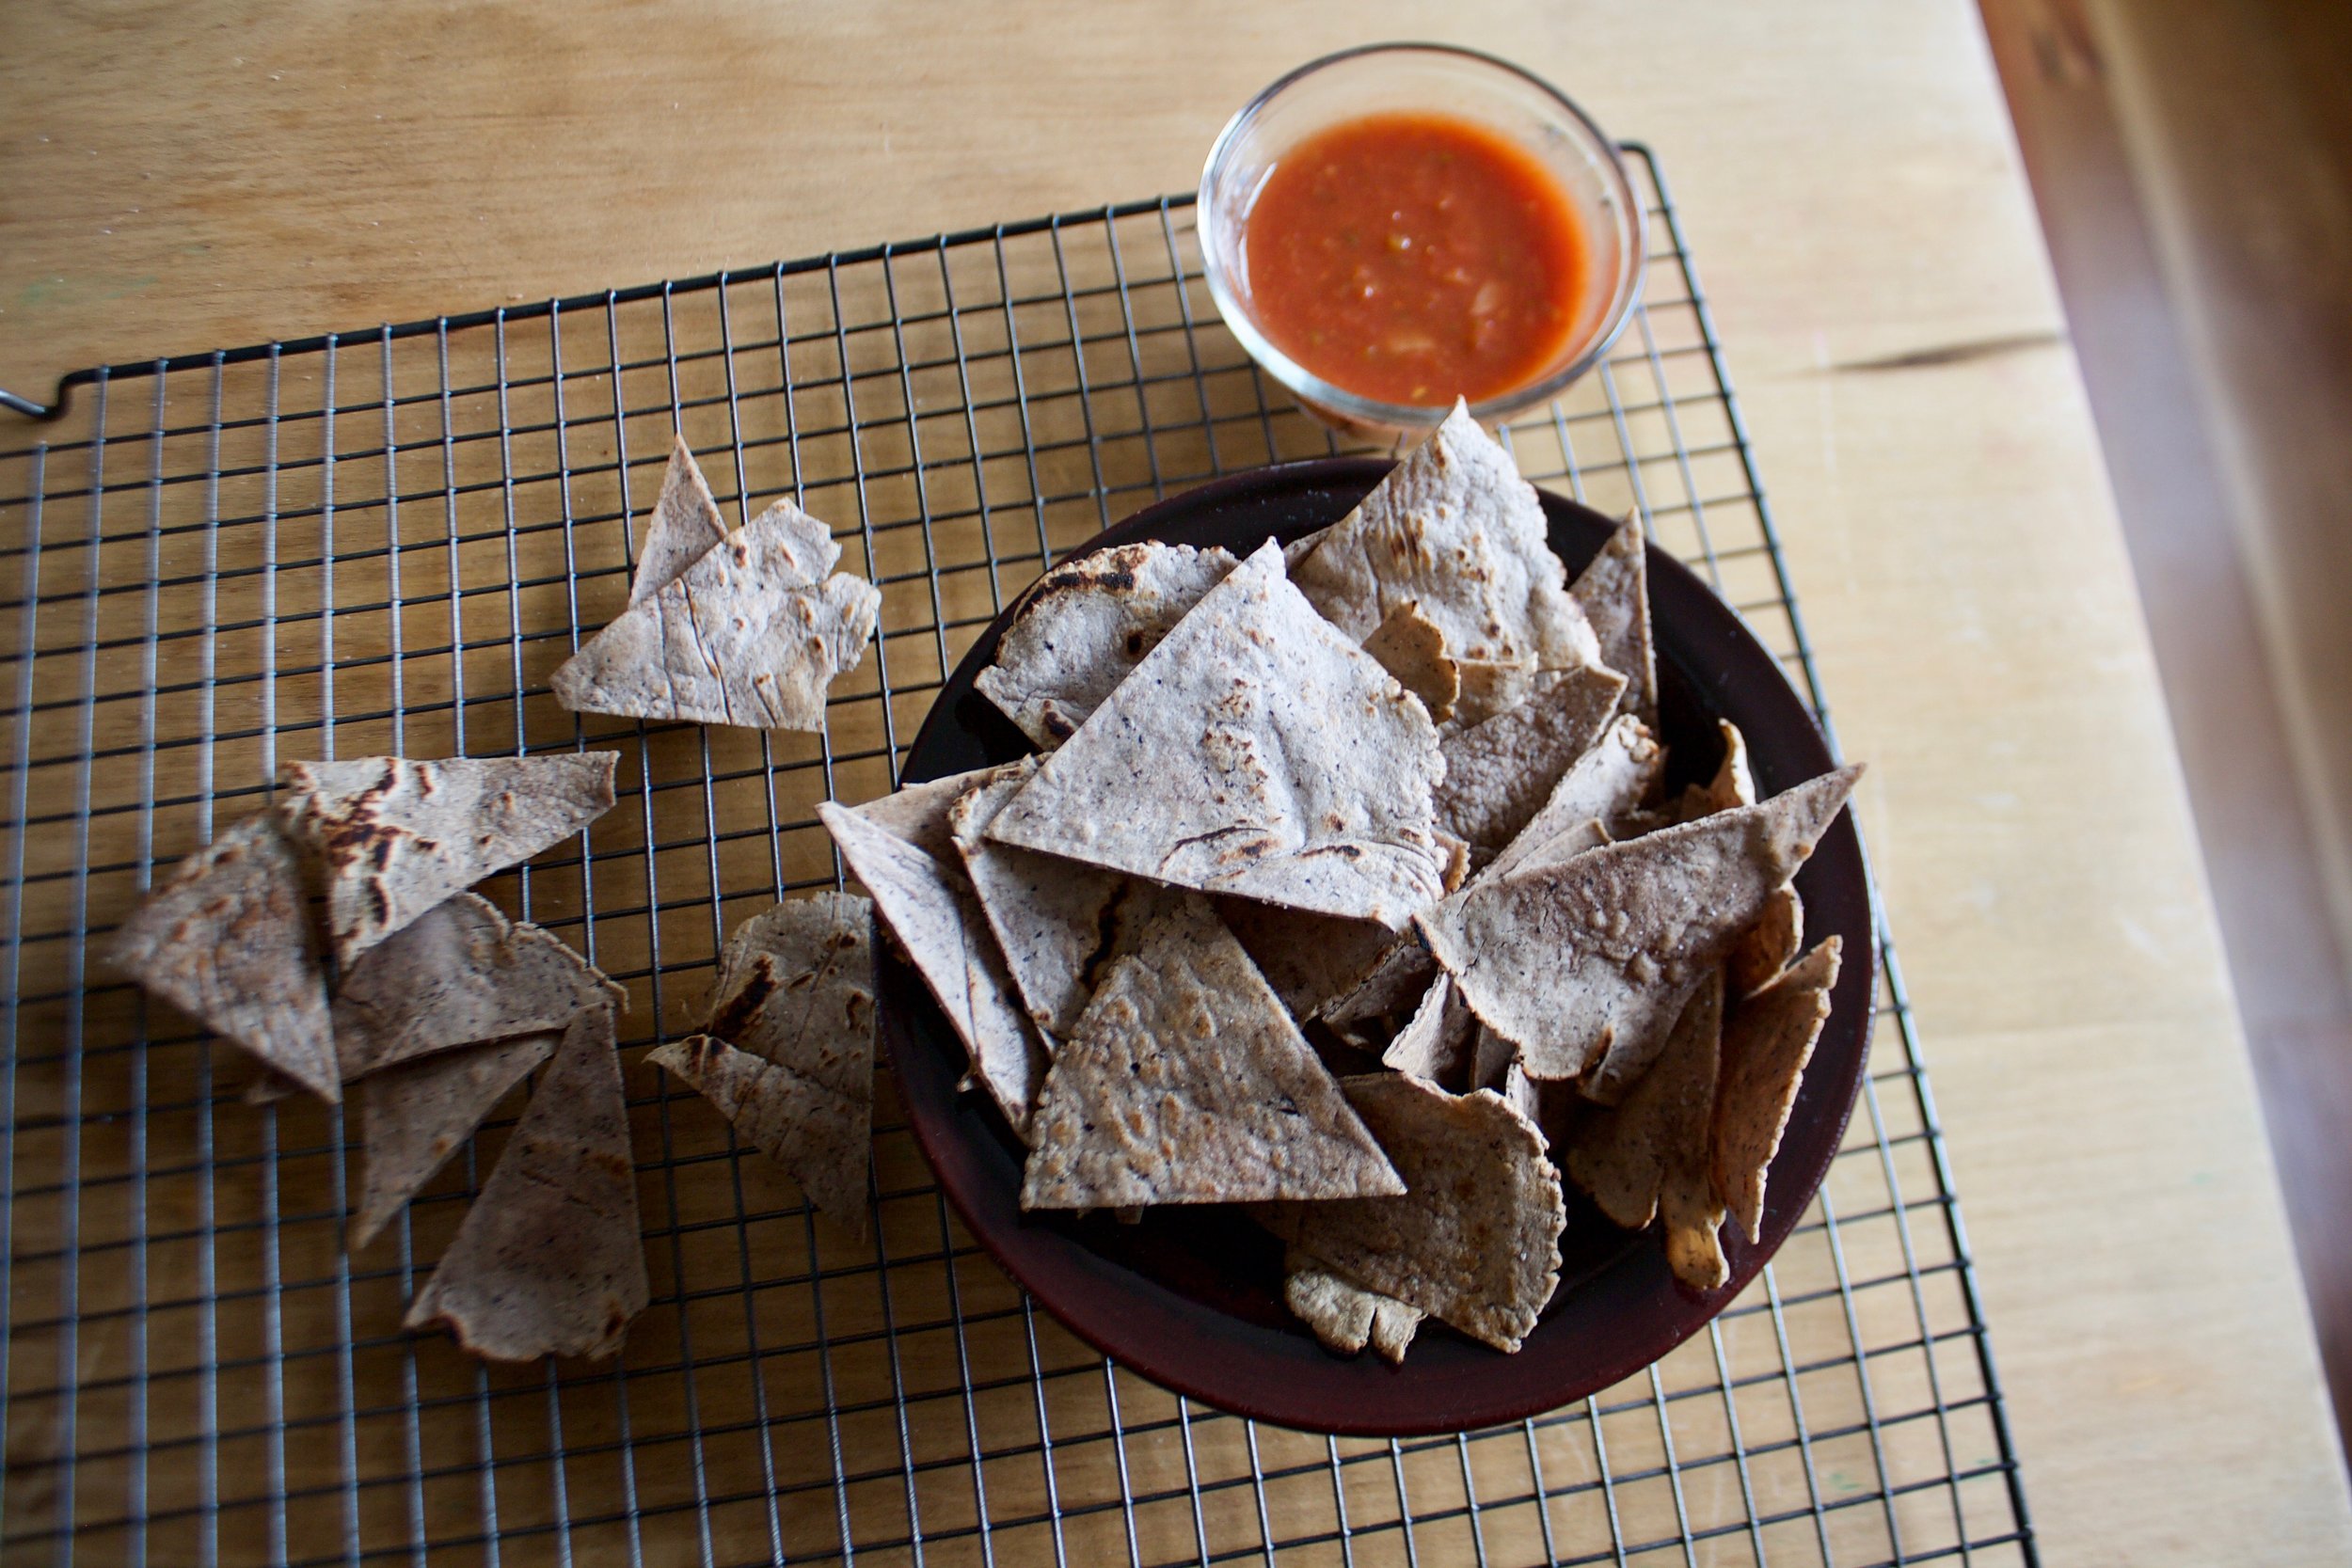
Dump cooked chips  onto a wire rack to cool. Eat as you work, you deserve it.

IMG_1837.jpg

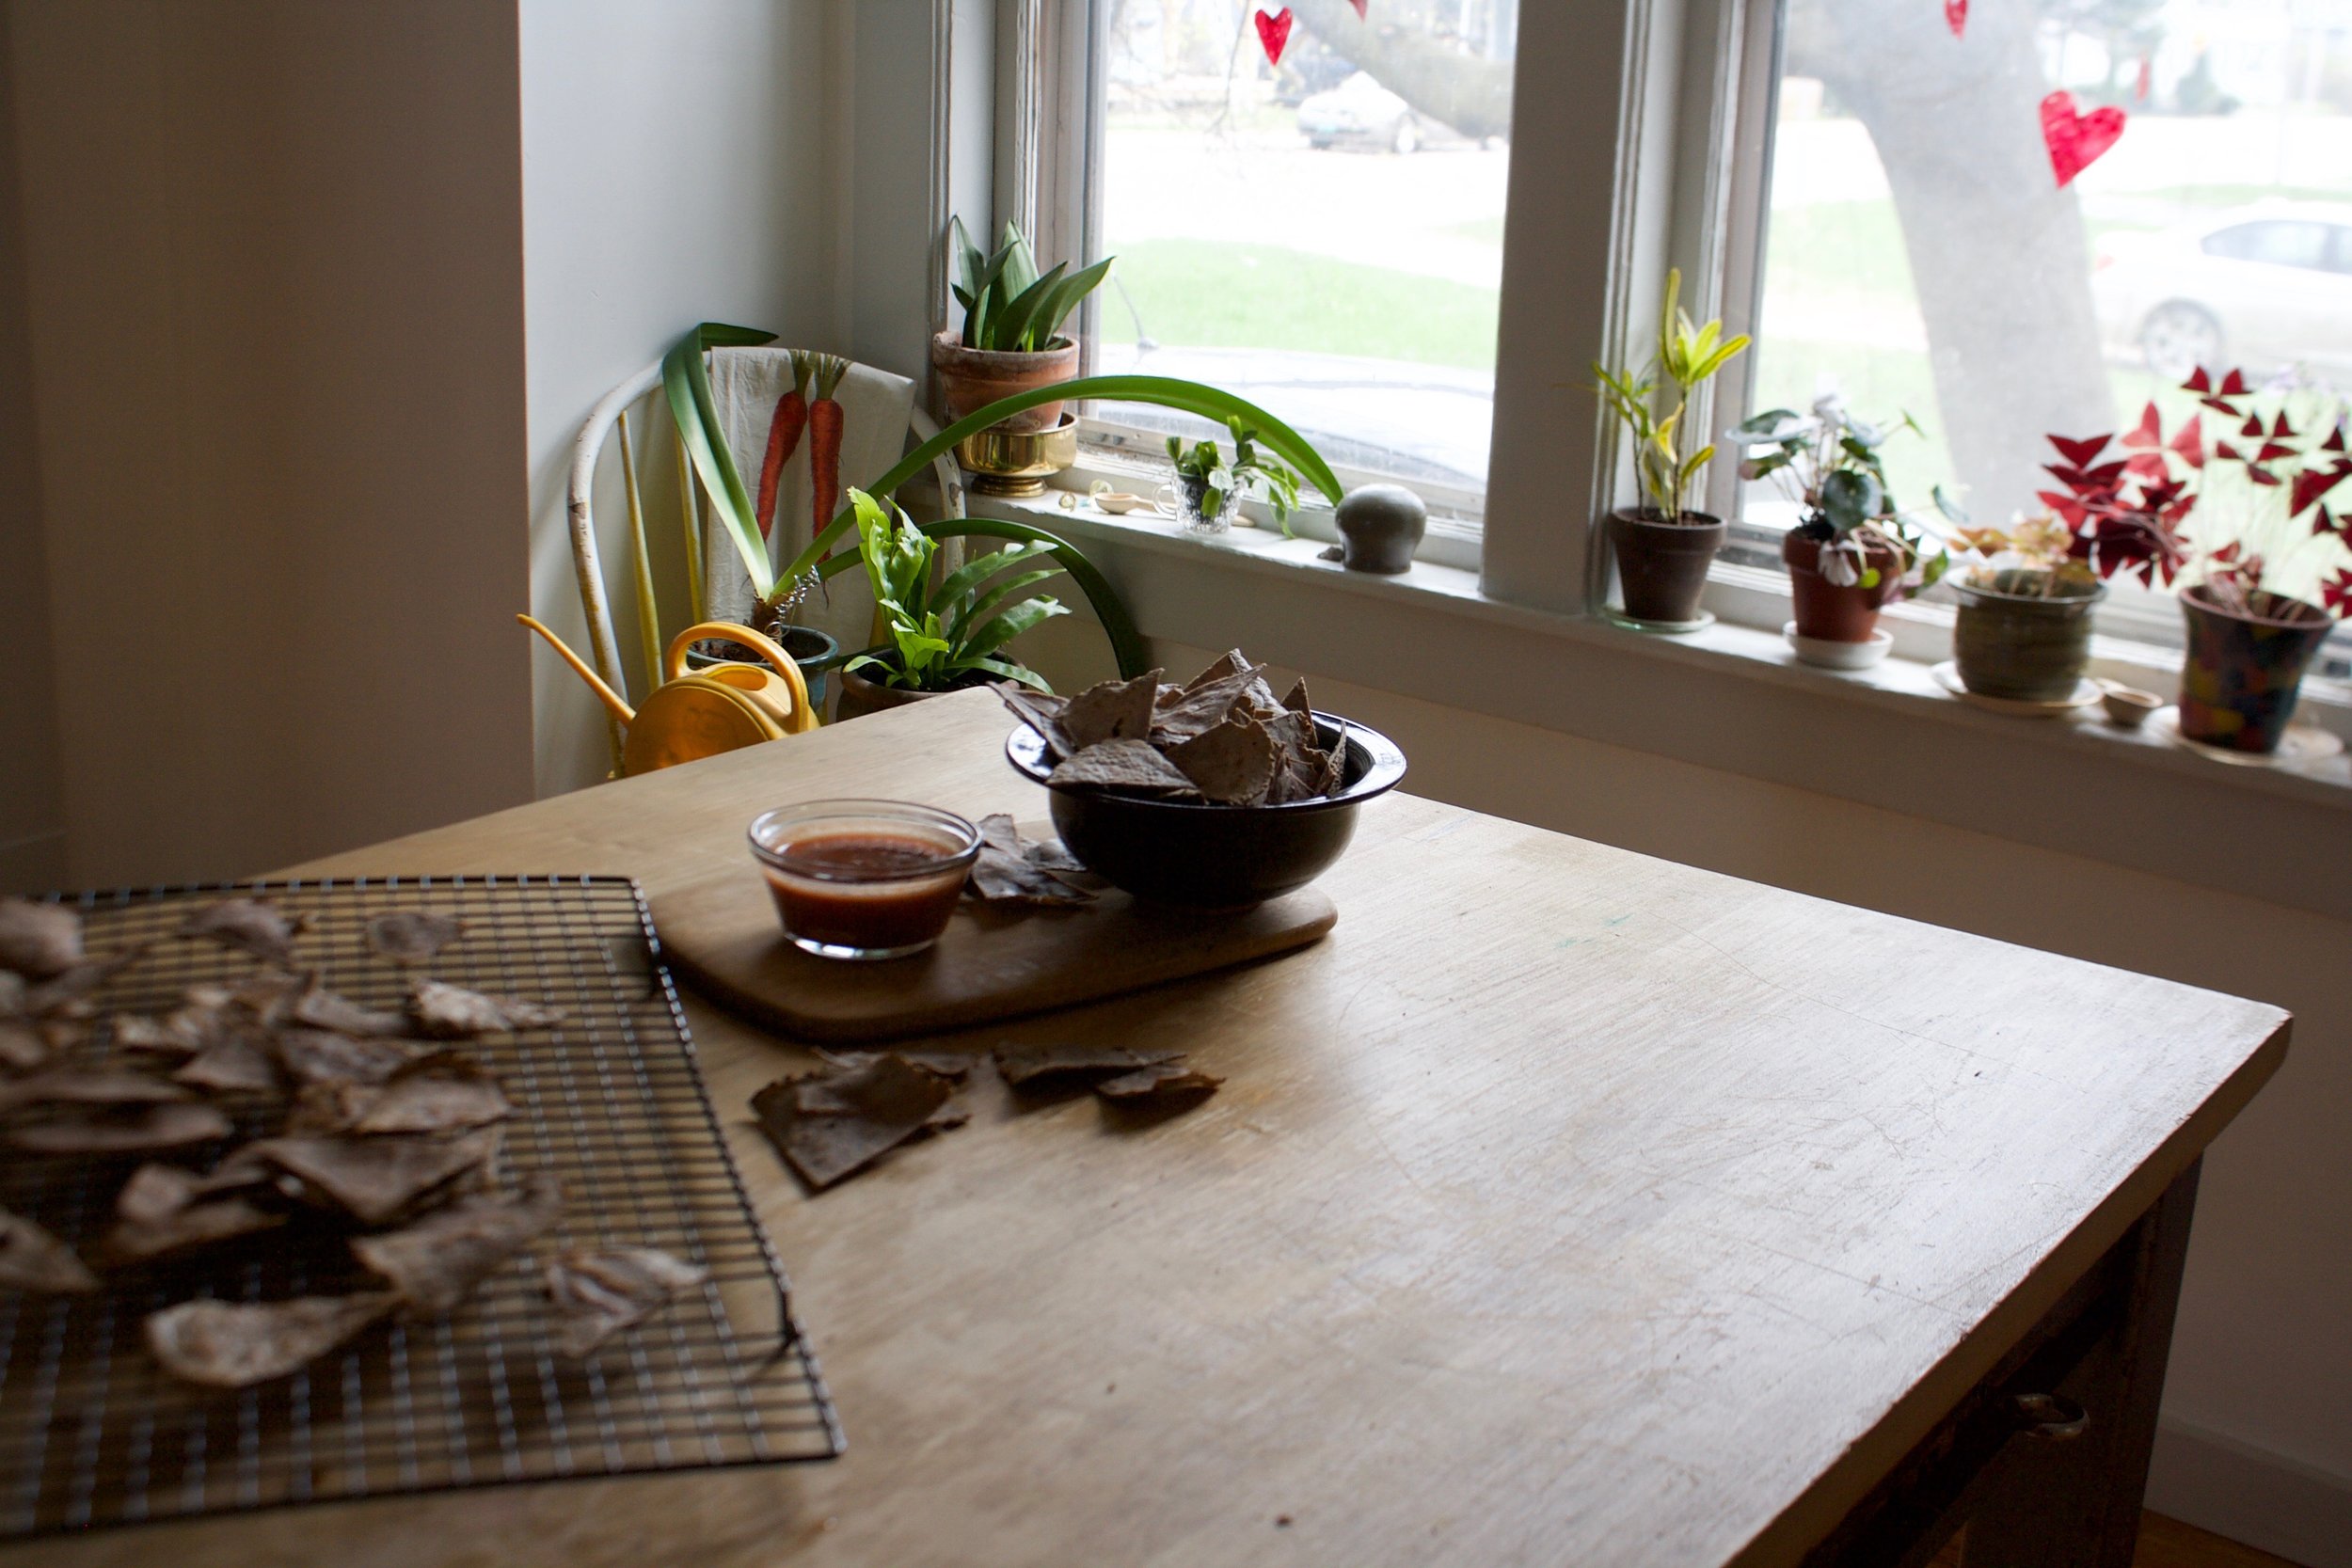
Pile chips into a bowl, and serve with some salsa or guacamole or whatever you eat you chips with.  They are your chips. 

-C


Black Bean Tortilla Chips 

Makes 98 chips, or like a good sized bag worth

  • 2 cups masa harina 
  • 1 cup cooked black beans in bean juice
  • 1- 1 1/4  cups warm water
  • couple teaspoons neutral oil (I used grape seed oil)
  • 2-3 teaspoons salt
  • A lemon or lime

Beans go into a food processor and blended until completely smooth. Add in the masa and blend, slowly adding 3/4 cups water until a dough starts to forms.  Stop and check dough. It should feel like play dough and come together easilty onto a ball. If it feel wet, add in a couple of tablespoons more of the masa. If it is still too dry and crumbly, add in more water until it's to the right consistnacey. Dump dough onto counter and form in a ball. Place dough in a bowl and cover with a damp towel and let sit for abut 15-30 minutes.

Preheat a skillet on medium high heat on stove.

Once dough has rested, divide into 12 pieces and roll into balls. Place balls onto a damp towel and cover when not working with them. Grab a large ziplock bag, a cutting board, and a rolling pin. Take a dough ball and place in the center of the bag. Press down with the cutting board, placing all your weight on top. It got flat, but not flat enough. Continue to flatten out with the rolling pin until it is about  1/8 inch thick. Press again one last time with the cutting board. Gently remove from bag and place directly onto the hot skillet. Cook each side for 3-4 minutes or until it  starts to get a few light brown spot. Place cooked tortilla on a baking sheet or in between a kitchen towel. Repeat until all 12 dough balls are cooked into tortillas.

Preheat oven to 375

Working in 3's. dump a little oil onto your hand then lightly rub it all over the tortillas. Stack them on top of each other then cut into 8 wedged. Place wedges onto a baking sheet, get as many as you can onto sheet without any overlapping, then sprinkle with salt. to taste. If you have them, use multiple baking sheets.  Place in oven for about 10-12 minutes or until the chips are crispy. Remove and sprinkle lemon juice all over the chips. Toss around and place back into oven for a minute or two just until lth lemon juice evaporates. Remove and dump chips onto a wire rack to cool.

Eat chips. Any left over can be placed into a airtight container or bag and will last about 3-4 days. 

In 5 ingerdients or less, beans, Dairy Free, Vegan, snack, Savory, pulses, Gluten Free, crackers and chips Tags Black Bean Tortilla Chips, Masa harina, chips form scratch, cinco de mayo, cron chips, Vegan, Gluten free, plant based, beans, black beans, black bean chips, corn chips, snack, chips, dairy free, gluten free
1 Comment

arugula walnut chickpea burgers with quick pickled radishes and onions 

April 21, 2018 Colleen Stem
IMG_5321.jpg
IMG_1552.jpg

I love me some spring time fresh greens, especially arugula. The last farm share pick up there was arugula for the first time since late fall and as soon as I saw it my mouth started to water for the fresh springy, peppery taste of  fresh spring time greens. As I bagged my greens, I shoved a fist full into my mouth. Ah, nothing better then a mouth full of fresh greens after a long long winter. Am I right or am I right?

I ate  a lot of those greens fresh, but did you know that arugula makes for a nice accompaniment to walnuts and chickpeas? And if you mashed all that together with a few other things and shaped the mixture into patties and you get yourself some dank ass burgers?  Well now you know. And now you can make them for yourself and experience the greatness of spring fresh arugula. Just make sure you have enough fresh to shove a handful into your mouth. It is spring time refreshing. 

The stuff. Chickpeas, arugula, walnuts, and big onion, and some radishes. Also a couple carrots, some oats, a few cloves of garlic, a Leon, salt and pepper, red wine vinegar, and a little olive oil. 

IMG_1449.jpg

To start, halve the onion. Thinly slice one half and thinly slice the radishes

Scoop it all into a bowl, sprinkle with salt and toss in vinegar. Set aside on the counter to do it's thing. 

Chop the rest of the onion, the carrots, and the garlic into small chunks.

IMG_1464.jpg
IMG_1468.jpg

Carrot, onion, garlic, and oats go into the food processor and pulsed until a medium crumble.

Walnuts and arugula next. 

IMG_1481.jpg
IMG_1489.jpg

Pulsed until combined then add in the juice of the lemon a good pinch of salt and pepper, and the drained chicken peas.

IMG_1493.jpg

Pulse until just combined. Some big chunks are good, you just want the mixture to be able to hold together.

IMG_1499.jpg

Dump the mixture into a bowl and place in the fridge for at least and hour and up to a day. 

After the time in the fridge, divide the mixture into 6 equal parts and form each into a patty about an inch think. Take a clean cloth and pat each applies dry on both sides.  

IMG_1525.jpg

Grab a skillet, lightly oil it, and place on a medium heat. Sear each side of each burger until browedthen place on a lightly Ould baking sheet. 

IMG_1529.jpg

Place the burgers into a preheated oven to finished cooking. 40 minutes, flipped after 20.

After the burgers are cooked, it time to assemble. Bread or buns of some kind(I used sourdough rolls) the pickled radish and onion mixture, some mustard( I used honey mustard) and more fresh arugula.

Do it up, do it right. Serve with some fries or chips and eat while knowing that spring is here, even if as you are eating, it is snowing. Damn snow. 

At least we have arugula. 

-C


Arugula Walnut ChickPea Burgers with Quick Pickled Radishes and Onions 

makes 6 burgers 

  • 1 can or 2 cups  cooked chick peas drained
  • 2 large handfuls arugula  (about 2 packed cups)
  • 1 large sweet onion
  • 2 small carrot
  • 1 cup old fashion oats
  • 1/3 cups walnuts
  • 2-3 cloves garlic
  • A lemon
  • salt and pepper
  • 2 tablespoon red wine vinegar
  • handful of radishes (5-7 of them)
  • salt and pepper
  • olive oil

To assemble burgers

  • Burger buns or baguettes
  • Maple or honey mustard
  •  fresh arugula 

Start by cutting half of the onion as thinly as you can. Do the same with the radishes and place the onions and radishes in a bowl with a sprinkle of salt and drizzle the vinegar all over Toss around and set the bowl aside.

Grab the food processor and dump the oats in. Roughly chop the other half of onion, the carrots, and the garlicand toss those into the processor too. Pulse until a medium crumble. Add in the arugula, the juice of the lemon, the walnuts, the chickpeas, and a good pinch each of salt and pepper. Pulse again until just combined and the mixture has come together. Taste and make sure the salt and pepper are good for you then dump the mixture into bowl and set in fridge for at least a half hour or as long as a day.

Preheat oven to 400.

When ready for burgers, take mixture out of the fridge.  Place a lightly oiled skillet on the stove on medium heat. 

Divide the mixture into 6 equal balls and pat into inch think patties. Take a clean cloth and pat eat patties dry.  Place each burger on hot skillet and cook each side for 4-6 minutes or until each side is nicely browed. Transfer burgers onto a lightly greased baking sheet then place them all into the oven to finish cooking for  40 minutes, flipping them after 20 minutes.

Once burgers are cooked, remove from the oven. They will be slightly fragile, but will firm up if you let them set  for 5-10 minutes.

Assemble the burgers. Grab a bun or bread of some kind (if you want), top with a good fork or two full of the pickled radish onion mixture, drizzle with some mustard and top with more fresh arugula.

Get on to eating it. 

If you don't eat all the burger at one time, the freeze really well. I almost prefer them after they have been frozen. 

In Vegetables, Vegan, Spring, pulses, Nuts, Gluten Free, entree, dinner, Dairy Free, beans Tags Arugula Walnut Chickpea Burgers With Quick Pickled Radishes And Onions, Vegan, Vegan Burgers, Veggies Burgers, Pulses, Beans, Burgers, Vegan Food, food, Pickled onion and radishes, spring, Walnuts, Nuts, Protien
Comment

Sweet Potato Chickpea Hash with Lemon Tahini Sauce

March 10, 2018 Colleen Stem

Easy quick dinners are no joke because sometimes life happens and then you are hungry, then hangry,  then maybe yelling and or tears start and nothing is ever going to be good again. And then you eat and everything is A OK, but that time between tears and food can be long, especially when you just can't think so one should have a least a good 2 or 3 good dinners up there sleeve (besides pasta) that can be made quick and easily to avoid the fallout of food deprivation. This bowl of goodness here is one of those. And sure some people might not always have a sweet potato, tahini, or chickpeas is the house  (I ALWAYS have a sweet potato or some type of winter squash and tahini and chickpeas... they are staples here) but with a tiny it of foresight, you can make these things happen too. And then you will make it and realize that you must have these ingredients on hand at all times because yeah, a good go to meal that will prevent the tears.

Admittedly I have made this for the mr but he is not that into it. Says he is not a huge fan of sweet potatoes. (what the fuck is wrong with him?) But me, I eat is and I eat it all.. The sweet potato/chickpea/tahini combination is classic fantastic. This hash is sweet potato sweet, a little chickpea crunchy, salty, savory, and creamy citrusy.  It's all sorts of goodness. I tossed this hash on a big bed of kale (any sturdy green would be good) and only good things happen in my mouth. So the mr. might not like it but I am starting to realize (after 15 years) that my taste is far superior to his. Haha. (but really)  Quick and easy (and healthy) and good.  Make it once and it will turn into on of your go to dinners, unless you don't like sweet potatoes. In that case there is pasta. 

The stuff. Chick peas (I had just made a batch but if you don't have any made already, grab a can) a sweet potato, an onion, a lemon, some tahini, and garlic Also some cumin and chili powder, olive oil, and salt and pepper. 

Preheat your oven and chop up the onion and sweet potato into mouth sized pieces. 

IMG_0745.jpg

Toss the chopped stuff onto a baking sheet with the chickpeas.

IMG_0743.jpg

Drizzle the whole shebang with olive oil and toss with cumin, chili powder, and salt and pepper.  

Into the oven it goes.

Half hour later it is all roasted and ready.

IMG_0733.jpg

Oh quick, make this before the stuff is out of the oven. Tahini, minced garlic, a dash of salt, a bit of the liquid from the chickpeas and the juice of a lemon. Just stick it all in a cup or bowl and mix it around. Then it's done.

IMG_0766.jpg

Scoop the hash into a bowl (I like a large pile of greens underneath) and cover with the tahini sauce. 

Eat is all to your face.

-C


Sweet Potato Chickpea Hash With Lemon Tahini Sauce 

dinner for one, a side for two. Very easily doubled or tripled. 

  • 1 sweet potato
  • 2 cups or 1 can cooked chickpeas drained but liquid reserved 
  • 1 medium yellow onion
  • 1 tablespoon cumin
  • 1 teaspoon chili powder
  • salt and pepper
  • 2-3 tablespoons olive oil
  • 3 tablespoon tahini
  • 1 lemon
  • 1/4- 1/2 cup of aquafaba (chickpea liquid)
  • 2-3 cloves garlic

Preheat oven to 425

Chop sweet potato and onion into mouth sized cubes and place on a baking sheet. Add the drained chickpeas and drizzle with olive oil and toss around. Sprinkle on the cumin, chili powder, salt and pepper, and toss that around again. When the oven is preheated, slide the baking sheet on in. 

While the stuff is baking, mince the garlic and place it in a bowl with the tahini, the juice of a lemon, and a pinch or two of salt to taste. Add in 1/4 cup of aquafaba and mix it all around. If to thick for your liking, add a little more of the aqaufaba until its a good consistency. 

Check the stuff in the oven after 20 minutes and give it a toss.  Keep baking for another 5-10 minutes or until the sweet potato is cooked and starting to brown. Remove from oven and dump into a bowl (maybe on a bed of greens or rice) and drizzle all over with the tahini sauce.

Eat


In Vegetables, Vegan, side dish, sauce, quick and easy, pulses, Potato, grain free, Gluten Free, entree, dinner, Dairy Free, beans Tags Sweet Potato Chickpea Hash With Lemon Tahini Sauce, vegan, grain free, gluten free, sweet potato, tahini, dinner, quick and easy, plant based, heathy, vegan dinners, pulses, beans, chickpeas, sheet pan dinner
Comment

 Butternut Squash and Lentil Tacos with Jalapeño Avocado Mousse

January 27, 2018 Colleen Stem
IMG_9755.jpg
IMG_9769.jpg
IMG_9768.jpg

There are just some things in life that are always right, like puppies, rainbows, human decency, or the smell of  springtime flowers. And tacos. Tacos are always right. Seriously, have you ever meet someone that doesn't enjoy a taco of some sort, of some variety? Everyone has a taco, that is a fact. (Even if you skip the tortilla and go straight for all the fillings like me.)

And if you are like me, lentils and butternut squash are always right too. So are all the veggies and  the avocado. Together all this goodness makes for one amazingly fantastical, very right taco. 

We all need a little bit rightness in our lives right now. Why not start with dinner. 

The stuff. You got to get lenitls, butternut squash, cumin, chili pepper, salt and pepper, and olive oil. Also kale, red onion, cabbage, avocados, a jalapeño, limes, and garlic. And you need something to stick it all in, so flour or corn tortillas. 

Start with making the veggie slaw. Basic here, just chop up the kale, onion, and cabbage into small thin pieces.

IMG_9661.jpg

All that veggie goodness goes right into a bowl with a sprinkle of salt and the juice of a lime. Give it a good toss to coast it all and set aside to do it's magic. The longer it sits, the better it gets.

IMG_9636.jpg

Now to roast the squash.  Dice it into small mouth sized pieces. I usually don't peel, but most people do and the mr has been avoiding he peel when he eats the squash so I peeled it (and roasted it and ate it myself) 

Toss the squash in a drizzle of olive oil and the cumin and chili powder and a little salt and pepper. 

IMG_9666.jpg
IMG_9702.jpg

Raw squash goes into a preheated skillet (or baking sheet) and roasted until browned and tender. 

IMG_9712.jpg

Squash meets lentils and it is good. So so good. 

IMG_9676.jpg

And don't forget the jalapeño mousse. . Dice the jalapeo and the garlic and toss into a blender (or jar to use an emulsion blender) with the avocado, juice of a lime, a sprinkle of salt,  and a little bit of water.

IMG_9681.jpg

Ready for moussing. 

IMG_9695 2.jpg

A pillowy cloud of green goodness. 

IMG_9723.jpg

You got all the stuff, you know what to do.

IMG_9777.jpg

Fact. Tacos = happiness. Now get on it. 

-C


 Butternut Squash and Lentil Tacos with Jalapeño Avocado Mousse

make about 6 tacos 

  • 1 1/2 cups cooked french lentils
  • 1/2 of a small butternut squash (about 3 cups cubed)
  • 1 tablespoon cumin
  • 1 teaspoon chili powder 
  • salt and pepper
  • olive oil
  • 2-3 large kale leaves
  • 1/4 head of cabbage
  • small red onion
  • 2 limes
  • 1 large or 2 tiny avocados 
  • 2-4 tablespoons water cup
  • 1 jalapeno
  • 2 cloves garlic
  • 6 small  flour or corn tortillas 

Grab the kale, cabbage, and red onion and thinly slice and dice into small pieces. Place into bowl, sprinkle with 1/2 teaspoon salt and add in the juice of a lime. Give it all a good mix around and set aside. 

Preheat oven to 450.  Place your cast iron skillet or baking sheet in oven while preheating.

Take squash, peel the skin off (if you want) and cut into cubes about an inch big. Place in a bowl and toss with a little olive oil and the cumin and chili powder. Sprinkle a little salt and pepper in and toss it all around. When the oven is preheated, carefully remove the pan and dump the squash in it. Evenly disperse the squash then place the pan back into the oven and roast squash until browned and tender, which takes about 25 minutes. 

When the squash is done, remove and dump into a big bowl along with the lentils.

While the squash is roasting you can go ahead and make the avocado mousse. Scoop avocado fruit into a bowl  or blender and add in the jalapeño (seeds and ribs removed) and the garlic. Add in the juice of a lime and 2 tablespoons water. Blend until smooth. Add in more water to thin out to desired consitancey. 

Now you have everything ready to taco. Grab your tortillas and heat them up if want and start to pile it all on. Lentil squash mixture, a good handful of the veggie slaw, topped with a dollop or two of the avocado mousse. Now you got yourself a taco and it's ready for your face. 

In Vegetables, Vegan, quick and easy, pulses, entree, dinner Tags Butternut Squash and Lentil Tacos with Jalapeño Avocado Mousse, Vegan Tacos, vegan dinner, tacos, lentils, butternut squash, plant based, dairy free, healthy, Jalapeño avocado mousse, quick and easy
Comment

Vegetable Soup

January 6, 2018 Colleen Stem
IMG_9302.jpg
IMG_9296.jpg
IMG_9274.jpg

Whether you are stuck at home because you have the flu or because you do not want to leave the house for fear of turning into a human popsicle, or maybe even you just don't want to because this is the first weekend that you have no plans, no obligations, no parties, well then you are in good company. 

Unfortunately for me, I have to leave the house. I have obligations, I am getting over the flu, and I am pretty sure I am going to turn into a popsicle because when -8 is the high for the day, well, it's bound to happen. 

But lucky for me I already made the soup, in my fitful sicky, but able to think about and eat food again state. Yes I had the flu, or better yet, the stomach flu. And the stomach flu and food do not mix. Even the thought of food would send me reeling and it was just no good. I seriously thought I would never be able to think or better yet, eat food again without turning straight to the bucket. But I will stop there because you don't need to hear about my misery. Anyway, the death spiral subsided and food was no longer the enemy. I actually wanted (kinda of) to eat again. So food it was to be.

Because it was my first day back to food, I really wanted to take it super easy. (Before I made this soup I actually boiled a carrot until it was mush and ate that just to test my tummy)  Nothing heavy, obviously hot and warming, not to spicy.  Just soothing and nourishing. And I didn't really want think about it and worry about it and spend much time in the kitchen. Sure I could have bought a can of soup but actually no, canned soup is not for me. And I know the mr would have thrown something together for me but I was determined to be a slightly productive human and do something with my day even if it was minimal.  I had to make the soup, I had to do it. 

This soup was exactly what I needed and could not have been any easier to make. Chop up some shit, toss it into a pot, and walk away (or nap on the couch) for a little while. It can be done on the stove, in a slow cooker, or if you have a Instapot and want to do that, I should say go for it. And I am not saying this because I was starving, but  this was one dang fantastic tasting soup. Right in every way. It's going on my semi permanent soup rotation for the next few months.    

No bad after 48 hours of dying and no food. (stupid flu)

The stuff. Carrots, celery, a small rutabaga, and and onion. A red potato, a parsnip, some green been, garlic, canned tomatoes, navy beans,  thyme, rosemary, a bay leaf, and salt and pepper.

Note here that all this stuff was already in my house. Say you do not have a rutabaga or a parsnip, it's totally fine. You can add 

IMG_9218.jpg

Here is the hardest part. Chop it all up into little pieces. All of it all mixed together, just get it chopped.

And toss it all into a big pot with he green beans, a handful of dried beans, and the spices.

Add in the can of tomatoes

IMG_9241.jpg

Then fill the pot with water.

Now stick the pot on the stove and bring to a boil then reduce heat to a little lower the medium and loosely cover with a lid. 

A couple hours later, once the beans are cooked and the veggies are tender, you got yourself a big ol' pot of some fantastic home made, easy as can be, vegetable soup. 

Chunky, hearty, and easy as can be. And the best part is that I have left overs and we all know that left over soup is the best soup. 

Stay warm, don't turn into a popsicle.

-C


Vegetable Soup

Makes a big pot of soup

  • 2 carrots
  • 3 stalks of elery
  • 1 onion
  • 1 small rutabage
  • 1 red onion
  • 1 parsnip
  • 2 cups frozen green beans 
  • 1/2 cup navy beans
  • 3-4 cloves garlic
  • 1 28oz can  (no salt added) crushed tomatoes
  • 1 teaspoon roasemary
  • 1 teaspoon thyme
  • 1 bay leave
  • salt and pepper
  • water

Note. You might not want rutabaga in this or you might want to add some cauliflour or peppers, so go for it. It's a pretty adaptable soup so use what you got and like. 

Grab all you raw veggies, give them a quick wash, then chop them all up into bite sized pieces. Mince up the garlic. Dump it all into a large heavy bottom pot. Add in the frozen green beans, the dried beans, the spices and the can of tomatoes. Add a pinch of salt and pepper and  enough water to cover the everything 3-4 inches. 

Place pot on stove, bring to a boil, then reduce heart to medium low and loosely cover wit a lid. Cook, giving it a stir once in a while,  for a least 1.5 hours ( can cook all day on long on simmer if you like)  or until the beans are coooked through and the veggies have soften. Add more water if needed.

Serve when you are ready to eat. Refrigerate leftovers.

In winter, Vegetables, Vegan, soup, pulses, one pot meal, grain free, Gluten Free, dinner, Dairy Free, beans Tags one pot meal, soup, Vegetable soup, vegan, gluten free, dinner, plant based, healthy, vegetabes, pulses, beans, easy, simple, tomato based soup, slow cooker, instapot, nourishing, clean eating, whole 30
Comment
← Newer Posts Older Posts →
 

https://thelovelycrazy.squarespace.com/config#/|/about/

Me. Food Maker.Food eater. Woo HOO!

STEM+NODE  SMALL BATCH AND ONE OF A KIND POTTERY

stem+node ceramics


____________________

Subscribe

GET NEW POSTS IN YO EMAIL

You are AWESOME!!!


@thelovelycrazy 2014-2021