• stem+node ceramics
  • HOME
  • Food Recipes
  • About
  • Contact
Menu

The Lovely Crazy

Street Address
City, State, Zip
Phone Number

Your Custom Text Here

The Lovely Crazy

  • stem+node ceramics
  • HOME
  • Food Recipes
  • About
  • Contact

Crispy Green Beans

March 6, 2021 Colleen Stem
IMG_0704.jpg

I rely pretty heavily on frozen produce in the mid to late parts of winter. I do have my winter farm share but that is never enough so I pack my freezer as full as I can with stuff in the fall (mostly shredded zucchini and lots of tomatoes and eggplant). And then sometime between Christmas and New Years its pretty much gone. Once that happens I start in with store bought frozen veggies. I usually by frozen broccoli, peas, and green beans and right now me and the frozen green beans are having a moment.

I don’t know how it started but almost everyday I dump like half a bag of frozen green beans (sometimes a whole bag) onto a baking sheet without any oil or seasoning, and pop it into a hot oven for like 15 minutes. And that is it. I pull them put and they are crispy, crunchy, and probably one of the tastily way a green bean can be eaten (besides fresh). And the weird thing is, I have tried to mimic the crispness and crunchiness with fresh green beans but it never works out. There is something about roasting them frozen that gives them the perfect crispy texture. And no no to oil. They don’t need it, it only makes the beans soggy.

So it might seem kind of weird and it’s not a recipe, but I highly, HIGHLY, suggest that next time have a hankering for a tastely crunchy treat, try roasting some frozen green beans. And then let me know if you become addicted too.

Sometimes it’s the simplest things, you know?

IMG_0694 2.jpg

Frozen beans go straight from freezer onto baking sheet and into the oven.

IMG_0700.jpg

They then come out crispy. That's it.

IMG_0703.jpg

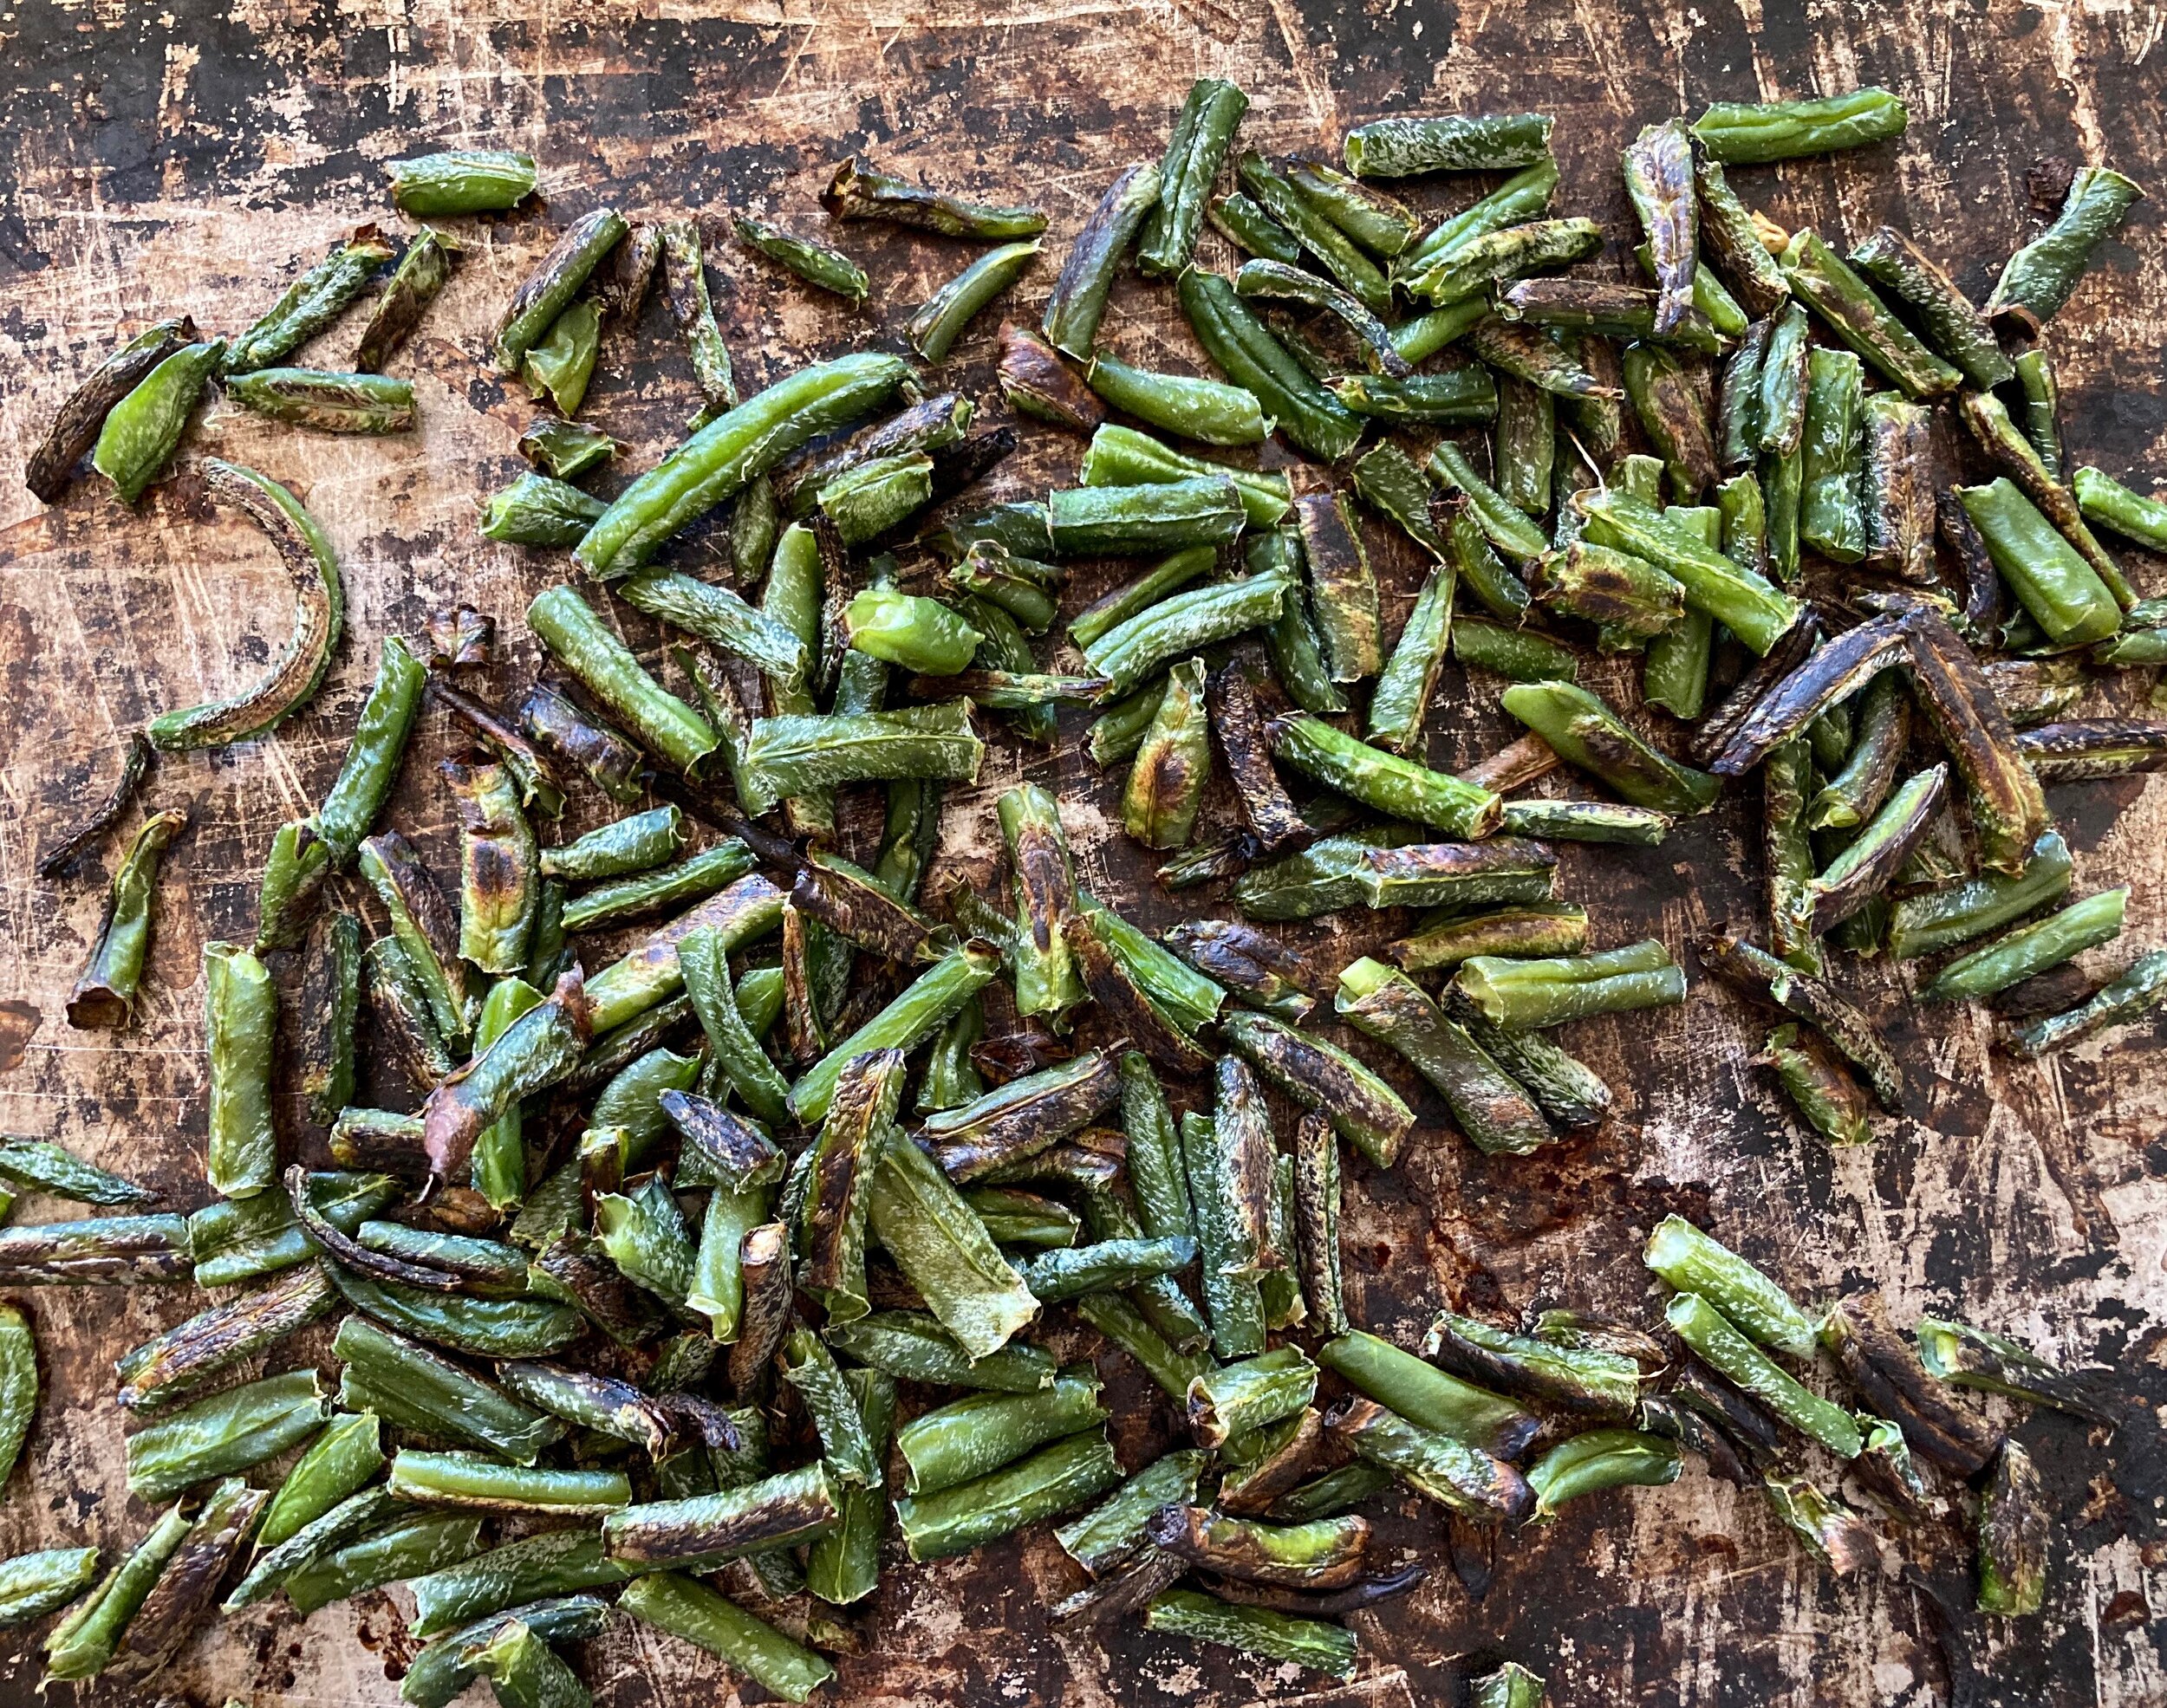
And yes, I usually just eat them off the baking sheet with my fingers because why bother dirtying a dish?


-C


Crispy Green Beans

  • Frozen green beans

Preheat oven to 400

Dump frozen green beans onto a non oiled baking sheet single layered and place into hot oven. Bake for 15-20 minutes or until crispy. Remove and eat.

In Vegan, snack, side dish Tags crispy green beans, frozen green beans, one ingredient, snack, vegan, vegetable, plant based, simple, delicious, grain free, gluten free, beans, winter, roasted, no oil
Comment

Sautéed Cumin Ginger Chard with Pickled Onions

July 20, 2019 Colleen Stem
IMG_0386.jpg
IMG_0487.jpg

I am on a major swiss chard kick. Like I am eating it all day, every day. And I don’t know if it the heat or what, but the other night I was laying in bed, super hot mind you, and couldn't keep my mind from racing. All I could think about was swiss chard and how much I love it and all the ways I want to eat it. Yeah, I know, but that is my brain so what can I do? Anyway, I finally fell asleep, and when I did it was dreams of chard and rainbows and all sorts of colorful things that I cannot remember anymore. I do know I woke up hungry. And with a plan for lunch.

I will just tell you now, this chard situation is sooooo good! And besides me being on a major chard kick, I am also on a ginger and cumin kick and an onion kick as well so it just made sense to make something with them all together. Tender and gingery cumin-y chard with crispy pickled onions. Seriously, is your mouth watering yet? I have made it twice in the past few day and I plan on making it a whole bunch more. So freaking good!

If you like chard, or don’t know if you do (you probably do), this is a great way to enjoy it. You will not be disappointed.

Now to the chard.

The stuff. A bunch of chard in a few different colors, a medium onion, a chunk of fresh ginger, cumin seeds, white wine vinegar, and salt and pepper.

IMG_0364.jpg
IMG_0370.jpg

First and the sooner the better, cut onion up into very thin pieces and place into a bowl with vinegar, a pinch of salt, and a splash of water. Toss onions around and let sit, for at least 20 minutes, or if you think of it and can make it happen, do it a few hours in advance. . The longer the onions sit in the vinegar the better.

IMG_0380.jpg

Ginger. If you haven’t grated it yet, do that.

IMG_0383.jpg

Remove the stems from the greens of the chard then chop the stems into small pieces.

IMG_0417.jpg
IMG_0428.jpg

Now here we go. First, before anything, place the cumin seeds into the dry skillet and place on medium heat to toast for a couple minutes, Then add in the grated ginger, the chard stems, a pinch of salt, and about 1/2 a cup of water. Stir around. Keep on medium heat and let cook until the chard stems start to become tender. If all the water evaporates out before they are done cooking, add a little more.

IMG_0423.jpg

Now chop up the chard greens.

IMG_0438.jpg
IMG_0449.jpg

Greens go into the skillet with the stems and a little more water. Cook the greens down until all wilted and lovey and delicious.

IMG_0456.jpg

Dump the cooked chard into a bowl or on a place and mix in all the pickled onions. Drizzle with a little of the left over vinegar from the onions.

IMG_0490.jpg

All there is left to do now is add a lot of cracked pepper and grab a fork.

My dreams come true…..Ha.

-C


Sautéed Cumin Ginger Chard with Pickled Onions

Serves 1 as a meal or 3-4 as a side

  • I bunch (around a pound) Swiss chard Any color or a mixture of colors))

  • 1 mediam onion (red or white)

  • about an inch or so fresh ginger (1 tablespoon grated)

  • 1 tablespoon cumin seeds

  • 1/3 cup white or red wine vinegar

  • salt and pepper

  • around 1 cup water

Grab the onion and slice it very thinly into rings or half rings. Place in a bowl and add the vinegar plus a pinch of salt and about 1/4 cup of water. Toss around and set aside for at least 20 minutes. If you think of it, do this a few hours before sautéing the chard. The longer the onions sit in the vinegar, the better.

When you are ready to cook it, grab the chard and remove the stems from the greens. Cut the stems into small little pieces. Grab a big skillet and place on medium heat. Add in the cumin seeds and let toast for a few minutes and while that is happening, grate the ginger. Once cumin is toasted, add in the chard stems, the ginger, and about 1/2 cup of water. Keep on medium heat and cook until the stems are slightly tender. Should take 8 or so minutes. If the water completely evaporates before cooked, add in a little more.

And the greens. roll them up together and slice them into thin pieces. Add all the greens to the skillet with tender stems. Add in a splash more water if needed and a pinch of salt. Mix around and cook for another 4-5 minutes or until the greens are completely wilted. Remove from heat and dump the chard into a bowl or on a plate. Take the onions, remove from the liquid and mix together with the chard. Drizzle a tiny bit of the left over vinegar from he onions on top. Cover with cracked pepper.

Eat. Hot, room temperature, or cold. It fantastic any way.

In Vegetables, Vegan, summer, side dish, salad, quick and easy Tags Sautéed Cumin Ginger Chard With Pickled Onions, Swiss chard, vegan, plant based, gluten free, whole foods, healthy, no oil, salad, greens, easy, chard salad, pickled onions
Comment
 

https://thelovelycrazy.squarespace.com/config#/|/about/

Me. Food Maker.Food eater. Woo HOO!

STEM+NODE  SMALL BATCH AND ONE OF A KIND POTTERY

stem+node ceramics


____________________

Subscribe

GET NEW POSTS IN YO EMAIL

You are AWESOME!!!


@thelovelycrazy 2014-2021