• stem+node ceramics
  • HOME
  • Food Recipes
  • About
  • Contact
Menu

The Lovely Crazy

Street Address
City, State, Zip
Phone Number

Your Custom Text Here

The Lovely Crazy

  • stem+node ceramics
  • HOME
  • Food Recipes
  • About
  • Contact

Sweet Potato Steaks on Arugula and Kale with Pea Avocado Cream

April 10, 2021 Colleen Stem
IMG_4654.jpg

All I want to do is eat fists fulls of arugula. Ok, maybe that is not all I want to do, but it is something that I have been doing a lot. I have always really like arugula but as of right now, it is my top choice green!

Anyway, big green salads are all I want to eat because it is spring and all and greens are the best in the spring. But I still am eating a lot of roots and will be eating them for a few more weeks unit winter farm share dies down. And because it is the end of the season, the choice of roots is dwindling and we basically get a bucket of carrots, beets, and sweet potatoes. Lots of sweet potatoes, which by the way, I am not made about. And greens, We get lots of greens!

So my new favorite salad comes to fruition. Thick cut sweet potato steaks on a bed of fresh spring arugula and kale toped with a thick creamy avocado pea situation and some toasted walnuts for flair and crunch. I mean, is your mouth watering and your tummy grumbling yet?

Mine is but that is just how it always is.

Now to the steaks and salad!

IMG_4603.jpg

The stuff. A sweet potato, some arugula and tender kale, peas (frozen and thawed) half an avocado, some toasted walnuts, a lemon, and salt and pepper.

IMG_4609.jpg

Start by cutting the sweet potato into thick steaks. 4-5 same thickness slices if you may.

IMG_4612.jpg
IMG_4617.jpg

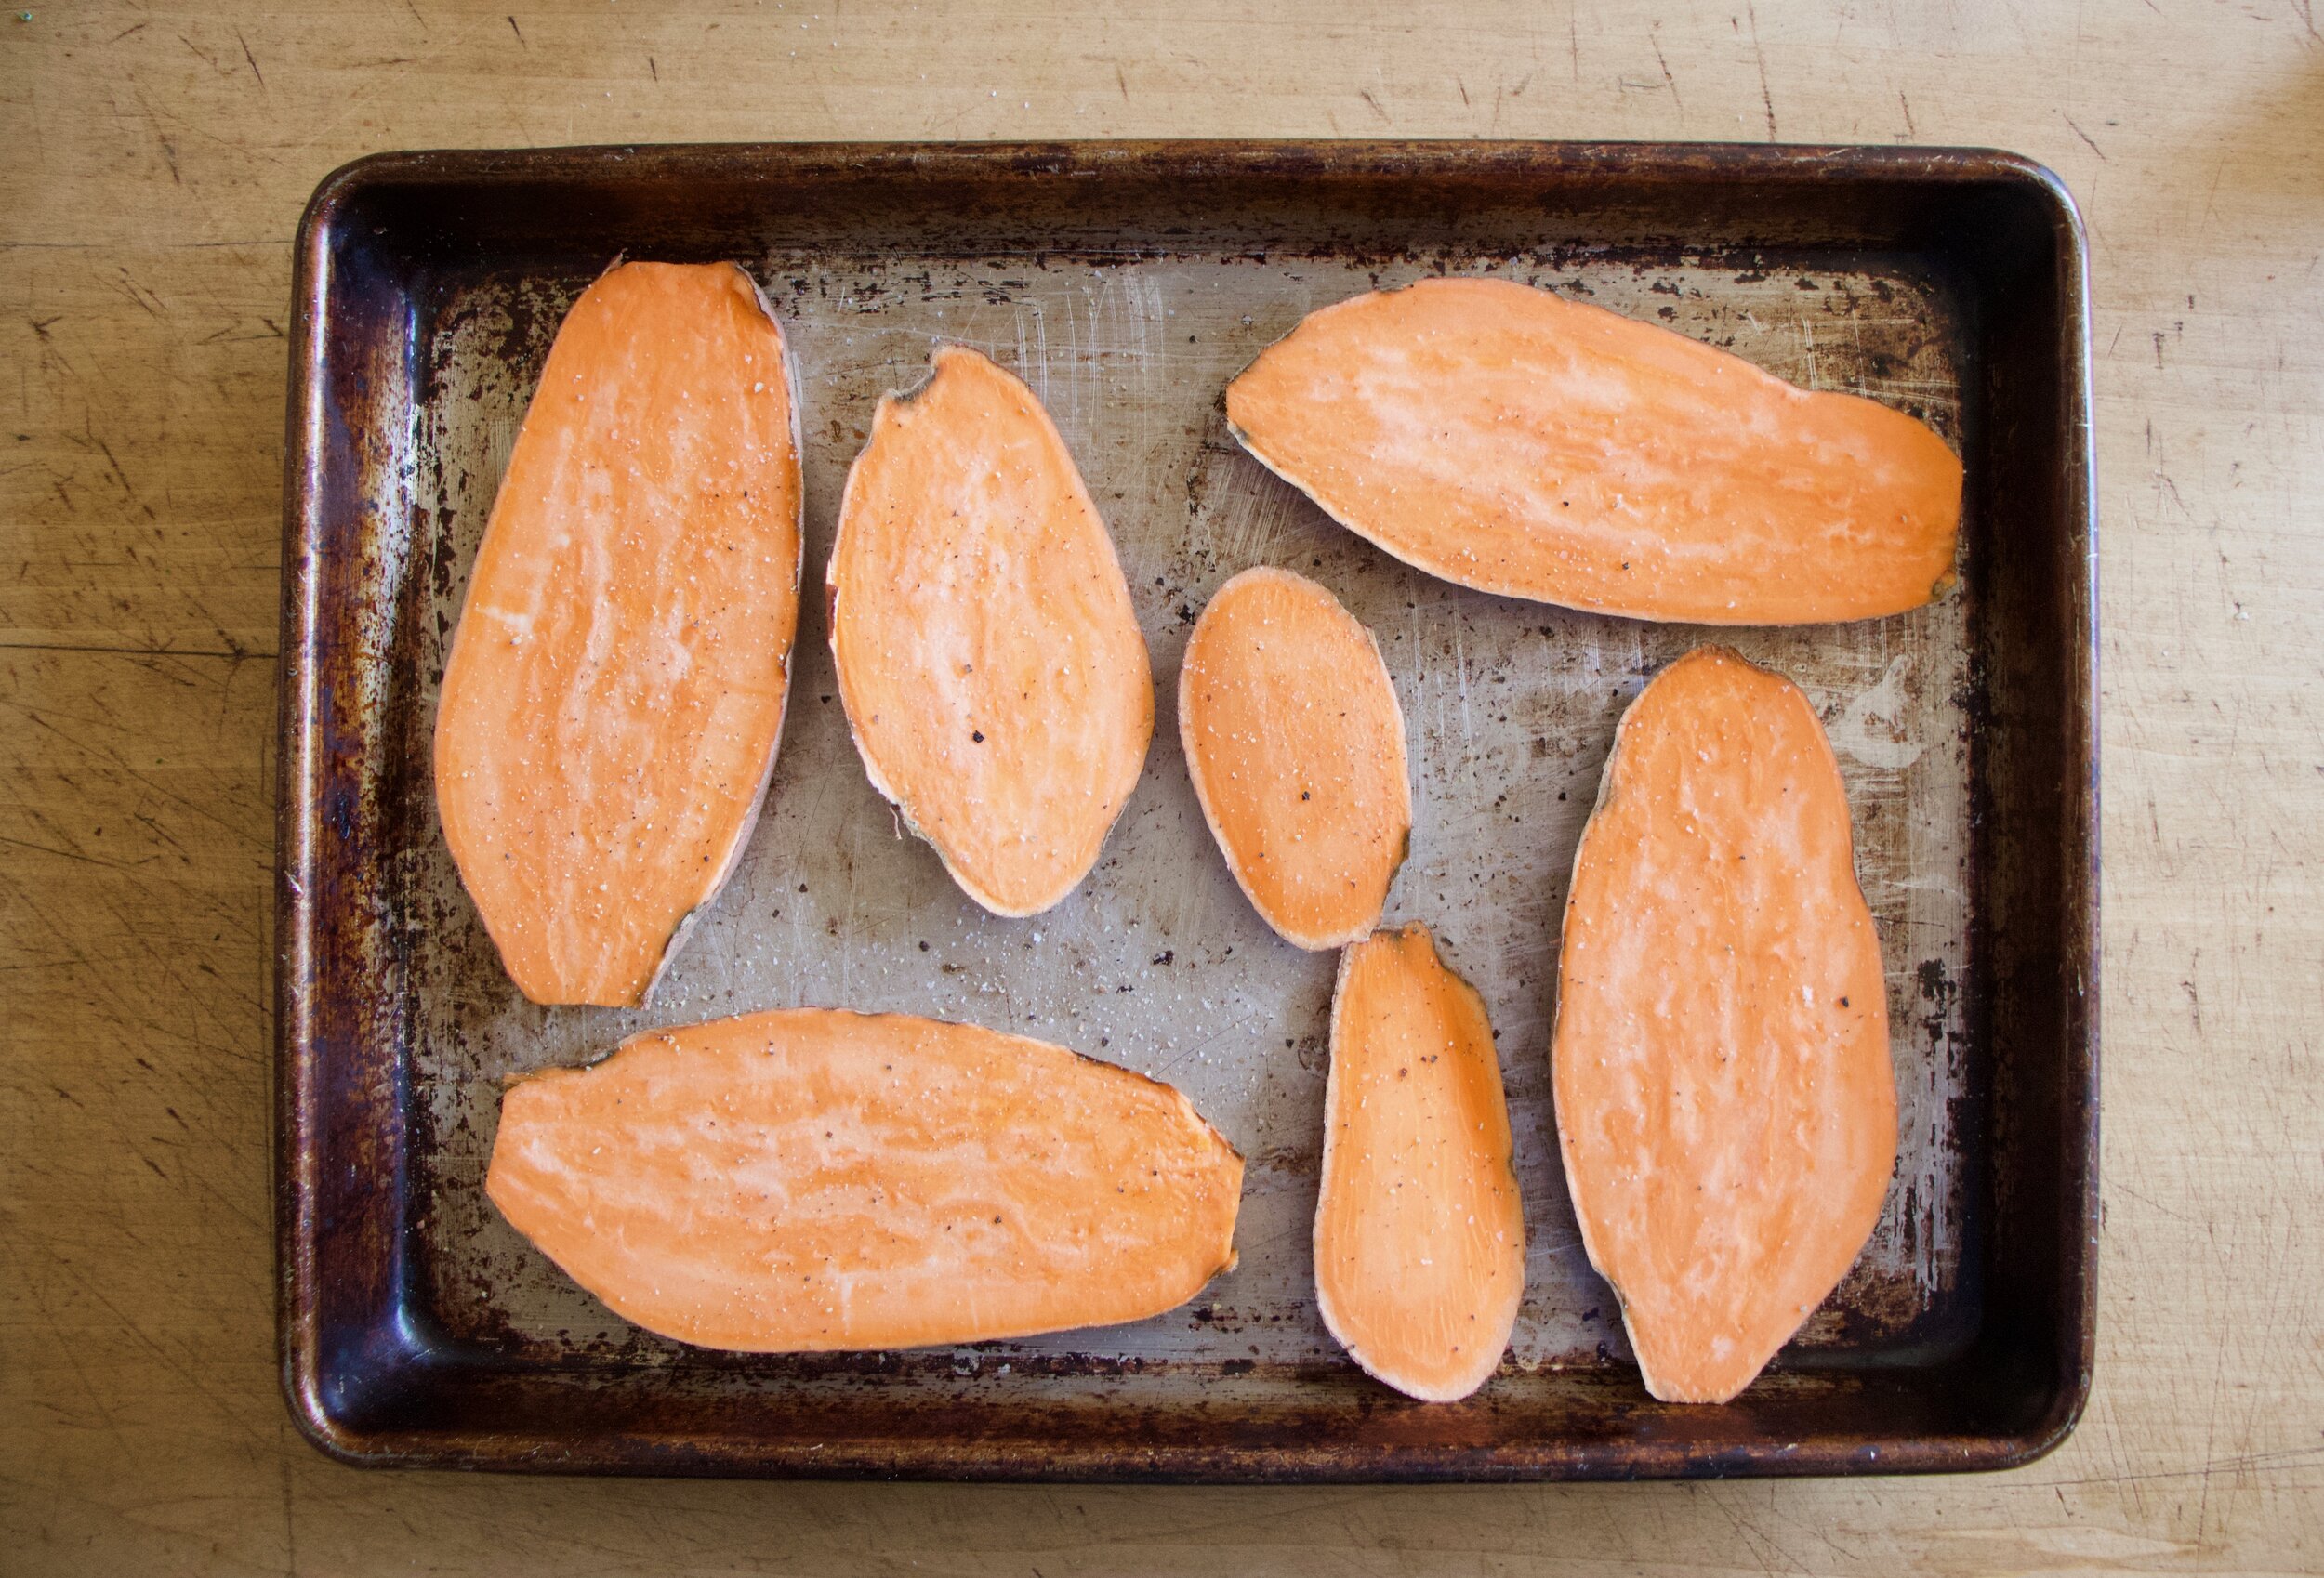
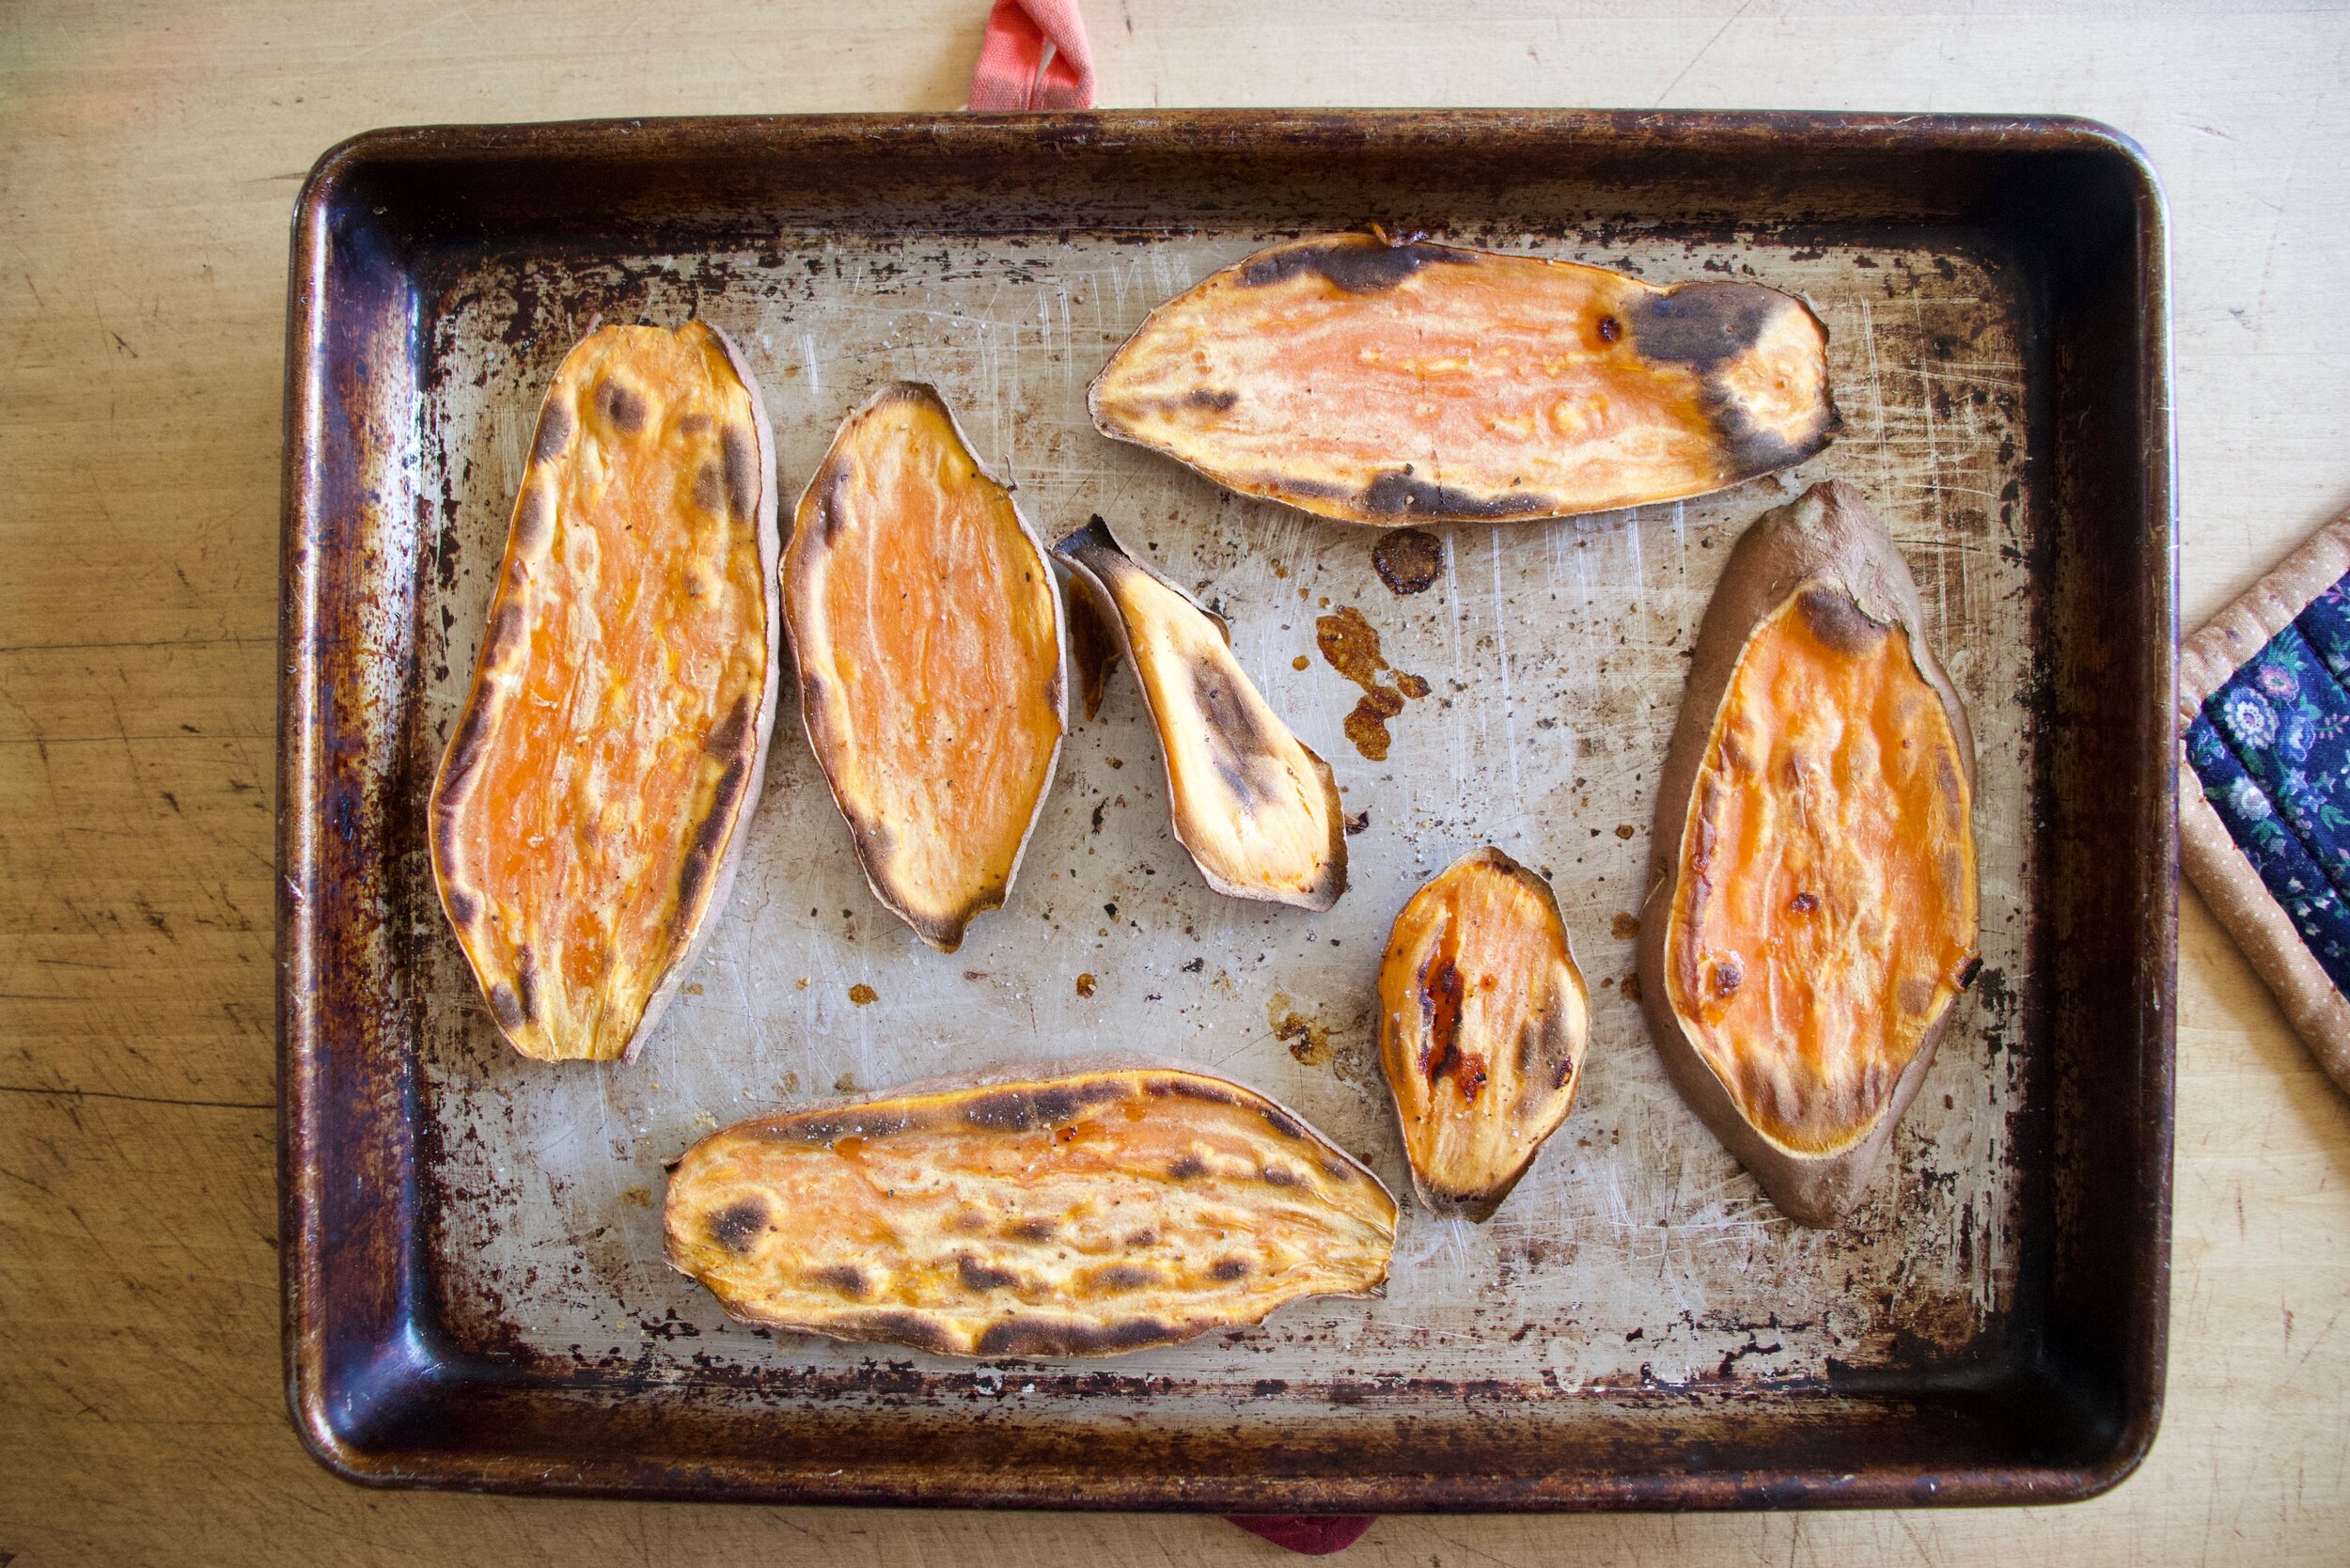
And no roast up the sweet potato steaks. Just place hem onto a baking sheet and pop them into a hot oven. Bake for 2-30 minutes, flipping over after 15-20 minutes. Once tender, remove from oven and set aside.

IMG_4629 2.jpg
IMG_4632.jpg

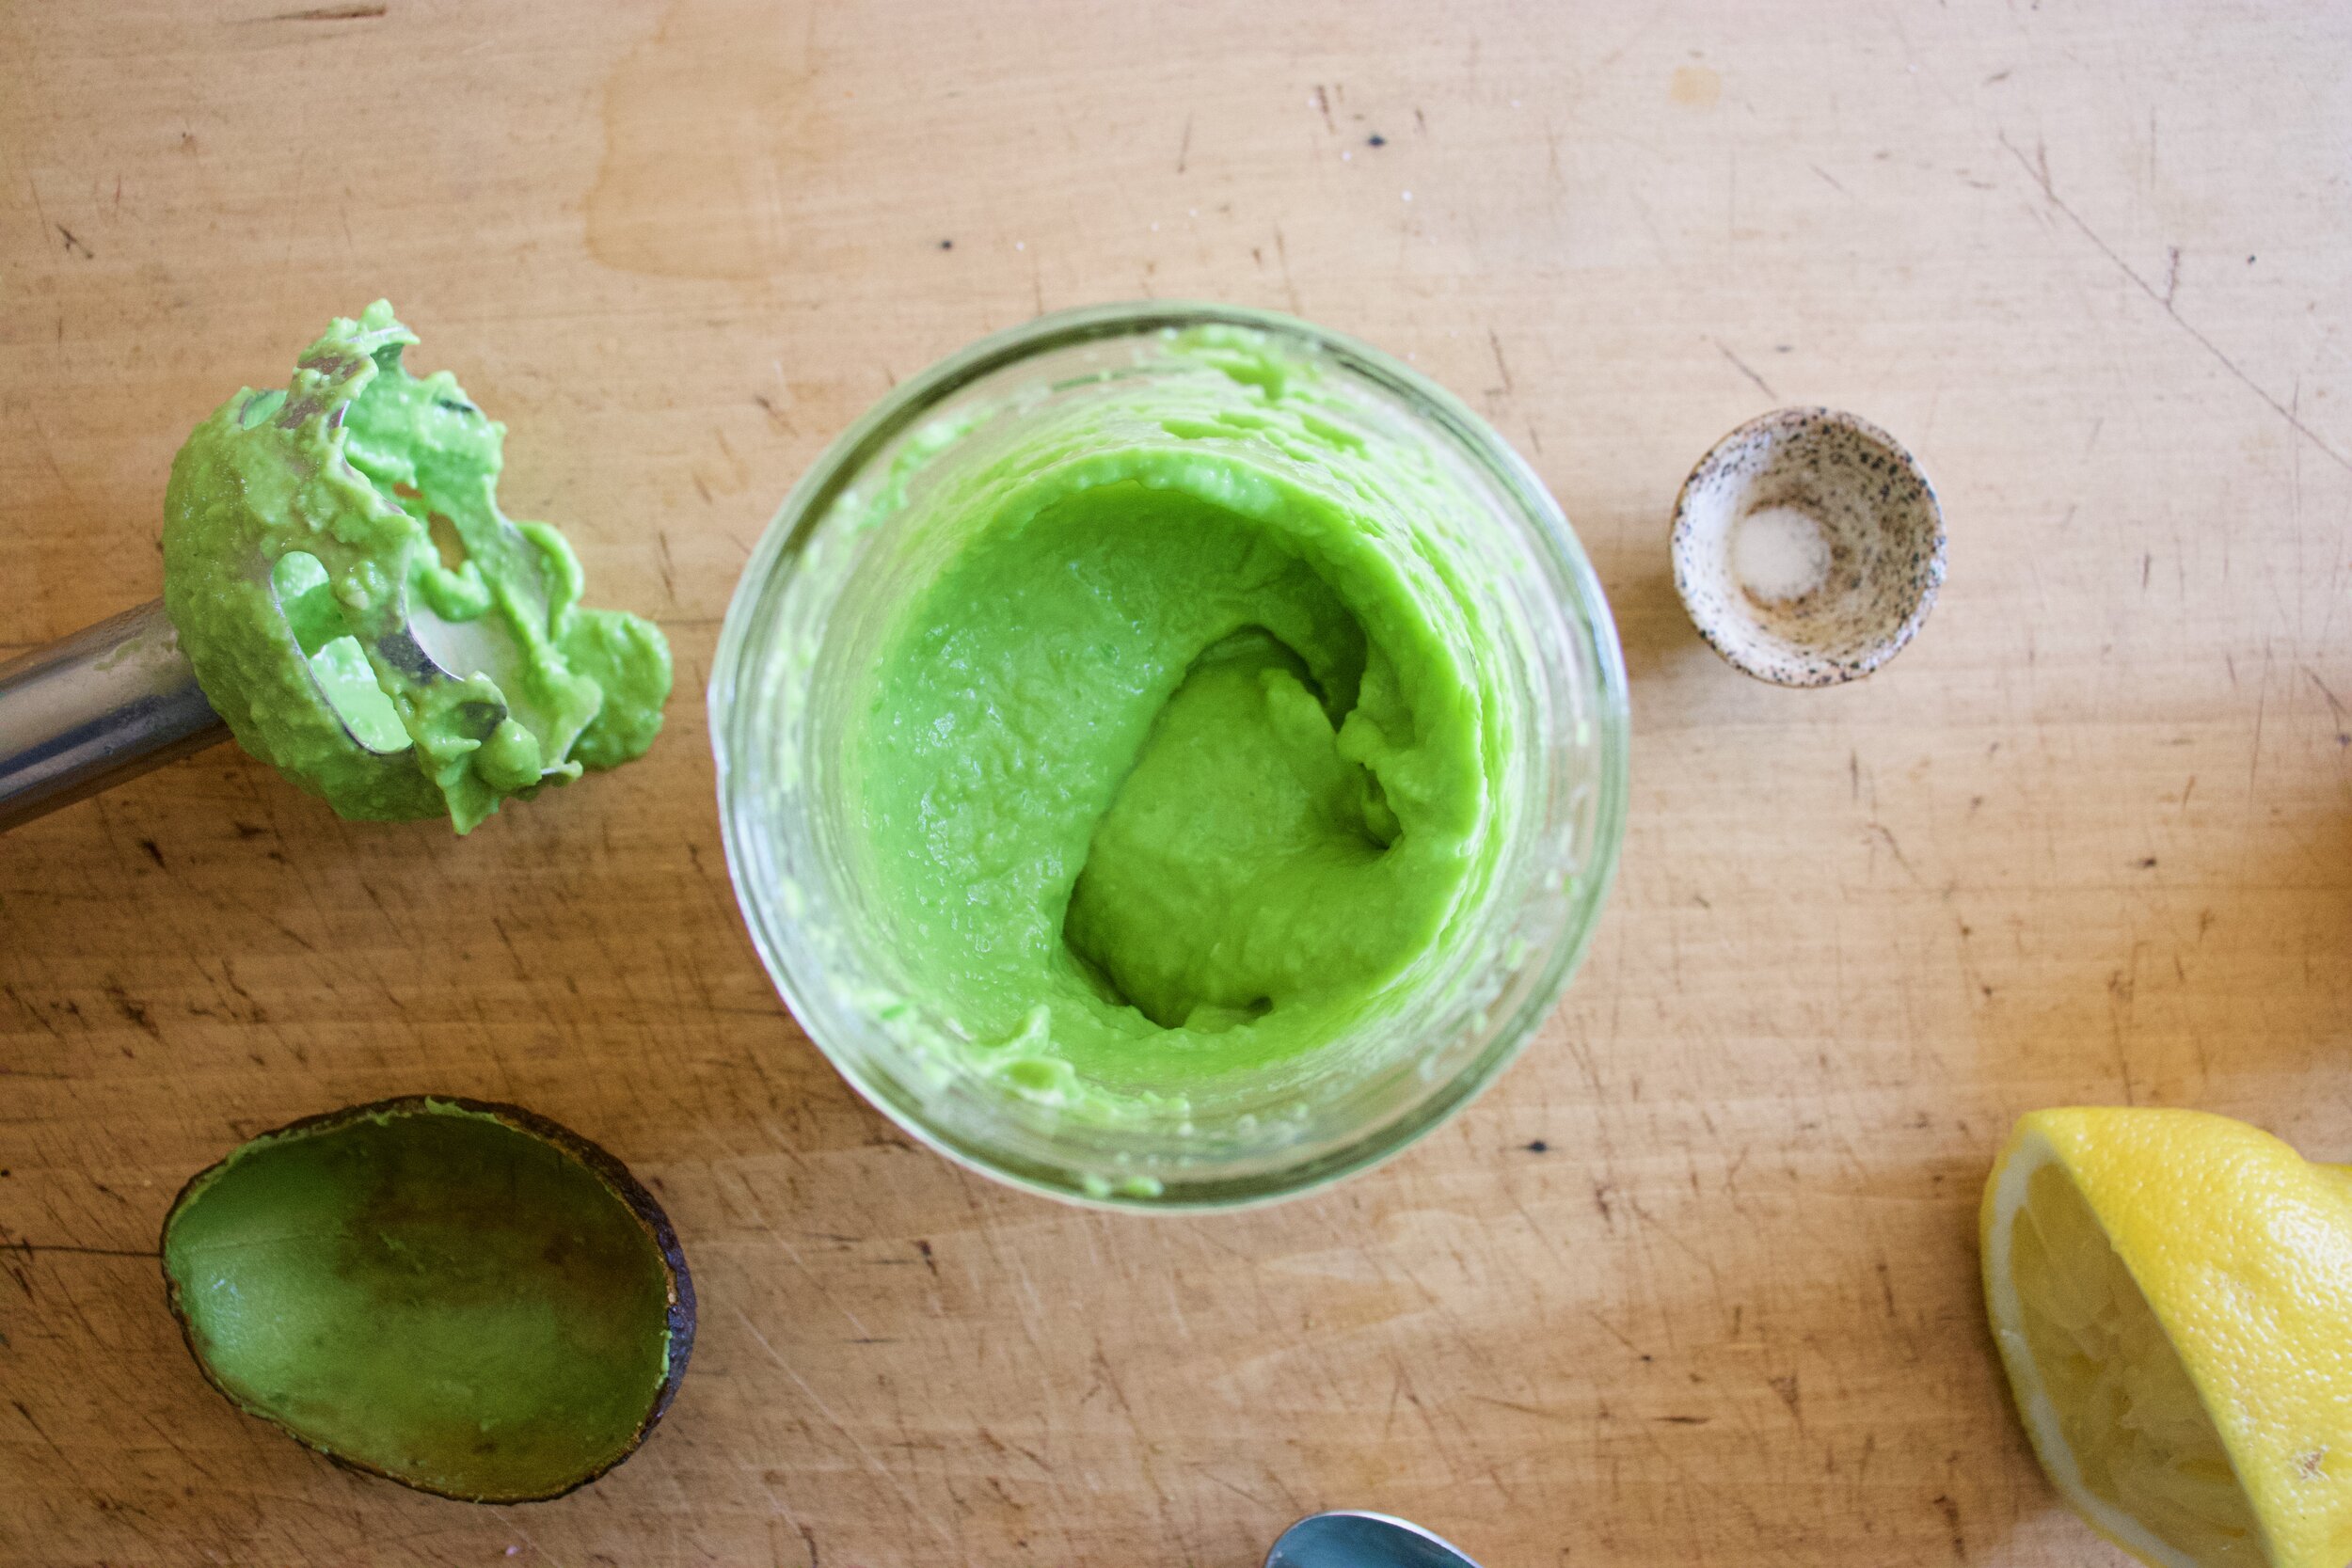
While sweet potatoes are baking, make pea avocado cream. Place peas and avocado into a blender or cup if using a hand blender along with the juice of the lemon and about a tablespoon of water. And a small pinch of salt. Blend until smooth. Add more water a tablespoon at a time until you get a thick but pourable constancy.

IMG_4644 2.jpg

Now rough chop the kale and toss together with the arugula and place in a large salad bowl

IMG_4650.jpg

Place the sweet potato steaks on top of the greens. Note here that the sweet potato steaks can be hot, warm, or cold. The are good all the ways.

IMG_4653 2.jpg

Then top it all with the pea avocado cream. Toss on the toasted walnuts and add some more black pepper and that be that. Grab a fork and a knife if you wish and get to it.

So much goodness in the mouth!

-C


Sweet Potato Steaks on Arugula and Kale with Pea Avocado Cream

serves 1-2

  • 1 medium sweet potato

  • 1/2 cup frozen (and thawed) green peas

  • 1/2 of an avocado

  • a small lemon

  • 2 large handfuls of fresh arugula

  • 4-5 leaves of tender kale

  • 1/4 cup toasted walnuts

  • around 1/4 cup cold water

  • salt and pepper

Preheat oven to 450. Wash sweet potato and cut into 4-5 equal thickness slices. Place cut pieces on a baking sheet and sprinkle with salt and pepper and pop into oven. Bake for 25-30 minutes, flipping after 15 or until the sweet potato is tender. Remove from oven and let cool a bit.

While sweet potato is baking off, make pea avocado cream. Place the peas and avocado into a blender or cup if using a hand blender, add in the juice of the lemon and a pinch of salt. Blend until smooth. Add in a tablespoon or two (or more) to thin out until it is still thick but pourable. Also rough chop the kale and mix together with the arugula in a big salad bowl.

Once sweet potato steaks have baked and cooled off a little bit (you can eat them hot or cold so whatever temperature you want), place them on top of the greens then top with the pea avocado cream, sprinkle on toasted walnuts, more black pepper, and maybe a squeeze of more lemon if you have it.

Then grab a fork and knife and start eating.

In Vegan, Vegetables, winter, Spring, salad Tags Sweet Potato Steaks on Arugula and Kale with Pea Avocado Cream, Arugula, kale, sweet potato steaks, vegan, grain free, dairy free, gluten free, plant based, dinner, salad, roots, winter, spring, avocado, peas, walnuts, easy, heathy, quick, delicious, yummy
Comment

Tomato Stewed Pumpkin with Cabbage Slaw

October 17, 2020 Colleen Stem
IMG_1057.jpg
IMG_1066.jpg

If you were to ask me what my favorite winter squash would be, I would have to say that I couldn’t choose, I love them all. But when I really, really think about it, when I look deep into my food soul, I could, and I think it would be pumpkin. Yup, pumpkin is my favorite.

Pumpkin is amazing and delicious, Not just as a pie or bread, but eaten in any way that any other winter squashed can be eaten. Fantastic in a soup or roasted or sautéed. And yes, blended up into all sorts of baked goods. It tastes somewhat like butternut squash but less sweet and has a nice nutty, earthiness to it and pairs well with al sorts of great spices, not just pumpkin spice. If you haven’t had it outside of a baked good, well then, make this. You are in for a really treat!

But don’t carve a jack o lantern pumpkin then eat that. Those big pumpkins are not very tasty. Get a small pie pumpkin, those are ones to eat.

Now to the tomato stewed pumpkin!

The stuff. A sugar(pie) pumpkin, a couple nice big ripe tomatoes, a large onion, a clove or two or garlic, cumin and chili powder, vinegar, shredded cabbage, and salt and pepper.

Start with the onion. Cut in half and thinly shred about 1/3 or it. Small dice the rest Also mince up the garlic too.

Add the thinly shredded onion to the shredded cabbage and toss around with vinegar a little salt and pepper then set aside.

IMG_0943.jpg

Dice up the tomatoes.

Place the diced onions, minced garlic, tomatoes, and cumin ans chili powder into a big pot with a splash of water and stick on medium heat on stove to start to stew the tomatoes.

While the tomatoes are going, cut up pumpkin. Just cut in half, remove seeds (save for roasting) and cut into small cubes. And sure, if you are not a fan of the skin (my favorite part) just peel the pumpkin with a potato peeler before cutting it up small. But really the skin, it is sooo GOOD!

IMG_0976.jpg
IMG_0982.jpg

Once the tomatoes are soft and mushy, add in the pumpkin. Keep on heat and place a lid mostly over pot. Let cook.

IMG_0992.jpg

Soft and stewed and all sorts of everything good.

And then you scoop it into bowls, top with the cabbage slaw, sprinkle with pepper and fresh cilantro if you just so happen to have some, and eat it.

Yeah, pumpkin is my favorite.

-C


Tomato Stewed Pumpkin with Cabbage Slaw

makes 2 bigger or 4 smaller serving

  • 1 small sugar pumpkin (around 3 or a little more cups cubed)

  • 2 large tomatoes

  • 2 heaping teaspoons cumin

  • 1 teaspoon chili powder

  • A few tablespoons water

  • 1-2 cloves garlic

  • 1 large onion

  • 2 cups shredded red or green cabbage

  • 2 tablespoons white vinegar

  • salt and pepper

Start with the onion. Cut in half and thinly slice a little more then half of the half. Toss with the cabbage, the vinegar, and a pinch of salt. Set aside

Dice the rest of the onion and place into a big pot. Grab tomatoes and dice them up as well and place them into the pot with the onions. Sprinkle with a pinch pf salt and pepper and add in the cumin and chili powder. Add 2 tablespoons of water and place on stove on medium heat to start to cook down.

While the tomatoes are stewing away, cut up the pumpkin. Just cut in half, remove seeds (and reserve for roasting) and dice it into small chunks. If you are not one to enjoy the greatness of pumpkin skin (it is really good) then before dicing it, just peel it with a potato peeler.

Once tomatoes have cooked down a bit, place the diced pumpkin into the pot. Add another tablespoon or so of water, mix around, partially place a lid on the pot, and let cook for about 20-25 minutes, stirring occasionally, until the pumpkin starts to fall apart. If at any time it seems like it needs more liquid, just add in another tablespoon or so of water.

Once it is all stewed up, remove from heat, scoop into a bowl or bowls, and top with the cabbage slaw that was made early.

Eat.

In winter squash, Vegan, soups/stews/chilis Tags Tomato Stewed Pumpkin With Cabbage Slaw, savory, pumpkin, fall, dinner, side dish, snack, vegan, gluten free, heathy, plant based, squash, winter squash, hearty, dairy free, stewed, cabbage slaw, grain free, delicious, yummy, food, recipe, blog
Comment

Chickpea Flour Onion Rings

May 16, 2020 Colleen Stem
IMG_8021.jpg
IMG_8005.jpg

I love me some onions, I mean I eat one everyday so I asked myself why the heck haven’t I made onion rings before? Probably because when I usually think onion rings, I think greasy and fried and that is not really my jam. But early in the week the lightbulb went off in my brain. I have been making a lot of stuff with bean flours lately and thought that chickpea flour would make an excellent batter for onions. And low and behold, I was right. Very very right.

These onion rings are so f-ing amazing. Sure they might not be the most traditional of onion ring but they are for sure just as good. A spicy crispy crunchy outer layer with a soft and creamy onion inside. Baked, not fried, and just really delightful. Easy to throw together and yeah, you got onion rings. I have made them twice this week already. Probably going to make them again tonight because why the hell not? They are simply a vegetable covered in bean. I should be eating them every day and you probably should be eating them everyday too.

Now to the onion rings!

IMG_7970.jpg

The stuff. Onions (I used valida but any sweet variety will work) chickpea flour, spices (garlic, ginger, cumin, chili powder, paprika, and a pick or red pepper flakes), warm water, oil, and salt and pepper.

IMG_7971 2.jpg
IMG_7973 2.jpg
IMG_7976 2.jpg
IMG_7980 3.jpg

Mix up the batter. All the spices get mix together with the chickpea flour. Add in the water and then mix unit completely combined and all batter like.

IMG_7983.jpg

Cut onions into rings.

IMG_7990.jpg

Dip the onions into the batter and place on a oiled baking sheet. Try not to overlap too much and use the insides of large rings to place the small ones!

IMG_7999.jpg
IMG_8006.jpg

Into the oven and out of the oven. Crispy, dark, and delicious!

Get those rings onto a plate while they are hot, grab some dipping sauce of choice (tahini for me) and eat.

Get into this.

-C


Chickpea Flour Onion Rings

  • 3/4 cup checkpea flour

  • 1 teaspoon each cumin and chili powder

  • 1/2 teaspoon each garlic, paprika and ground ginger

  • pinch of red pepper flakes

  • 2 medium sized valida onions (or whatever onions you have)

  • 3/4 cup warm water

  • 1/2 teaspoon salt

  • cracked pepper

  • tablespoon or so of oil to oil baking sheet

Preheat oven to 425.

In a wide bottomed bowl mix together the chickpea flour. salt. and all the spices. Add in the warm water and mix until completely incorporated and smooth. You want the batter to coat the onions when dipped but not be overly thick. If you think it needs to thicken up a bit, add a tablespoon more chickpea flour. To thin it, just add a splash more water.

Grab onions and peel off papery skin then slice into 1/4-1/2 inch rounds. Take onion rings and dip them into the batter then place rings on a large oiled baking sheet. Try not to overlap to much and definitely place smaller rings inside bigger rings. Also use a second baking sheet if you need to.

Once rings are all battered, place in preheated oven and bake for 40 minutes, giving them a flip atfter about 25-30 minutes.

Once dark brown and crispy, remove from the oven. Place rings on a plate and eat. Dipping sauce recommendation is tahini but anything or nothing at all is also right.

In appetizers, Gluten Free, grain free, pulses, quick and easy, side dish, Vegan, Vegetables Tags baked onion rings, chickpea flour, gluten free, onion rings, dairy free, baked, plant based, easy, simple, healthy, protein, side dish, onion, savory, spicy, food, homemade, fresh, yummy, eater, delicious, vegan, grain free, pulses, beans, besem flour
Comment

Carrot Ginger Brown Rice Pilaf

April 25, 2020 Colleen Stem
IMG_7607.jpg
IMG_7559 2.jpg

Do you have a shit ton of rice? I know of at least a few people that might have gone overboard with their rice stock so I think it might be safe to assume that many more did too. And that’s cool, just as long as you eat it. No one like a food waster.

But are you bored with plan rice? Well I got you. Rice is so easy to jazz up. Add a little this, add a little that, and you’ve got yourself a rice dish among the greats. Even better, toast the rice a little before cooking it and you end up with a even better, flavorful rice. That is fact.

Carrot ginger is a classic flavor combination and can pair with just about any other flavors so you don’t have to think too hard about what else to serve with it. And really, you could just eat a big bowl of the rice. There is no need for anything else. It has it all. Grain, veggies, and seeds or nuts… All you need is a fork (or spoon if you are like that) and an open mouth and you are golden.

Now to the rice pilaf!

IMG_7466.jpg

The stuff. Long grain brown rice, a couple carrots, some fresh ginger, garlic, an onion, soy sauce, olive oil, water, and pepper.

Grab onion and dice it up really small. Shredded or julienne the carrots.

IMG_7475.jpg
IMG_7476.jpg
IMG_7482.jpg

Add a couple of tablespoons of olive oil to a pot. Add in the onions and start on medium heat and let them cook for a few minutes. Then add in the carrots and keep cooking for a few more minutes until they become slightly tender.

Mince the garlic and the ginger.

IMG_7497.jpg
IMG_7499.jpg
IMG_7520.jpg

Add that freshly minced garlic and ginger to the pot and give it a good stir. Add in the rice now as well and cook for another few minutes , stirring it once or twice until you can smell the toasty-ness of the rice. Then add in the water and soy.

IMG_7532.jpg

Bring the pot to a boil then turn heat down to the lowest simmer. Pop a top on the pot and let cook, undisturbed, for about 30ish minutes, or until all the liquid has absorbed into the rice.

Once rice is cooked, grab a fork and fluff then pop the lid back on and let it rest for 5-ish minutes. Trust, this makes the rice so just do it.

And then the rice is done, all fluffy and flavorful. Add some green something for a little pretty and yum. Also added a handful of toasted sunflower seeds because why the heck not.

-C


Carrot Ginger Brown Rice Pilaf

makes 3-4 servings

  • 3/4 cup long grain brown jasmine rice

  • 1 1/2 cups water

  • 1 small onion

  • 2 carrots (about 2 cups shredded)

  • 2 tablespoons minced fresh ginger

  • 2 tablespoons soy sauce

  • 2-3 cloves garlic

  • 2 tablespoon olive oil

  • pepper

  • 1/2 cup toasted sunflower or any other seeds or nuts you have on hand (optional)

Start by dicing up the onion and shredding or julienning the carrot into small pieces. Place into medium pot along with olive oil and set on medium heat. Cook for a few minutes until the slightly tender.

Mince garlic and fresh ginger and add it to the pot with carrots and onions. Add in dried rice too and keep cooking on medium heat until the rice smells toasty. Add in the soy and the water. Bring pot to a boil then reduce to lowest simmer you got. Place a lid on top and cook for 30ish minutes or until the rice has absorbed all the liquid.

Once the rice has the liquid, remove the pot from the heat and fluff it with a fork. Place lid back on pot and let the rice rest for 5ish more minutes.

Then eat. I think adding a handful of some crunchy seeds or nut and maybe something green only adds to the rice so go for it if you have it around.

In grains, side dish, Vegan, Vegetables, dinner Tags Carrot Ginger Brown Rice Pilaf, grains, whole grains, rice, vegan, food, pilaf, healthy, plant based, dairy free, dinner, easy, homemade, fresh, yummy, simple
Comment

Cranberry Orange Soda Bread

March 14, 2020 Colleen Stem
IMG_6647.jpg
IMG_6626.jpg
IMG_6676.jpg

One of my go to things to do when I am feeling feelings of stress and or anxiety (or angry , or happiness, or sad… all the emotions really) is to bake. I have a feeling that I am going to be baking quite a bit in the next few weeks. And due to the fact that when I went to go buy my usual 25 lb bag of flour the other day and all the flour, at multiple stores, was sold out, I think some of you might be planning on some baking soon too? I sure hope so because I am gonna be pissed if I find out that people are just hoarding all the flour and not using it. 😁

Anyway, soda bread. This bread is not like a soft and fluffy yeasted bread. It is thick and hearty and this one is full of orange zest and dried cranberries to give it just a little more flavor. Of course I was thinking of St Patricks Day next week when I made it because we all know that Irish soda bread is well, Irish, and St Patricks Day is an Irish celebration, but I was also thinking that the mr was coming home for lunch and my sourdough was only about an hour into it’s 8 hour ferment and I had no back up bread for lunch food. So soda bread is what I made. Quick to throw together, bakes within an hour, and is every bit as fantastic as any yeasted bread. The mr was very much pleased to have a nice sturdy, fragrant, hunk of a this bread situation when he came home for lunch and I was a little less crazy stressed because of it. Plus, as usual when baking nice things, the house smelled so good! I think I sometime just bake things just for the smell that lingers for the day. I love it when my hair smells like bread. HA!

Now go grab that flour your hoarding and get at this bread!

The stuff. All purpose and white whole wheat flour, some oats, baking soda and powder, salt, soy milk, brown sugar, oil, dried cranberries, a bit of apple cider vinegar, and an orange.

First add vinegar into milk and stir it up.

Zest the orange into the bowl with the dry stuff, add in the sugar, and give it a good stir to fully combine it all.

Add in the cranberries. Make sure they are not all stuck together and stir them in.

And lastly, add in the milk and oil and stir until a dough forms.

The beauty of unbaked bread dough.

IMG_6580.jpg

Turn the dough out onto a well floured baking sheet and knead it a few times. Then shape into a big ball and score the top with a big X. Then you just pop it into the oven to bake.

IMG_6581.jpg

There she is. A big, beautiful loaf of bread. And guess what, you don’t have to wait forever to cut into it. Just 15 minutes of so.

IMG_6623.jpg

Now you got what you were waiting for. Warm fresh bread, maybe some buttery spread, and a plate (if you a civilized). You eat, you feel better.

Stay well folks!

-C


Cranberry Orange Soda Bread

makes 1 loaf

  • 1 1/2 cups all purpose flour

  • 1 cups white whole wheat flour

  • 1/2 cup old fashion oats

  • 1/4 cup packed brown sugar

  • 1 teaspoon baking soda

  • 1/2 teaspoon baking powder

  • 1 teaspoon salt

  • 1 1/2 cups plant milk

  • 1 tablespoons apple cider vinegar

  • 1/3 cup neutral oil

  • a large orange for zest

  • 1/2 cup dried cranberries

preheat oven to 375

Mix together the apple cider vinegar with the milk and set aside.

In a large bowl, mix together both flours, the oats, the brown sugar, the baking soda and powder, the zest of the orange, and the salt, until full incorporated. Then toss in the cranberries (make sure they are not all stuck together) and mix them in. Lastly, add in the oil and milk and vinegar mixture and stir until completely combined.

Turn out dough onto a well floured surface and knead a few times, adding more flour to keep your hands from sticking then place on a well floured and parchment lined baking sheet. Form dough into a ball and then score the top with a big X that is about a third of the way deep. Place into oven to bake for 50-55 minutes or until bread is a deep golden brown and sounds hollow when tapped on the bottom.

Once bread is baked, allow to cool for at least 15 minutes or so on a wire rack before cutting into it, but you can cut while still slightly warm.

And then eat

Store uneaten bread in an airtight bag at room temperature for up to 3 days, but it is actually better to eat it within the first 2 days. It does great when sliced and frozen and then tossed back to life.

In bread Tags Cranberry Orange Soda Bread, st patrick's day, holiday, bread, vegan, plant based, soda bread, no yeast, fast, food, yummy, oats, grains, stress baking, fun things to do while quarantined, easy
Comment
Older Posts →
 

https://thelovelycrazy.squarespace.com/config#/|/about/

Me. Food Maker.Food eater. Woo HOO!

STEM+NODE  SMALL BATCH AND ONE OF A KIND POTTERY

stem+node ceramics


____________________

Subscribe

GET NEW POSTS IN YO EMAIL

You are AWESOME!!!


@thelovelycrazy 2014-2021