

I never can really tell how I honestly feel about halloween. I love fall, I love pumpkins and cider, but thats fall ,not halloween. I love to see all the happy little littles running around being super cute. all jacked up on way to much sugar. And I know when I was a kid I was all about it. I mean, what kid doesn't get jazzed to run around, dressed up (I was alway a black cat), with a pillowcase full of candy all night long? That is just magic. But as an adult, I haven't really done too much. Sure I help wit the costumes of the littles and sometime I hand out candy, but where we live now, it's not possible to give out candy. And the littles, they go do stuff with there friends, not there old lady aunt. And I guess me and the mr could dress up and go to a party or something, but honestly, we are not really party people…. So yeah, don't know. I think when I finally have my own kids It will be more fun. But whatever, at least I can do a little decorating.
For as long as I have been as adult with my own living place, I have really gotten into holiday decoataing. But here is the thing. I like my decor to be minimalistic, not to over the top, or super cheesy. (although I really do like when other people go super overboard and cheesy) But no, you won't find a 20 foot blow up of a witch or severed hands in my front lawn.(maybe a few dead mice, but thats the cat, not me) And I like to make my decorations. I even like to get some littles in one it, cause hand made kiddo decorations are the best.
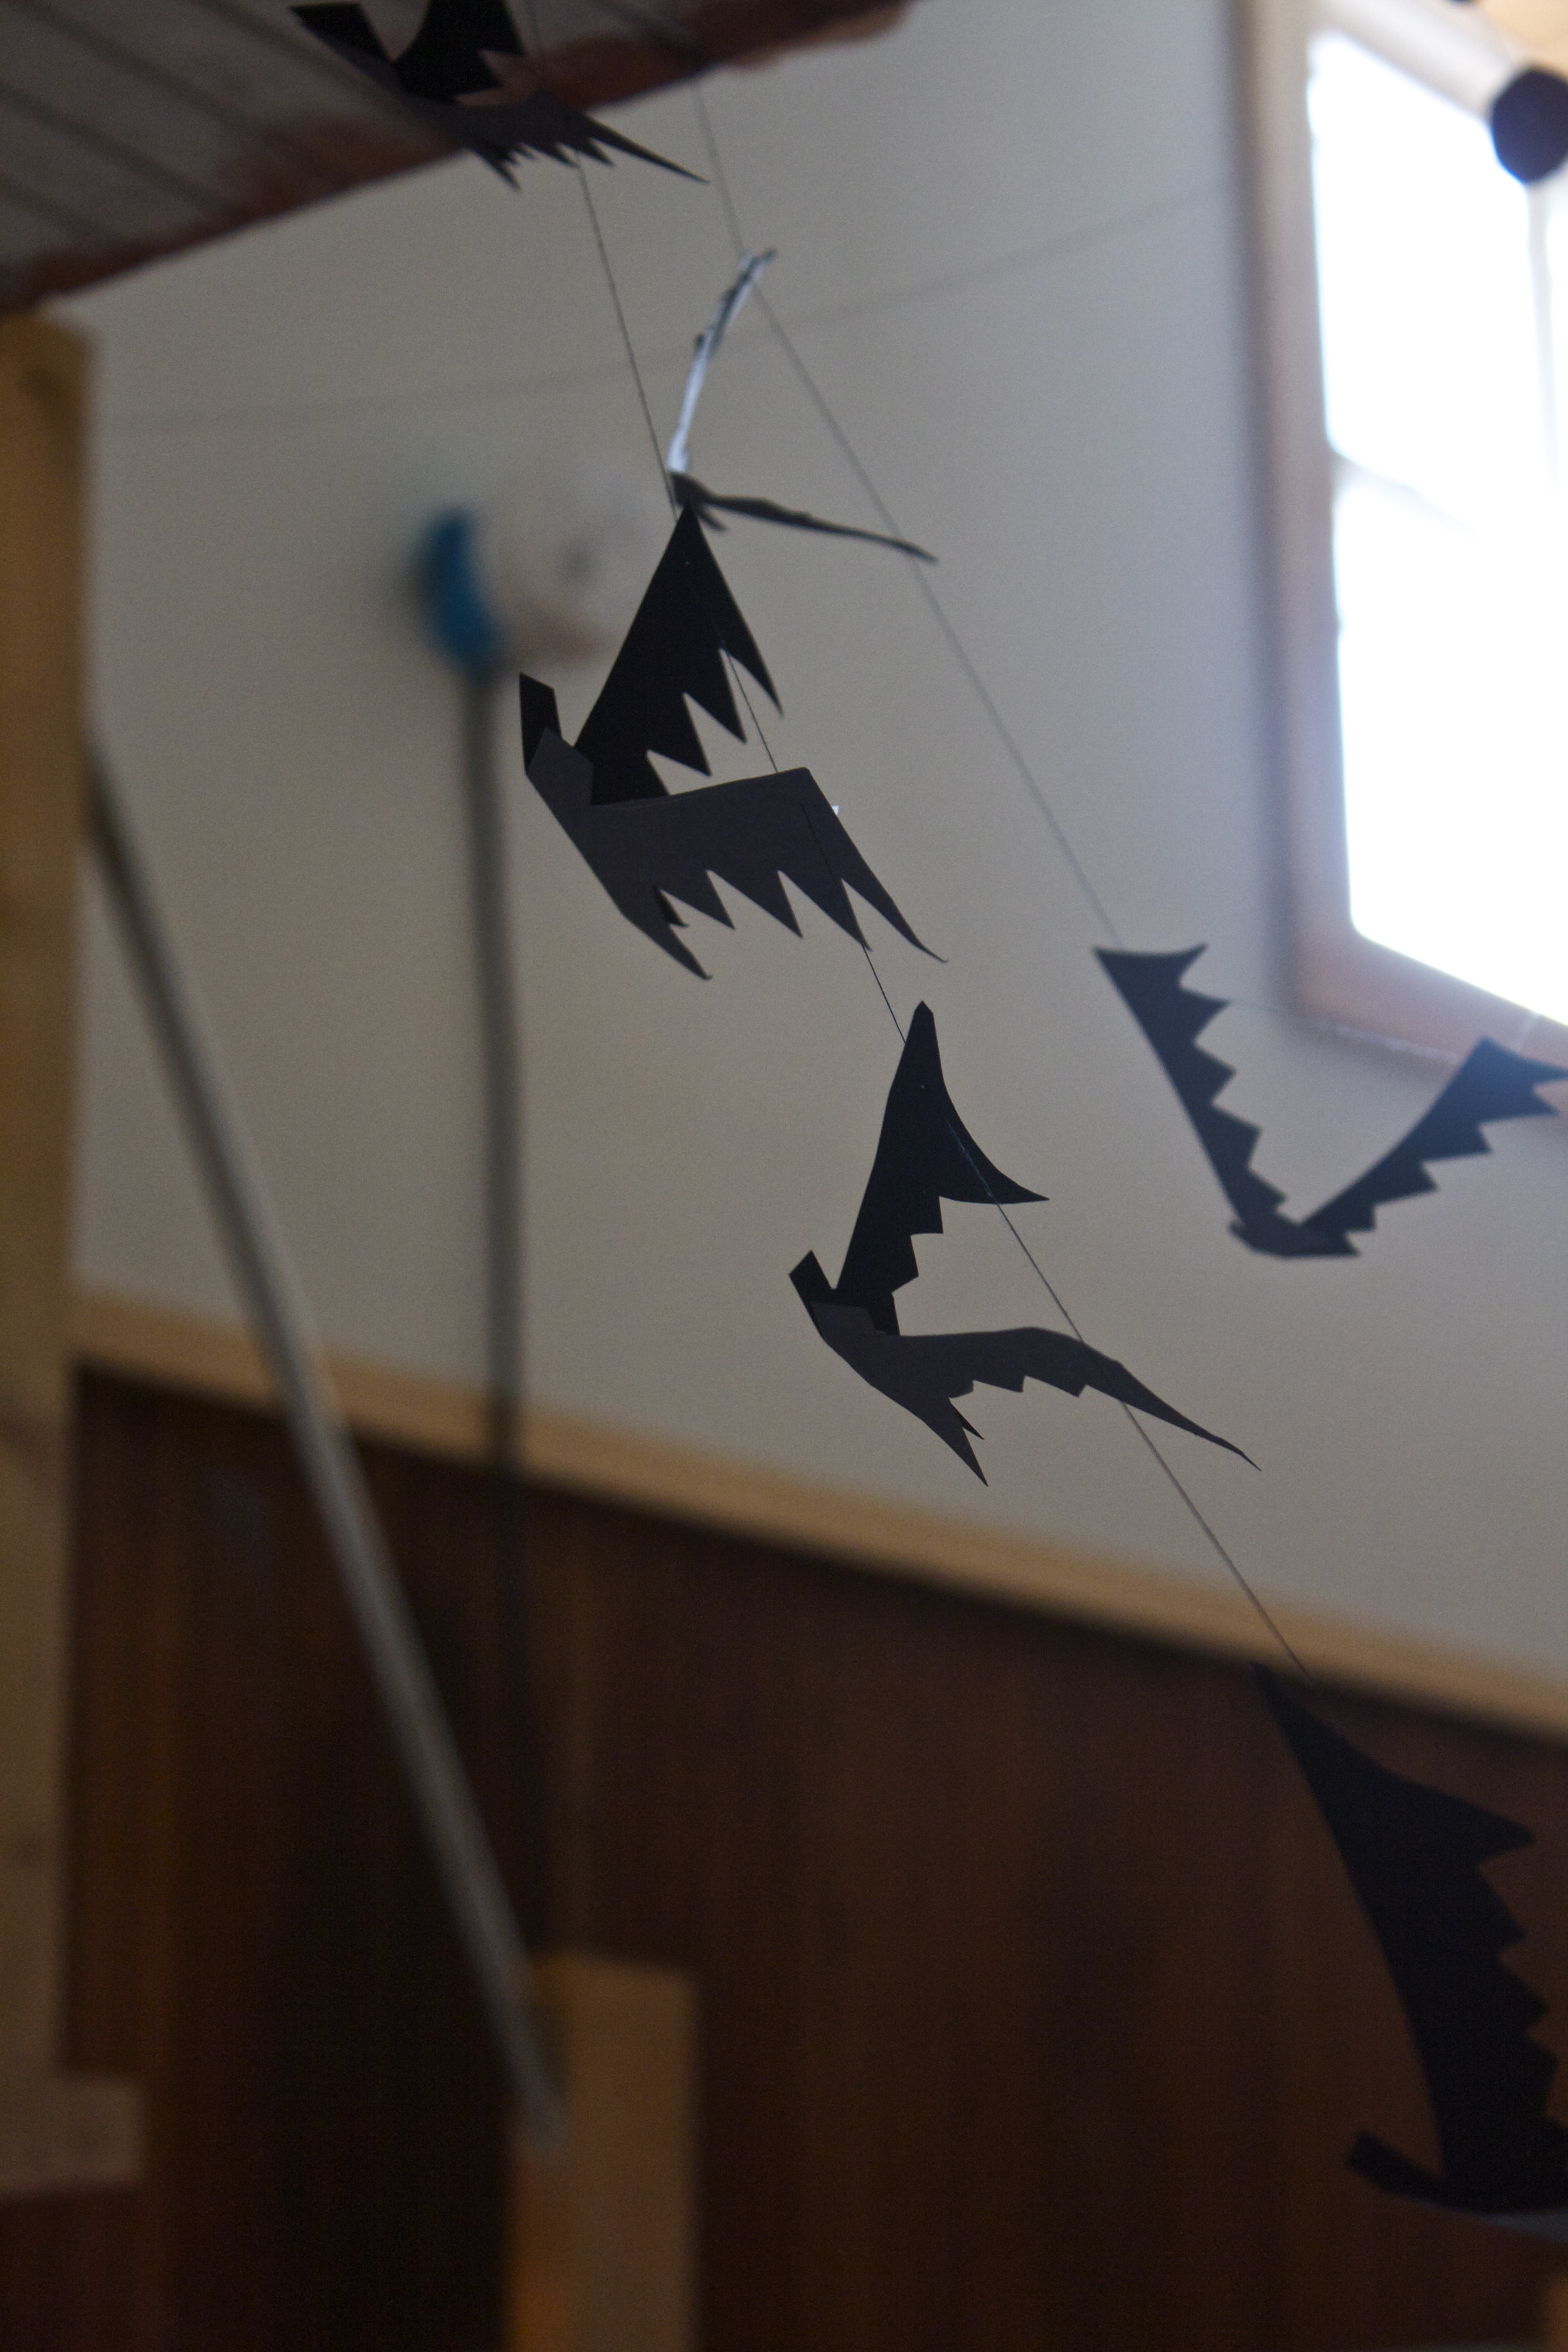
These bats are the perfect bit of halloween decoration. I made a ton of them a few years back and lost them, so I just whipped up a new strand. Fast and easy to make, are not overly crazy or gory, and can be hung anywhere. An yeah, making them with a few littles is fun, but you don't need them. I made them all on my lonesome…. Oh me..
Anyway, to the bat mobile (garland)!

The bat stuff
- 2-3 pieces of Black card stock (construction paper is fine, but will the color will fade over time)
- scissors
- pencil
- needle and thread*
- clear tape or tacks (not shown.. to hang bats)
Note. You can use embroidery floss instead of thread, but the thread is much more visible and you are going to need a tapestry needle.

Take a piece of paper and fold in half, either length or width wise.( If you do lenght wise, you can cut out a few more bats per piece of a paper, width wise, the bats wings are longer.. up to you, do it both ways if you want)

Outline a bat.
Bats are all jagged lines.. nothing too complicated so I figured a stencil is not needed. If you really need a stencil, I can email you one...

Cut out bat and open up.
See, easy. And now you have a bat. If you do not like the exact way it looks, fold in again and cut a little more, but don't get to picky, you have many more to cut.

Now make yourself a bat army. As many or as few as you like. I think 12 is a good number. If you want, take the first bat that you cut out and use that as a stencil. Me, actually just free form cut the guys, so none of them look the same.

Bats are ready, now thread you needle. Don't cut the end loose or tie the two ends together.

Fold bats back flat and thread them through the upper portion of the wings. Do that to all your bats.. and make sure that you are threading them on all the dame direction (if you care)
Once all the bats are threaded on. remove needle and tape the end of the thread. Space the bats out evenly or however you like, and hoe ever far apart you like, and cut thread of spool. Tape that end off too.
And hang them…. Most of my bats stay where I placed them, but a couple wanted to slide around on the thread, so I just stuck a tiny piece of tape on the inside of the wing over the thread to stop that.

They can fly threw the air….


Or drape on the wall.
Any way, these bats are freaking bad ass and the coolest!
Happy Holiday Decorating!
-C


 I figured now is a good time to get this recipe out there before we get to far into spring and summer recipes because there is going to be a lot of banana ice cream filled recipe coming and I figured its a good idea to have the basic banana ice cream recipe ready for people to refer too.
 The stuff you need for this ice cream…. Nice and ripe bananas, peeled and then frozen* That's it.
  After all blended and smooth, either eat right away or scoop ice cream into a freezer safe container and stick in freezer. That's the banana ice cream… And it is amazing and so so so so so addictive. I make a batch, think I am only going to eat a scoop, then find myself eating half of what I have made, but it's ok cause it's only bananas.
  One batch of banana ice cream, either freshly made, still in food processor or made ahead and placed in a food processor and given a good pulse to smooth it up.
  Now you have cookies and cream naner ice cream…. and everybody is happy.
 I don't know if I have bitched enough about it, but I only have one window in my living space. And as much as I love love love our little tiny loft, I am a person who needs the sun. So when I am home I spend a lot of time siting in front of the window.
  So this project is really easy and fast. I recommend that if you are going to go to the trouble (it's really no trouble) of making one, you might as well make 2 or 5. I actually made a bunch (think Mothers day or Easter presents) and ended up only keeping a s couple. I am going to have to make a few more soon.
 Take a piece(s) of paper a little bit bigger then the hoop you are working with and stick it into a pan or tray of water. Let it sit there for a few minutes until the paper is completely soaked.
 Take the wet paper and, oh so gently, crumple into a ball. This part can be a little tricky. You want to make as many creases as possible without ripping that paper. (I ripped a few pieces) I found that if I folded that paper a few time, then crumpled that it was less likely to rip.
 Uncrumple the paper and lay it gently onto the inner part of the hoop. Now the fun part. Go to town with the watercolors. I used 2 colors per piece, but you could do 1 or 3, or more. When applying the color, use big gentle strokes and let the colors kind of meld together. Watch as all the crumple veins soak up the paint. Try using different dilutions of color. I applied some color on thinly and some on the thicker side. But really, you can't go wrong, just keep applying paint until you are happy. I stopped a few times and held it up to the window just to see what it looked like. When it looked good, I was done.
 When you are happy with the colors, let the paper dry for a while on the hoop until it is not longer super wet. I would say about an hour or so, but if you stick it near the heater, it might dry faster. (Just don't stick it in the oven while you are making bread like I did with one.. It just ended up setting on fire. Oops)