Pickled Jalapeño's

IMG_1202I am kind of obsessed with  pickled jalapeños… like I want to eat a whole jar with a fork and then drink the juice. So much hot and spicy love.  One of my sisters is the same way, pickled  hot pepper obsessed. We used to buy the humongo gallon sized jars of jalapeños at Costco and go through them in like a month. But sadly, Costco stopped selling those humongous jars and we have been left buying the itty bitty jars that actually fit in a normal fridge. (I know, so sad).  And maybe because the jars were normal sized and I was more aware that I shouldn't eat a of cup of jalapeños at one sitting, or just the mire fact that a tiny jar cost the same as a gallon, but the store bought little jars weren't doing it for me anymore.  And then fate happened. The grocery store was having a super sale on fresh jalapeños and  I figured it was time to make make my own. Now I don't think I can ever go back to those store bought jars of blah  because the ones I made are the best freaking pickled jalapeños this girl has ever eaten.  I might even start making my own gallon sized jars!!!!

Note….Don't toss the pickled juice! It is a super yummy, full of flavor, liquid gold. You can use it as a straight up salad dressing or add to a homemade dressing. Add juice to soups, casseroles, marinades. Replace some of the liquid in a bread recipe and use the pickled juice. Use it in your favorite cocktail drinks. There is no end to what you can use the juice for. 

-C


Pickled Jalapeños

for a half pint jar

  • 8-10 Jalapeños 
  • Apple cider Vinegar
  • 1 teaspoon salt

Remove stem and seeds*of  jalapeños and thinly slice. (I used a mandolin which works really well, but a sharp knife does the trick) Pack Jalapeños into a clean glass half pint jar and fill with half water/half apple cider vinegar and a teaspoon of salt. Dump  into a pot  with a lid, and bring to a boil. Take of heat and let cool for a few minutes. Stick back into jar (leave an inch of head room) Stick in fridge for at least a day. Eat your heart out.

*I like to keep some of the seeds. It adds heat.

Paper Hearts

IMG_9535
IMG_9508
IMG_9593

This weekend I made a stand of paper hearts that live all around the house. An early Valentines for my mister. We don't do fancy dinners,  store bought cards or gifts….. Handmade and pretty is what we do.

These hearts hang from the ceiling and toss pretty heart shadows on the walls…..and make both of us smile. 

IMG_9609
IMG_9553
IMG_9575
IMG_9526

  The making of stringed paper hearts is so very simple. What you need is..

  • One or more different colors of card stock paper
  • scissors
  • A sewing machine with thread..(can be hand sewn for sure)

To start, cut out a bunch of hearts, as many as you want. You can free form cut them (that's what I did) or you can either make a template and rouse  a cookie cutter or something and trace, if you want perfect uniform hearts. 

Decide on a color pattern (I did red, pink, white, brown, repeat) or random is nice too.

Start sewing the hearts. (I used a scrap to get started..and use the scrap piece for tacking to the ceiling). You can either sew hearts close together or leave an inch or two in between each. One trick I have learned when sewing strands of paper is to give a little tension to the strand as you are sewing…it helps keep the machine from jamming up.

You are done when all the hearts are sewn… And hang them up or, if you want to save them for a surprise for Valentines day, wrap strand around a piece of cardboard.  Leave up for a day, for a week, or like us, all year long.

IMG_9604

Hearts everywhere…so simple, so pretty, so much love!

-C

Mountain Pillow

IMG_6343 Soft huggable mountains…..happy all over!

It started last month when I decided to make cool shaped pillows for all the little littles in family. (they all got fruit or veggies shapes…so cool. I wish I took some pictures)  I needed to make a bunch so I went a bought this humongo box of stuffing  thinking that I would end up using most of it and maybe have a little left over to make myself a pill or two. Oh man was I wrong. Those hug boxes could stuff a hundred pillows…the stuffers of stuffing really stuff those boxes stuffed!  Now I had this giant box of stuffing and a bunch of extra fabric so I just figured that I'd make everyone in my family a pillow.  I didn't want to make the any more food shapes but still wanted to do something fun and pretty and huggable. …and then it came to me,  A mountain! I mean, who wouldn't want to hug  a mountain? 

So I made all the adults in my family a mountain for Christmas. (I am so nice).  A couple of weeks went by, I had a little extra time and thought, "I should make a mountain pillow for me!"And if you are anything like me (super awesome), one mountain is just not enough and  you will make an entire mountain range of pillows…… Mountains all over!  

This pillow is so easy, no fuss, and can be made any size you like. I made mine on the smaller side, but if you have the fabric and the stuffing, why not go big? Do what feels right to you. 

And I have to add, these pillows are really great gifts… I am thinking maybe a lovely Valentines day mountain? Doesn't that sound fantastic?

What you will need:

  • Sewing machine.(you can hand sew but machine is much much faster)
  • Two pieces(or one piece folded in half) of fleece* for the mountain
  • One small piece of fleece in another color for the mountain top
  • Needle
  • Thread
  • Stuffing

Note: You can use other fabrics, but fleece is more forgiving because it had a little stretch, plus it soft and cuddly.

IMG_6294To start, take you main color of fleece and cut into a mountainy triangle shape. You can go tall and skinny or short and fat….. any shape you want.  If you feel like you need to make a paper template and use that to cut, go for it, but I don't think you really need to.

IMG_6298

 Next, take the contrasting color fleece (the peak) and cut a large square.  Line up with the top of the mountain peak underneath.

IMG_6301Cut the piece for the peak in a jagged  up and down pattern. Place right side up onto the base  of the mountain and trim away excess fabric.

IMG_6312Using the zig zag stitch on your machine, sew the jagged edges of the mountain peak right side up onto the right side of the mountain. Go slowly, but don't worry about making  it perfect, just make sure to sew over all the jagged edges. 

IMG_6324Now turn the two pieces right sides facing in on each other. Change the stitch on you machine to a straight stitch and sew around the perimeter of the mountain, leaving a small hole in the bottom.

And make sure to check your seams!

IMG_6326Fold it right side out and stuff it. I started with little bits of the stuffing in each of the corners, then filled in the middle, it makes it easier to fill.

Once you are happy with your stuff job, thread a needle and hand sews the hole shut.IMG_6368

 A  soft, huggable, and oh so grand mountain. 

I know, so fantastic…one is just not enough. And if you have gone to the trouble of pulling out the sewing machine, you might as well make a bunch. Just do it!

Have fun making a mountain range! 

-C

Make Yourself an Awesome Little Shelf

IMG_6543 The conversation I had with my little brother on his birthday...

Me- "Happy Birthday!"

Bro- "Thanks"

Me- "What do you want to do.. want to come over, I'll make you something, anything you want…donuts, cake, pizza…"

Bro- "Make me a shelf, I got like seven books for my birthday"

Me- "Um, ok… what are you thinking?"

Bro- "Something to hold like seven books"

Yup, he got "like seven" books and needed a shelf……. I guess I didn't realize that "like seven" was a unit of measurement. Man, I love my little brother,  but sometime I wonder about the kid. Anyway, Being that coolest big sister he's got (and coolest big brother in law who did most of the work), we went along and made him a  shelf. Hopefully it holds those "like seven books".

IMG_6419Here is the list of what you will need to make the exact shelf with the same measurements that we used…but feel free to use and adjust the measurements to your want or need.

  • 2 pieces of 1x8 common pine measuring 25 1/2 inches (sides)
  • 2 pieces of 1x8 common pine measuring 17 1/2 (top and bottom)
  • 1  piece od 1x8 common pine measuring 16 inches (middle shelf)
  • 2 pieces of 1x8  common pine measuring 4 inches (legs)
  • Wood glue
  • About 20 (having a few extra never hurt) 2 1/4 inch finishing screws

Tools

  • Drill
  • Either a circular saw or a chop box to cut the legs
  • Measuring tape
  • Speed Square or something to make a perfect straight line

IMG_6413

The legs are the hardest part to make and really, it's so not hard. Take both 4" pieces of pine and cut in half ( each piece will end up being 3  5/8".. how is that you ask? Well here is some knowledge… 1x8  pine actually measures 7  1/2 "…. nuts right?) With each piece, measure an inch in on the bottom and side…Draw a vertical line to connect and  then cut the line. Repeat last step with the second piece you just cut, then repeat the whole processes with the second piece  of 4" pine. These words seem a little confusing, just look at the picture above, it has all the measurements on it too. In the end, you should end up with 4 legs.

IMG_6445Take one of the 17 1/2" pieces and with a straight edge, draw two lines form opposite corners to find dead center.  Measure 8" from center on each line, that is where the legs are going to be placed. Working with one leg at a time, add a smear of wood glue to each leg as you are about to screw it down. Place leg on mark and sink a screw about an inch up from the inside of the leg, screwing at a slight angle (see photo)..

Phew.. this is the most complicated part of the whole shelf so once you get the legs on… its all smooth sailing.

IMG_6455

Flip bottom onto legs and sink a screw in (1 inch in on both sides) into each leg.

IMG_6468Now grab the top piece (17 1/2 ") piece and the two sides pieces (25 1/2"). Add a bit of wood glue to the side ends and line up top piece with the sides.  Sink 2 screws into each side. If you have another person helping, have them hold the pieces for you while you screw the top into the sides.. if not, use the bottom to rest a side against (like in picture). 

IMG_6483Now flip over and screw the bottom piece into the sides……

IMG_6498

Take a minutre…. Look at what you have accomplished! You have a kick ass square with legs!

Now place the shelf. We went for just about center.. 12 1/2"  from the bottom. Mark the measurements on both sides and use a square edge to draw a line.

IMG_6515Place shelf on the lines (The wood should fit in tight, you might even have to bang it a bit to get it into place….but you want it to fit nice and snug.) Now screw the shelf…two screws on each side.
IMG_6532

Flip onto legs and ……….TA DA!!!! So Fancy!

 You now have a shelf to shelf things.. Simple as that. And I tested it out…It holds more the "like seven" books. A success! 

Note…...If you are feeling like you need to, use a little wood putty to fill in the screw holes. You can sand it if you want. You might even want to stain or paint it. Up to you. The shelf is made and is yours to do what you will. Me, I like it just the way it is.

If anyone out there takes this little shelf project up.. let me know how it goes, maybe even send a picture…and feel free to ask any questions!

Have fun building awesomeness!

-C

A Little about Washer and Make your own Dog Leash

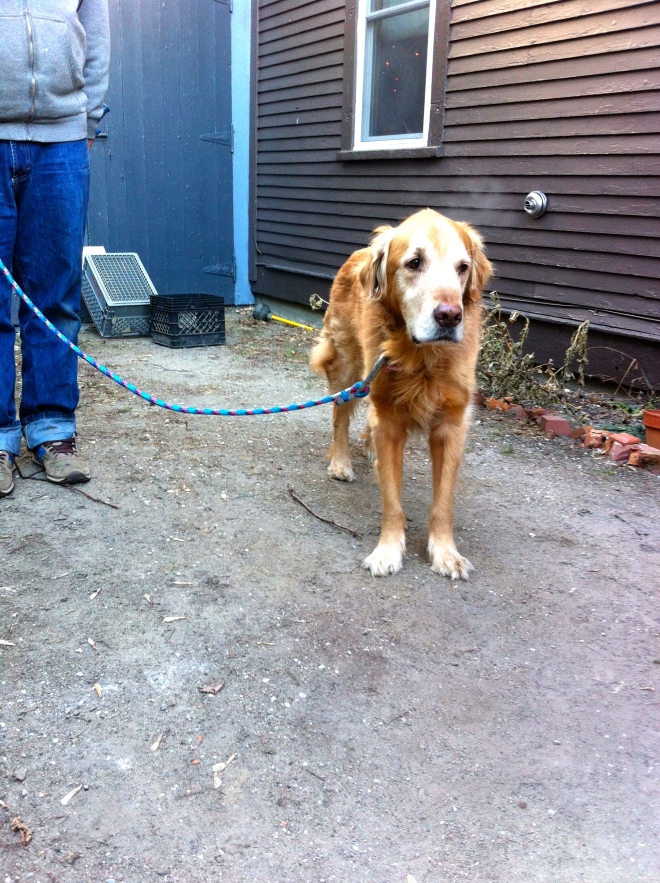
IMG_6485 Look at that old man face…. how can anyone stay mad at him? (there was a recent incident involving bananas, you can read about it in the last post.)

Before we get started on the leash, I'll give you a little background about Washer the trash dog. A little over 9 years ago,  Nick brought home this 8 week old little ball of fur for us as a Christmas present. Oh man, he was so so so freaking cute, but that didn't stop me from crying… Why you ask? Because I didn't want a golden retriever, we never talked about getting a golden, we talked about getting a husky or a german shepherd. And so I cried.(I was so pissed) But it didn't last long. A few hours after he was home, I fell in love and we have been a little family ever since. Mind you that the first two years of his life, he was a terrible beast of a dog. Nick and I were really young and neither of us had ever had a puppy before so we kind of let him do whatever he wanted…..not a great idea. He was a shit.  He would eat everything  and anything. Seriously anything; book shelves, linoleum floors, windowsills.. You name it, he ate it. He also started to act a little jerky, growling at little people and getting aggressive around food which ended with us having to hand feed him for about 8 months. But eventually he grew out of his eating parts of the house, now he just eats anything food or trash .He doesn't mind little people so much anymore just as long as they don't try to play with him, and he now sits in front of his food bowl leaving great big puddles of drool until he is told he is allowed to eat. Oh how he has grown

One question that people always ask us is,"Where did that name Washer come from?" Truth is, it was kind of joke. We had had him for a few days and  hadn't named him by the time we went to my Dads house on Christmas. Sitting around with my family, we came up with all sorts of stupid and inappropriate names. At one point appliances were named off and I guess the name Washer just kind of stuck out. We had planned on changing it right away, but as you can see, we still haven't gotten around to that.

Anyway,  Washer has had the same leash for about 7 years. (His first 2 years he ate a few) That's   a long time for a leash, especially if you think of all the times that it has been dragged through the mud, pulled into the lake, or my favorite, peed on. Yup, his current  leash is ripe and it's about time we  made the old man a new one.(Ok, its more for us, but he seriously has been peeing on it a lot lately and I am not a fan of handling a pee soaked leash)

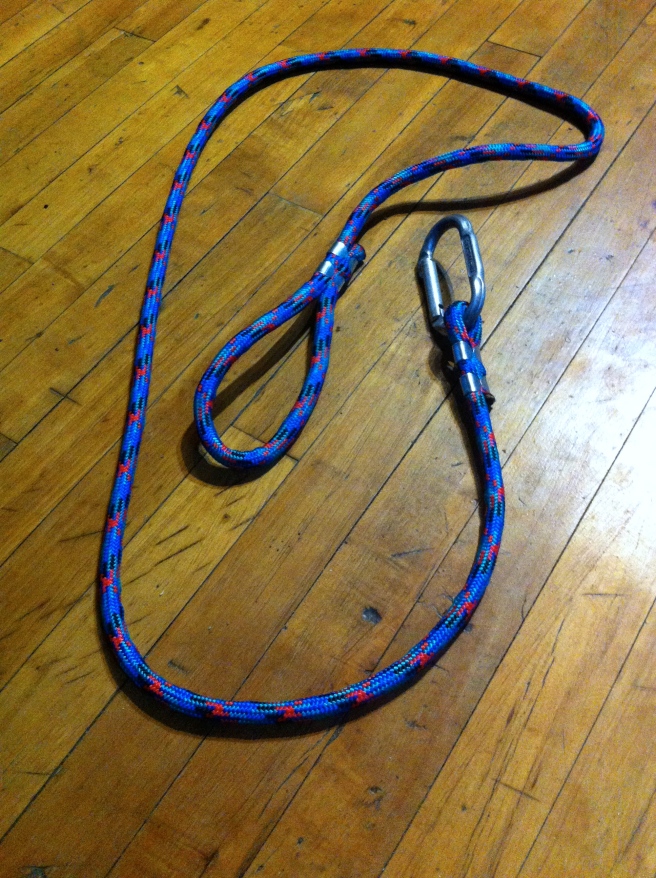
1 custom sized leash. Super simple and cheapy cheap.

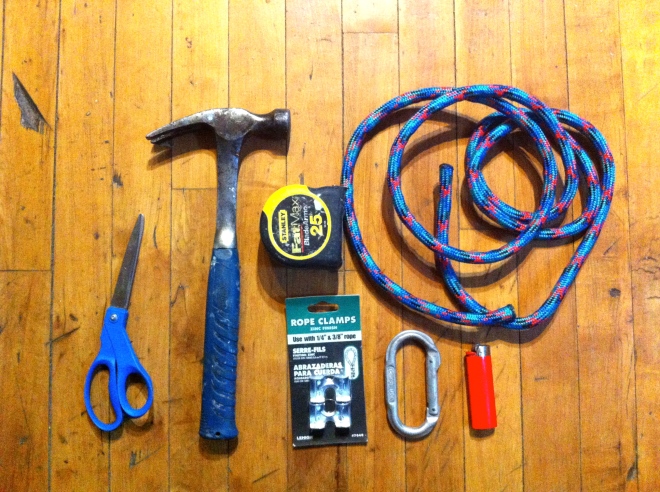
What you will need is….

IMG_6420

  • 6-7 feet of 3/8 rope(or however long you want it)
  • two 3/8 inch rope clamps(1 package comes with 2)
  • carabiner
  • scissors
  • hammer
  • lighter
  • measuring tape if you want exact measurements(it's not necessary)

Note: You can get the rope, clamps and the carabiner at any hardware store, but I think the big ones like Home Depot or Lowes sell rope by the foot so you don't have to buy a 50 ft piece…unless you want it. 

 IMG_6463 IMG_6467

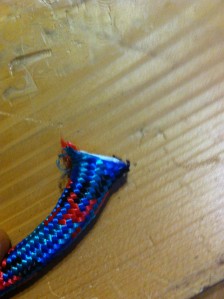
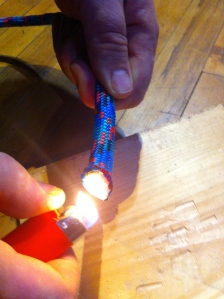
First thing.Trim the ends of the rope nice and clean. Take the lighter and melt the nylon around the end of the rope so it will stop it from fraying…BE CAREFUL….And do it over the sink or somewhere with water…It's not hard to do, I just don't want anyone to burn themselves or the burn their house down.(not that I think you are going to)

IMG_6426 IMG_6439 IMG_6442

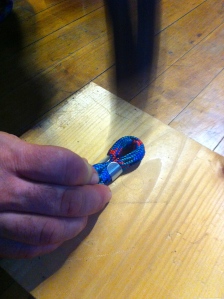
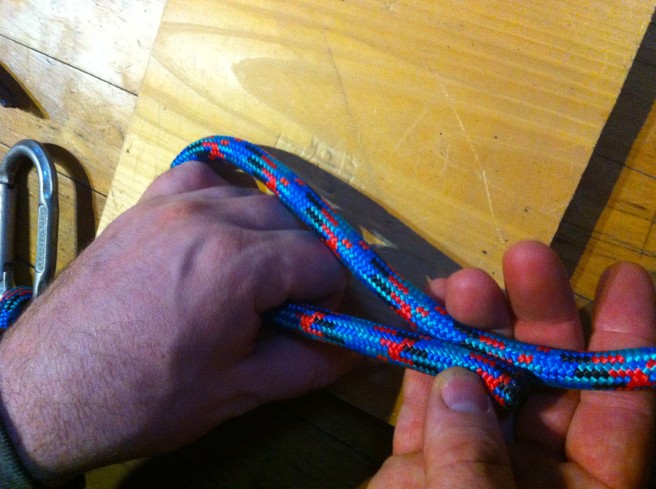
Once the nylon is melted and no longer hot…Make a small loop and place rope into rope clamp. Make sure to leave the loop big enough for the carabiner to fit. Now hammer the clamp around the rope, I mean, really smack that thing  We used a scrap piece of wood to hammer on… and I suggest you do the same.

IMG_6443For the handle, make a large loop, whatever size that works for you, and do the same hammer clamp situation on the ends here.IMG_6456

Pretty freaking simple….Thats it, you are done and now you have an awesome customized and pee free leash.

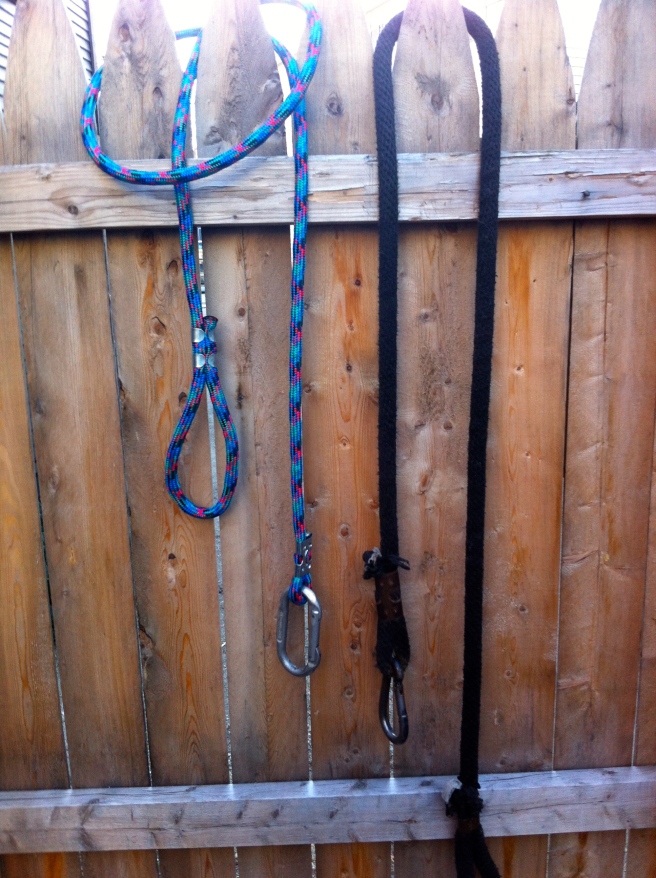
IMG_6478New and old. Hopefully he won't pee on this one for a while.

Have a great weekend and l would love to hear from anyone that makes themselves a sweet ass new leash!

Have a great weekend!

-C