Fluffernutter and Nutella Yule Log

IMG_5801

.I am awesome. It's ok for me to say that today because this is probably the coolest and most fantastic thing I have ever made in my entire life. Phew, I had to get that off my chest.For the last week I have been thinking a lot about what holiday treats I want to make. I have been planning on making a full fledge yule log with the rolled sponge cake, the filling and the candy mushrooms and taking a whole day to do it. Well that is just not happening this season.. The next week is nutters and I have so much other baking to do that I just don't have time to do a log…bummer

Oh, but how my mind never stops.. See, it's not the cake that I wanted to make, it was more making a cake look like a piece of wood that was appealing to me.  So I must try, or better yet, create my own version of a yule log…………...

Problem solved. Peanut butter, fluff, nutella and a wrap.  And oh what a piece of wood I made.(insert dirty joke here) A yule log,(or yule branch), but whatever. Its food that looks like a piece of wood. I am happy. 

IMG_5715

Simple ingredients…I pictured 2 flour wraps because I was going to make 2, but ended up only making one, so one wrap per log works…… A glob of fluff, a glob of peanut butter… A smaller glob of nutella and a sprinkle of a crunchy cereal (I used crispy rice cereal) The cereal is not essential, but it add a little bulk and crunch to the log and when eating wood, there should be a little snap crackle and pop.  If you want to make this into a vegan log, use vegan marshmallow cream. You can even omit the mallow and use a banana, or jam, or anything you want. Heck, you can make a smorgasbord of logs…That would be fantastic. A bundle of logs of all different flavors….I am doing it!!

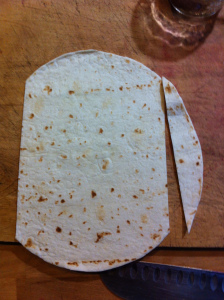
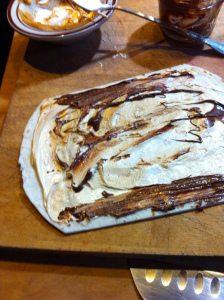
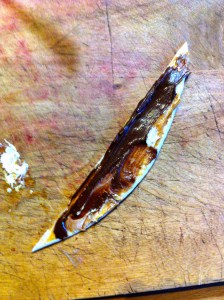
 Trim off two opposite  side of the wrap and put them aside, you are going to use one of the trimmings in a second. Smear the peanut butter, fluff, and a bit of the nutella all over, even to the very edge of the wrap.

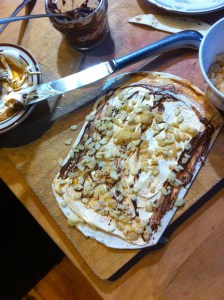
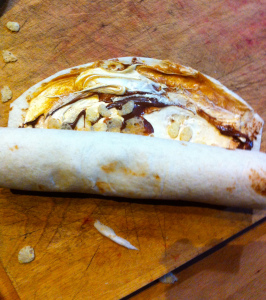
        Sprinkle the crunches on top  and then starting rolling from one of the non trimmed edges,  Try to get it as tight as you can. 

IMG_5751

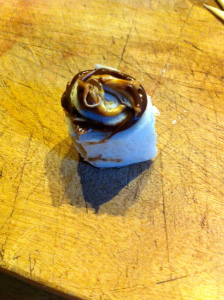
  Take one of the scraps and smear some more peanut butter and nutella all over it(leave our the crunches) and roll. You will end up with a branch nub. Attach the nub. I smeared more fluff to the bottom and it stuck on pretty well, but (not shown here) I took a little piece of a spaghetti and stuck it in the nub to keep it in place. If you don't use the fluff in your log, I would use the spaghetti(It is edible and will soften from the peanut butter so you don't have to worry about taking the noodle out)

Looks good right…You can go ahead and stop here if you want to…Its pretty great, but one more minute and…

IMG_5764

A bona-fid Yule log…well its kind of more like a branch, but whatever.

IMG_5781
IMG_5782
IMG_5801

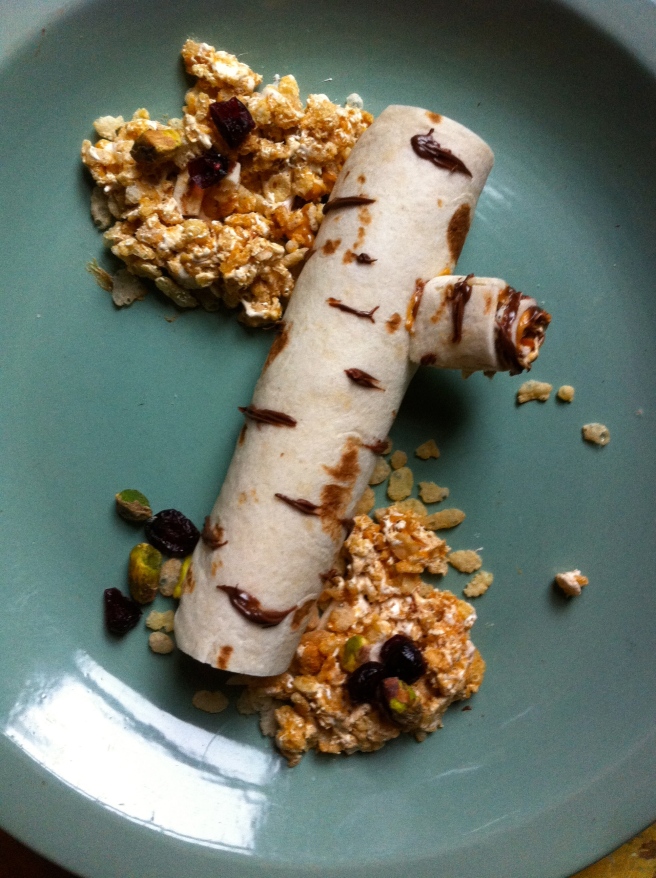
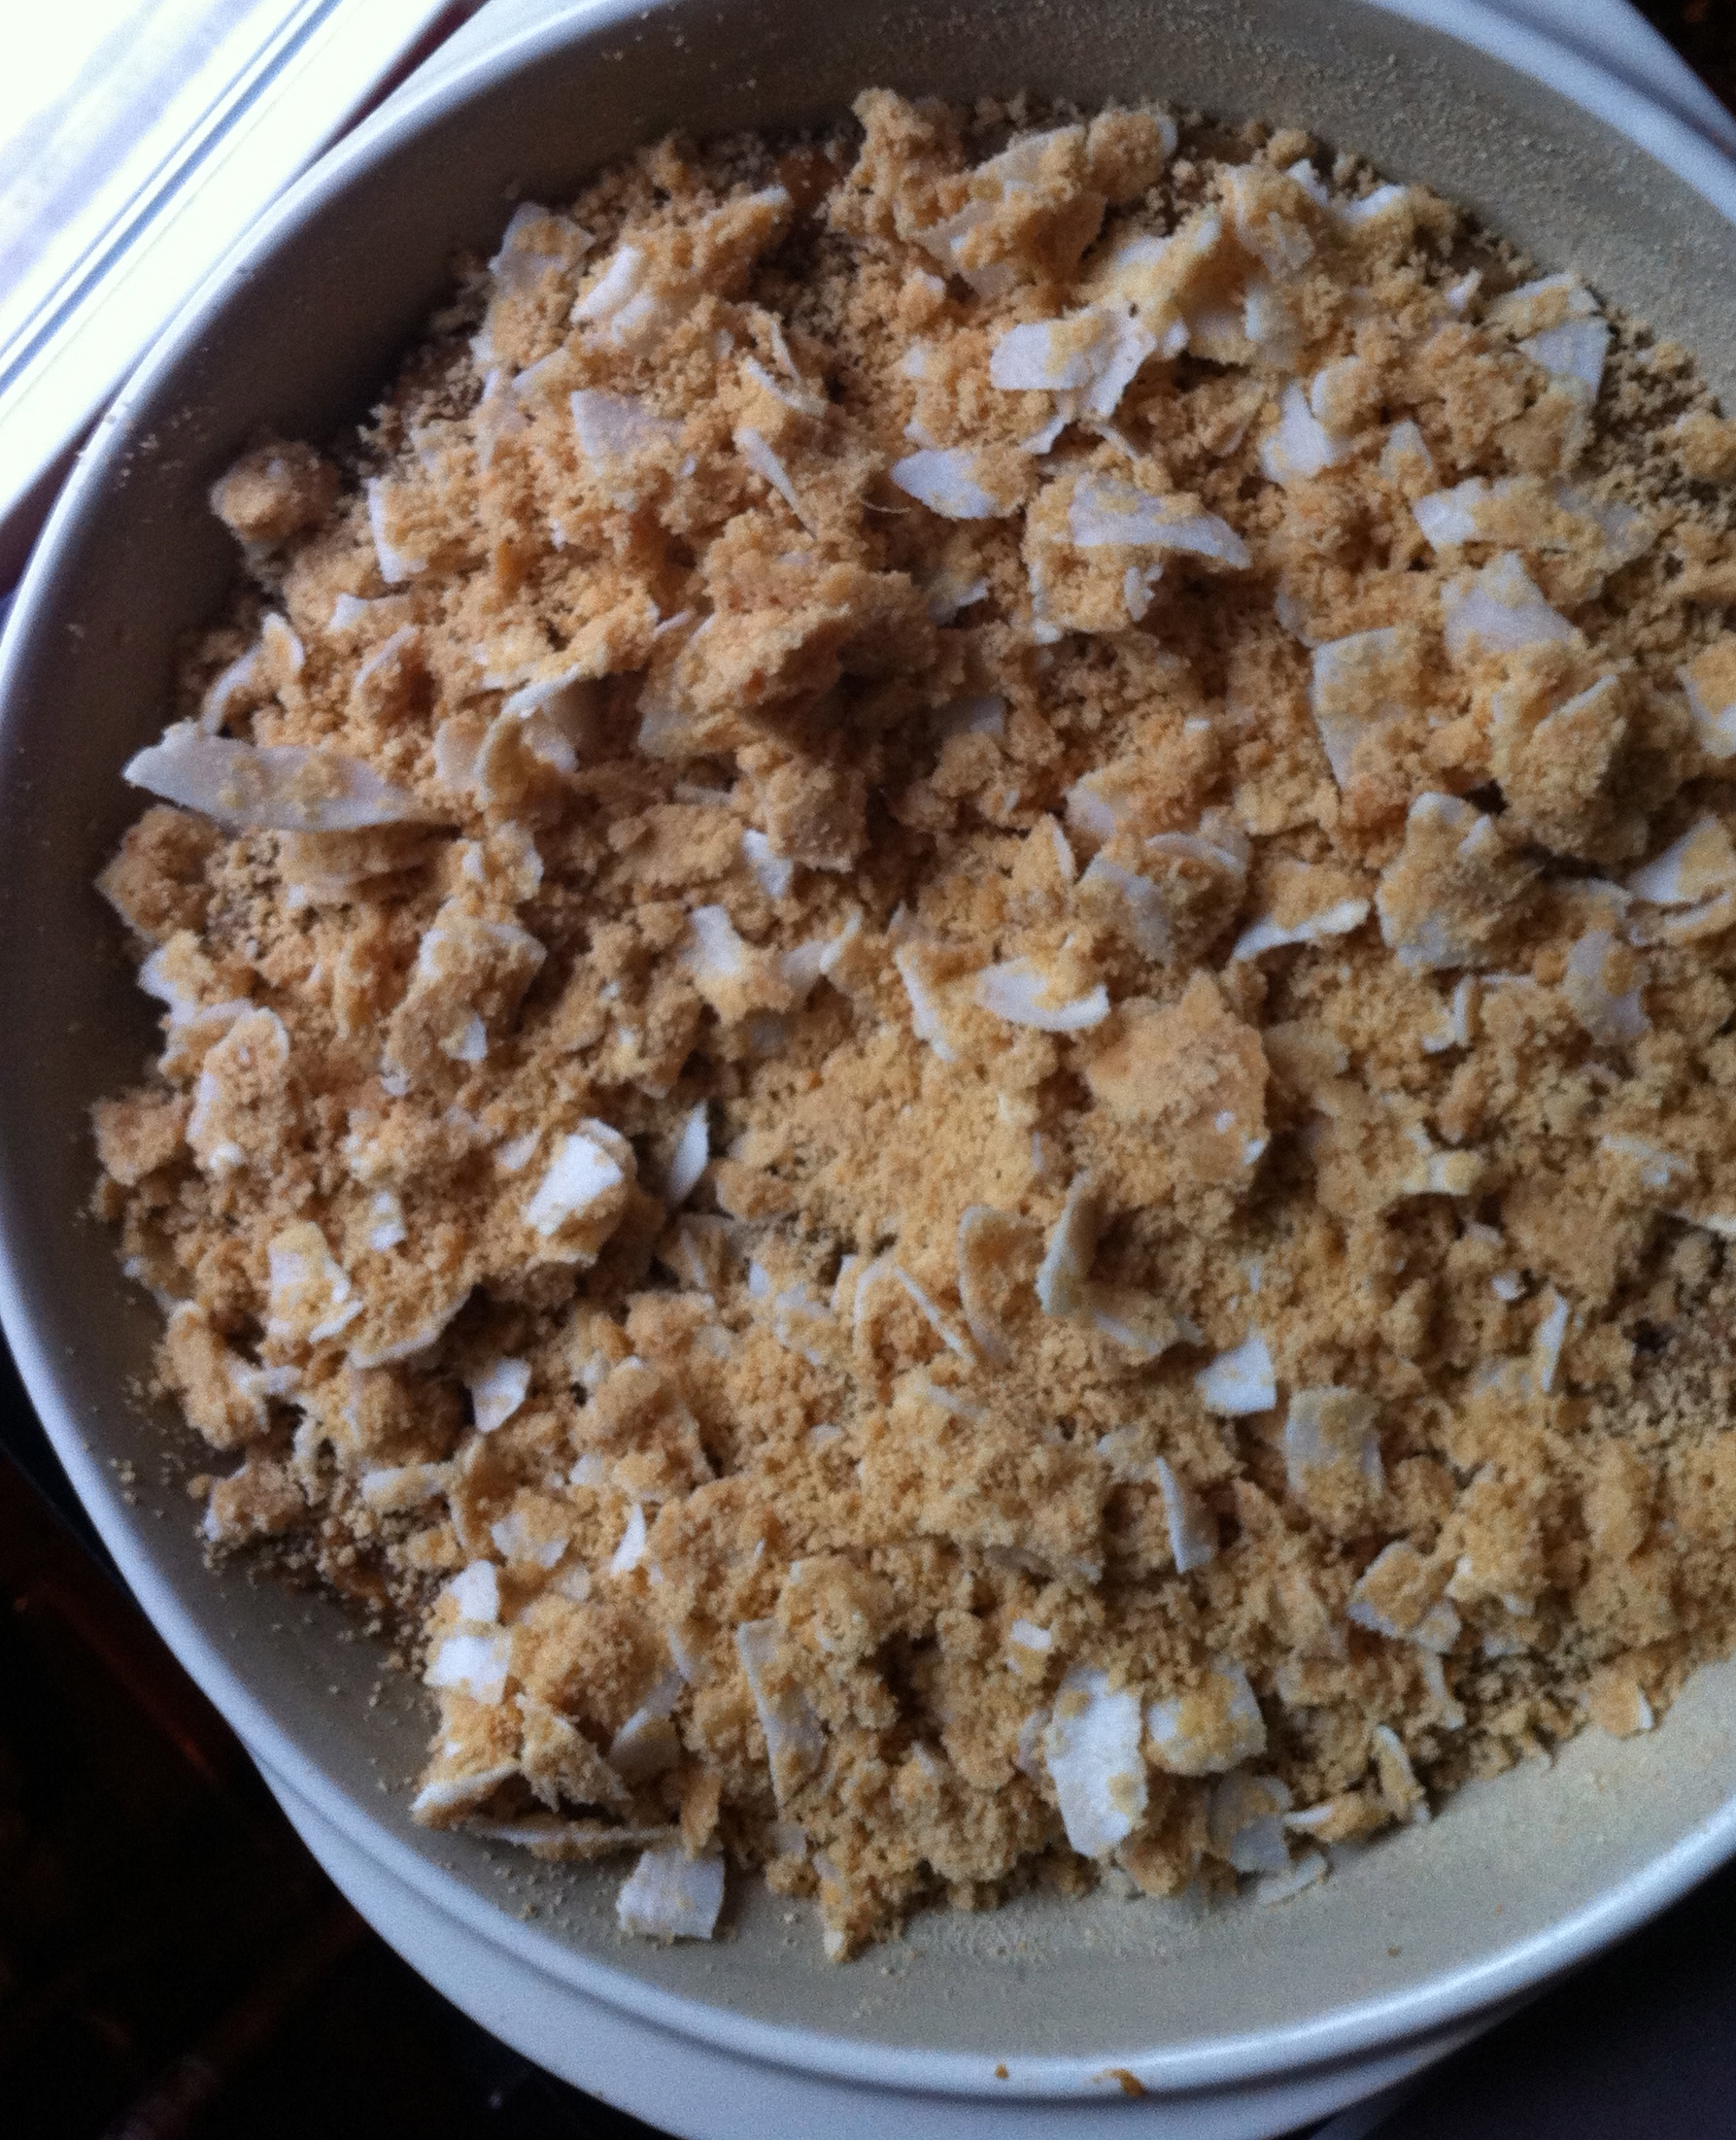
 I used the other end of the spaghetti noodle dipped in the nutella to make the lines. I just free formed it and it really transformed the log into a LOG!!! Just to jazz it up  I added a handful of crunchy rice with the extra glob of pb and fluff, mixed it up and made little piles of  yule log landscape.   Added a few dried  cranberries and pistachios for color…. It like taking walk through the woods. After the mister ate the crispy mounds, I sprinkled some flaked coconut around it and that looked pretty fantastic too.

Needless to say that if you make this, your day will be excellent.Make it for a friend, you will bring them joy. Its hard not to smile when looking at food that looks like wood. Happy.

These little logs would make fantastic party snacks. Fast and tasty … can't get better than that.  Think about walking into an office party, or better yet, a school party….All the other parents will think you are awesome and then probably start to hate you..Hey, it's not your fault that you are cool enough to read my blog.(it's ok, you can share the website) SO make them for friends, for family, for anyone.. Just don't try to start a fire with the logs….It might not turn out so well.

Have fun splitting wood!!!

-C


Yule Log

One wrap makes one log

  • 1 big glob of Peanut Butter
  • 1 big glob of marshmallow cream (vegan or what not)
  • 1 small glob of nutella (again, vegan if needed)
  • 1 medium flour wrap
  • 1 handful of crunchy rice cereal
  • a spaghetti noodle

Note..Use these flavors or make up you own…...PB and Jam…PB and Banana.. PB and Apples ….Cream cheese and Jam.. the possibilities are endless.

With a sharp knife, trip two opposite sides of a wrap and set trimming aside for later. Spread the peanut butter, fluff, and nutella(or whatever ingredients you want) all over wrap, up to the  very edges. Sprinkle crispy rice all over.

Starting from one end, roll wrap leaving the seam on the bottom. With one of the wrap trimmings, spread more peanut butter fluff and nutella all over and wrap as well. Place a dollop of fluff on the bottom of the small nub and place on the roll where ever you see fit. For a better hold, snap small piece of spaghetti noodle and stick through nub into log.

For the tree markings, dip a toothpick or spaghetti noodle into nutella and lightly draw little lines on the log…..And you are done. If you want to jazz it up, sprinkle rice cereal or coconut or whatever you want to make the log look more nature like, do it. .

And now its time to eat your log…..

CRUNCH CRUNCH CRUNCH!!

Polenta Delicata Caramelized Onions and Mushroom Pizza

IMG_5231Wowzers.. What was I thinking! I know, the same thing you are…YES YES YES!!! Gluten free what now.. My lovely sister is on that ban wagon. She has been having"issues" lately(so many, it's hard to pin point) and says she is feeling better without the gluten. Me being the lovely person that I am want to feed my poor sister, make her happy with food.  I HAD to prepare that lady a dinner and it had to be pizza cause I know how much she likes her pizza. So I brain storm. What would be a good gluten-free pizza crust? I could do the obvious and  get gluten-free flour, but to be honest, that's some expensive stuff and I really didn't feel like going to the store. I wanted to work with what I had in the house….and ah ha, there it is,  cornmeal.. With a little bit of water I can turn that into some polenta and a super gluten-free pizza crust.

So in walks polenta(if polenta could walk) What goes good with polenta? Caramelized onions, mushrooms and yes, my last delicate squash.(I am too nice) A nice base of marinara sauce and a bit of parmesan cheese mixed into the crust and sprinkled on top…..a complete work of genius that I was proud to serve to the gluten free lady.

Note. I have to make this clear, just because this pizza is gluten-free doesn't mean that a person that is not gluten-free cannot eat this. Anyone and Everyone should eat this pizza.

IMG_5160 There really isn't a whole lot of ingredients to this pizza… Cornmeal for the polenta. Marinara sauce….I used jarred marinara because it was a little easier and we don't always need to make things from scratch…Lots of onions(2 finely sliced), handful of  sliced mushrooms, thinly sliced squash and parmesan cheese. Most of the prep takes place at the same time, but that's good, we can multi task, just have everything pre chopped and ready to go. First thing first, start the polenta

IMG_5166IMG_5176

There are so many different ratios and directions on how to prepare polenta, so if you feel like your way is better, I trust you. What I did for this crust was 1 cup cornmeal to about 2 1/4 cups water. The main thing is the finished product. You want a pasty paste that is spreadable but not overly watery.

Bring the water to a boil and constantly whisk while gradually pouring in the cornmeal. After a minute to two, it should be pretty well incorporated and there shouldn't be to many lumps. Turn the heat down to simmer and stir a lot  until the polenta starts to pull away for the sides of the pot. Really scrap the bottom of the pot so it doesn't burn. Once its done, add in a 1/4 cup of parmesan( if you want to keep it vegan, just don't add it) and salt and pepper.

IMG_5181   IMG_5199        On a well oiled baking sheet or pizza sheet..spread the polenta into the shape of your desire. I went with a somewhat circular shape, but now that I think of it, I wish I had been more creative, like maybe a triangle or even the shape of a bus….Yeah, a bus shaped pizza would have been cool.

This crust needs to be pre baked so stick it in the oven.It should take about 20ish minutes.

IMG_5173 IMG_5190           You can do this pre crust or at the same time, but roast your sliced squash. Place single layers squash on an oiled pan, salt and pepper, then into the oven. It should take 10 minutes on each side.

IMG_5186     IMG_5198

You got the crust in, the squash in, now we need to caramelize the onions. You may be thinking that 2 onions is a lot, and it kind of is, but you want a lot. A tiny bit of oil into a skillet and all the onions. medium low heat with a lid, string on occasion. When the onions start to caramelize, add the mushrooms and cook until onions are nice and soft and the mushrooms are no longer raw.  By the time you done with this task…everything should be ready….time to assemble!

IMG_5206    IMG_5210

First marinara…then the roasted squash.

IMG_5211 IMG_5217     I Sprinkle a layer of parmesan cheese and pile on those onions and mushrooms,. Sprinkle with a little more cheese.  ( use vegan cheese or no cheese if you want it vegan) Back into the  oven for another 15 minutes to give everything some time to crisp and melt.  IMG_5232Remove from oven and appreciate…That is one good looking pizza. I took  a long spatial and run under the crust just to make sure if wasn't stuck. I also found that if you let it  cool for a few minutes before serving, the polenta gets a little stiffer and easier to handle, but not necessary.

Its time to eat!   And I know that it was a success. This is my gauge for how good it was…I stopped by the next day to drop a xmas tree stand off to her(again, look at how nice I am) and she was eating lunch…the left over pizza. That might not seem like anything to you but to me… She doesn't eat leftovers. Sure, she will stick them in the fridge, but that's where they stay until she tosses into the garbage. The pizza was leftover good….That is good!

Polenta Delicata Caramelized Onions and Mushroom Pizza

Ingredients

  • 1 cup polenta (Cornmeal)
  • 1 tablespoon olive oil, plus more for the pan
  • 2  1/4 cup water
  • 1/2 cup grated Parmesan(omit if making vegan)
  •  1/2 of Marinara sauce
  • 1 small delicata squash
  • 2 medium onions
  • 8-10 mushrooms
  • 2 gloves garlic

Directions

Pre heat oven to 425

In a medium saucepan, bring 2¼ cups water to a boil. Whisking constantly, slowly add the cornmeal while constantly whisking. Once full incorporated, turn to low and stir for a few minutes until the polenta starts to thicken and pull away from the sides. Stir in 1/4 cup of parmesan (if using). Salt and pepper to taste. Genously oil a pizza sheet to a cookie sheet and spread the polenta mixture  about a 1/2 thick. Place into oven and bake for 20-25 minutes or until crust is a nice golden brown.

While the crust is cooking, place thinly sliced squash on an oiled baking sheet and sprinkle with salt and pepper. Place in oven at the same time as crust, flipping squash after 10 minutes. Cook until fork tender, about 20 minutes.

While the crust and squash is baking, caramelize the onions. In a large skillet with a bit of oil. toss in onions and a little salt.  Cook on medium low heat with a  lid, giving them a good stir every now and then. Once onions are nicely cooked down, toss in the mushrooms. Continue to cook unit mushrooms are no longer raw.

Remove crust  and squash from oven and let cool for a minute. Now just pile stuff on. Spread  marinara sauce evenly around crust. Add squash and top with cheese. Dump the onions and mushroom on top and sprinkle with a bit more cheese.(Again, use vegan or no cheese to keep it vegan) Place back into oven for another 20 minutes.

Remove and let cool for a few minutes………..and then eat eat eat!!!

A good side dish for this pizza…a nice light arugula salad. Hey, you could even just toss some greens right on top of this pie, that would be fantastic too!

Enjoy and be awesome!

Milk Crate Shoe Seat

IMG_4541Made from necessity, a seat near the door to sit and remove shoes,  store winter stuff and doesn't look like I threw a bunch of milk crates together..I threw them together and added  a nice blanket, I'm classy like that. I do love a good milk crate…there has always been something so satisfying to me about a free plastic receptacle that has a world of uses. These three crates and some scrap wood  have changed my entire living situation. The entryway of our 200 sq ft loft is now super functional, looks fantastic, and makes me happy. .All from a the scrape pile. IMG_5274It's not what you think…we have a barn that is pretty much dedicated to scrap wood and some other building material that has come from buildings we have worked on. This picture does not do our scrap wood(and junk) pile any justice. It is pretty crazy, and drives me nuts. I don't know how many times I have threatened a 30 yard dumpster, but you know what? When Nick or I are in need of some wood, we always find ourselves rummaging through the pile and can almost always find a piece of what we are looking for. The pile somehow always redeems itself,   for that reason it still lives on(for now). Being  that you as a  sane person, you probably don't have a barn full of scrap wood(and junk), so what you will need for this project is..

Materials

  • Two 39.5 X13 inches pieces  of 3/4 inch ply wood(top and bottom)
  • Two pieces   13X13 of 3/4 inch plywood(sides)
  • Four 10 inch 2x4 (Legs)
  • about twenty-five 2 inch finishing screws
  • 3 milk crates(you can do 2 or 4…just have to measure out for wood)

Tools

  • Drill
  •  circular saw
  • measuring tape
  • t square or a long straight edge.
  • pencil

Note: If you are not comfortable buying a full sheet of ply wood and cutting it down or you don't own necessary tools, go to Home Depot or Lowes and have them cut the pieces to size for you.. Also, I have never really gone through a project step by step so if you are making  this and somethings seems off or you have any questions, totally email or comment to me… but I will try my best to make each step clear…..

IMG_4499Three milk crates..What I found was that there are some milk crates that are not the same size so make sure that you have three that are the same. These crates are 13x13x11.

IMG_4480Measure and cut ply wood. The  top and a bottom  are the same measurements…Here comes some math…. three milk crates that are 13 inches long = 39 inches. One crate deep is 13 inches. . Cut two pieces  39.5 inches by 13 inches. (The extra 1/2 inch is so the crates can move in and out easier)

IMG_4475Now measure and cut sides. Two pieces at 13x13.The crates are 11 inches high, but you need to add the extra 1.5 inches  because of the thickness of the plywood. If your milk crates are a different height,  use that measurement plus 1.5 inches.

If you haven't heard this saying before, it will change your life…Measure TWICE!! cut once. Dont get overly cocky, cause even the seasoned wood worker screws up measurements.. I screw up sometimes so the saying is not lost on me.

IMG_4484    IMG_4496

Once you have all four pieces cut, its time to assemble. Having an extra hand will help a lot, but you can do this on your own.

Screw the side pieces into the top and bottom. We stood the top and bottom vertically and place and lined up the side. Now sink four screws into both sides to secure to the other pieces.  When sinking the screws, make sure you are drilling straight down so your drew doesn't come out of the side of the wood. If that happens, just remove and start again, no biggy. Once you have done one size, flip and screw in the other.

IMG_4504I caught that piece of wood he is throwing at me. Ok, not really, but I could have. Here Nick is cutting  four 10 inch pieces of 2x4 for the legs. We decided on 10 inch legs because we wanted a bench that was a  little taller than the average chair, which is about 18 inches floor to seat. If you wanted to make the legs shorter or taller, by all means, I just wouldn't go to much taller or you might not be able to sit conformably on it.

IMG_4506After you have all your legs cut, mark out where you want to place them. We did a one inch recessed from the front and the side…but do whatever looks best to you. Mark where the legs go and place two screws into inch leg, screwing from the inside of the bench. IMG_4519And thats it… ..now you have the frame. Take a minute here to admire your handy wood working skills. If you are not into the raw wood look, this would be the time to paint it.

IMG_4523With the crates inserted…Doesn't it look magnificent! I choose these 3 crates for the colors and the patterns..I wish I has a grey crate that fit. That would have looked awesome.

IMG_4536Test one……….the crate slides out perfectly and my mittens fit!!

IMG_4528Now for the big test……....and it works!! My butt safely seated. My feet touch the ground and I can bend over and tie my shows… can't get any better…

IMG_5271But it did. The addition of a folded blanket as a cushion. I was going to make a cushion but found a really pretty blanket at the second-hand store that was perfect. It was 2 bucks and is actually way more practical than a cushion. I can wash this blanket, a hand-made cushion, I probably wouldn't want to mess with that, plus a piece of foam alone cost like 25 bucks. The blanket was meant to be.

A great success.. This bench is really great, I definitely recommend it to anyone and everyone.. It's the perfect place to sit and remove wet shoes, store all of our hats, mittens and canvas shopping bags and it just looks cool. It was really simple to make, cheap, and took very little time. You could even make two, one for you and one for a friend(think holiday gift)

A perfect weekend project!! DO IT!!!! and if  you make one, please, send a pic on over, I would love to see it!

Have Fun!!!!!

Funday Monday Rutabaga fries

IMG_5148Sometimes, no matter whats going on with the week, Monday seems like, well, like a Monday. I drag a little on Mondays. I think it stems from the Monday through Friday school week that was beaten into me for 16 plus years. Hate Mondays, Love Fridays.. Yup, I blame the public educational system(I have to blame someone) I want my day back. I don't want to feel the drag today. I am going to have a fantastic day.  I'm getting excited, pumped up and ready for the week. I am turning my Mondays into fun days. Funday Monday...Yes, yes I did just say that. .  See, don't we all feel better already?

On this Funday, I don't want to worry all day what I am going to make for dinner, I just want something tasty and easy. .Whats better than a plate of fries?……. a plate of roasted rutabaga fries! Yes! See, we are already having a great day. A plate of fries, easy, delicious and nutritious. Not a bad start to the week. You can eat them with  just about anything, a grilled cheese tomato and avocado sandwich, a bowl of curried lentil soup..or just straight up eat a big old pile of these roasted rutafries (That a word, I swear) Just have fun with it. Its funday Monday after all.

IMG_5117One large rutabaga… This one fed 2 as a side… but if your eating just the fries, eat a whole one to your face. It's totally cool.IMG_5130Chop the rutabaga into fries and toss with a smidge of oil, salt, pepper and ground up rosemary. Don't like the rosemary… don't use it. Maybe try something else like sage or garlic and onion powder or curry powder. Just use whatever you like. Throw into a 425 degree oven for 20 minutes, give them a flip and back in for another 15, Simple. Easy.

IMG_5145


Remove from oven when crisped to your liking and eat.

Yes, this was a dinner of rutafries and brussel sprouts, is that a problem? I don't think so .A suggestion, .dip in mustard….its fantastic, but go the ketchup route if that s your fancy.

Alright people..Have a great day and remember to not let today be a drag of a Monday, make it fun, looking forward to a  plate of rutafries for dinner and think of how great the rest of the week is going to be!( I might have been a motivational speaker in a past life)

FUNDAY MONDAY!!!!!


Sweet Potato Coconut Crustless Pie

IMG_4307Yes Please. Thank you very much. Sweet Potato custard (I don't  know what else to call it) topped with coconut. My taste buds have found themselves in heaven. I have found myself sticking my butt out of the fridge with spoon in hand. Hey there, like what you see?

Now that thanksgiving is over you might be thinking.. oh we can't or, no we shouldn't or, that it's too much work. Well you can, you should, and it's not. This custardy crustless pie is nothing short of awesome and is super easy to make. All you really have to do is puree and mix a few ingredients together and bake it. The obstacle here is trying not eat it all in one sitting, But you know what. that would be ok..You eat this and it tastes so good and you feel like you have used your days worth of guilt on dessert but guess what, you didn't. This pie  is actually pretty darn healthy, even maybe good for you.  There is no sugar, no gluten, no dairy, no crap. Hardy sweet potatoes  and sweet little dates with so many vitamins, chai and coconut for protein and health fat and cinnamon, which is good for everything.  I mean, AMAZING  Now you can have dessert and  save your guilt for say,  buying a new sweater when you really don't need it or for canceling your dentist appointment because, let's be honest, you really just don't feel like going( Its ok, I rescheduled for next week). See, you must make this. Pie, sweater and no dentist…It's a winner.

IMG_4056Custard ingredients. A whole lot of not much. Sweet potatoes are the star here. A few dates, chia seeds, and a bit of cinnamon spice. That's  it. Oh yes, this desert is 100% way acceptable for breakfast and comes with absolutely 0% quilt. Its magic.

sweerIf you have left over sweet potato, this is your chance to use them up, but if not, 3 sweet potatoes, stuck in the oven at 400 degrees for about 45 minutes or until they are fork tender.

IMG_4077      While the potatoes are baking, chia seeds go into water to soak.. I remember the first time I used chia seeds and they turned into gel, I thought something was very wrong.  They are suppose to turn gloppy, so if your concerned, don't be. Now take your dates..MAKE SURE TO REMOVE PIT!!!..and stick in some warm water, just enough to cover. If you are familiar with dates and use them often, you might already have date paste on hand…just use that. otherwise. we are going to turn these dates into a paste by simply letting them sit in a bit of water to soften and then pureeing.. It's a really simple process that you can do every time you use date paste in a recipe, but my suggestion is to make a big batch and save the rest. It will turn into a new thing for you. You will want to eat it by the spoon full and then some. It's that good..

IMG_4108The potatoes are done and cooling… now is a good time to puree dates. The consistency doesn't have to be silky smooth, but it doesn't hurt to get close. Once the potatoes are cool enough to handle, remove skin( eat the skin) and stick into either a large bowl  if you're using a handle blender or emulsifier, or into the food processor.  Puree those sweet roots of deliciousness, adding a splash of water or two if they need help whipping up.  Add the chia seeds, the date paste, and spices….mix and POW!!. Go ahead, you must eat a bite….or two. Satisfied for now? Stick it into the fridge. Refrigerating for a bit to even over night makes the custard set up a smidge better, but you really don't need to refrigerate. To be honest,, you don't need to bake this either, just eat it like pudding(which is what I have been doing too) But you really want to bake it. Just stick the bowl in the fridge.

IMG_4285Now to make this custard even more awesome, we are going to add a little coconut topping. Here we have coconut flour, unsweetened coconut flakes, a little scoop of the custard filling  and a little coconut oil

IMG_4289

Mixed together for a bit of a crumble… and yea.

The custard is make.. The topping is ready. Take a pie plate and light oil with the coconut oil and dust with a bit of coconut flour. Transfer the sweet potato puree into plate and top with coconut topping.  Move to oven and bake at 375 degrees for about half hour to 40 minutes…checking every now and then to make sure that coconut isn't burning. Remove when top is golden brown

IMG_4326

And one more thing, add a scoop of whipped coconut cream which I forget to photograph. All  I did was whip a can of cold coconut cream with a tiny bit of vanilla.  SOOOOOO GOOOOOD!!

IMG_4329

There you have it, the best, easiest, healthy,  crustless custardy pie that ever was or will be.

  Sweet Potato Coconut Crustless Pie

Ingredients

Custard

  • 3 medium sweet potatoes
  • 3-4 dates pureed. Raserve a teapoon for topping
  • 2 tablespoons chia seeds
  • 6 tablespoons water
  • 3 teaspoons Vietnamese cinnamon or pumpkin pie spice
  • 1/2 teaspoon allspice
  • sprinkle of salt

Coconut topping

  • 1/4 cup of coconut flour
  • 2 tablespoons coconut oil
  •  1 tablespoon prepared custard filling
  • 1/4 cup of unsweetened coconut flakes
  • Whipped coconut cream… I bought a can of Trader Joes coconut cream, stuck in fridge for the day, and just opened the can, scooped the hardened cream into a bowl and whipped it up. I did add a tiny splash of vanilla, but that's it…And oh man it is sooooo sooooo good.

Place sweet potatoes in oven at 400 degrees and bake for 40 minutes or until fork tender.

While the potatoes are baking, place chia seeds in 6 tablespoons of water to soak. Place dates into just enough  warm water to cover. REMOVE THE PIT! Let chia seeds and date soak while potatoes are cooking. When the potatoes are out of the oven cooling, take dates and either place in food processor or emulsify until smooth.

After potatoes are cooked and cool enough to handle, remove  skin and place flesh in bowl or food processor and puree, adding a small amount of water if needed to keep it moving. Mix in date paste, chia seeds and spices. Refrigerate for 1 hour to overnight.

For coconut topping, place all ingredients into a bowl and crumble together.

Grease a 9 inch pie plate with coconut oil and dust with coconut flour. Scoop custard into plate and coat with coconut topping. Place in oven at 375 degrees for half hut to 40 minutes or until topping is golden brown.

Remove  and let cool. Top with coconut whipped cream and eat all to your face.. Maybe saving a little for breakfast or even sharing with someone you love.